Rajbir Singh
Things used in this project
Hardware
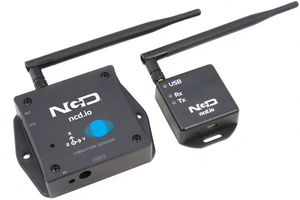
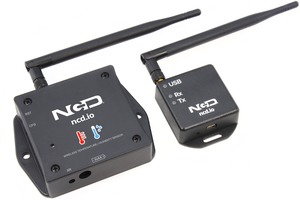
National Control Devices IoT Long Range Wireless Temperature Humidity Sensor
National Control Devices 900HP-S3B Long Range Wireless Mesh Modem with USB Interface
Software
Story
Introducing NCD’s long-range wireless temperature humidity sensor, boasting up to a 28 Mile range using a wireless mesh networking architecture. Incorporating the Honeywell HIH9130 temperature humidity sensor, transmits highly accurate temperature and humidity samples at user-defined intervals.
The on-board temperature sensor is rated for -25°C to 85°C or -13°F to 185°F and the humidity sensor is rated for 0 to 100% RH. It can be powered by just 2 AA batteries and an operational lifetime of 500,000 wireless transmissions.Battery life can be extended upto 10 years depending on environmental conditions and the data transmission interval. Optionally, this sensor may be externally powered.
With an open communication protocol this IoT wireless temperature humidity product can be integrated with just about any control system or gateway. Data can be transmitted to a PC, a Raspberry Pi, to Microsoft Azure® IoT, or Arduino. Sensor parameters and wireless transmission settings can be changed on the go using the open communication protocol providing maximum configurability depending on the intended application.
The long range, price, accuracy, battery life and security features of Long Range Wireless Temperature Humidity Sensor makes it an affordable choice which exceeds the requirements for most of the industrial as well as consumer market applications.
Steps to install NODE-RED
Now that you have sensors running, we need a way to do something useful with that data.
- First of all you'll have to install Node-RED.
- Once that’s done, you’ll need to enter your command line, or Power Shell for Windows users, navigate to the directory Node-RED is installed in.
- Now type “npm i ncd-red-wireless node-red-dashboard“. This will install the nodes required to receive data from your wireless sensors and you can start Node-RED once this is done.
- To start node server write node-red in the command prompt or terminal and press enter.
Setting up the nodes
Assuming at this point you’ve started up Node-RED, you should be able to open a browser and navigate to http://localhost:1880, this will open up the flow builder that is the heart of the Node-RED experience.
Steps to build the flow
- At this point you’ll be viewing a large blank flow with a long list of nodes on the left hand side, this sidebar is called the palette.
![]()
- Go ahead and drag a Wireless Gateway node over to your flow canvas to get started.

- ncd-red-wireless Provides the nodes that manage the serial connection, parse incoming sensor data, filter it by specific parameters, and allow you to configure the wireless sensors.
Finding your wireless sensors
Once you’ve added the node you’ll be able to view the info tab, which contains information about the node’s functionality, this tab is well populated for most node-red packages and contains valuable information, many times you will not need to view any other documentation outside of the info tab, so keep it in mind while you are building your flows if you have a question about how a node works. The next thing we need to do is configure the node, when you first add it you’ll notice that there is a small triangle on the top right corner next to a blue dot, the triangle indicates that the node needs additional configuration, the blue dot indicates that the node has not yet been deployed as part of the flow.
- Double click on the node to open up the configuration options.

- Click on the pencil icon next to the Serial Device field to configure your USB router, this will open a second configuration panel that only has a few options.

- Click on the magnifying glass next to...