 dannyvandenheuvel
I made a complete electronic sheet of my THOR+ robotic arm
Components used:
1x Main controller board Ultratronics Pro V1.0 based on arduino due
6x Polulu stepper driver 8825 cooled max 2A - 24V
1x Logic shifter 3V3 <> 5V 8 channels
1x USB Host PCB with flashed software PS4 controller to TTL serial connection
1x Bluetooth dongle 4.0
1x Slipring 24 wires max.2A for each wire
1x Arduino Nano
1x Neo pixel ring (gripper)
1x Servo motor (gripper)
1x Stepper motor (base) 17HS16-2004S1 (2A) 24V
3x Stepper motor geared 17HS13-0404S-PG5 (400mA) 24V
3x Stepper motor 17HS13-0404S (400mA) 24V
2x Fan 24V 40x40x10mm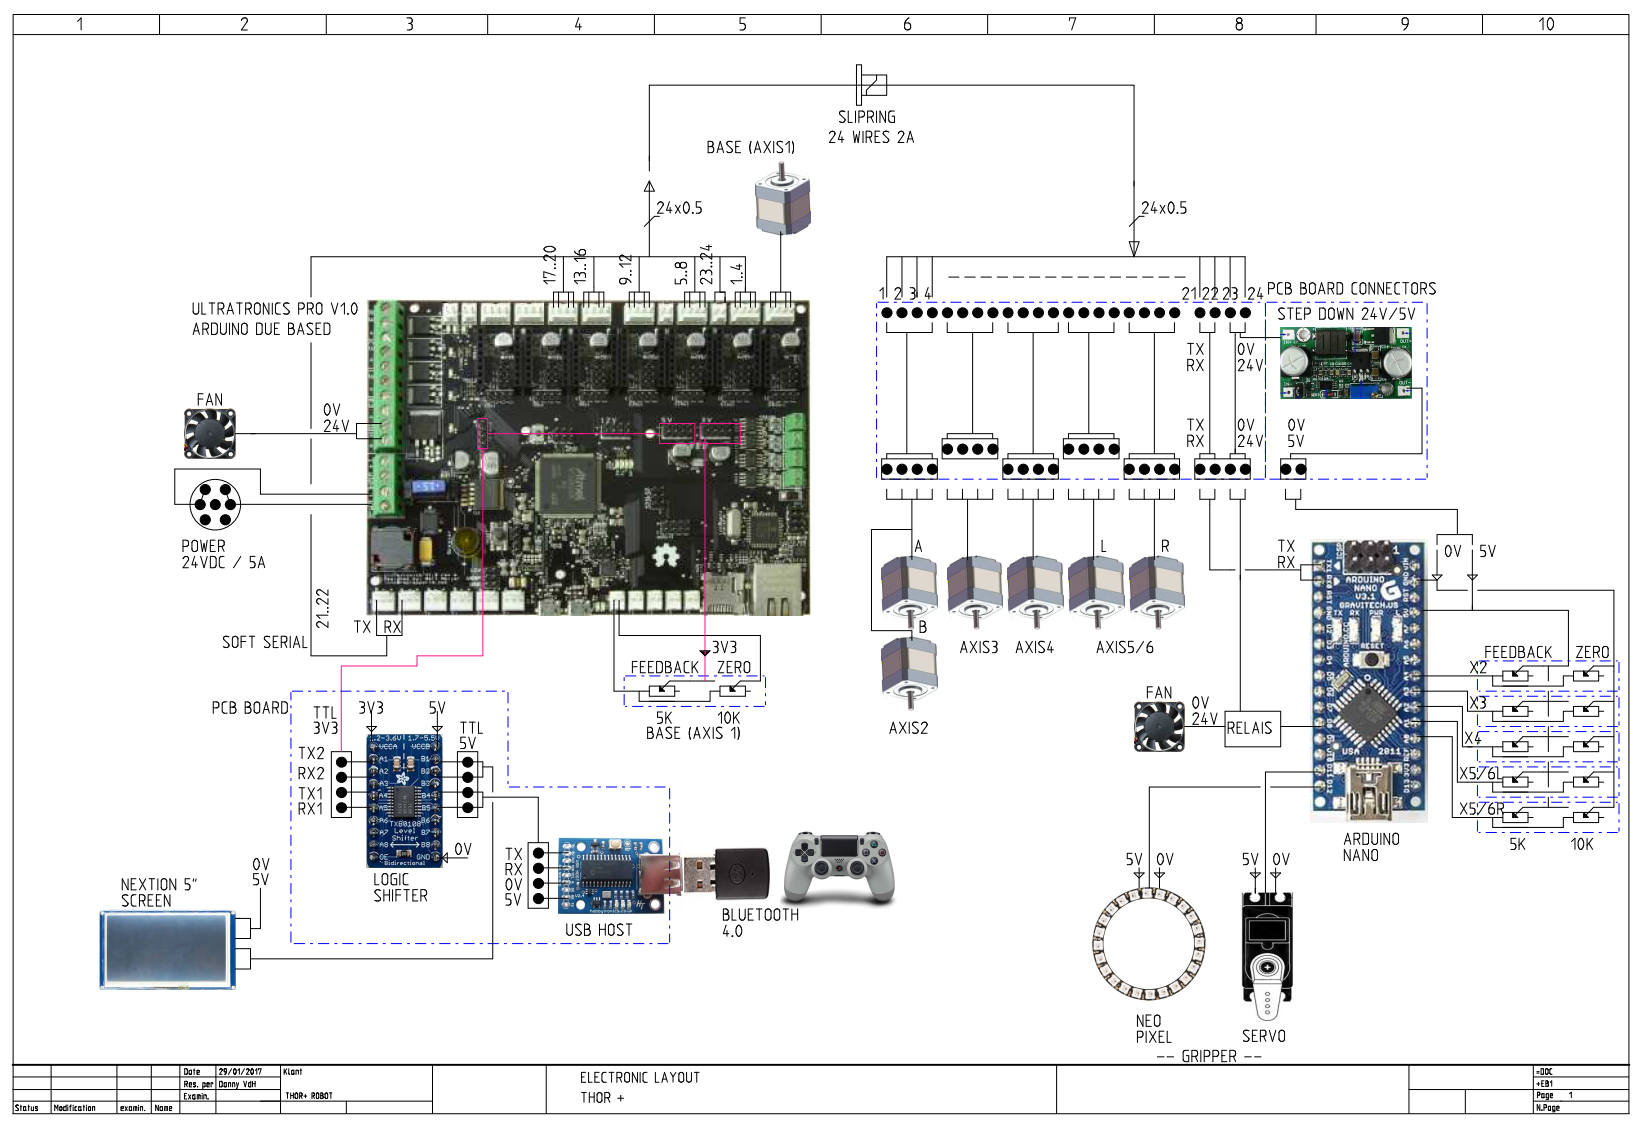
It becomes time to assemble it! So next week I'll try to put it all togetter.
In the meanwhile I'm gone put all drawings and stl files online this weekend.
And after all these works I finnaly can program back on my GUI controller software :-)
In the next comming weeks I will have a real moving robotic arm, Yeah...
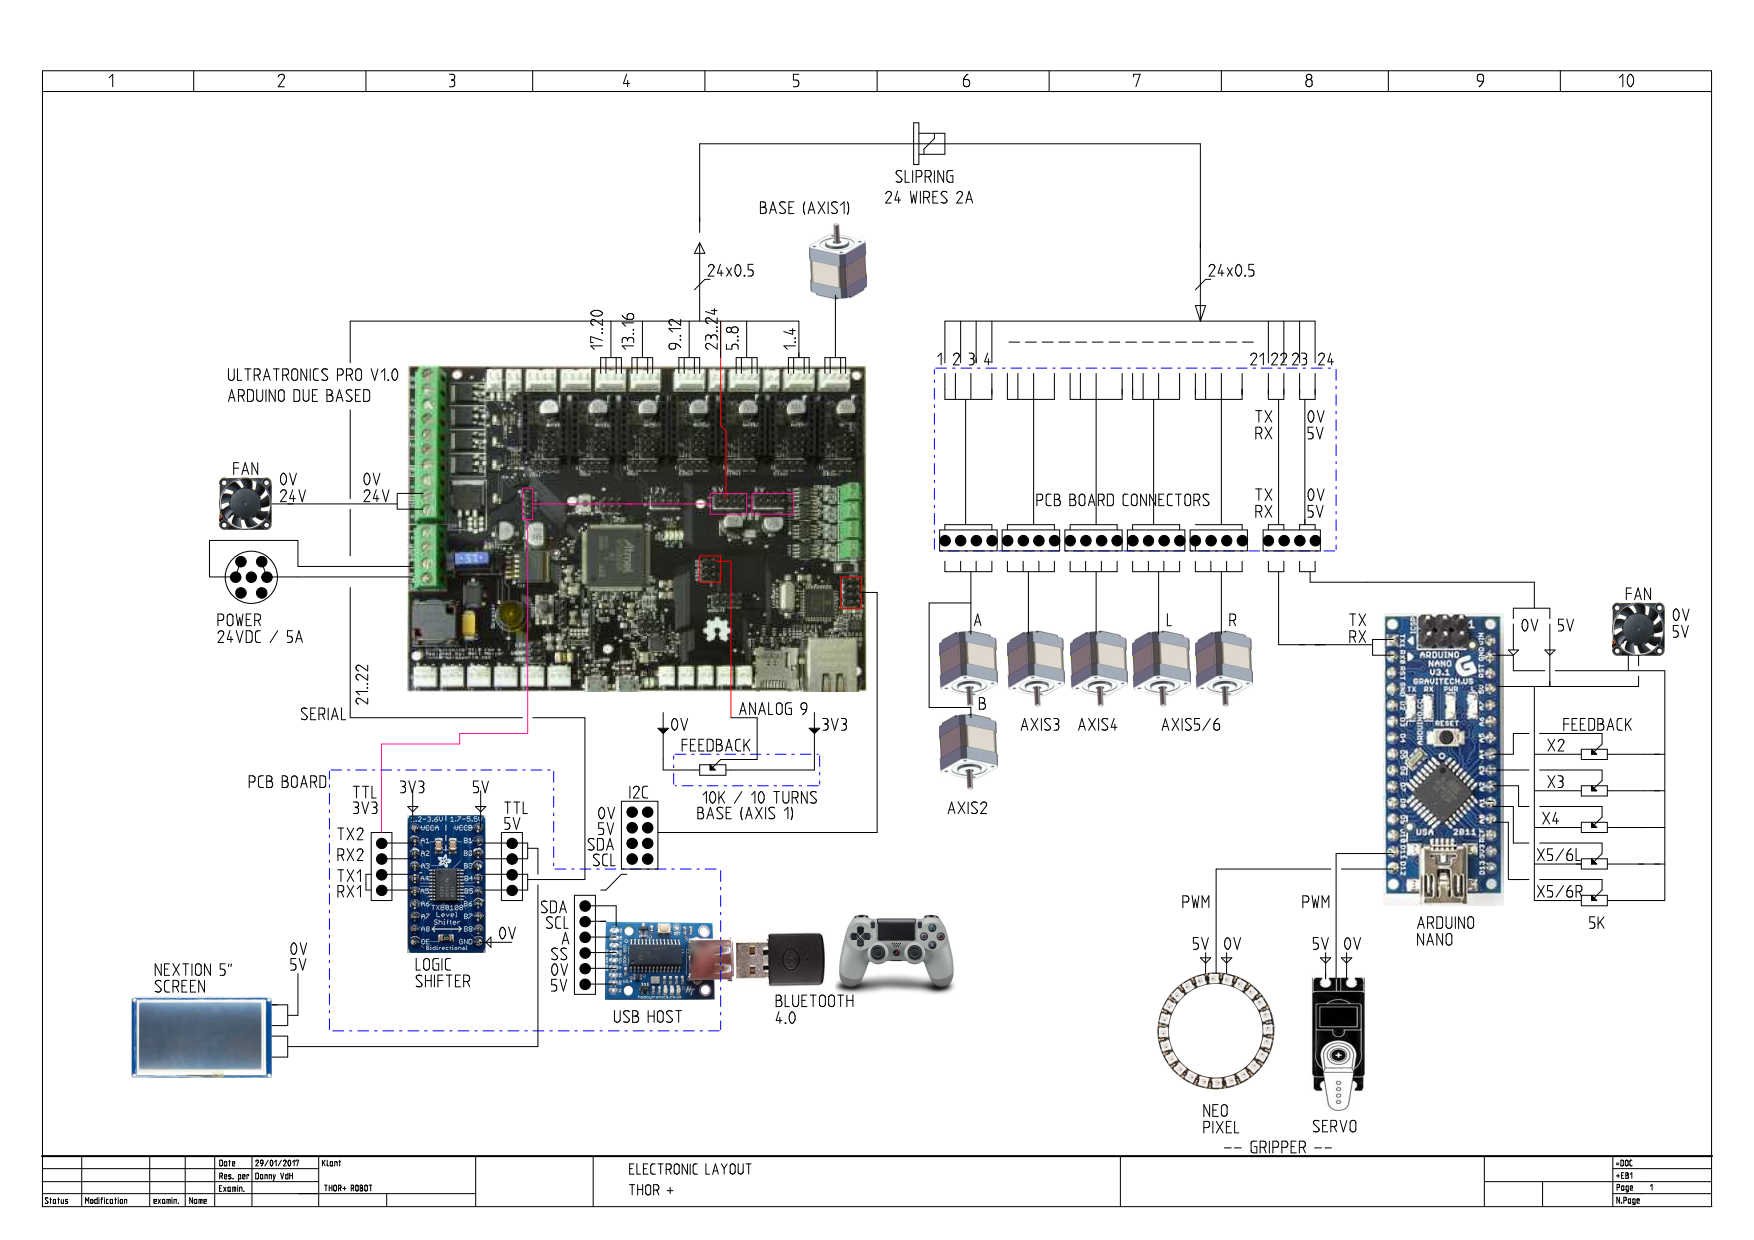
UPDATE!!!
Drawing has been changed, I had problems to connect to the mini arduino so had to change the communication to a real serial port. I did move my usb host to I2C.
The base potentiometer has been moved to another analog point, don't need the extra zero potentiometer anymore.
Removed the stepdown pcb and feed arduino mini directly with 5V and used a fan at 5V.
Don't use de extra zero potentiometers at the other axis on arduino mini anymore.
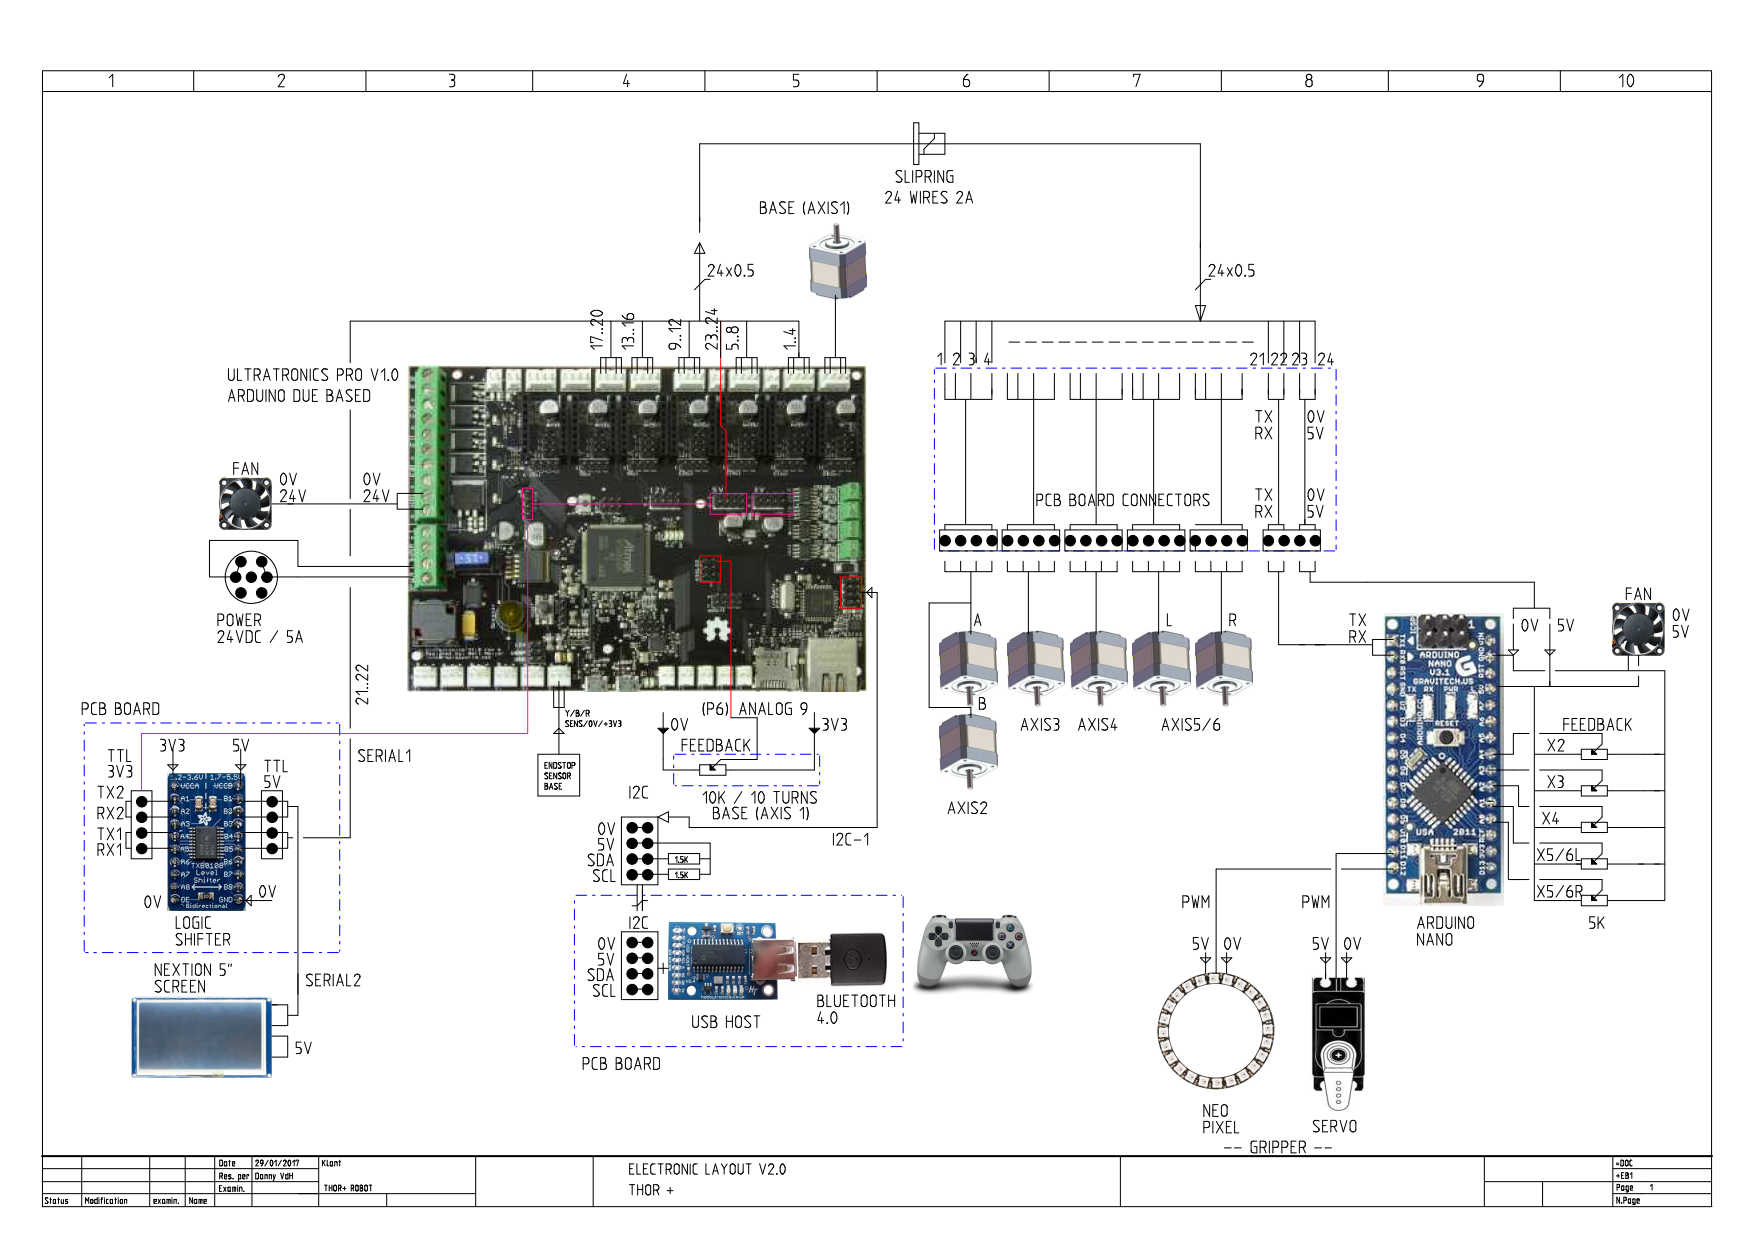
UPDATE LIST
1x Fan 24V 40x40x10mm
1x Fan 5V 40x40x10mm
1x Potentiometer 10 Turns 10Kohm
1x Opto board (init base) https://reprapworld.com/products/electronics/endstops/opto_endstop/
5x Makeblock angular sensor V1 http://www.makeblock.com/me-angular-sensor
Did some testing to use the SDA SCL at the right side on the unitronics board, a little bit tricky but it works now for 100%.
Needed pullup resistors 1.5Kohm between SDA,SLC lines to VCC. Edit the 'ps4_i2c.h' source and changed all the words 'Wire' into 'Wire1'. Added Wire1.begin() in setup function.
Now everything is working like I wanted it! Got a spare serial port for connection on my arduino nano.
Don't forget to attach the usb host module on TTL/USB module and set 'SERIAL OFF' to avoid latency problems. Read the documentation very carefully from the vendor.
Discussions
Become a Hackaday.io Member
Create an account to leave a comment. Already have an account? Log In.
Hello Danny, I assume that the 24V to 5V step down is separate to give more power than then 5V boartd could provide?
Are you sure? yes | no
indeed, but after experimenting I don't have to to this. There is power enough on the 5V side to get it through the slipring wires.
Are you sure? yes | no