 Md. Khairul Alam
In this part, I’ll explain how to connect and program an LCD using the board. The display used in the kit is a 16×2 LCD display. You may be wondering why it’s called a 16×2 LCD. The part 16×2 means that the LCD has 2 lines, and can display 16 characters per line. Therefore, a 16×2 LCD screen can display up to 32 characters at once. It is possible to display more than 32 characters with scrolling though.
The LCD’s integrated in the kit uses the standard Hitachi HD44780 driver. These displays can be wired in either 4 bit mode or 8 bit mode. Wiring the LCD in 4 bit mode is usually preferred since it uses four less wires than 8 bit mode and the kit has only 4 bit mode option. In practice, there isn’t a noticeable difference in performance between the two modes.
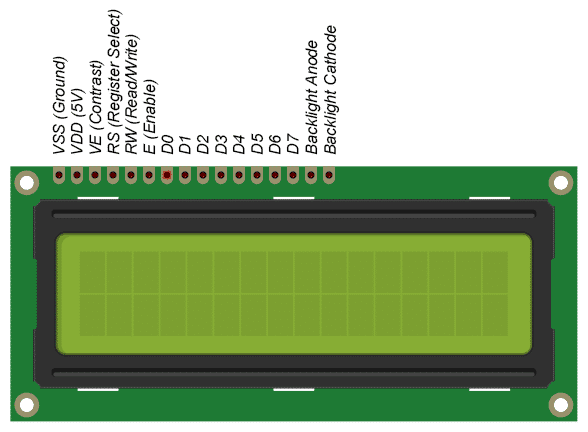
There is some basic and common connection for LCD which are already made in the kit. You only need to connect 6 pins of LCD to 6 digital pins of the Arduino. These pins are:
- RS (Register Select)
- E (Enable)
- D4-D7 (Data Bus)
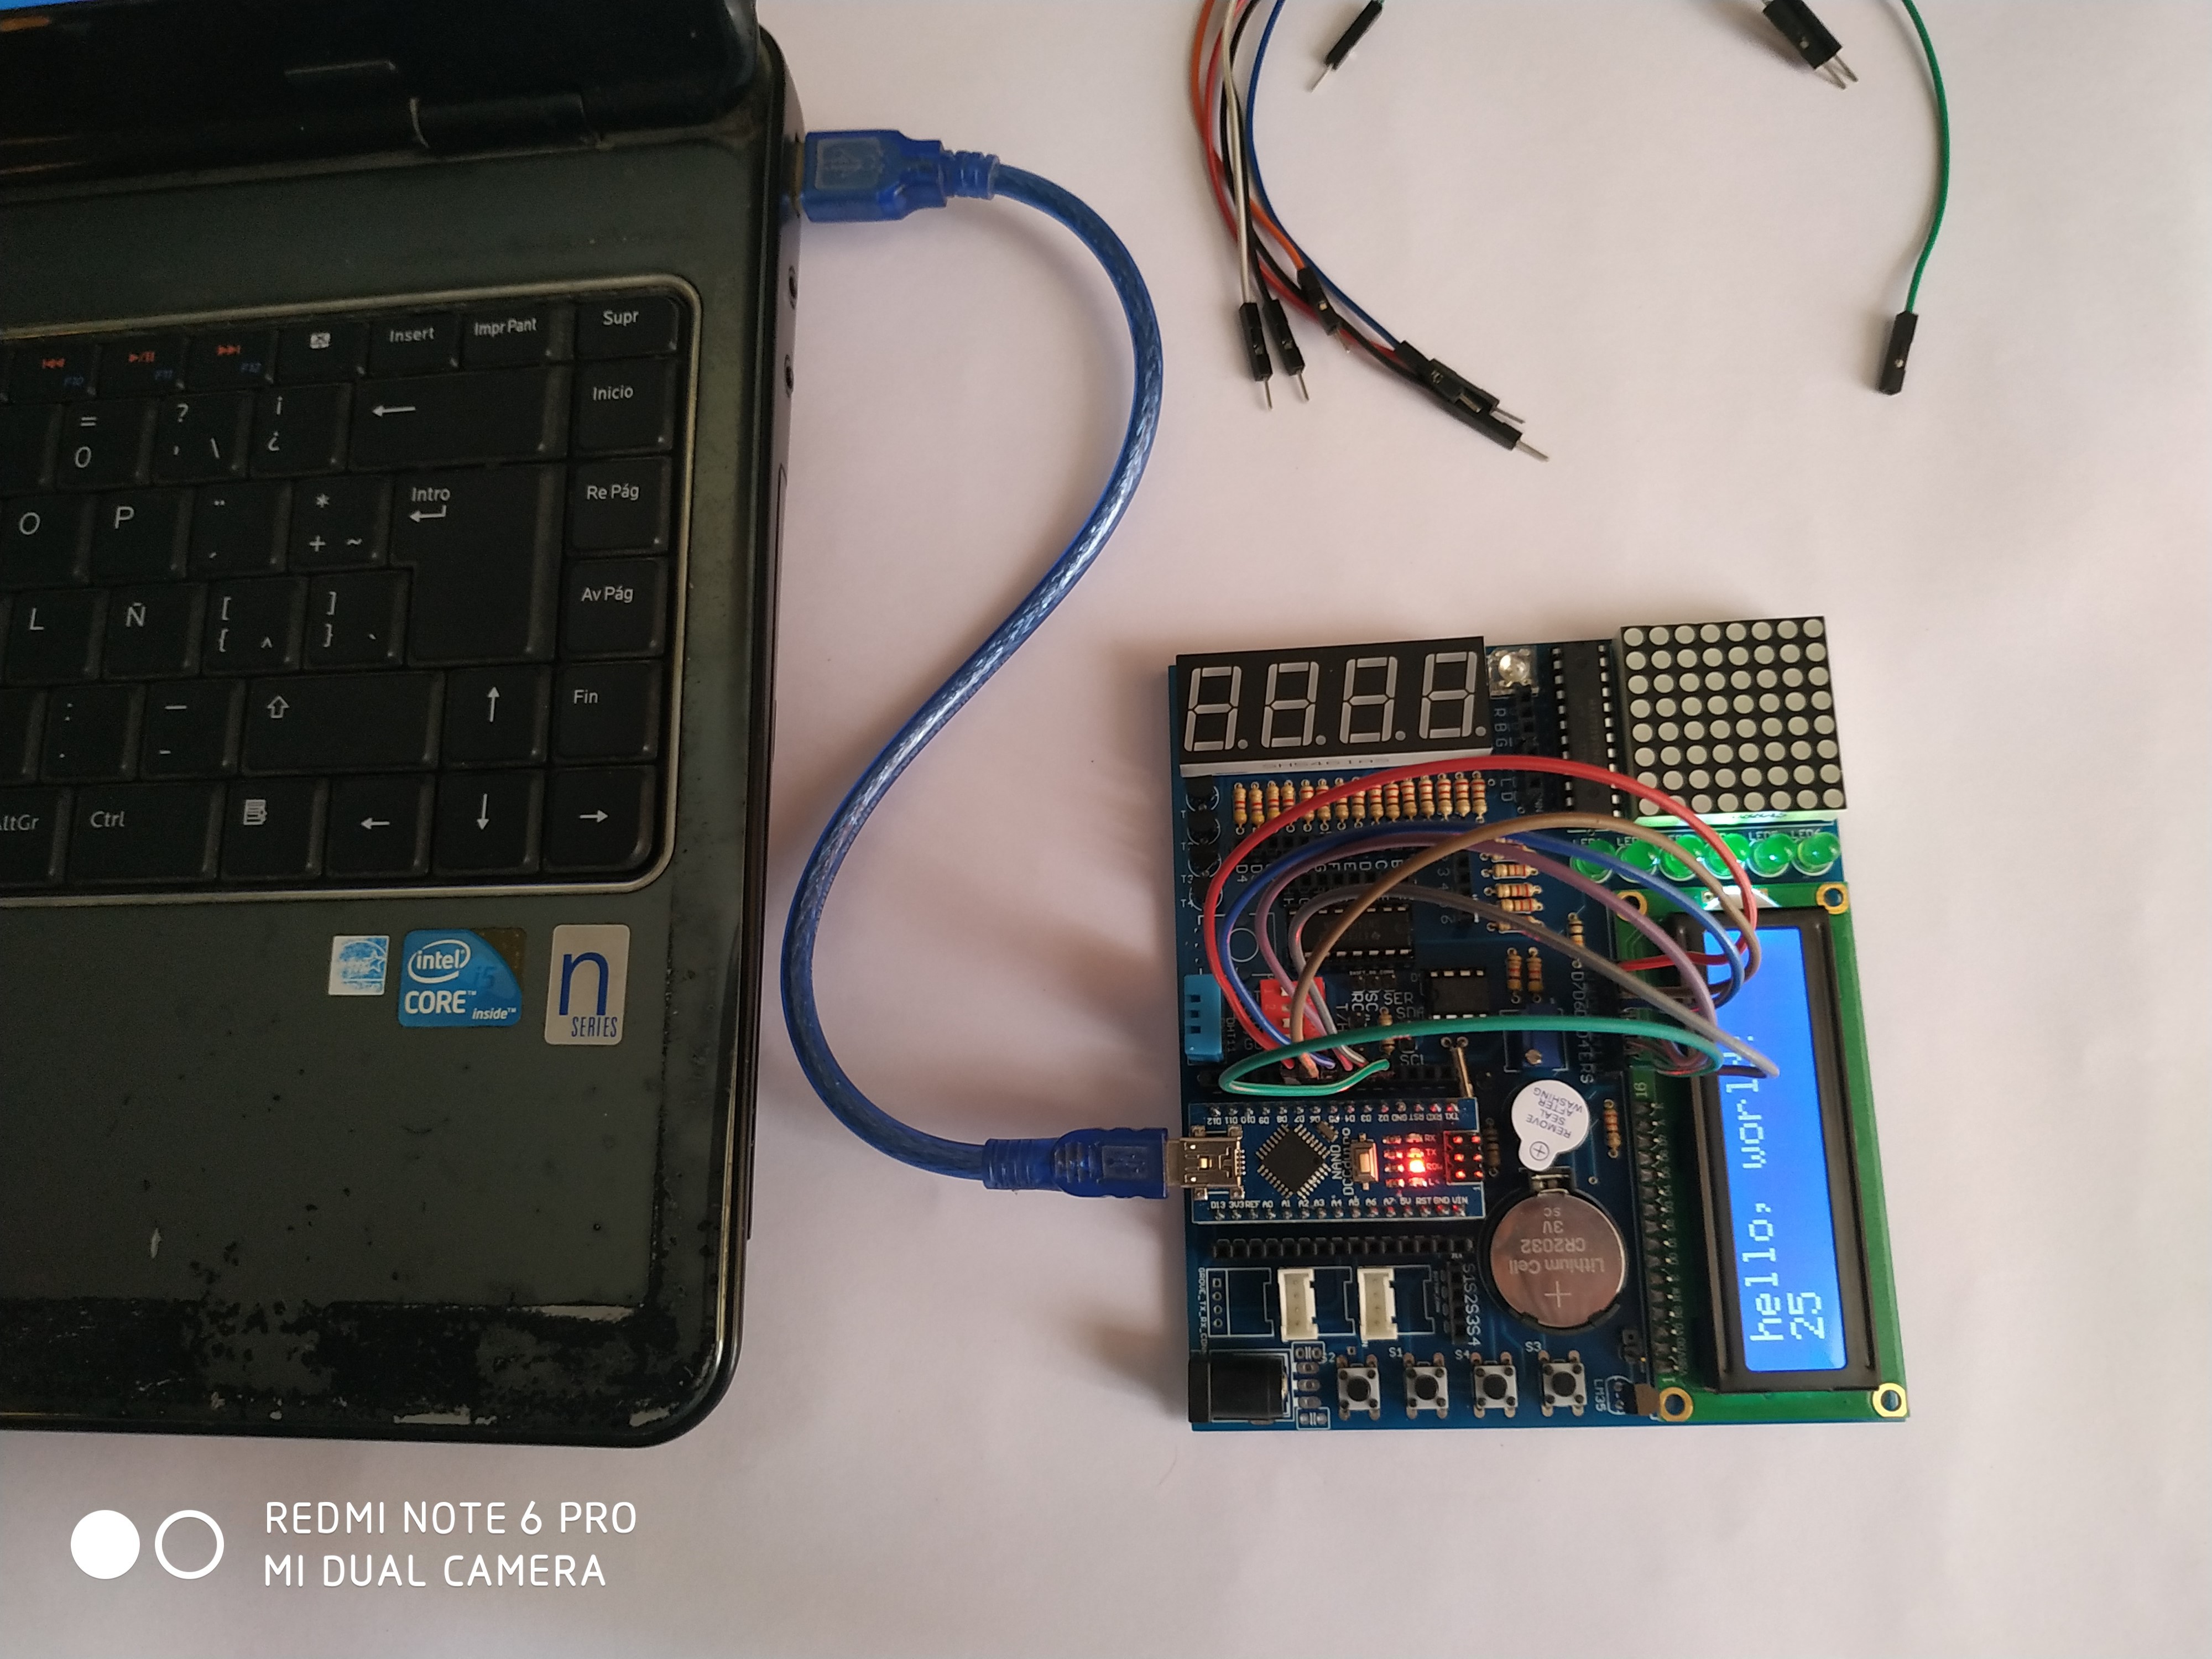
Connect this 6 pins to 6 digital pins of Arduino and upload the following code by changing the pin configuration according to your connection:
/*
  LiquidCrystal Library - display() and noDisplay()

 Demonstrates the use a 16x2 LCD display.  The LiquidCrystal
 library works with all LCD displays that are compatible with the
 Hitachi HD44780 driver. There are many of them out there, and you
 can usually tell them by the 16-pin interface.

 This sketch prints "Hello World!" to the LCD and uses the
 display() and noDisplay() functions to turn on and off
 the display.

 The circuit:
 * LCD RS pin to digital pin 12
 * LCD Enable pin to digital pin 11
 * LCD D4 pin to digital pin 5
 * LCD D5 pin to digital pin 4
 * LCD D6 pin to digital pin 3
 * LCD D7 pin to digital pin 2
 * LCD R/W pin to ground
 * 10K resistor:
 * ends to +5V and ground
 * wiper to LCD VO pin (pin 3)

 Library originally added 18 Apr 2008
 by David A. Mellis
 library modified 5 Jul 2009
 by Limor Fried (http://www.ladyada.net)
 example added 9 Jul 2009
 by Tom Igoe
 modified 22 Nov 2010
 by Tom Igoe
 modified 7 Nov 2016
 by Arturo Guadalupi

 This example code is in the public domain.

 http://www.arduino.cc/en/Tutorial/LiquidCrystalDisplay

*/

// include the library code:
#include <LiquidCrystal.h>

// initialize the library by associating any needed LCD interface pin
// with the arduino pin number it is connected to
const int rs = 12, en = 11, d4 = 5, d5 = 4, d6 = 3, d7 = 2;
LiquidCrystal lcd(rs, en, d4, d5, d6, d7);

void setup() {
  // set up the LCD's number of columns and rows:
  lcd.begin(16, 2);
  // Print a message to the LCD.
  lcd.print("hello, world!");
}

void loop() {
  // Turn off the display:
  lcd.noDisplay();
  delay(500);
  // Turn on the display:
  lcd.display();
  delay(500);
}
The output on the display:
Discussions
Become a Hackaday.io Member
Create an account to leave a comment. Already have an account? Log In.