 Jeremy Ruhland
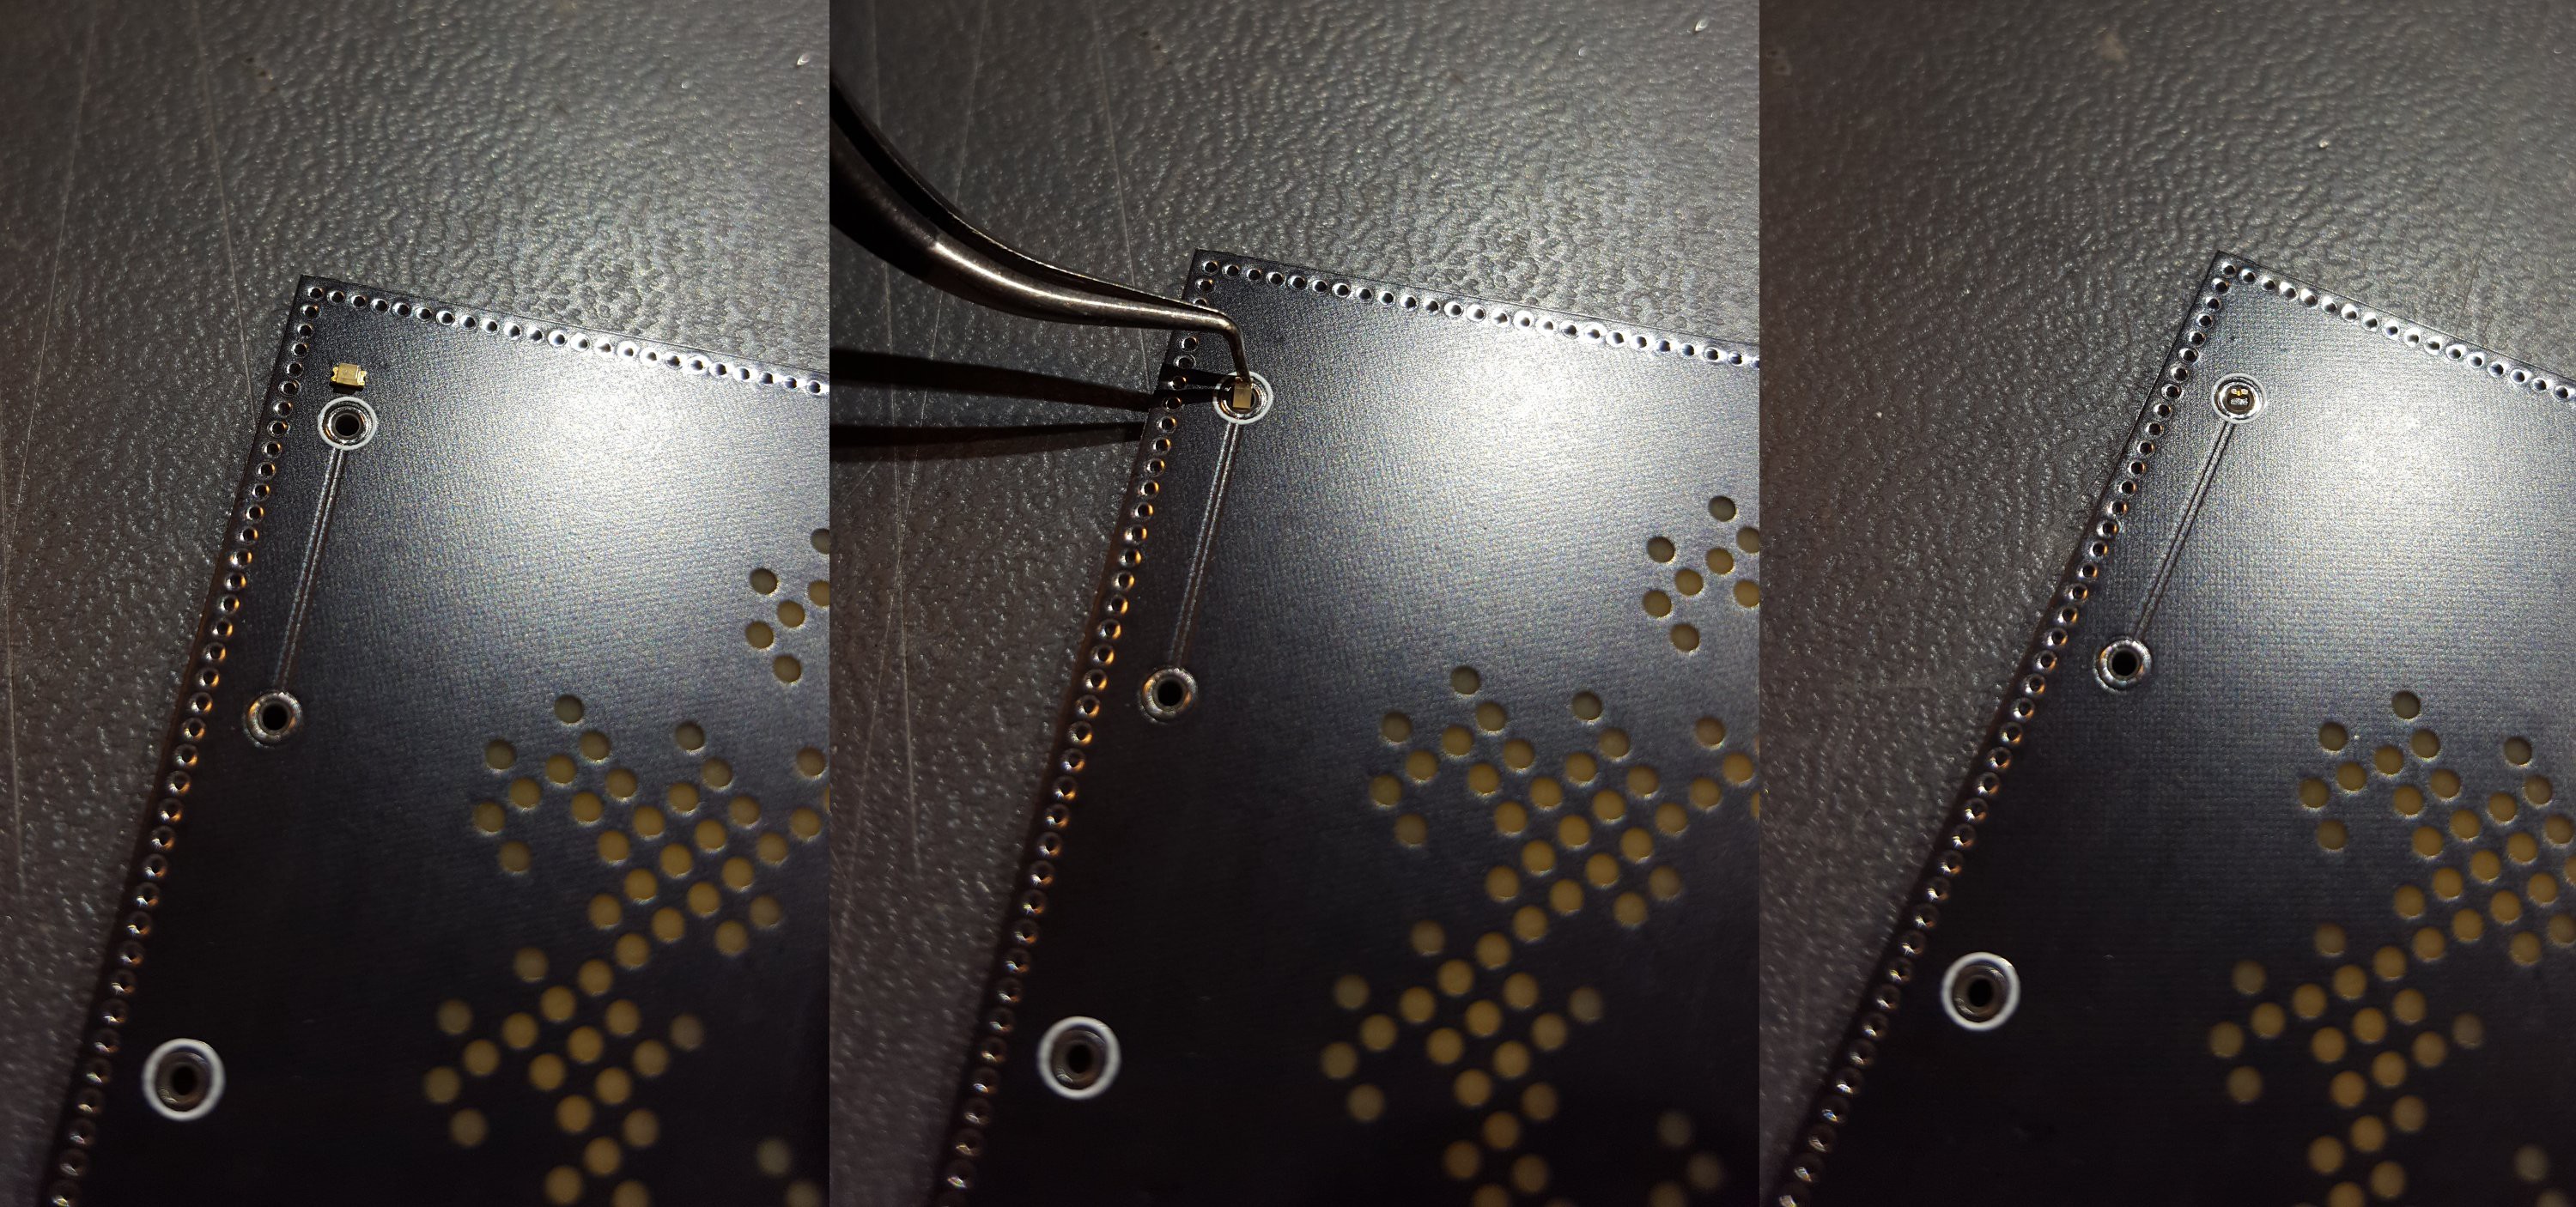
Assembly of the board was straightforward. LEDs fit easily into their holes as long as they were aligned normal to the surface. Friction was sufficient to hold them in place before soldering, even if the board was lifted.
Care had to be taken while soldering to ensure the solder successfully made contact with the component leads and did not simply dome over it. Diagnosis can be performed with a multimeter in diode mode. Connection to ground pours was difficult despite thermals but it worked well once the copper heated a bit. I cannot recommend using additional flux for these components as the off-gassing causes the cavity to pressurize while the final solder cap is cooling and it will pop like a bubble.
Discussions
Become a Hackaday.io Member
Create an account to leave a comment. Already have an account? Log In.