Close
0%
0%

IoT Cat Litter Box (with ESP32 and Thingspeak)

A cat litter box with WiFi, using an ESP32, able to measure the weight of my cats, monitoring cleaning conditions and store data online

Public Chat
Similar projects worth following
A cat litter box with WiFi, using an ESP32, able to measure the weight of my cats (using weight sensors and HX711 amplifiers), monitor the general cleaning conditions of the cat litter box and even store all the data in the cloud (using the Thingspeak platform)! The device is even able to generate notifications by email, Twitter, etc.
Surely it may seem like a shitty idea (in this case, cat poo), but that can be used by the reader to learn some new skill that can be used in other projects!

If you follow my tutorials, you know that I live with some cats and I love doing projects involving four things: 3D printing, internet of things, robots and, of course, cats! You can find other of my projects like this scale saves weight measurements in the cloud or this hanging cat bed made with PVC pipes.

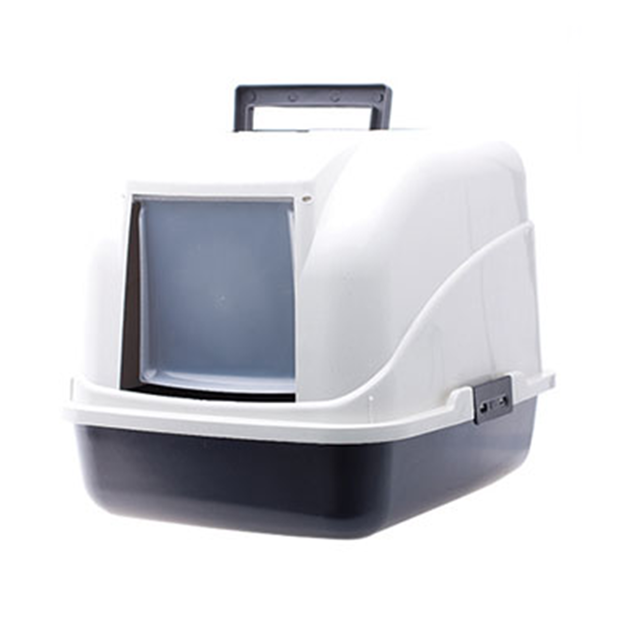
When I was shooting the video on the IoT scale, I realized that it would even be used to track the weight of my cats. They usually come up on the wooden surface regularly (especially if I'm trying to weigh myself in an attempt to troll me and make I look heavier), but they don't have not have the patience to stand on the device for long enough to complete the measurements. It made me think of ways to weigth them regularly without having to worry about having to put them on some specific surface and hold them there for a while. And that's where the idea of using their litter boxes as "bait" came up.

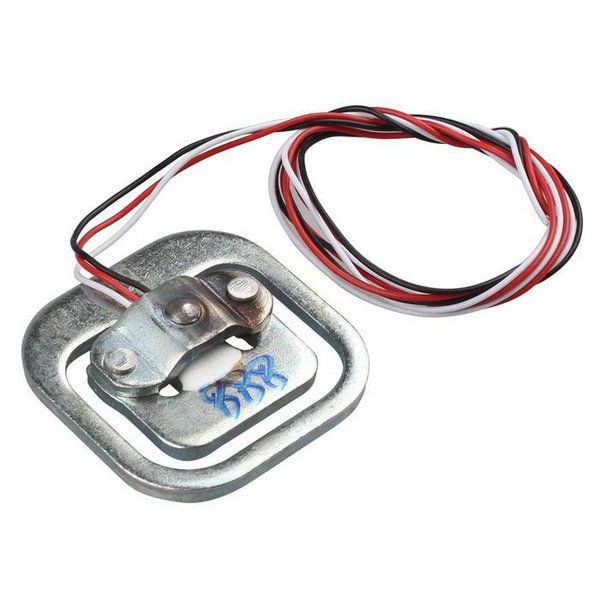
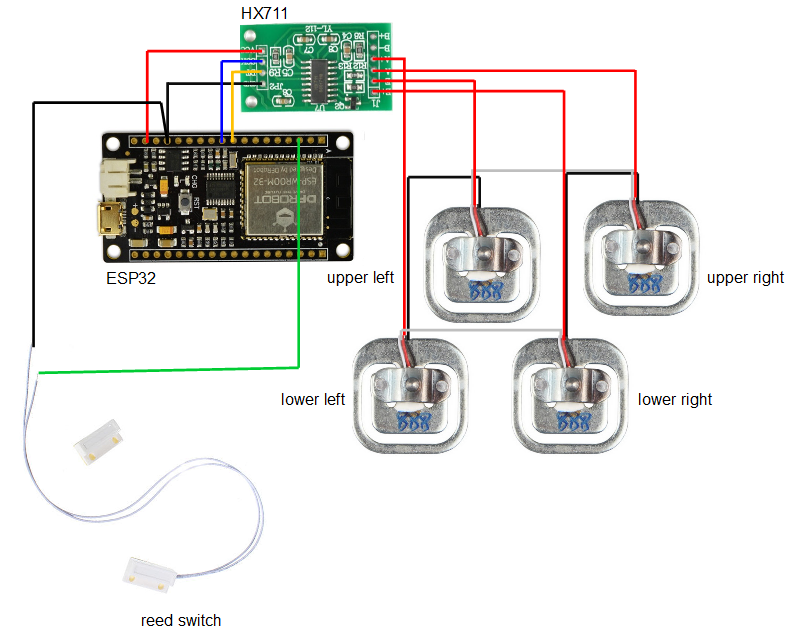
They usually stay inside the litter box long enough to make the necessary measurements, and they use it several times a day without the need for human intervention, making the box the ideal surface for the installation of a similar device used om my IoT scale. In addition, their weights are considerably different (one has about 3 kg and the other one 5 kg), so that it would be possible to distinguish between the measurements which cat was on the scale.

But I finally realized that it would be possible to use the device to extract a lot of new information! By measuring the weight of the box it would be possible to monitor the amount of sand available inside (as a way of indicating that it is time to fill with more sand or change all the contents), the number of times the cats have used the box per day, when the box was last cleaned, etc.

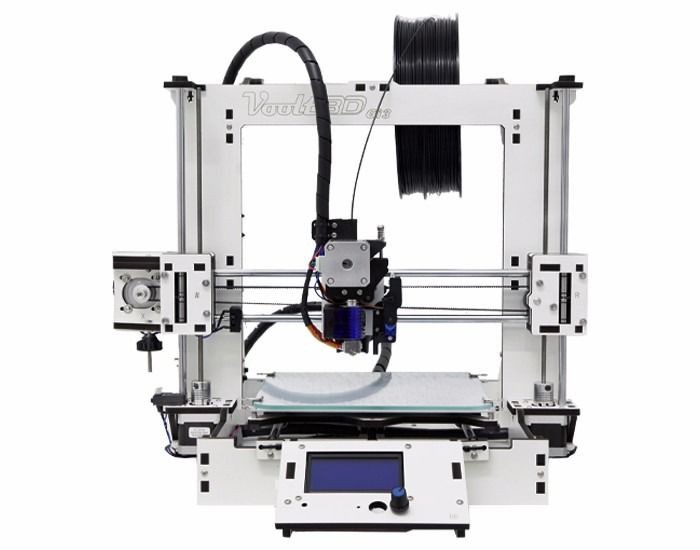
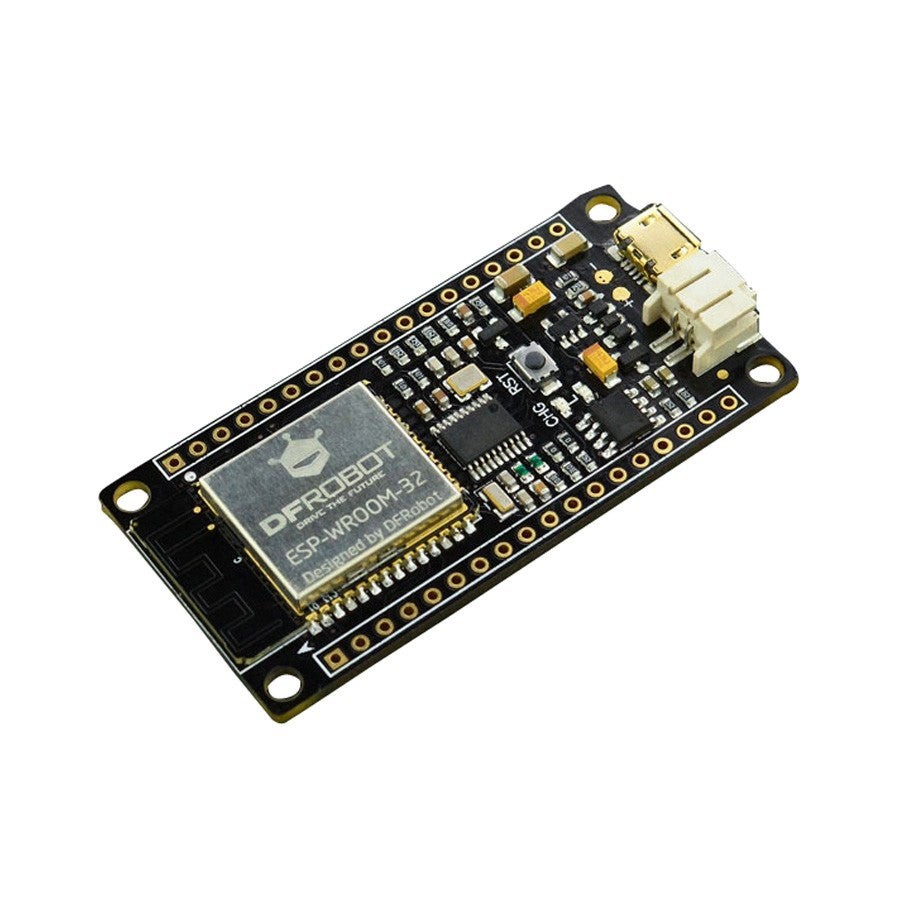
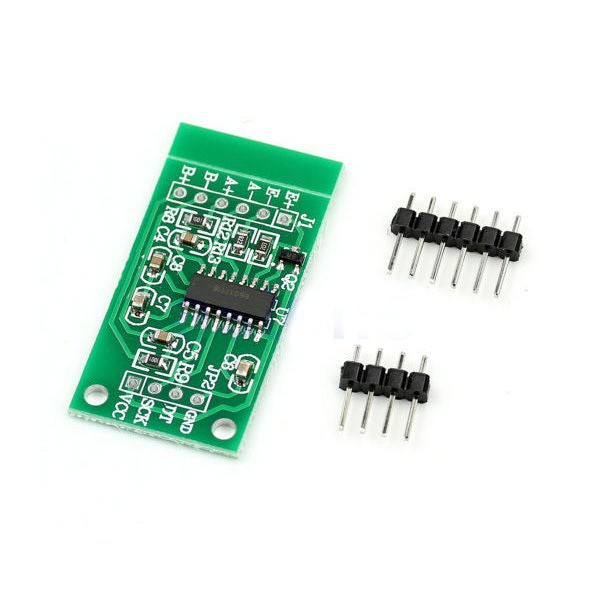
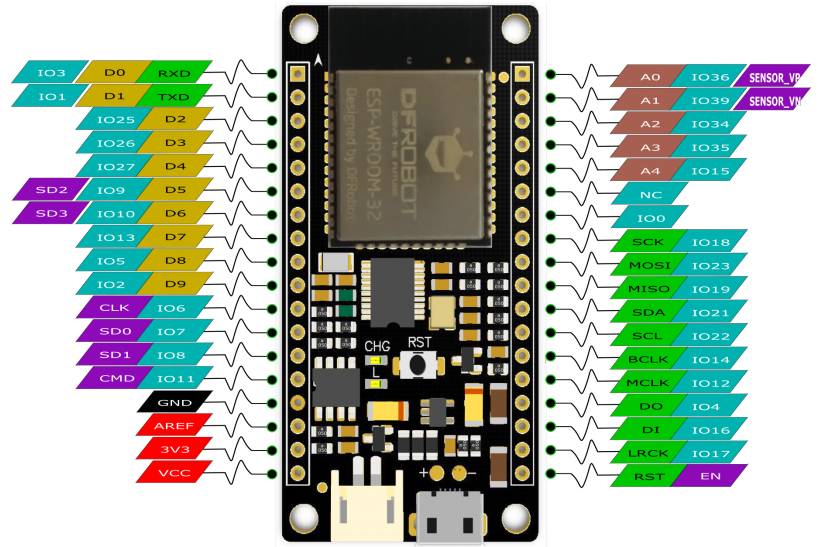
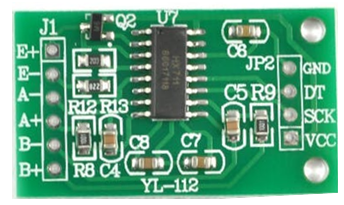
I rolled up my sleeves and set out to design the project described here: a cat litter box with WiFi, using an ESP32, able to measure the weight of my cats (using weight sensors and HX711 amplifiers), monitor the general cleaning conditions of the cat litter box and even store all the data in the cloud (using the Thingspeak platform)! The device is even able to generate notifications by email, Twitter, etc. Surely it may seem like a shitty idea (in this case, cat poo), but that can be used by the reader to learn some new skill that can be used in other projects:

- How to program an ESP32 using the Arduino IDE;

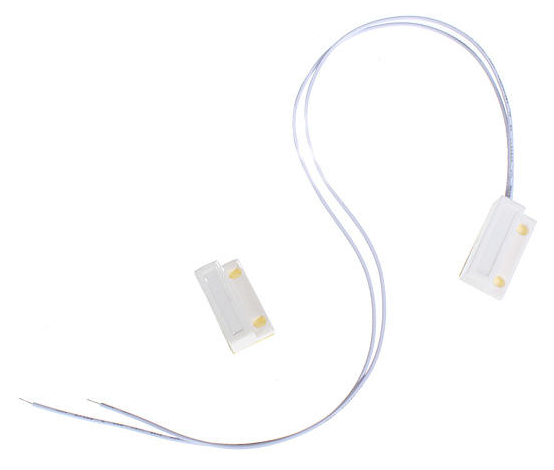
- How to read digital inputs using an ESP32;

- How to use load sensor and an HX711 for weight measurement;

- How to send ESP32 data to the cloud using Thingspeak platform;

- How to design and print a 3D case using Fusion360.

Did you like this project? Please consider supporting my future projects with a small bitcoin donation! : D

Deposit Address: 1FiWFYSjRaL7sLdr5wr6h86QkMA6pQxkXJn

ino - 9.52 kB - 08/27/2019 at 22:06

Download

View project log

  • 1
    Tools and Materials

    The following tools and materials were used in this project:

    Tools and materials:

    • 3D printer (link / link / link). It was used for printing the case where the electronics are encloused.
    • Solder iron and wire. Some of the components (ESP32 Firebeetle and HX711, for instance) doesn't come with soldered terminals. I needed to solder some wires or pins in order to connect those devices.
    • Shrinking tube. l also had to solder the wires of each load cell. A piece of shrinking tube might be used for a better isolation of the conductors.
    • Screwdriver. The structure is mounted using some screws. A set of screwdrivers was used.
    • M2x6mm Bolts. They were used for mounting the electronics inside the case.
    • FireBeetle ESP32 dev board. It's really easy to use and program using Arduino IDE. It has built-in Wi-Fi module, so you can use it in a variaty of projects. You can also use other ESP8266 based bords (link / link / link) if you wish.
    • HX711 module (link / link / link). This works as a load cell amplifier. Four strain gauge load cells are connected to this module, and it communicates on a serial communication with the microcontroller.
    • 50kg load cell (x4); (link / link / link). They are used to measure the weight. Four of them were used for a maximum weight of 200kg.
    • Magnetic door sensor (link / link / link). It consists in a magnectic switch, which was used to detect that the litter box is opened.
    • Micro USB cable;
    • 6 female-female jumper wires;
    • Cat litter box.

    The links described above are only a suggestion of where you can find the items used in this tutorial (and support my future hacks). Feel free to search for them elsewhere and buy at your favourite store.

    I used a FireBeetle ESP32 dev board, which was kindly supplied by DFRobot.

    Did you know you can buy a Creality Ender 3 3Dprinter for only $168.99? Get yours! https://rebrand.ly/3Dprinter-BG

  • 2
    Setup FireBeetle ESP32 on Arduino IDE

    For this project I used Arduino IDE for programming my ESP32 module. It's the easiest way if you've already used an Arduino before, and you won't need to learn a new programming language, like Python or Lua for instance.

    If you've never done this before, first you'll have to add ESP32 board support to the Arduino software.

    1. Download and install Arduino IDE latest version

    You can find the latest version for Windows, Linux or MAC OSX on Arduino's website: https://www.arduino.cc/en/main/software

    Download it for free, install it on your computer and launch it.

    2. Adding ESP32 board

    Arduino IDE already comes with support to a lot of different boards: Arduino Nano, Mine, Uno, Mega, Yún, etc. Unfortunatly ESP32 isn't by default among those suported development boards. So in order to upload your codes to a ESP32 base board, you'll have to add its properties to Arduino's software first.

    • Navigate to File > Preferences;
    • Add the following URL to Additional Boards Manager textbox (the one on the bottom of the Preferences window):

    https://git.oschina.net/dfrobot/FireBeetle-ESP32/raw/master/package_esp32_index.json

    • If the text box wasn't blank, it means had already add other boards before on Arduino IDE before. Add a comma at the end of the previous URL and the one above.
    • Hit "Ok" button and close the Preferences Window.
    • Navigate for Tools > Board > Boards Manager for adding your ESP32 board.
    • Type "FireBeetle-ESP32" on the search text box, select "FireBeetle-ESP32 Mainboard by DFRobot DFRDuino" and install it.

    Now your Arduino IDE will be ready to work with ESP32 FireBeetle board.

    Plug the microUSB cable on the ESP32 and on your computer. It will automatically install Windows communication driver. If it fails to install the driver, download the following file and manually install the driver for the newly connected device.

    https://git.oschina.net/dfrobot/FireBeetle-ESP32/raw/master/FireBeetle-ESP32.inf

    If you wish to use an alternative ESP32 based board, add the appropriate board.

    3. Adding the libraries

    The following libraries will be used for our Arduino code. Download the following libraries:

    Navigate to Sketch-> Include Library -> Manage Libraries... on your Arduino IDE and add the libraries above.

    ............

    Now that your dev environment is ready, let's move on to the next step!

  • 3
    Wiring Up - HX711, Load Cells, Reed Switch and ESP32

    This project used the following electronic components:

    • ESP32 Firebeetle development board: This board has an Expressif microcontroller and is the component responsible for reading variables, handling and sending data to the cloud using a WiFi connection. It is in this device that the project code runs.
    • Load Sensors: component responsible for measuring the force, converting the pressure applied on the device into an electrical signal.
    • Amplifier HX711: circuit responsible for the amplification of the electric signal generated by the charge cells and digital analogue conversion of sina. The signal generated by the load cells has a very restricted amplitude (signal in mV). This circuit amplifies this signal and performs the conversion of the analog signal to digital, delivering the converted signal to the microcontroller.
    • Door sensor switch: consists of a switch that is normally closed in the absence of a magnetic field. When applied a magnetic field in its proximity, the switch closes an internal contact, allowing the conduction of electric current. In this project, a switch of this type was used to identify whether or not the top of the litter box was opened. A magnet has been attached to the top cover, while the switch is attached to the controlled and fixed on the bottom of the box. When that cover is closed, the magnet and key will be aligned and close together, keeping the switch closed. When the two parts are separated, the magnet will move away from the switch and the circuit will open.

    Each device was connected according to the schematics.

    HX711 - input:

    • Upper left load cell signal (red wire) => HX711 E- pin
    • Lower left load cell signal (red wire) => HX711 A+ pin
    • Upper right load cell signal (red wire) => HX711 A- pin
    • Lower right load cell signal (red wire) => HX711 E+ pin

    HX711- output:

    • HX711 Vcc pin => ESP32 3.3V pin
    • HX711 GND pin => ESP32 GND pin
    • HX711 SCK pin => ESP32 GPIO 2 (pin D9)
    • HX711 DT pin => ESP32 GPIO 5 (pin D8)

    Door sensor:

    • Reed switch (terminal 1) => ESP32 GND pin
    • Reed switch (terminal 2) => ESP32 GPIO 25 (pin D2)

    When everything is wired up, plug a USB cabe on the ESP32 and get ready for uploading the code.

View all 8 instructions

Enjoy this project?

Share

Discussions

Thomas Rose wrote 09/13/2019 at 11:28 point

I love this project and am going to build this after my 3D-printer is assembled :D

Only thing i would love to see additionally would be MQTT instead of Thingspeak Cloud, so i could host locally :D

  Are you sure? yes | no

Radio Pushka wrote 09/01/2019 at 21:53 point

that sounds fun

  Are you sure? yes | no

Tim Rightnour wrote 08/29/2019 at 01:32 point

One thought I had recently, was to see if any of the various gas sensors like the BME680, or MQ-X sensors were sensitive to things like ammonia, etc.  IE, could you detect when it is stinky?

  Are you sure? yes | no

igorfonseca83 wrote 08/29/2019 at 10:44 point

Hi Tim! I’m trying to add a MQ-135 gás sensor to detected if the box is too dirty. But so far the readings are too noisy... 🙁

  Are you sure? yes | no

Tim Rightnour wrote 08/30/2019 at 13:29 point

With the BME680 I had to use 8x oversampling to calm the readings down. You might also just need to look for trends over time...

  Are you sure? yes | no

JoshRibbeck wrote 10/14/2019 at 16:52 point

I have a litter robot (https://www.litter-robot.com/), which does some of the things your system does. If you ever want a pic of their circuity, I'd be happy to send it over!

  Are you sure? yes | no

Øystein wrote 08/28/2019 at 07:18 point

great project! psst, catbox.io is an available domain.

  Are you sure? yes | no

igorfonseca83 wrote 08/28/2019 at 12:02 point

thanks! I’m glad you liked! :D

Wow! Great idea! I’m running to register it! 😸

  Are you sure? yes | no

Richard Hogben wrote 08/27/2019 at 23:04 point

is that your cat?

  Are you sure? yes | no

igorfonseca83 wrote 08/28/2019 at 04:59 point

Yes, that’s one of my cats. 😸

  Are you sure? yes | no

Similar Projects

Does this project spark your interest?

Become a member to follow this project and never miss any updates