 Christian Walther
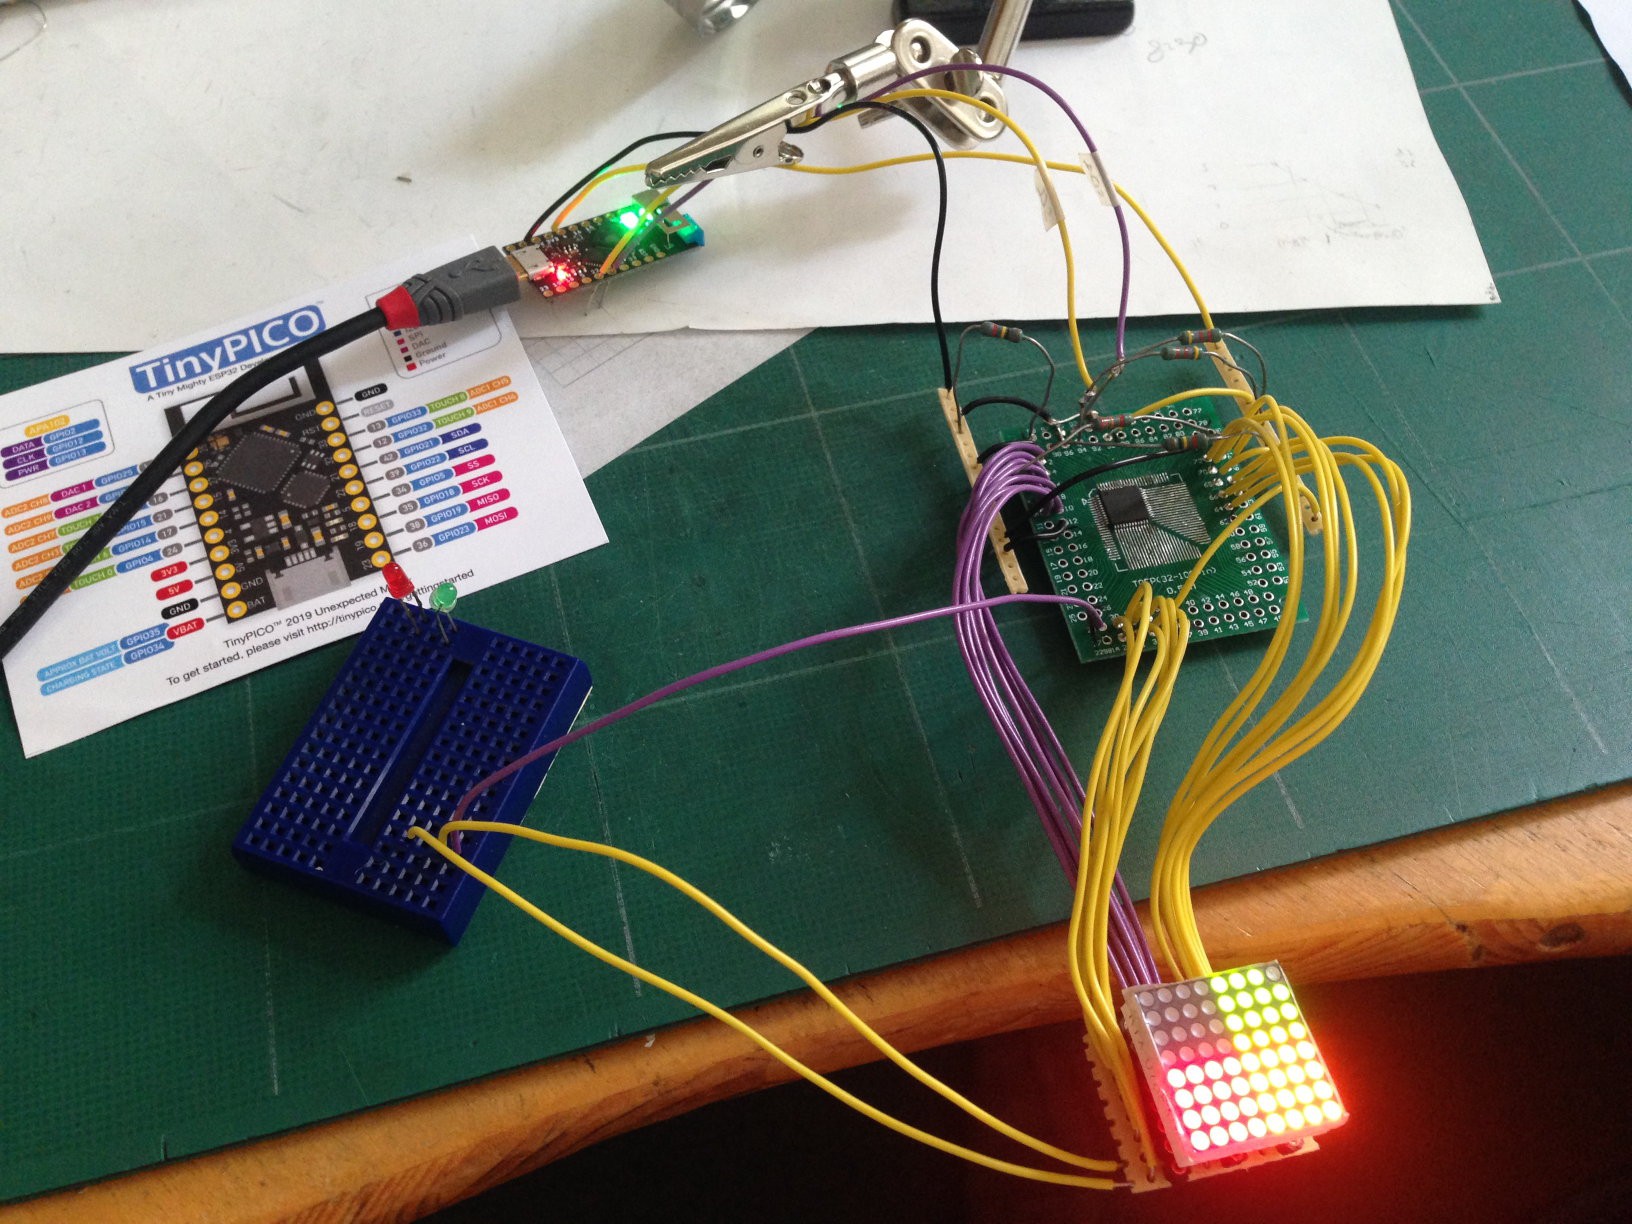
Meanwhile, my TinyPICOs had arrived, and the picture shows one driving the prototype. With the wires going to the breadboard on the left, connected to one unused row output on the green PCB and two column outputs at the matrix, I was testing whether I could use the open/short detection feature of the ISSI chip to read buttons. It worked in principle, I could detect from the software whether the wires were connected, but unfortunately a scan resulted in a visible flash of the display, either dark when set to the minimum current as recommended, or bright at a higher current. I therefore concluded that this was not a practical solution.
As alternative solutions for connecting the buttons, I considered using some IO expander chip or a second microcontroller such as an ATtiny. With the latter, I would also be able to offload the latching feature of the PewPew key reading API from the main microcontroller (it remembers which keys have ever been down since the last check, no matter how briefly). Either would be connected to the same pair of I²C pins as the display driver and thereby leave lots of other GPIOs available for other uses, such as maybe a 12-pin PewPew Standalone connector. The disadvantage, on the other hand, would be the space needed on the board for at least one additional component, which might compromise my goal of making the device as tiny as possible.
In the end, I decided to just use ESP32 GPIOs for the buttons – the TinyPICO had enough of them, and I was unlikely to need them for anything else. If I left DAC1 and GPIO4 open, it would still be possible to connect an official TinyPICO audio shield, for people who want their games to make noise. (I usually don’t and am happy with the lack of sound in the PewPew standard.)
I had bought some tiny buttons from Mouser, with a rectangular package, a relatively large cap that is still comfortable to push with bare fingers, and a nice clicky feel. The same size was used in the PewPew Lite for D1 Mini. I experimented with several arrangements and settled on one where the directional buttons are arranged in a cross, visually emphasizing their meaning. It uses a little more space than the most compact arrangement possible, but assuming that I would arrange the buttons to the left and right of the display, as in the FeatherWing, my preferred arrangement, I would have that space. Whether to choose that arrangement or the Gameboy-like arrangement below the display as in the D1 Mini shield would be decided later based on what was easier to achieve in the PCB layout.
Radomir later also graciously gave me two of the impressively small D1 Mini shield PCBs. After populating them (including working around some design flaws where he had pushed Fritzing to its limits), I could test that arrangement and found that the buttons were a bit too close to the display, and the two groups a bit too close to each other, for me to comfortably use with two thumbs.
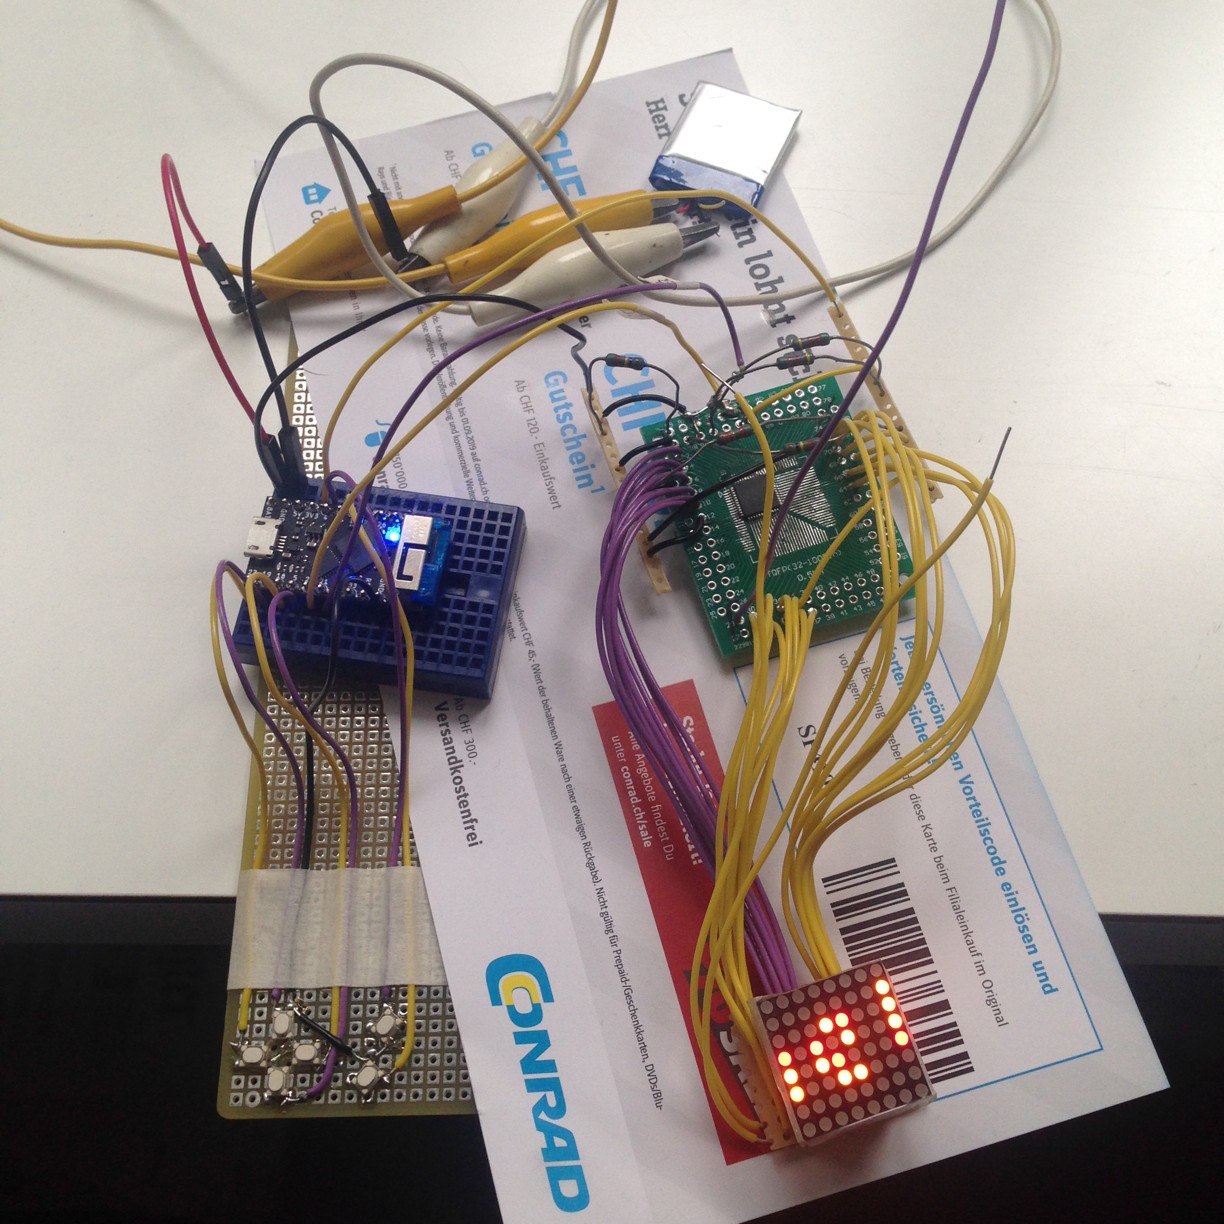
For my prototype, I soldered six buttons in my chosen arrangement onto a corner of an upside-down perfboard (luckily they fit well onto its 2.54 mm grid) and attached wires that would go into the breadboard with the TinyPICO.
With this, all the hardware for a fully functional PewPew was in place, and of course I couldn’t wait to also get the software ready. I started from the MicroPython pew library for PewPew Lite and replaced the display and key functions by ones suitable for my hardware. I used pin interrupts to read the buttons and at first only looked at which pin triggered the interrupt to recognize which key was pressed. This however resulted in some occasional crosstalk between keys: sometimes, pressing one key would register as a simultaneous press of that key and one of its neighbors. I do not know whether these spurious interrupts were caused by inductive coupling between the parallel wires or by something inside the microcontroller. The problem disappeared when I, inside the interrupt handler, actively read the state of all 6 pins to decide which ones were pressed. Success! I was now able to play all the existing PewPew games on my prototype.
Discussions
Become a Hackaday.io Member
Create an account to leave a comment. Already have an account? Log In.