 Dominik Meffert
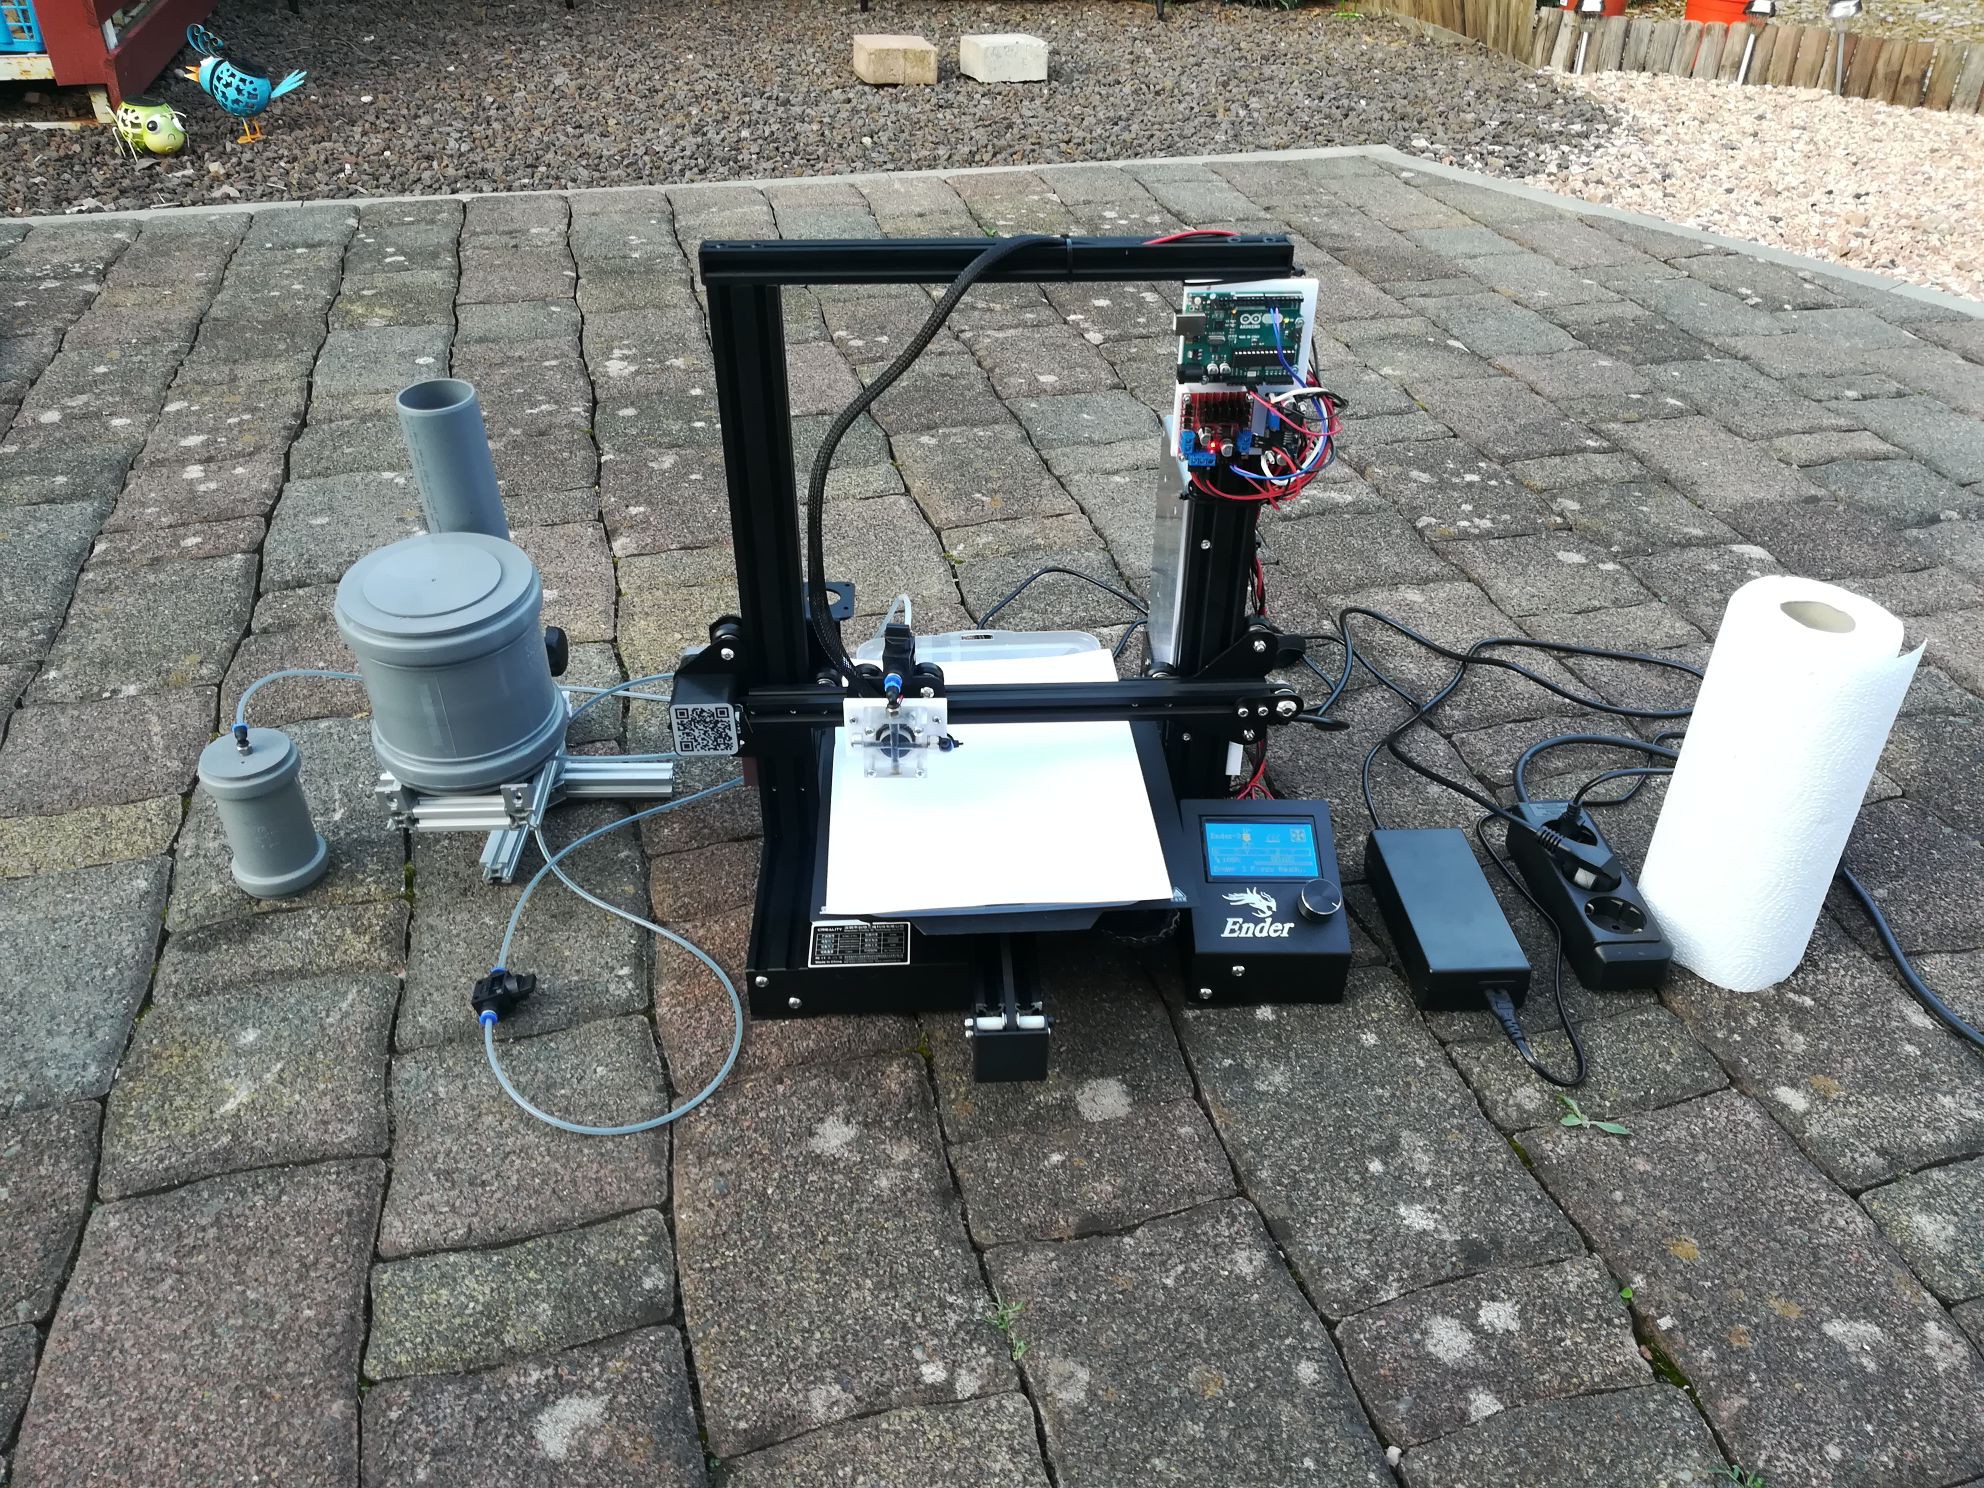
After I got the printhead to work, I bought a Ender 3 Pro because it's not expensive and can be easily modified to test controlling the printhead by gcode and working with it. So I removed all parts which were not needed, like the Z axis, the hotend and the extruder motor. To get a free pin for pwm control on the Ender 3 the Pin 27 Board is needed. With the 3D printed parts the printhead and printhead electronics are mounted. Also the Z axis is locked in place with 3D printed parts. The printhead electronics are powered by a 36V DC power supply. 36V goes to the L298N and LM2596 which converts it down to 5V which powers the Arduino and the logic side of the L298N (The jumper must be removed if the voltage exceed 12V). Digital pin6 and pin7 of the Arduino are connected to the logic input of output B on the L298N. The GND pin of the Pin27 Board is connected to the GND Wago 221 and Pin27 is connected to enable B on the L298N. The piezo disc is connected to output B of the L298N. The Arduino continous switches the "direction" of the piezo "forwards" and "backwards". In the Arduino sketch the time between the direction changes can be set. It seems like one pulse must be longer than the other e.g. pulse1 = 50ms pulse2 = 2ms. I flashed the latest Marlin firmware on the Ender 3 and added the pin27 as fan 1 like here http://marlinfw.org/docs/configuration/laser_spindle.html. Then the piezo can be started with M106 P1 S255 and stopped with M106 P1 S0.
Discussions
Become a Hackaday.io Member
Create an account to leave a comment. Already have an account? Log In.