 Peter
PeterThis is geared towards the newly initiated in the world of Arduino, but I hope others will stop and take a read as well.
Here I am going to use a simple project to cover this subject. I have an Arduino Nano and 8x32 controlled by a HT1632C. This project is focused on the library used by the Arduino IDE and HT1632.
While this is a well put together library, there were a couple of items I had to check on and wanted to share some of the knowledge to help and inspire others. A note to all of the real engineers and programmers out there, I welcome constructive criticism and corrections. I want to help some other soul out there who is just dying to get a project put together but can't find quite all the information they need.
At this point I am going to make a note that the data sheet of any device / chip will provide some very useful details. I highly recommend you take a look. Even if you don't know what everything means, it is another place to start learning; but that is for another article.
What is a Library?
According to the Arduino site, the definition of a library is
"Arduino Libraries
Libraries are files written in C or C++ (.c, .cpp) which provide your sketches with extra functionality (e.g. the ability to control an LED matrix, or read an encoder, etc.)."
Within these files lies all of the information needed to grasp control of said device. Most of libraries will have a decent README file laying out how to setup the program, the device, options available, and a word or two of advice. Others might be short on the README but long on the comments in the examples. And others might leave you high and dry and your kind of left poking around to find what you can. This guide will hopefully get you started on that path if need be; or if you are just a curious mind and need to know more.
Included in an usual Arduino library are the following files:
- device_name.h - the header file. This is the file declared in the "#include" statement. And what can be done with the device.
- device_name.cpp - the source file. This is the code the C compiler works with. The .h file is not used directly, but is copied if "#included" in the .cpp file.
- keywords.txt - commands for programming and Arduino IDE coloring of class and member
- README - a little or a lot of info
- examples directory - a quick look at what it can do
Let's get wired
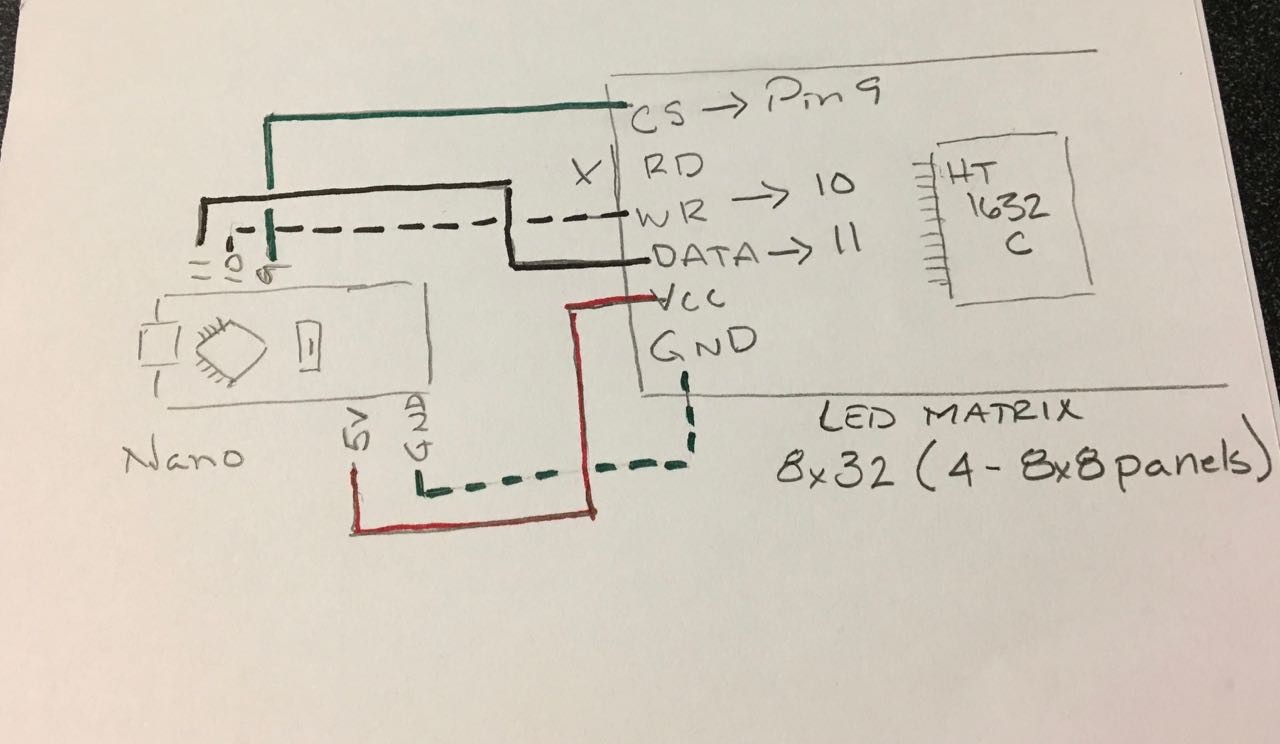
Now here is how the HT1632 panel is wired to the Arduino. In this case I have used a Nano, but the pins assignments are the same. Up to 4 panels are supported, but being I only have one on hand here it is.
The core of the matter
Off the bat, here is the scoop. To complete this project you must have the Arduino IDE installed.
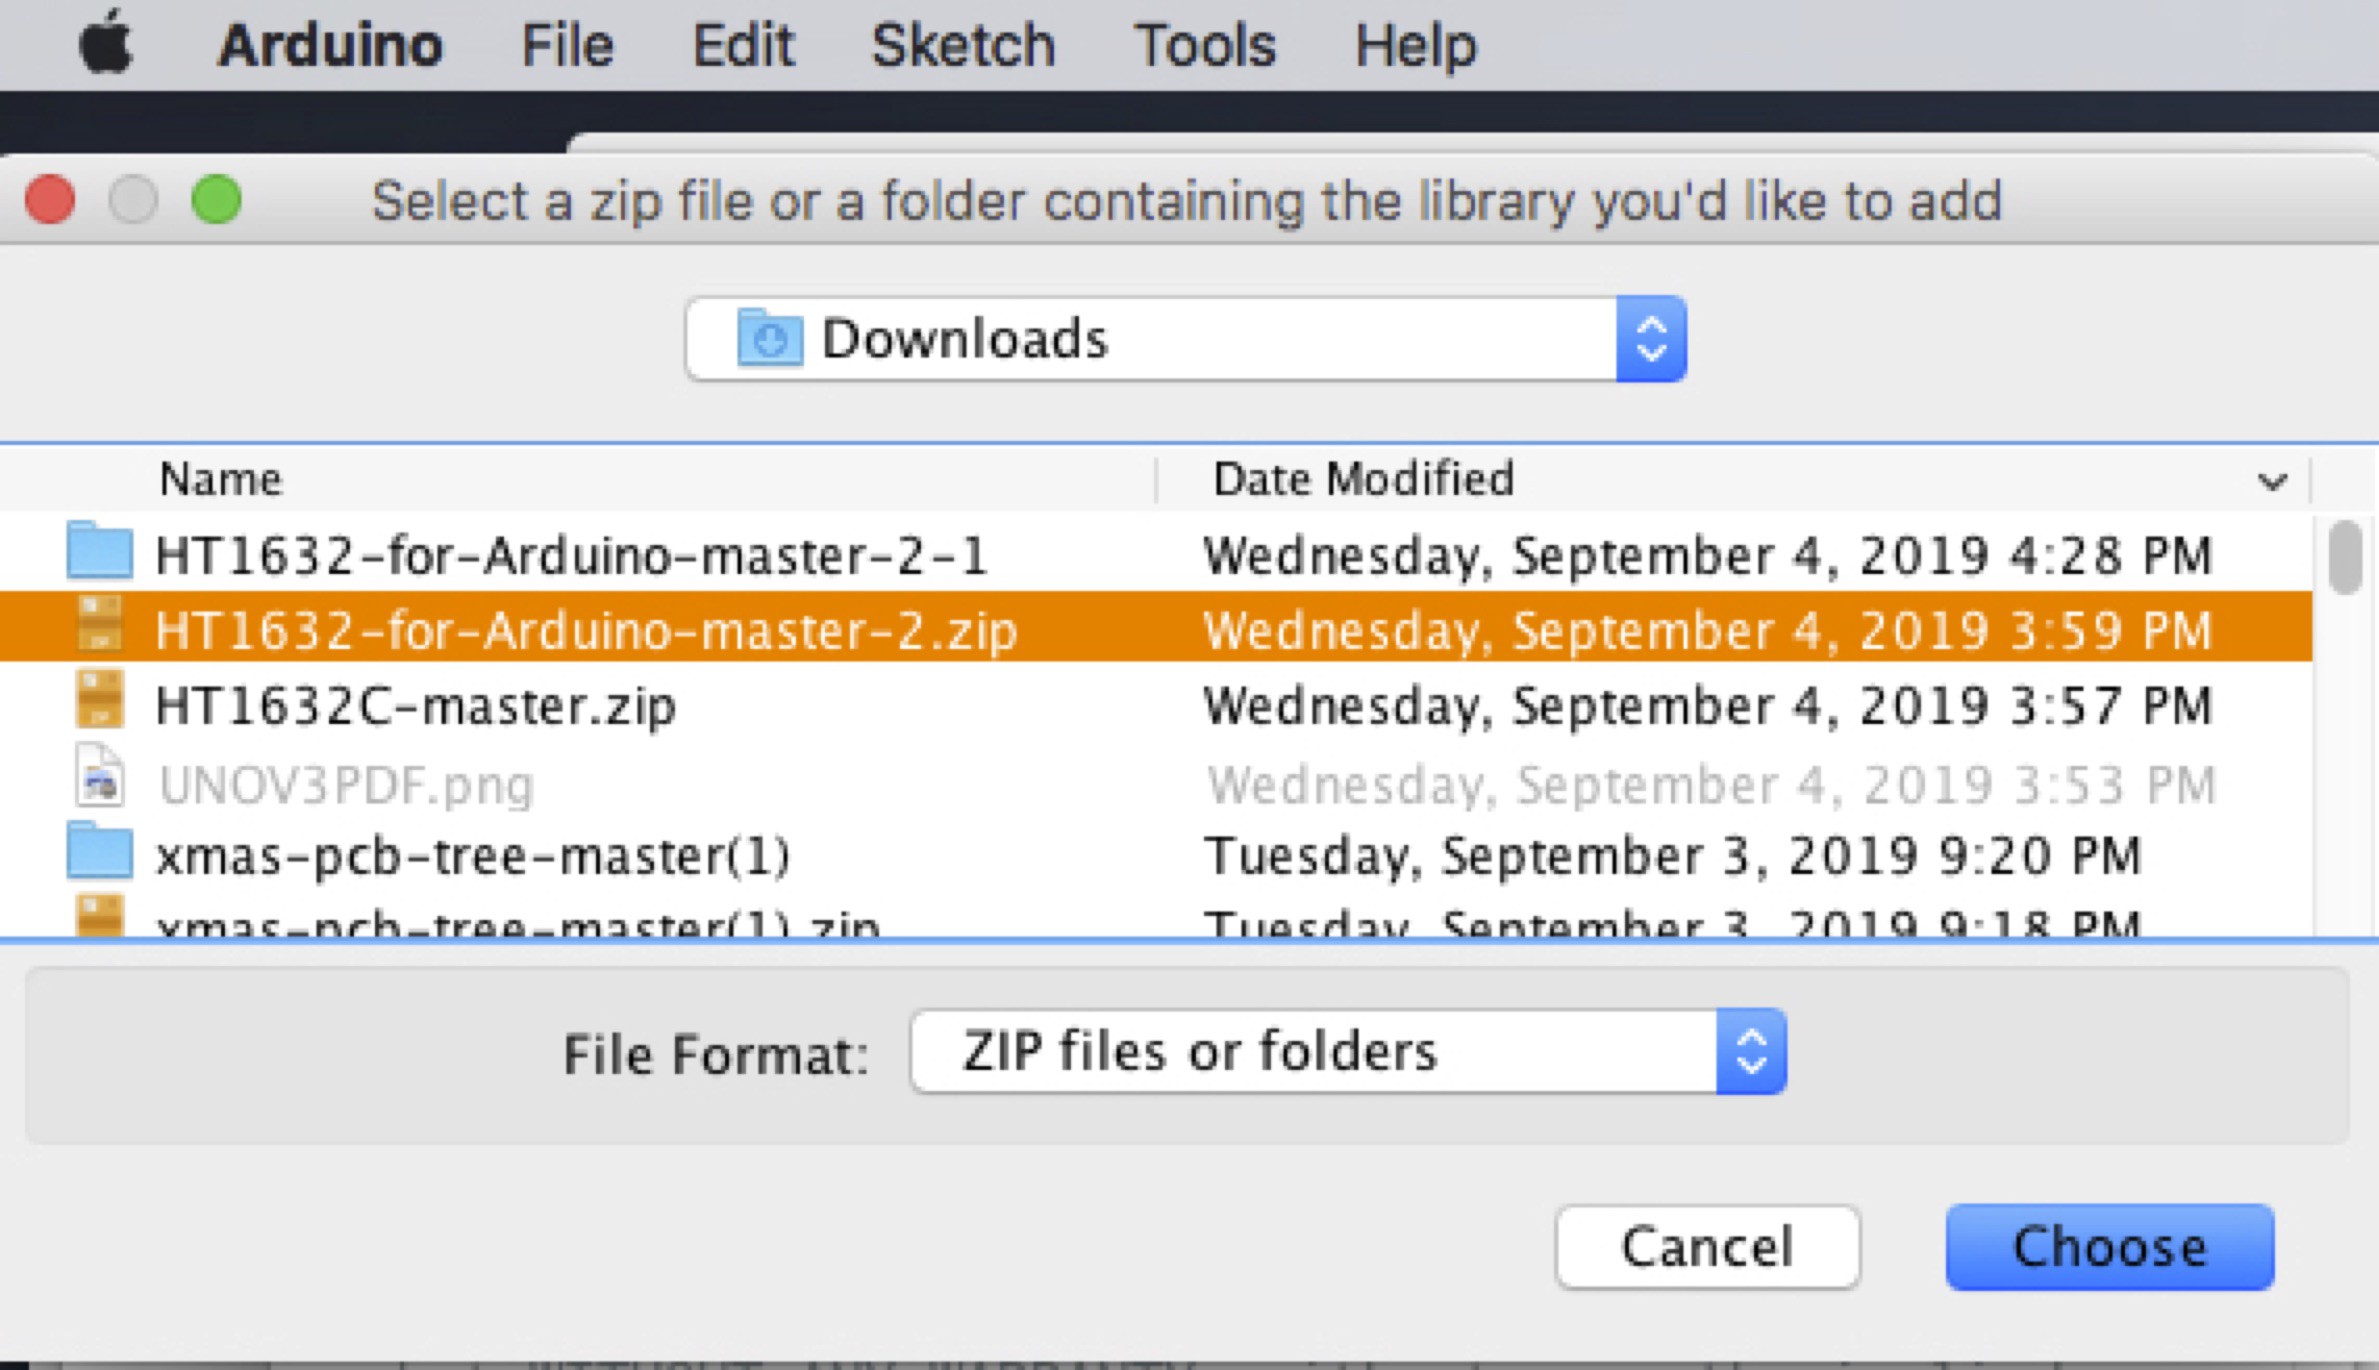
Download the library HT1632-for-Arduino. One can either download the library from GitHub through a web browser with the link above, or if you have GitHub installed on your computer that can be used as well.
Install the library in the Arduino IDE. From the menu Sketch -> Include Library -> Add .ZIP library. Once the selection window appears, navigate to where the .zip file is, select it, and click Choose.
This library is a bit different than some as it must be edited to declare what type of display is being used. This edit is done in the HT1632.h file. It includes instructions on how to edit the file for your panel. Be and sure to edit the file in the library directory being used. This can be done with any text editor. I used BBEdit to make sure it is set to:
// SureElectronics 32X08 Monochrome LED Dot Matrix Unit Board
#define TYPE_3208_MONO 1
In the Arduino IDE, open the example sketch from the File menu.
... Read more »

 Marcellus Pereira
 Christoph
 Lithium ION
 Alexander