Close
0%
0%

Hello Double Bell Clock

Like the hello world of Hackaday, I'm building a clock.

Public Chat
Similar projects worth following
I saved the double Bell clock pictured from the trash and I wanted to give it an illuminated digital facelift.

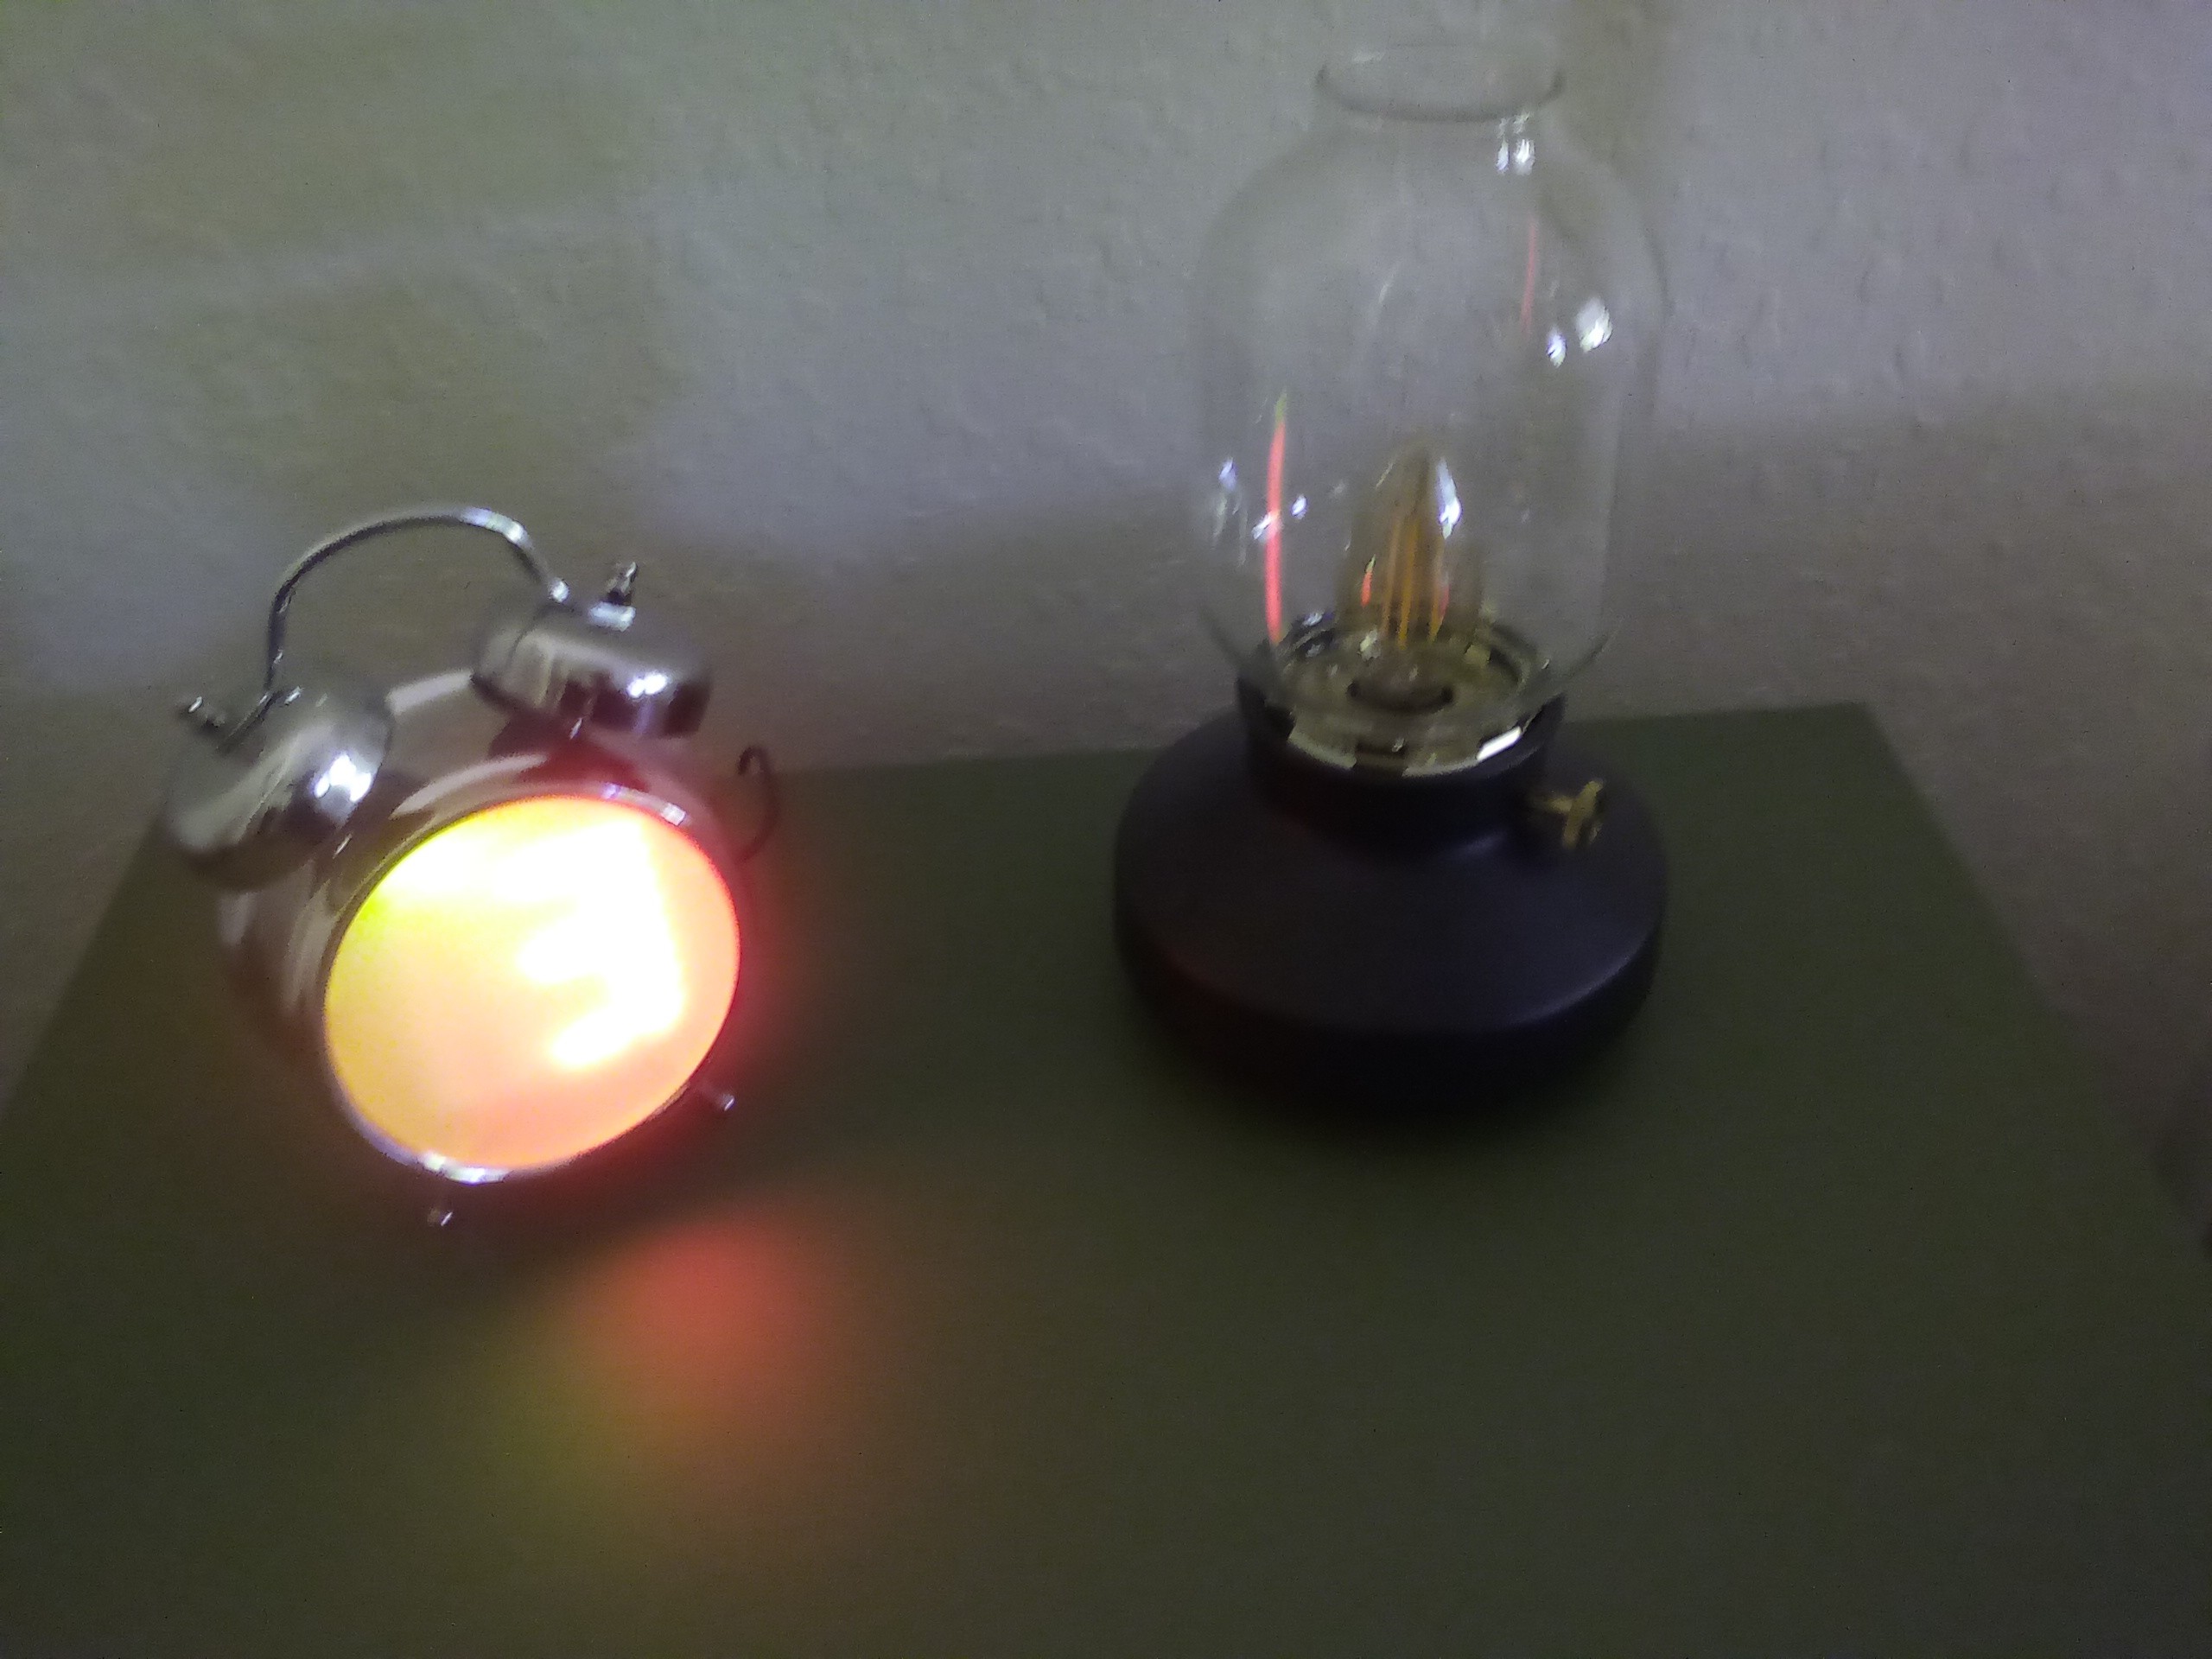
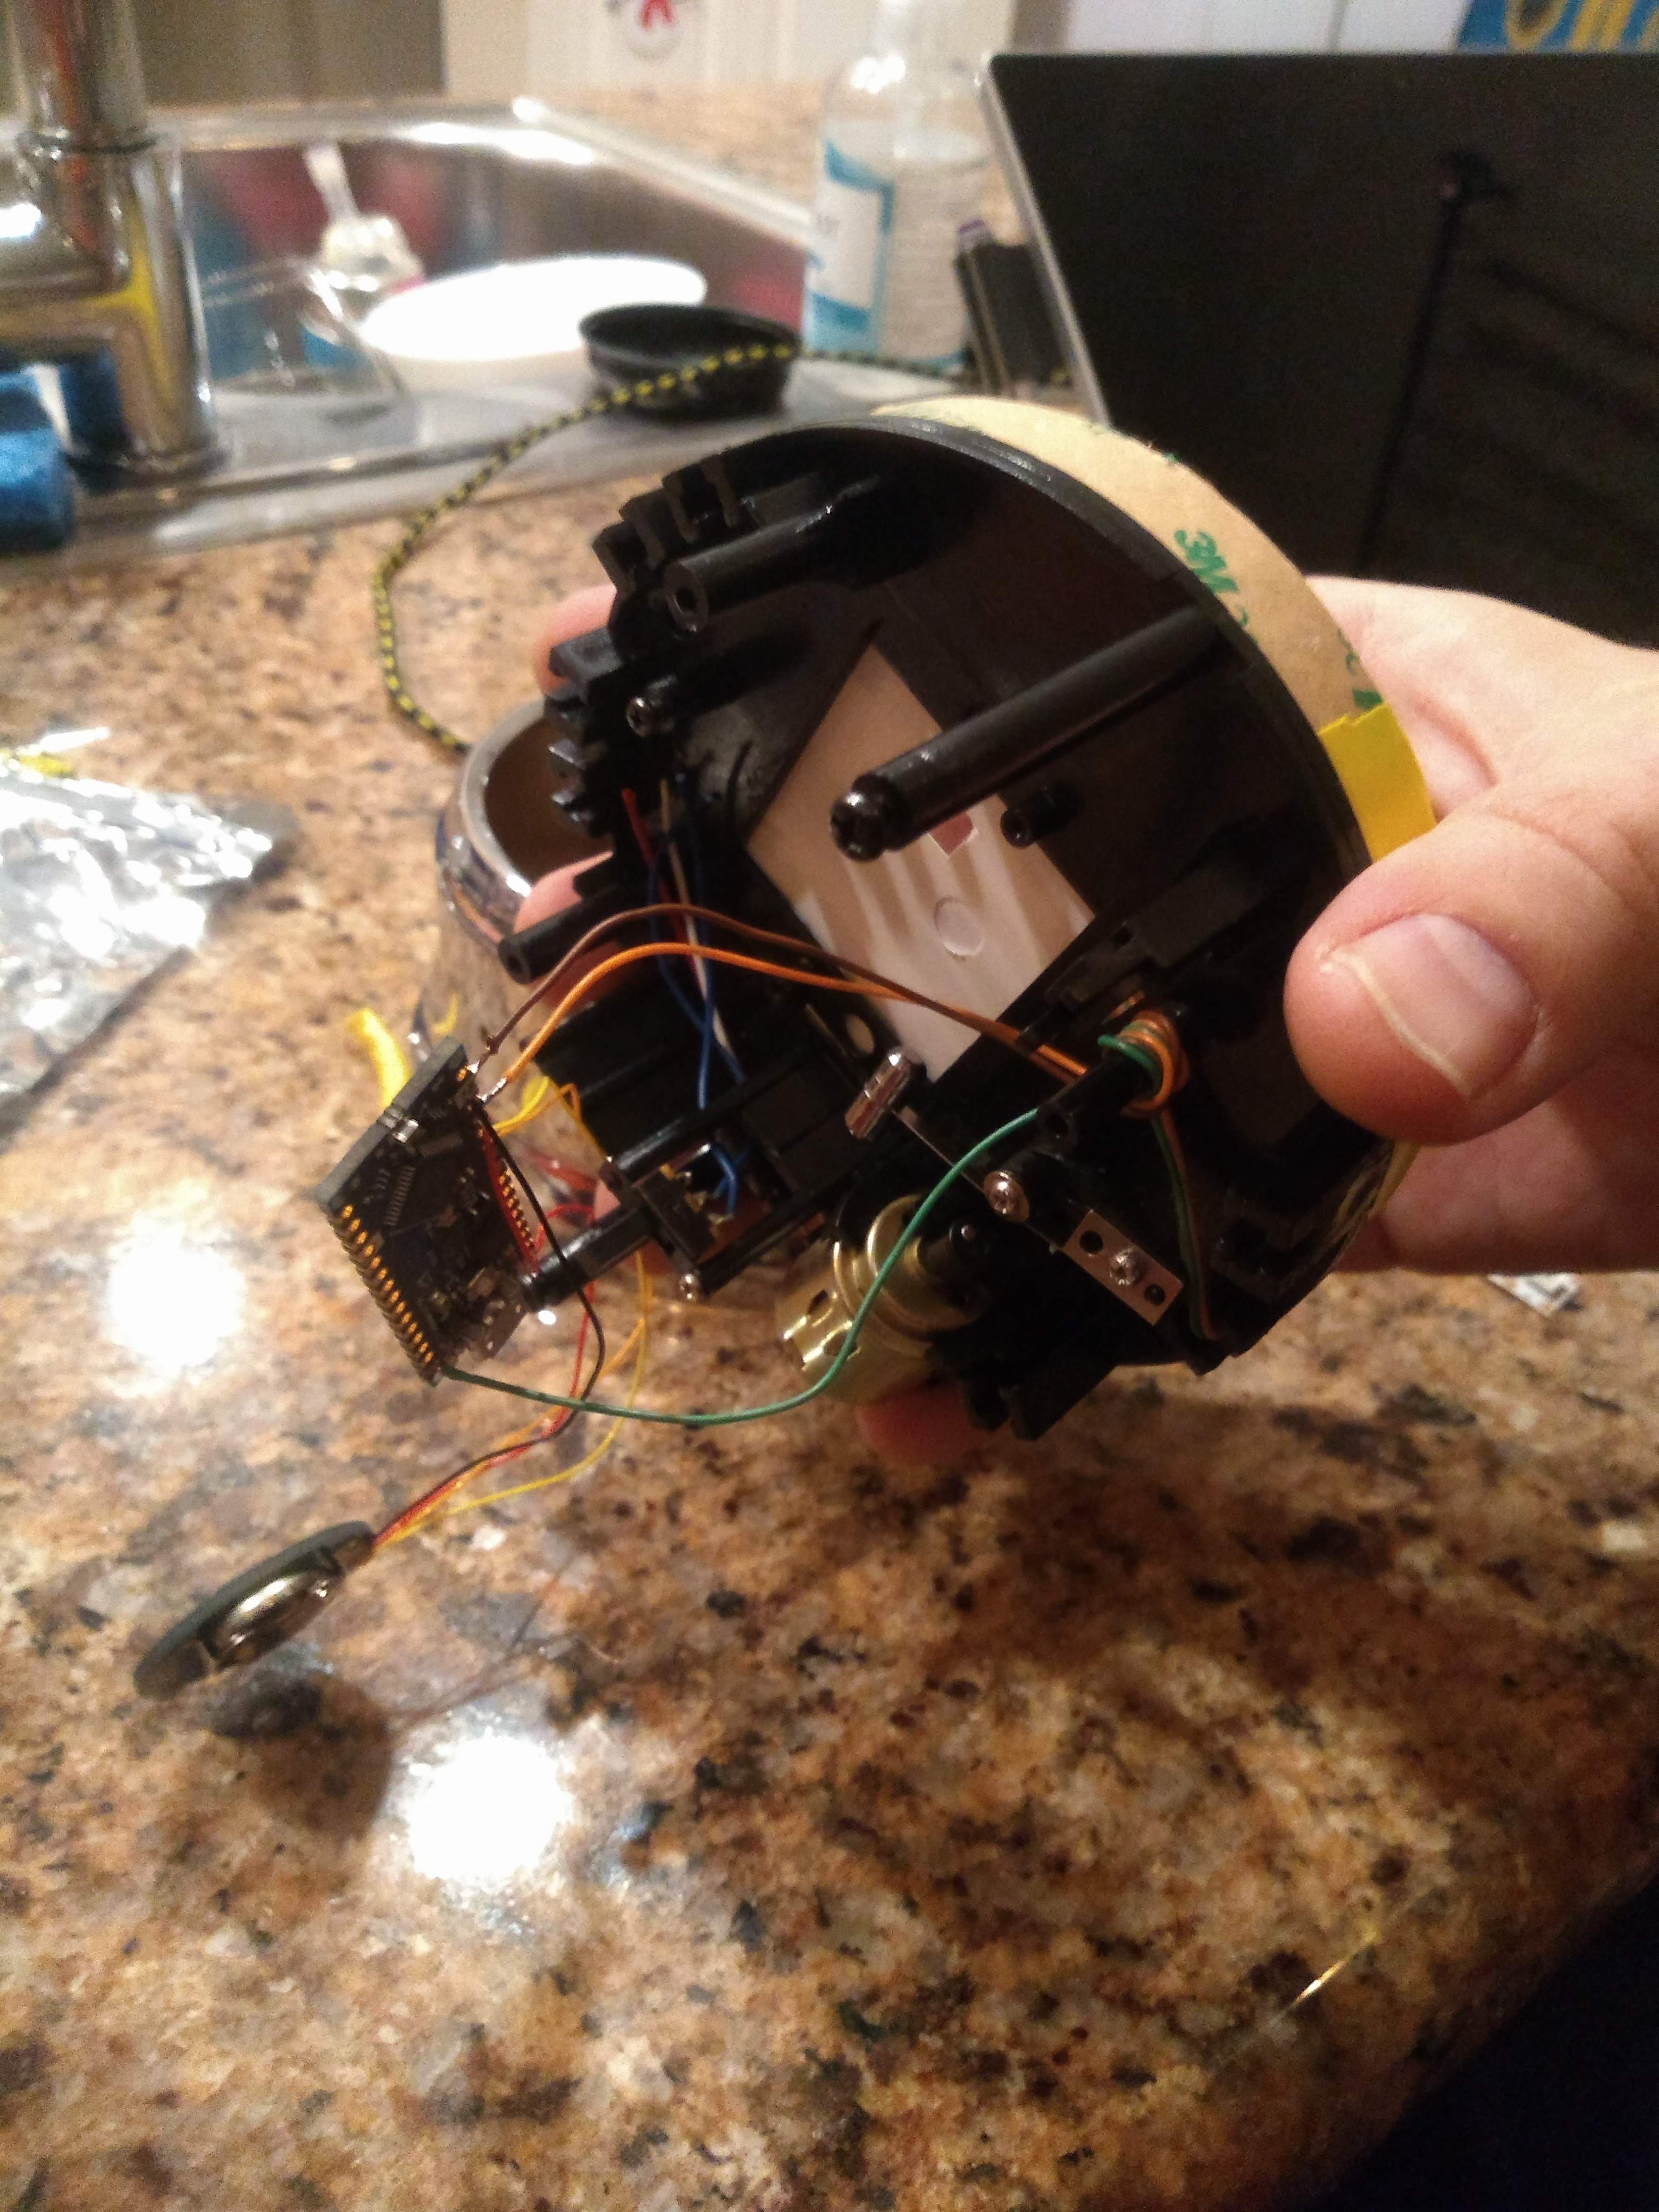
This is a re-imagined double bell clock with an illuminated LED twist.

The source documents, which currently includes Arduino source code and FreeCAD files, is located at this GitHub repository: https://github.com/akcooney/HelloDoubleBellClock

I currently have the clock working to my satisfaction, but I owe the rest of the community some better documentation.  I will post that documentation to the GitHub repo and then update this page.

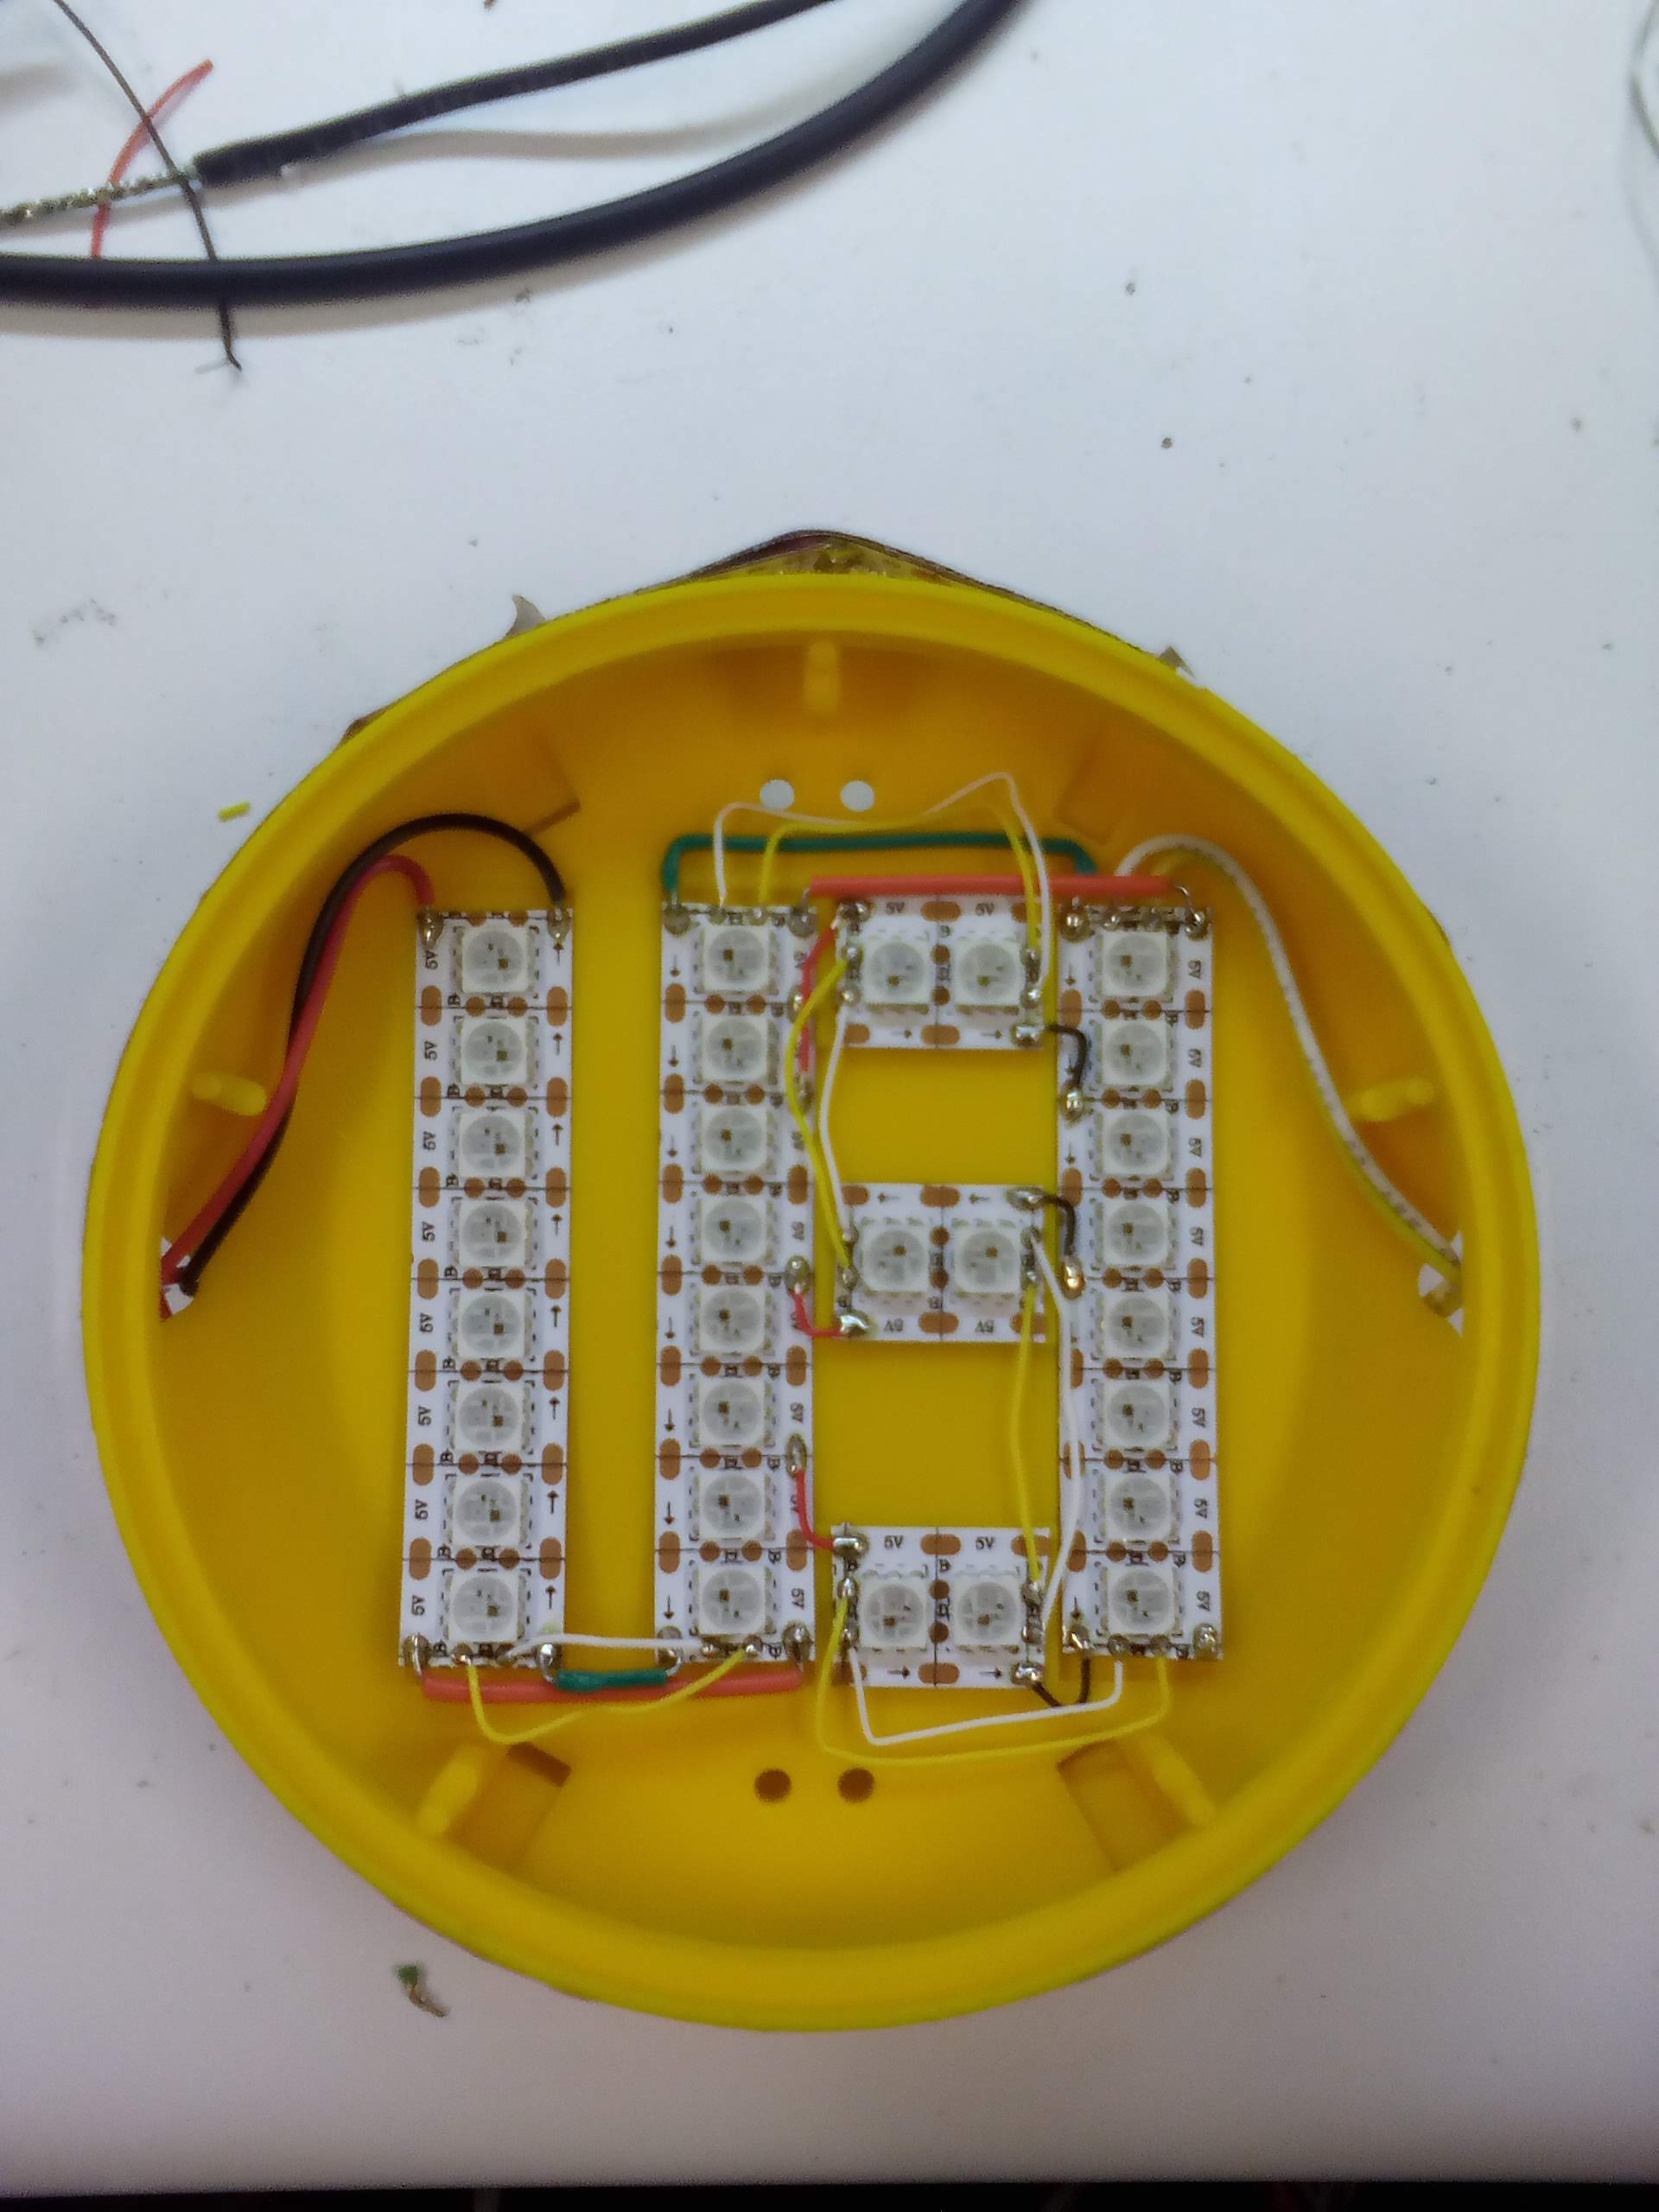
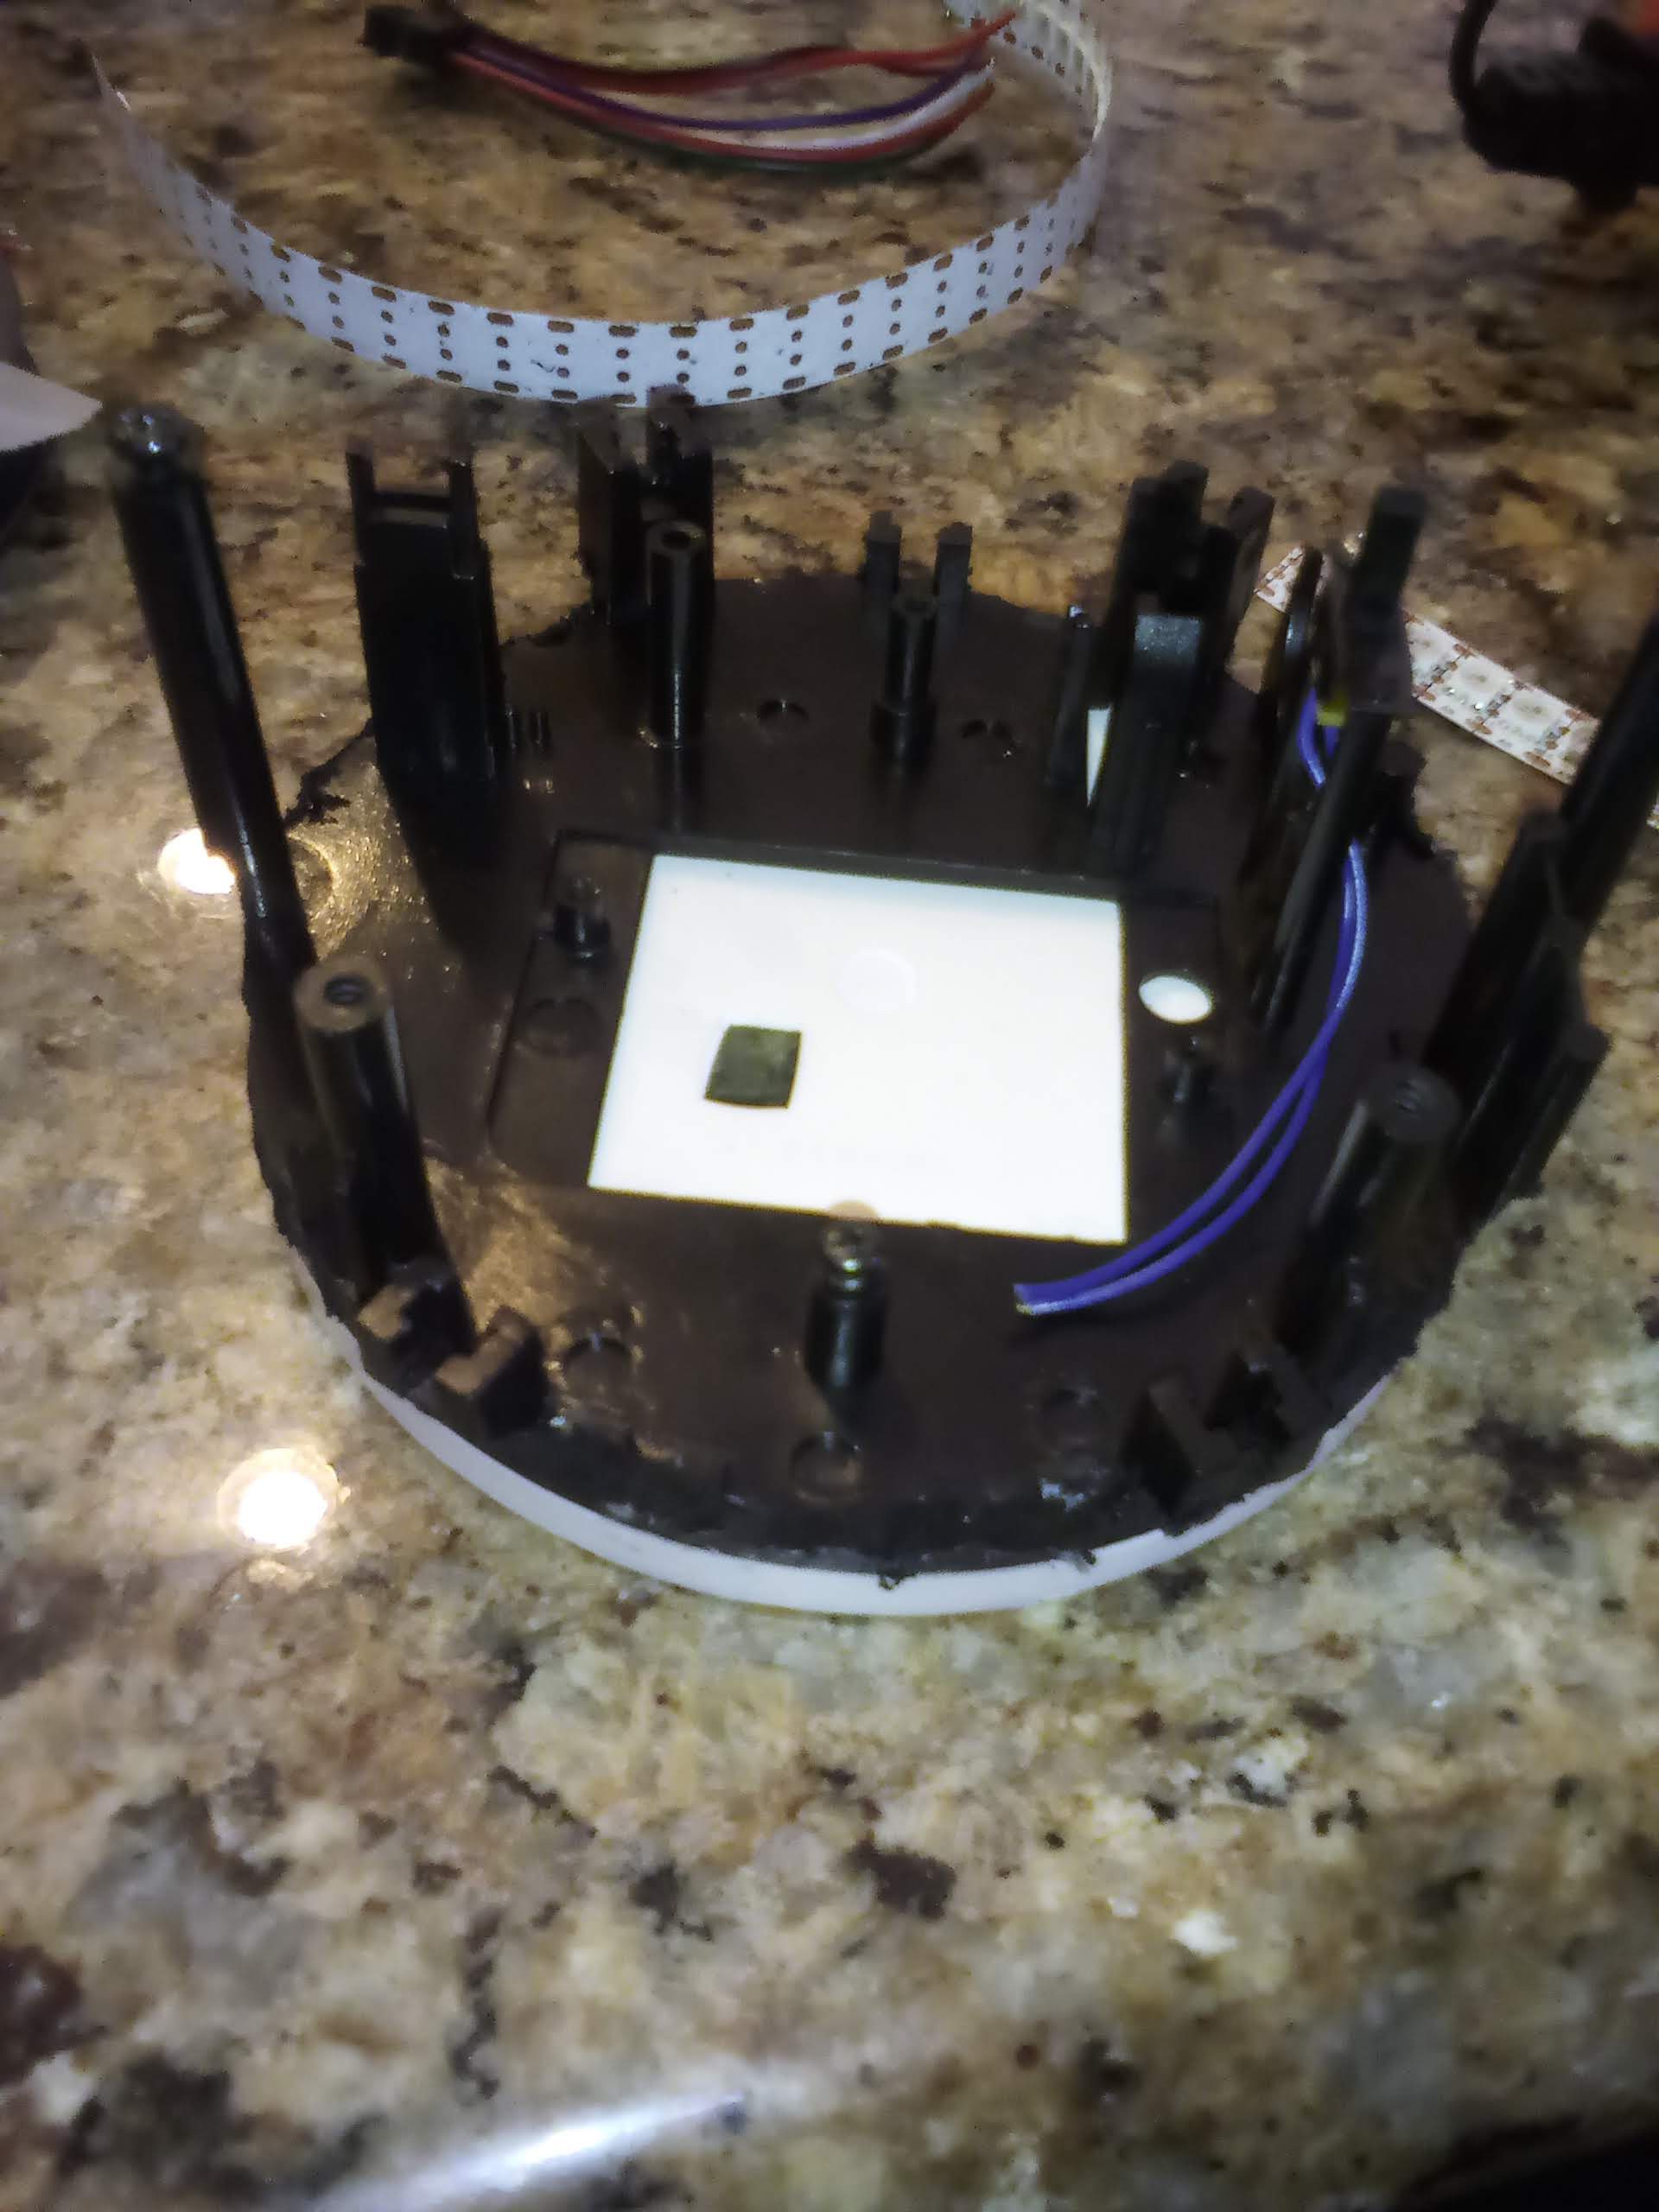
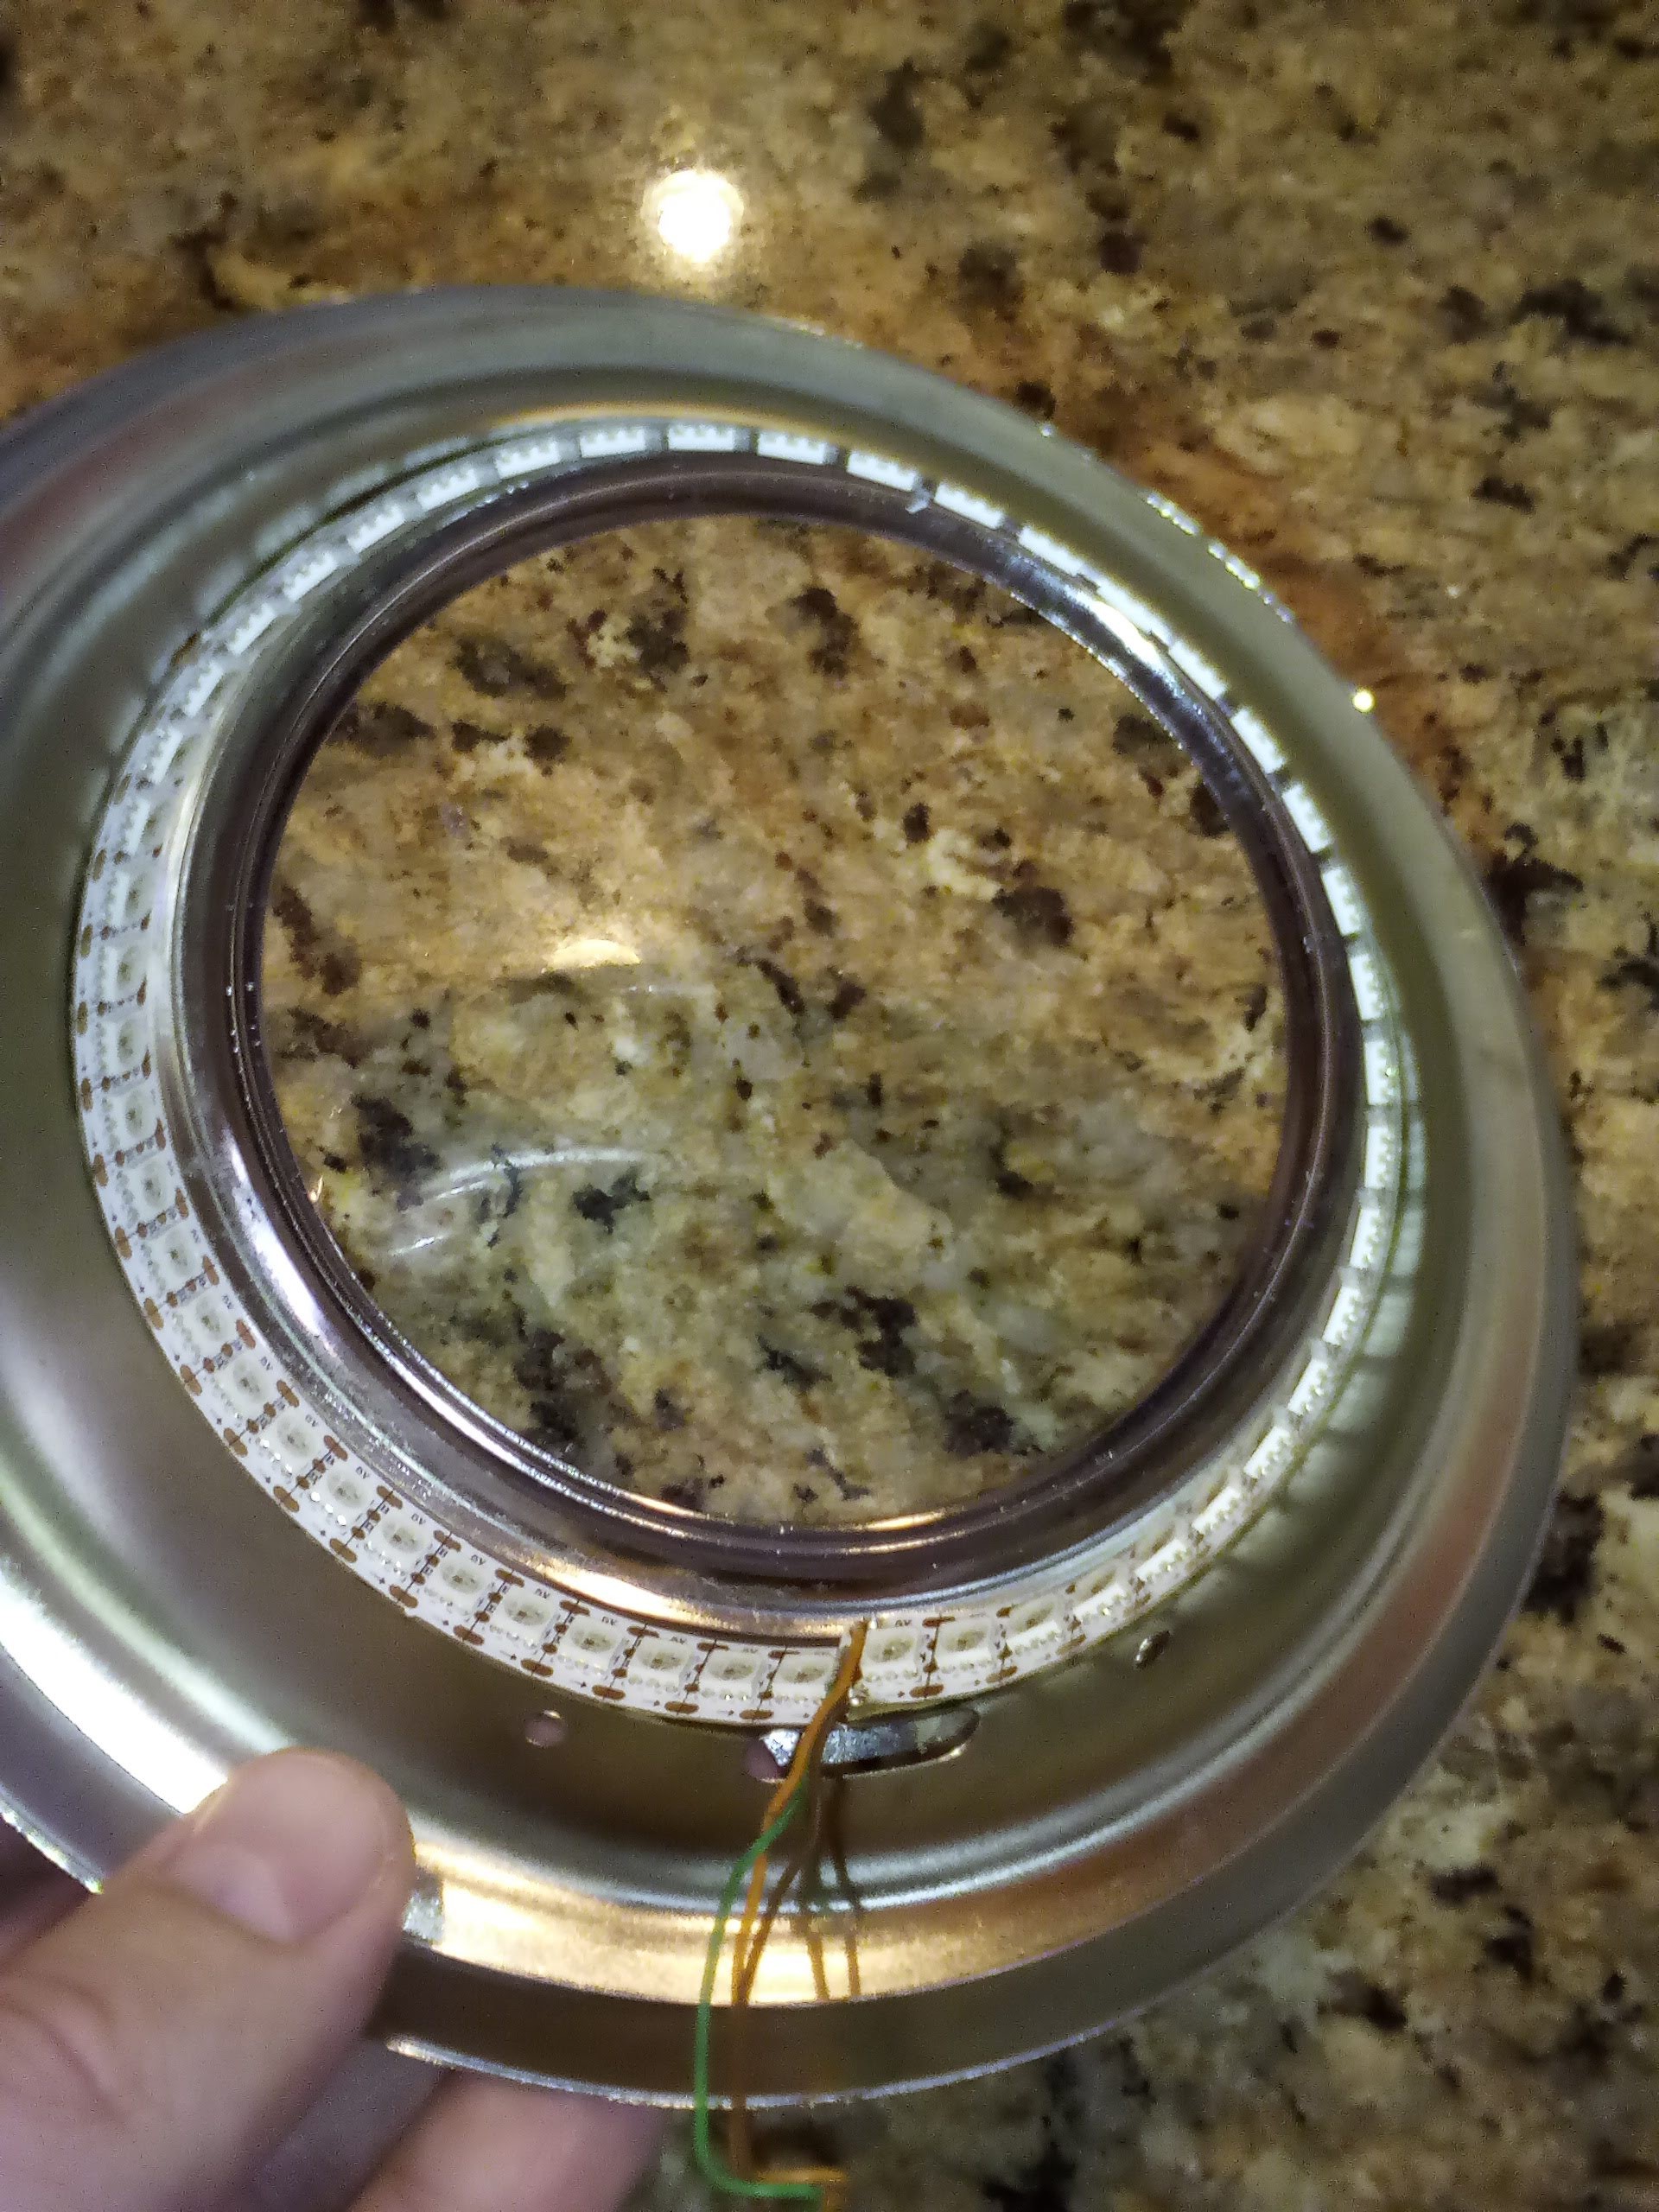
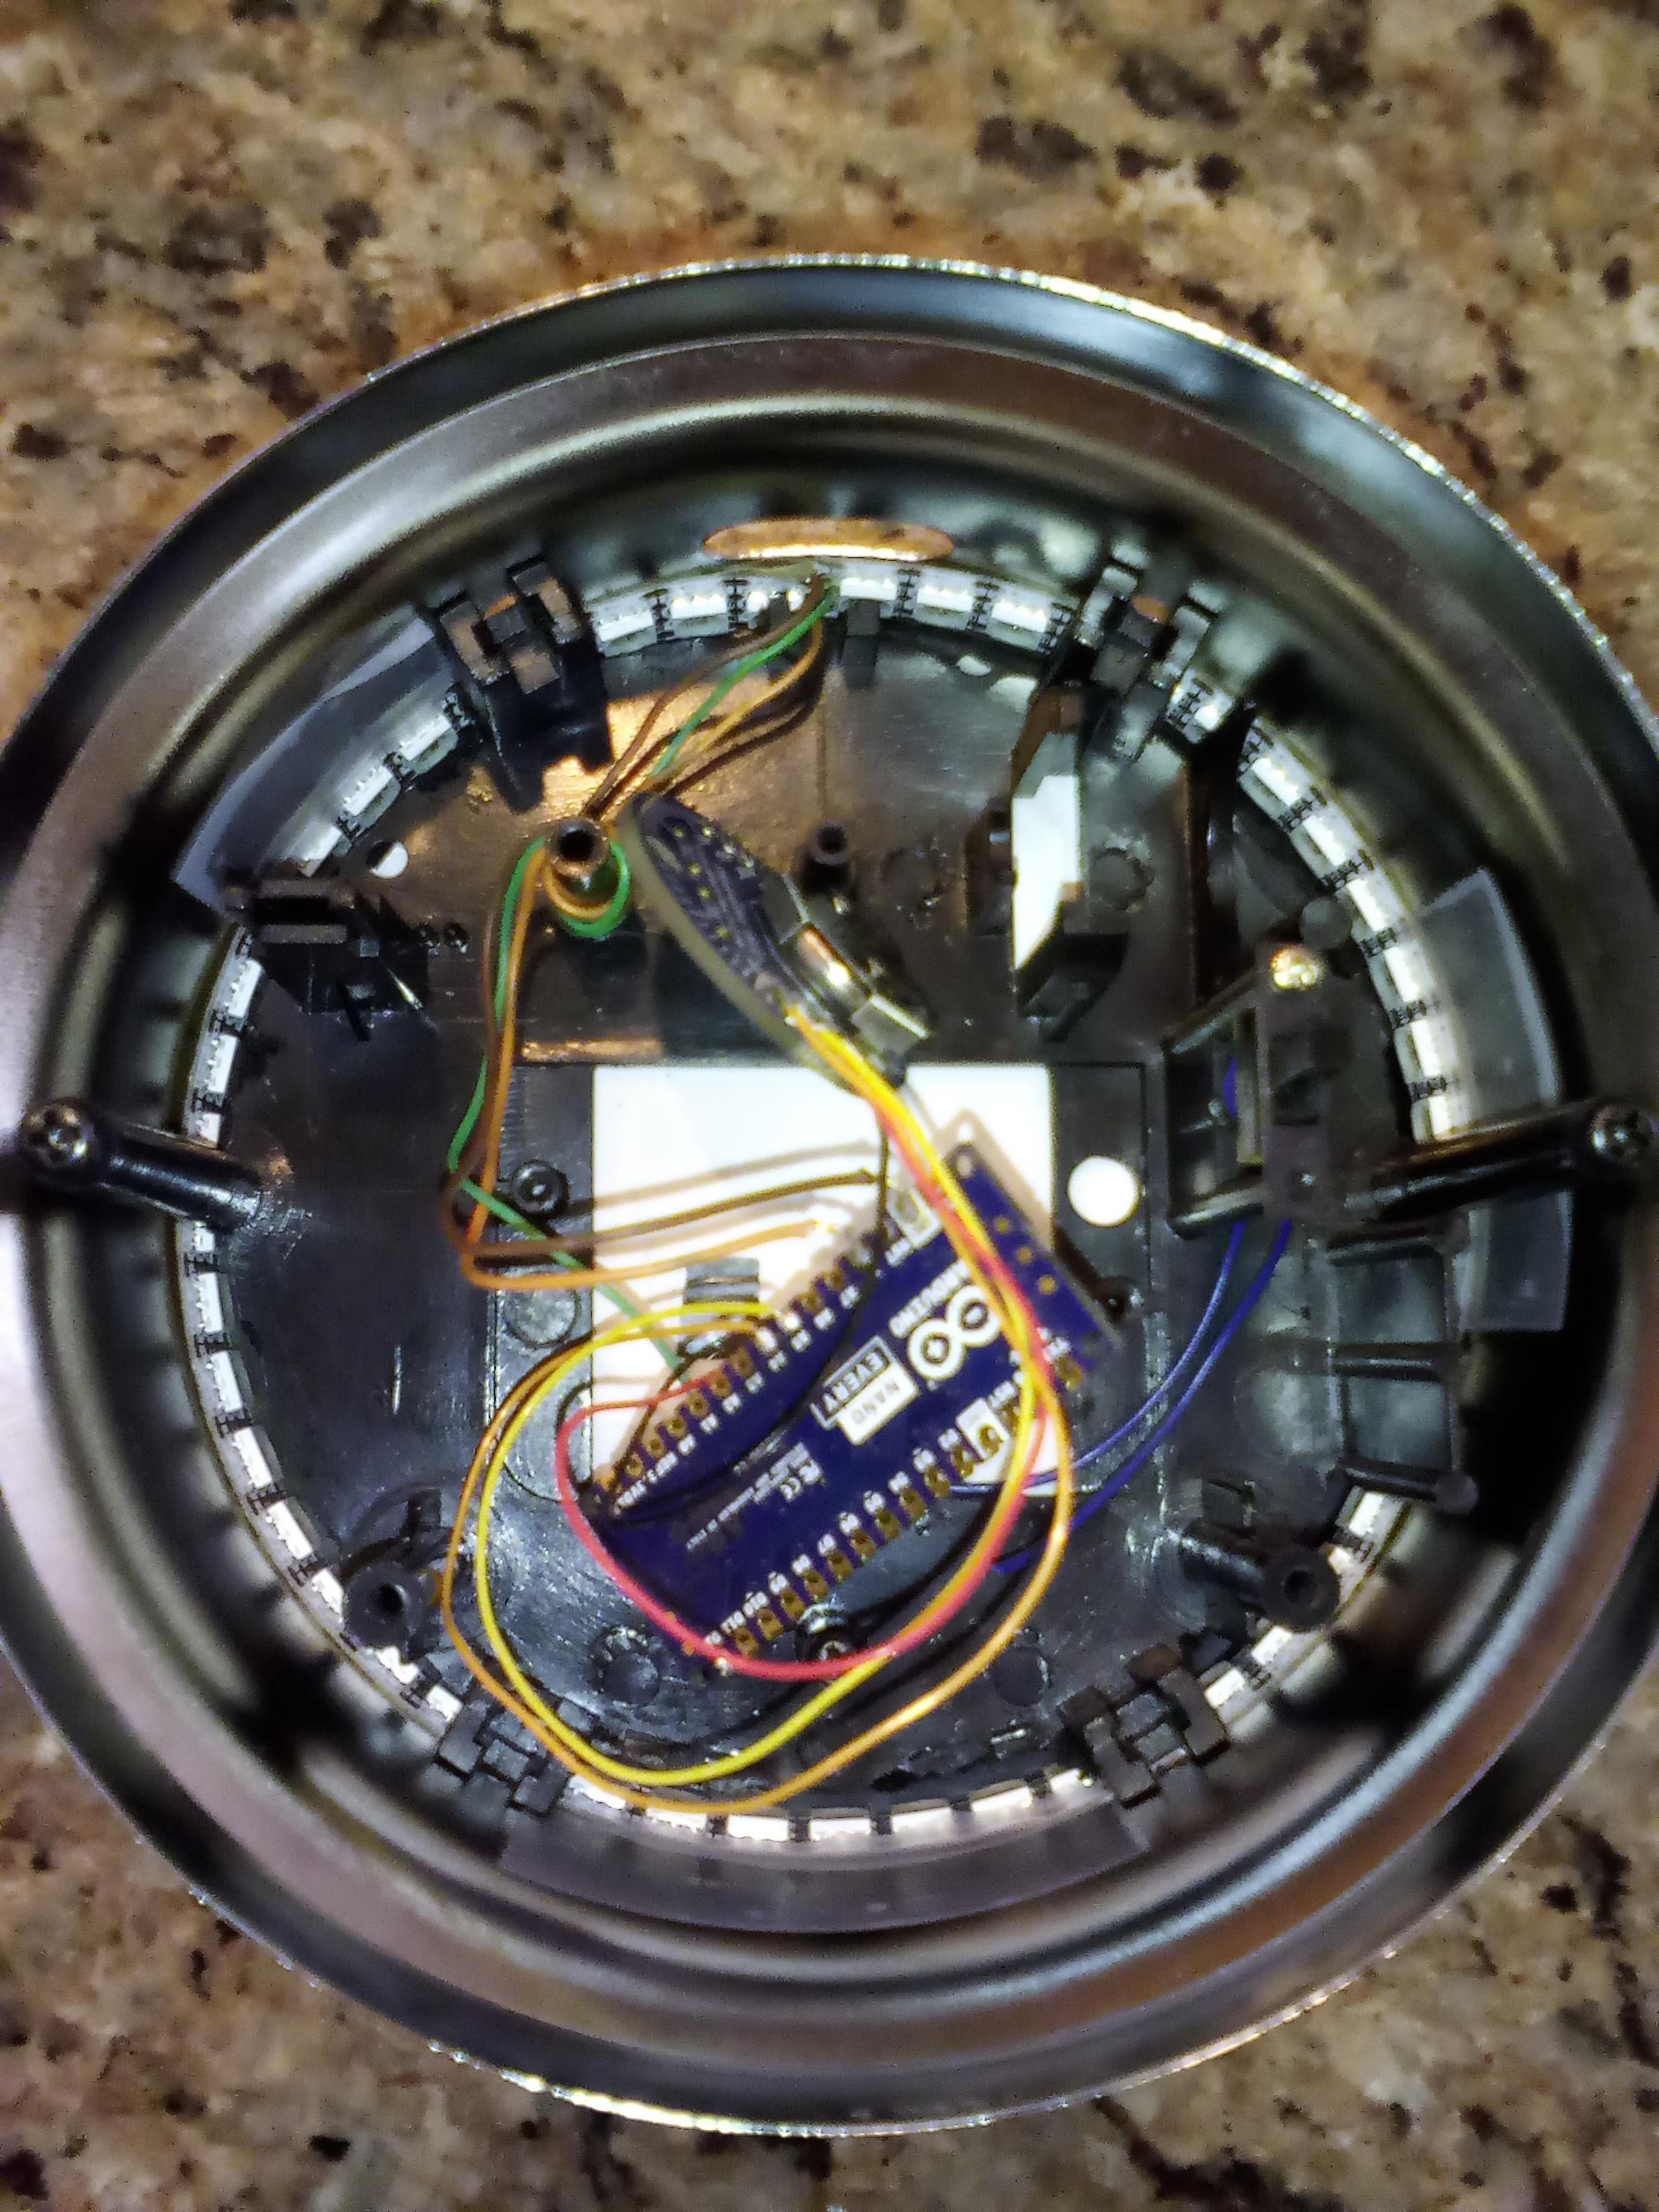
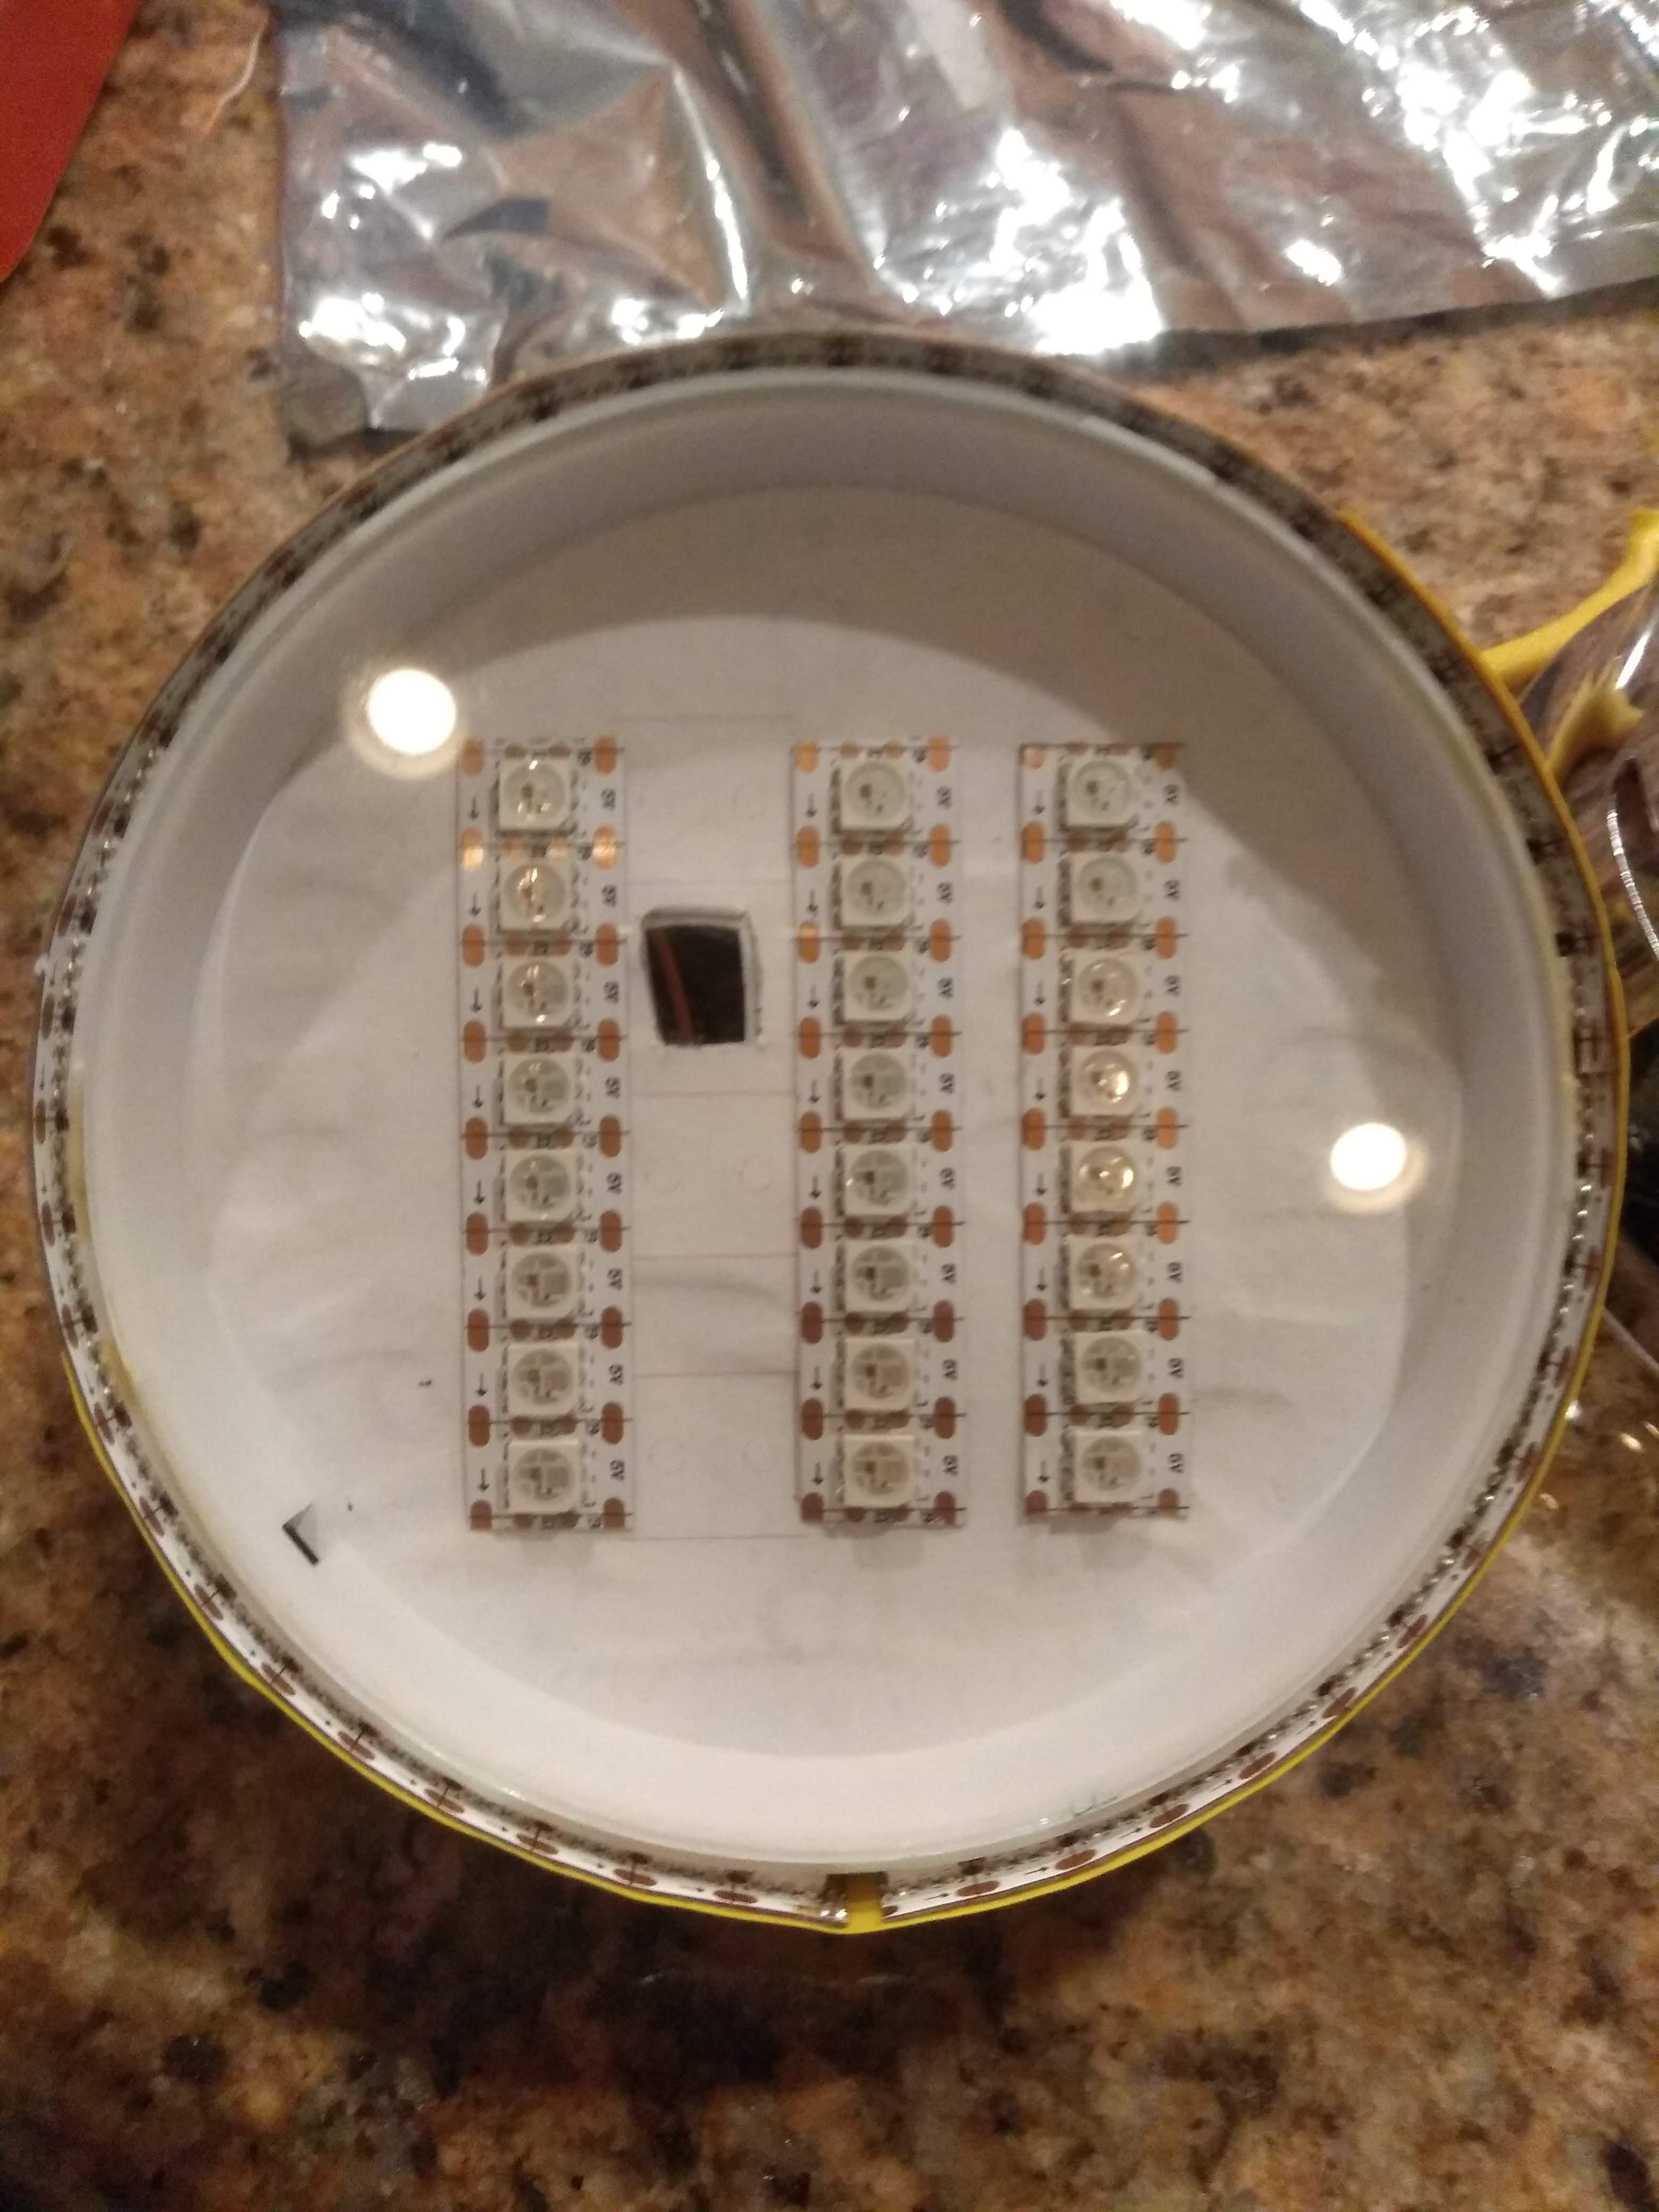
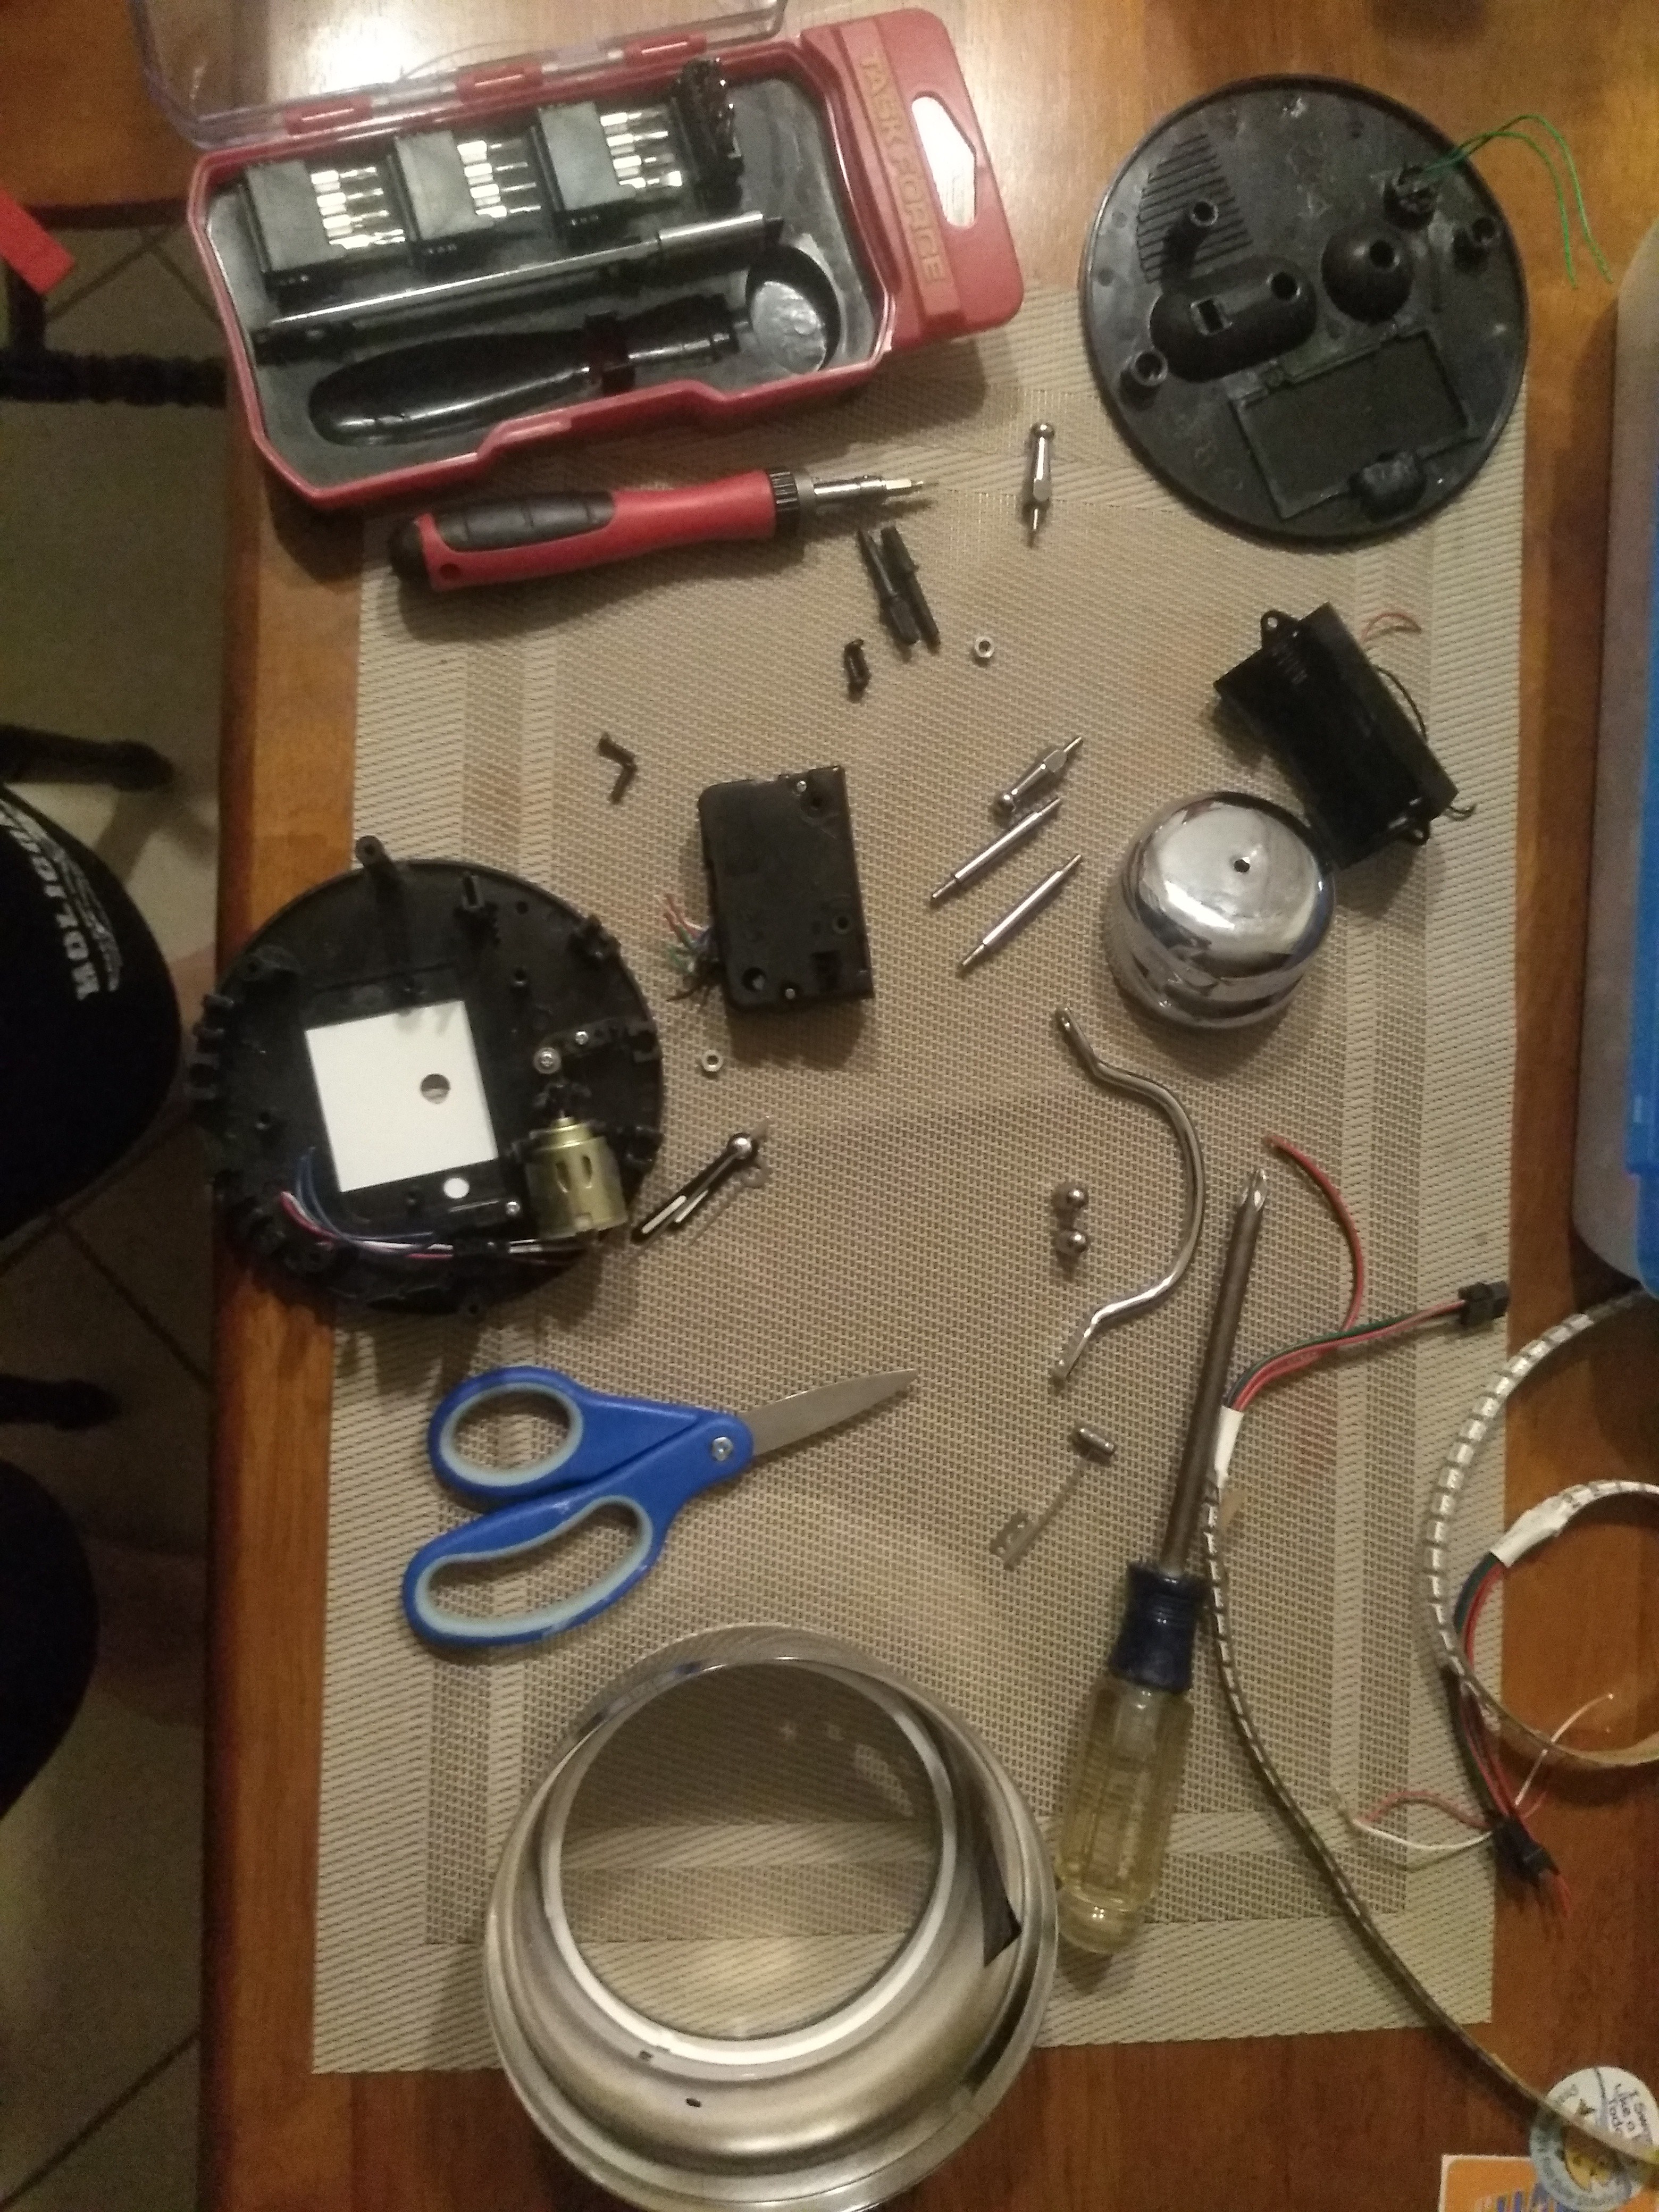
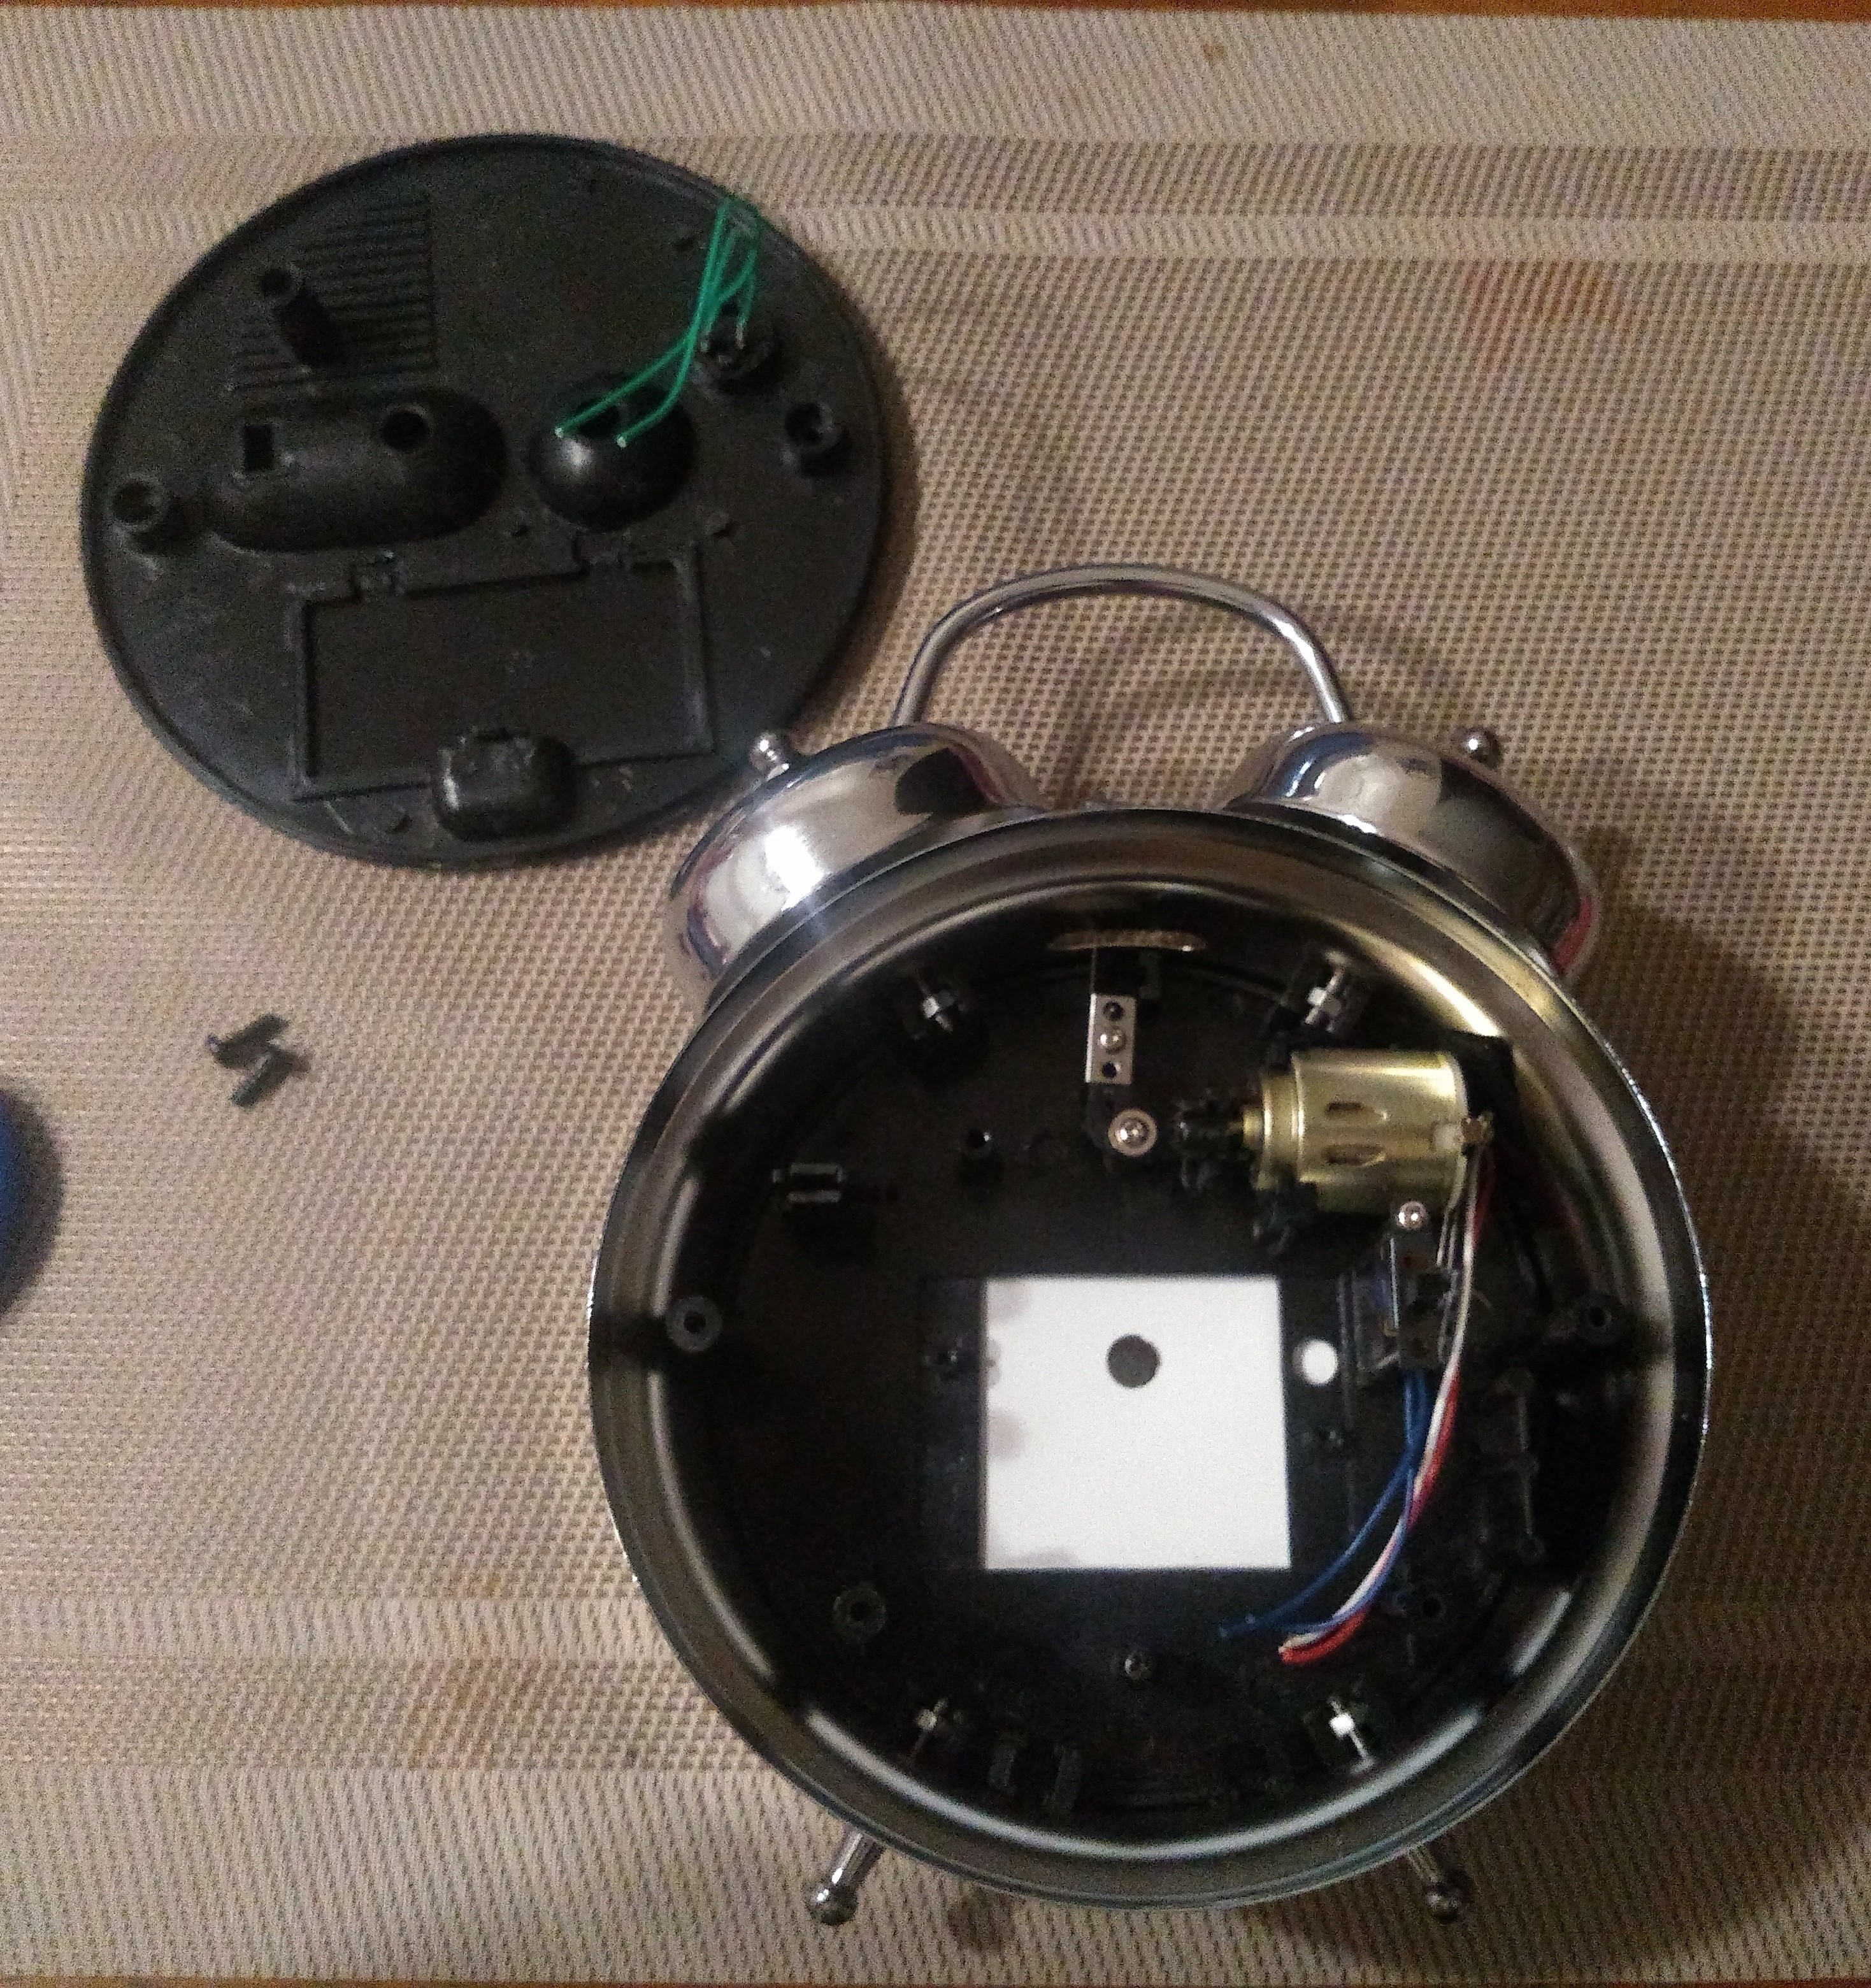
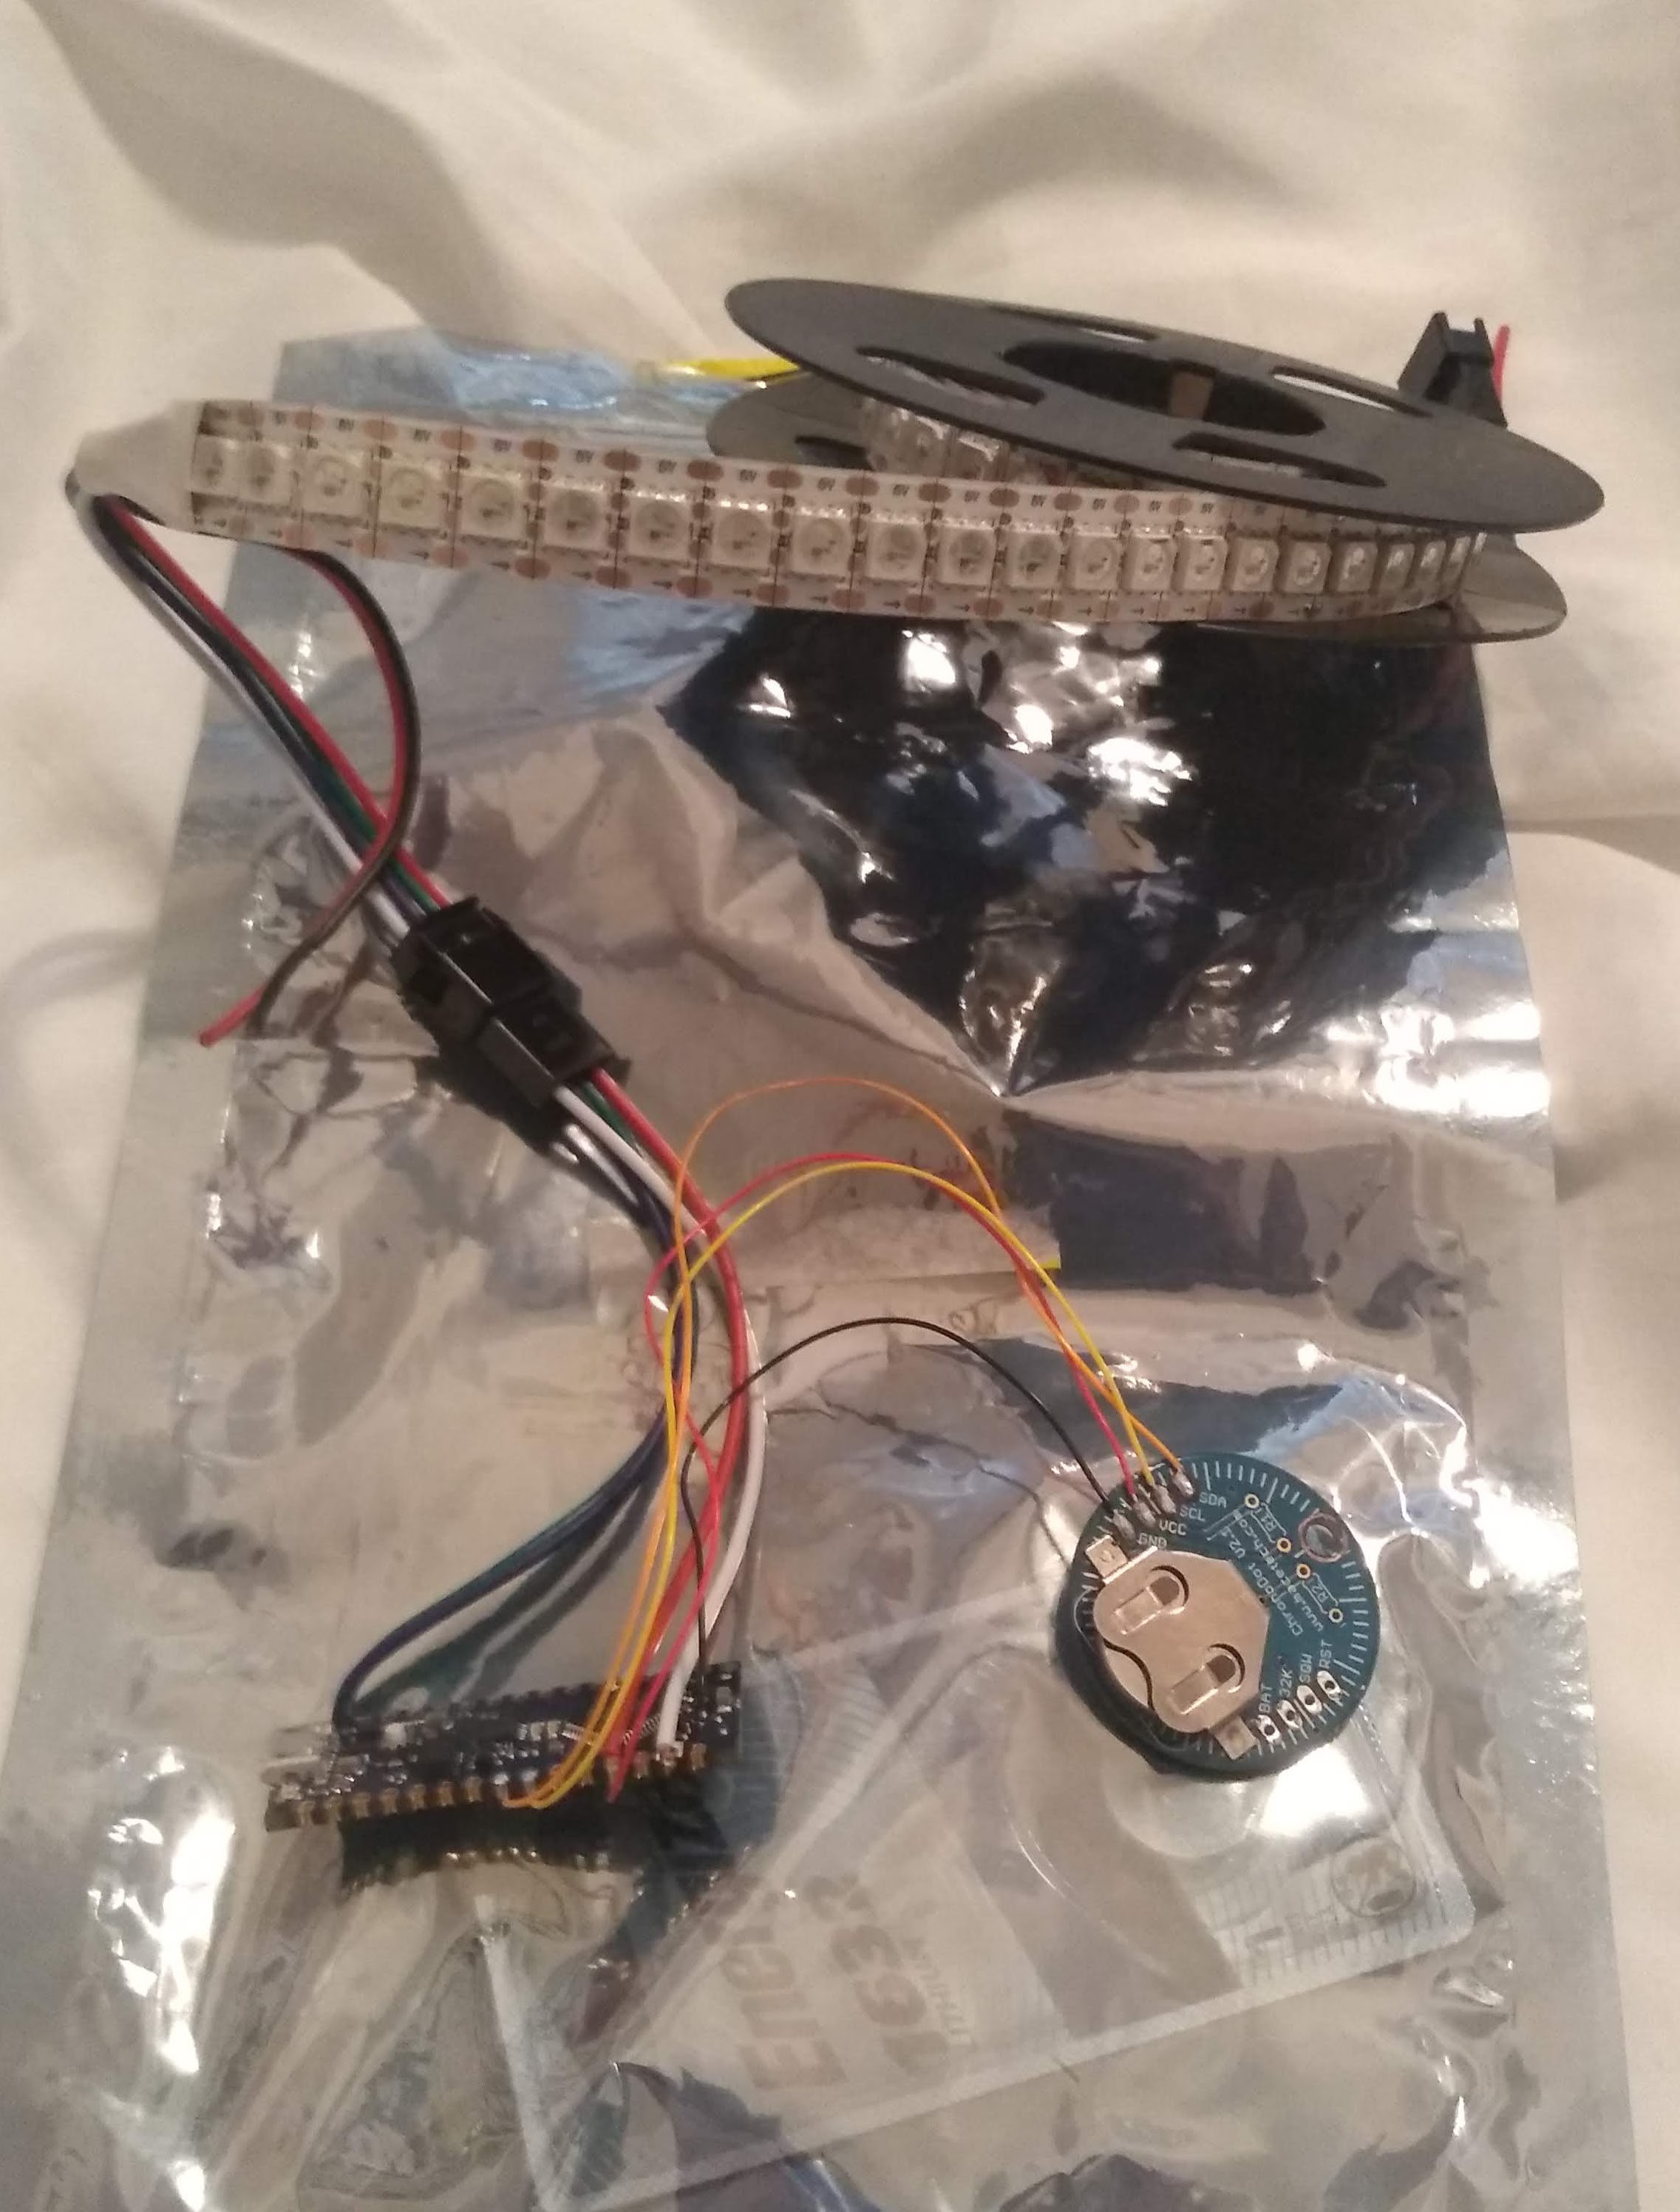
As of now the clock does not require a custom PCB but does require a lot of hand wiring.  Since I found a second corroded double bell clock in my closet, I may take a second crack at this a build a custom board to simplify assembly.

  • 1 × Arduino Nano Every The microcontroller
  • 1 × Chronodot V2.1 The timekeeper
  • 30 × WS28212B The LEDs
  • 1 × Doulbe Bell Alarm Clock The Donor Clock
  • 1 × USB Cable A to Micro B

View all 6 components

  • Hardware Lock

    Andrew Cooney05/17/2020 at 20:12 0 comments

    So I made corrections to the CAD and reprinted a few pieces namely the locating blocks for attachment to the existing enclosure.  While wiring it up it became obvious that the order I placed in the software did not make sense from a layout perspective, so I changed it.  Here is the face after wiring:

    I was so excited to assemble everything that I... broke the glass.  Thankfully I trash picked a diffuser from a defunct light fixture and I was back in business.  Admittedly there's still plenty that could be better but the hardware is good enough for me.

    For posterity here's my gripe list:

    1. Since I'm shining LEDs near support pieces on the ring there are shadows.  This should have been easy to anticipate, so fail.
    2. I should have done a better job assisting with assembly as putting it all together is not user friendly.
    3. I didn't think through how the back should be attached and I failed to put features on to allow me too reuse mechanicals.  I'm either going to leave it or print something later.

    I've updated the GitHub page with the latest models.  My next step is to update the software.  Currently it tells time but I want to add some animations and time aware brightness changes, so I can actually sleep next to it.

    Here's a photo of it on my nightstand and you can clearly tell I like new takes in old things.

    Like most optoelectronic devices it does not photograph really well, but I'll take another shot soon.

  • The CAD Duke, the CAD!

    Andrew Cooney04/29/2020 at 14:05 0 comments

    For the first time in over 10 years I took a crack at some 3D CAD.  The FreeCAD startup picture is now my spirit object (since it's not an animal).  I very much enjoyed the dive back into 3D CAD, and I chose FreeCAD because of its cost and feature set.  The user interface also felt very familiar as I first trained on SolidWorks.  Below is a picture of the final assembly:

    Things I learned from doing this and building some of the earlier prototypes:

    1. You have to make wiring allotment, especially on the horizontal segments where the wires would end up hitting the other LED strips.
    2. Measure twice print once.  I had a failed print (shown below) where if I had measured again I would have realized I made a huge error.
    3. FreeCAD assembly options aren't great, but A2plus was good enough for my objectives.
    4. If you're printing a clearance fit, actually put some clearance in there.  I made a few parts line to line and it made assembly difficult.  A nice side effect: the fits ended up being press-fit like and they stayed together with minimal tape or adhesive.

    I've also never 3D printed anything before, so that was fun.  I had two failed prints, and the reasons were quite funny.

    1. I build a part that needed a lot of support and then I didn't load the support extruder (oops).
    2. I should have double checked some measurements as I failed big time there.

    Also since I had some success, here are the pieces I'm ready to use as is, and I'm super excited to do some assembly.

    Anyway I now have all this posted on the Github page.  I still need to print the support pieces that lock it into the housing, but after that it's wire, reprogram, and enjoy.

  • Stuck and Pivoting

    Andrew Cooney04/06/2020 at 16:40 0 comments

    I spent a few days trying to get the original clock pieces and the new fancy LEDs to play nice together.  Initially I had quite a bit of interference and I was able to take care of much of that with my friend Mr. Dremmel (note the ragged edges on the black piece of ABS):

    At first glance everything looked great, as I was able to find a spot where the strip could live and I was able to reassemble the whole works.  It looked something like this:

    I was so excited to assemble the rest of the works (which I did) and everything "looked" great:

    So I fired it all up and I saw... nothing.  There is very little actual light making it to the diffuse part of the clock so I can hardly see the LED which tell the minute.  Subsequently I no longer expect to be able to reuse the plastic innards which make up the mechanical section of the clock.  I have zero experience with 3D CAD (beyond one class back in college) but I think it's time to make a custom part.  Before I go and design something I will first reverse engineer the housing (which is a medium draw stamped sheet metal piece) and hopefully print a few test fit pieces.  If I've learned anything its that I overestimated how good I would be at mechanically winging it; and under estimated how much I would need CAD for floor planning.

  • Putting on a Face

    Andrew Cooney02/28/2020 at 14:26 1 comment

    It was finally time to start placing the Neopixels and I was able to use the templates that I had previously put together.  After taking a closer look, the ring around the clock looked especially tight and I changed my plan to use a single string of Neopixels due to wiring issues.  I put the vertical segments of the clock face down and found a way to stuff the control electronics in the back.  I was very happy with the clock face and took some pictures to celebrate.

    However I then hit my first snag.  The whole assembly did not fit in the housing anymore.  While diagnosing what happened I believe it has to do with a joint that was made on my Neopixel strip.  In order to meet the desired length my supplier spliced the strip in one location.  Three small snippets (the horizontal parts of the 7-segment displays) fit along with the housing in place, but the intended ring does not.

    I also discovered that I had a wiring error and chose the data out of the last pixel instead of the data in of the first pixel.  That was easily corrected but the fitment is not yet.  My next plan is to take one of the spare strips I have and choose an unspliced segment to confirm it will fit since the three small segments did.  After that I'll reassemble the whole works and start to alter the code to support two different segments.

  • CAD and Cutting

    Andrew Cooney09/28/2019 at 18:53 0 comments

    After disassembly and sorting I had to take some measurements.  The goal was to put the clock face in CAD which would allow for me to plan the clock face.  Foolishly I tried making these measurements with a tape measure and I quickly found how inadequate it was for the task.  I borrowed some calipers and I found a mechanical drawing of the LED strip and I was set.  Using my drag knife cutter I fabricated the template and diffuser.

    A test fit showed the template was a success but the diffuser had to get bigger. That will have to wait as I am itching to cut and wire.

  • Scavenging

    Andrew Cooney09/15/2019 at 23:03 0 comments

    After building the development rig it was time to crack open the donor clock and remove unnecessary components.  I saved the clock face, ringer assembly, and the button (which previously activated the light). The disassembly was my usual level of chaotic evidence below:

    I separated the wheat from the chaff, specifically tossing: the clock hands; the clock mechanism; and the battery compartment.

    The final collection of parts for reuse are shown neatly below:

    Thankfully there is sufficient space between the clock face and the glad to fit the LED strips with no new mechanicals. Next up: putting the clock face in CAD and planning the layout.

  • Early Steps and Missteps

    Andrew Cooney09/09/2019 at 01:41 0 comments

    I started with the assumption that I should use what I had, and this caused a few delays.  Specifically I had chosen a Nucleo board as the starting point for this project because I have familiarity with the processor line; but I do not have familiarity with the software.  I quickly discovered that many of the Arduino libraries I had used before were specific to AVR processors.  While many crosses existed there were not enough for me to build a complete project.  I decided instead to purchase an Arduino Nano because it had support for libraries I was familiar with.

    At this stage of the project I have working prototype software on the rig pictured below.  The following features are functional, but not fully documented:

    1. A serial parser is written and I can set the time via a computer.
    2. The RTC can be set and tracks time.
    3. Three functions turn the time into animations for the.
    4. Ring displaying the minutes.
    5. The tens digit.
    6. The seven segment display.

    A picture of the rig I was able to develop this on is shown below.

    See the latest code at: https://github.com/akcooney/HelloDoubleBellClock

View all 7 project logs

Enjoy this project?

Share

Discussions

Andrew Cooney wrote 09/15/2019 at 22:35 point

Indeed they look innocent, simple, and quick... Next thing you know you're getting shocked by a flyback making your 200V rail.

  Are you sure? yes | no

Dan Maloney wrote 09/09/2019 at 18:48 point

What, no Nixies?

j/k, clock projects are sort of the "gateway drug" in our world, right?

  Are you sure? yes | no

Similar Projects

Does this project spark your interest?

Become a member to follow this project and never miss any updates