 Cloud4RPi
Introduction
In the previous article, I connected my ESP8266-based NodeMCU board to a Cloud4RPi service. Now, it’s time for a real project!
Hardware requirements
- Any board based on an ESP8266 chip (for instance, NodeMCU)
- A DHT11 or DHT22 sensor
Software and services
- DHT sensor library by Adafruit — v1.3.7
- Adafruit Unified Sensor — v1.0.3
- cloud4rpi-esp-arduino — v0.1.0
- Cloud4RPI — Cloud control panel for IoT devices
- PlatformIO IDE for VSCode
Goal: Measure temperature and humidity
I already had a DHT11 sensor, so I decided to use it for temperature and humidity measurements. Let’s choose an Arduino library to read sensor data.
Arduino registry contains several libraries, from which I selected the most popular one.
According to their GitHub repository, we are also required to add an Adafruit Unified Sensor package.


 DIY GUY Chris
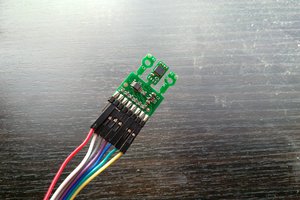
 Apocalyt
 Gentiam
 StanislavJochman