 J.C. Nelson
With some work, I've figured out how the Firmware CRC works.
The first 3 DWORDS of the file are, in order:
A signature - must be
0x443D2D3F
The XOR CRC of all DWORDS after the header
An encryption seed
To calcuate the CRC, begin with a seed of 0xef3d4323. XOR each subsequent byte with this.
In production, it's highly likely that the way this works is that they write the header first, calculate the XOR value of the firmware, and the final XOR is with the seed, resulting in what's written to the header.
Now, moving on to the XOR encryption.
Here's the code that does it, taken from Binary Ninja
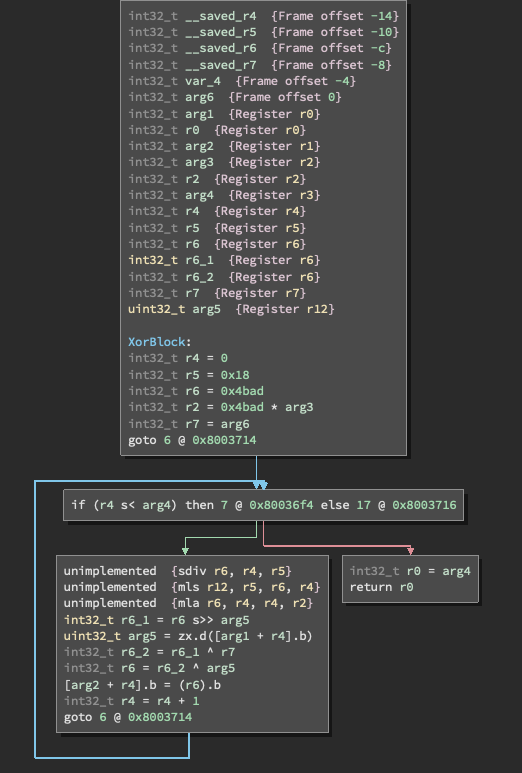
Here's the call:

The operation pretty much only operates in blocks of 0x800.
The first two parameters appear to be the data from the encrypted file and a working buffer which is where the data is written to.
The third parameter is the block counter, which goes up as blocks are decrypted.
The file size is fixed, and I believe the last parameter is the encryption seed.
The problem is, my python implementation of this never seems to actually use different values, so I'm missing something obvious.
Discussions
Become a Hackaday.io Member
Create an account to leave a comment. Already have an account? Log In.