Close
0%
0%

Raspberry Pi EVSE Hat

Use a Raspberry Pi to build an EV charging station

Similar projects worth following
Starting from
$125.00
nsayer has 2293 orders / 162reviews
Ships from United States of America
I've done a couple of EV charging stations here on Hackaday.io - to wit, OpenEVSE II and the Hydra. One difficulty with using either of those as a foundation is that they're microcontroller driven, which means the firmware is difficult to customize and external connectivity is harder to arrange. What if, instead, we gave the job of overall control over to a Raspberry Pi? Then most of the work could be done in Python or some other, friendlier language.

One issue with having any sort of Linux based system controlling an EVSE is that there are certain aspects of the design that must not be allowed to be software controlled.

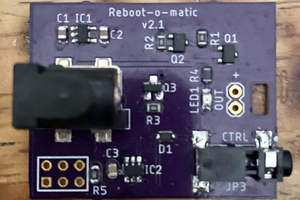
In particular, with OpenEVSE/Hydra, responsibility for cutting off the vehicle power contactor when a ground-fault was detected was given to an interrupt service routine triggered by the GFI circuit. This was deemed acceptable, because code analysis could provide some assurance that there was no reasonable way this ISR would *not* be run. But we can't really do the same with a Linux machine controlling the show. So in this design, instead, the contactor power signal is gated by the GFI. A ground fault will cause a flip-flop to be set, and while it's set, the power relay is explicitly disabled. The software will need to first turn the relay power off, then reset the GFI state. This will insure an instant reaction to a ground-fault regardless of what Linux may be doing at the moment.

In addition, leaving the power turned on when there's no call for it is a serious safety error. To prevent that, there is a hardware watchdog that must be "fed" constantly whenever the EV power relay output is on (a GPIO pin toggled at least every 10 ms or so). If the watchdog isn't fed, it will bite, forcing the equivalent of a GFI event and turning the power off.

Linux can generate a PWM signal on GPIO18, which can be used for the pilot. We can use the same two level double MOSFET generator design to generate the ±12 volt pilot from the pin, and the boost converter and charge pump to generate the ±12 volt supply. We can also use the same voltage divider and an external ADC so the Pi can sense the voltage, and thus the impedance being imposed by the vehicle.

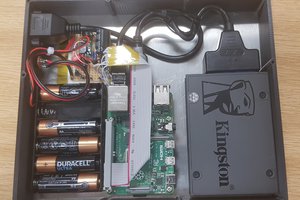
This project can use the same HV boards used by OpenEVSE II, which means that we have a ready made solution for relay test / GCM monitoring. The power boards also would be able to supply 5 volts to run the PI.

That's the complete list of features required for an EVSE, but we also added two more ADC channels to sense the input voltage and watch a current transformer and obtain between the two of those a power monitoring solution.

Everything else at this point becomes a software feature. Given the power and connectivity of a Raspberry Pi, there are a million different directions you could go from here.

Adobe Portable Document Format - 120.22 kB - 08/08/2021 at 19:02

Preview
Download

sch - 642.94 kB - 08/08/2021 at 19:01

Download

brd - 148.36 kB - 08/08/2021 at 19:01

Download

  • Spelling it out: Making pilot

    Nick Sayer04/25/2022 at 07:25 0 comments

    To start with, make sure you've done the PWM overlay as described in previous logs. Either by adding it to /boot/config.txt or doing it manually at the command line with dtoverlay.

    Next, as a preparatory step, open /sys/class/pwm/pwmchip0/export and write "0\n" to it.

    When you want to activate the pilot, write "1000000\n" to /sys/class/pwm/pwmchip0/pwm0/period. That's one million nanoseconds, which is one millisecond - a 1 kHz period. Next, multiply the duty cycle in percent by 10,000 and write that (with a trailing newline) to /sys/class/pwm/pwmchip0/pwm0/duty_cycle. As an example, 10% (which would represent a pilot ampacity of 6A) would be a duty_cycle of 100,000 - which means that the high portion lasts 100,000 nanoseconds, or 100 microseconds. Lastly, write a "1\n" to /sys/class/pwm/pwmchip0/pwm0/enable.

    To force the output high (solid +12v), set the duty cycle to 101%. To force the output low (solid -12v), set the duty cycle to 0%.

    Normally, a solid -12 pilot is supposed to indicate a fatal error - because the pilot never exceeds 0v, the EVSE cannot detect the presence of a vehicle at all.

    A solid +12 volts indicates that in principle the EVSE is willing to charge, but is not yet ready. Normally when there is no vehicle connected the pilot is pinned to +12v. In this state, the EVSE can detect the presence of a vehicle by seeing that the +12v is pulled down to +9v (the vehicle could, in principle pull to +6 or +3 volts, but that would be illegal, as the vehicle is required to wait for an "offer" first).

    An oscillating pilot from an EVSE is an indication to offer the indicated number of amps to the vehicle, depending on the duty cycle.

    Detecting the pilot feedback is done with the ADC, which was described in a different project log.

  • AP62200WU

    Nick Sayer02/28/2022 at 01:21 0 comments

    I tried this chip out on another project, and one thing I discovered is that the absolute maximum voltage on the EN pin is 6 volts. That means you can't just tie it to Vin. Fortunately, the spec sheet does say you can leave it floating and it will be pulled up, so it's not a huge inconvenience. But it does mean that I have to get new boards in before I can add inventory back to the store.

  • Possible supply chain resolution

    Nick Sayer02/18/2022 at 22:30 0 comments

    I've discovered the AP62200WU-7. It's not pin compatible with the AP63205 and it's an adjustable buck converter, so it will need a resistor divider to generate 5 volts, but it's otherwise the same device, essentially. I've ordered a set of boards reworked to accept this chip. We'll see.

  • Supply chain issues

    Nick Sayer12/08/2021 at 22:46 0 comments

    Unfortunately, the AP63205WU (the buck converter to go from +12 to +5V) is out of stock everywhere and it appears like it won't be back in stock during 2022. Go figure.

    I use this chip in a lot of things, it turns out, so I'm screwed.

    In some cases, I can substitute an AP1509, but it's a SOIC-8 instead of a SOT23-6 and does not include a synchronous rectifier, so it means adding a Schottky diode to the circuit. There just isn't room for all of that on this board.

    I'll post back when the 63205 becomes available again. But for now... I'm out.

  • Diagnostic LEDs

    Nick Sayer08/08/2021 at 19:42 0 comments

    I've added two LEDs to the board to help with checking the power circuit state. One LED is nominally orange and it's whether or not the relay/contactor is (or should be) on. The other is nominally red, and it's an indication of the GFI flip-flop state. If one LED is on, the other must be off, but both can be off as well.

    This will allow you to potentially do some testing and troubleshooting without having the HV board hooked up. If you power the Pi other than via the HV board, the pilot generator, pilot generator feedback and the AC voltmeter won't work, but you can still perform the GFI self test and power start procedure, including petting the power watchdog.

  • PWM overlay

    Nick Sayer08/27/2020 at 04:26 0 comments

    It turns out you can also dynamically turn on hardware pwm. Just run this (as root):

    # dtoverlay pwm pin=18 func=2

    That will make /sys/class/pwm/ and all of the rest show up and work.

  • Tracking OpenEVSE II

    Nick Sayer08/04/2020 at 03:03 0 comments

    A while ago, I changed the Hydra design to use a primary 5 volt supply and a boost converter on the logic board to supply the pilot generator. I also made this change on OpenEVSE II, and at the time, the shared HV board dictated that design here.

    What was missed in that design choice was the fact that the Hydra only supports using contactors. There's no provision for DC relays because an L1 Hydra essentially makes no sense (you'd just plug two L1 EVSEs into two different 120V circuits). Asking a boost converter to make enough 12 VDC for both the pilot generator and to trigger a relay is on the border of asking too much, whereas a buck converter to make 5 volts for the logic system and the Pi is not a big deal at all.

    So since the OpenEVSE II HV boards are going to switch over to a 12 volt primary supply, that means swapping out the boost converter for a buck converter, and it has to be beefy enough to run a Pi as well.

  • Errors on the board

    Nick Sayer08/03/2020 at 21:06 0 comments

    Well, I've discovered that there's an error on most of the boards. Fortunately, it's easy to work around.

    I thought there would need to be a level shifter of some sort for the watchdog chip's WDI signal. So I added a MOSFET and pull-up to make this happen, but I used the footprint for a P channel MOSFET instead of an N, so it's wrong.

    It turns out that you don't need a level shifter - the 3.3 volt high from the Pi is good enough on its own. So the fix is to replace the MOSFET with a 0Ω 0805 resistor going from the gate to the source pin (which is supposed to be the drain, but for the error). You also should leave out the 5 volt pull-up resistor that's on the watchdog chip's input. The 3.3 volt pull-up is all that's required (though these resistors are 100kΩ, so there's little harm in leaving them).

    Version 4.0 has a similar error, but in this case the 0Ω resistor goes from source to drain.

    In every case the idea is to just connect the WDI pin on the watchdog chip directly to GPIO4 on the Raspberry Pi header, with a 100 kΩ pull-up to 3.3 volts. This will be the design with 4.0.1 and beyond.

  • Pin definitions

    Nick Sayer10/06/2019 at 01:02 0 comments

    To make this work, you need to manipulate these GPIO pins (note these are GPIO numbers, not the actual pin numbers on the Pi GPIO connector):

    • 4 - The power watchdog pin. Whenever the relay is powered on, you must toggle this pin at 1-10 kHz.
    • 17 - The power pin. Set this high to turn the vehicle power on. Whenever it is on, you must toggle the power watchdog pin or else a (synthetic) GFI event will occur.
    • 18 - the pilot pin. Set this high for +12, low for -12. See below for using this pin.
    • 22 - The GFI status pin. This is an input. When high, the GFI has been set and turning the power on is disallowed.
    • 23 - The relay test pin. This is an input. It gives the status of the HV relay / GCM test. Within 100 ms of turning the power on, this pin should go high and stay high. Within 100 ms of turning the power off, this pin should go low and stay that way.
    • 24 - The GFI test pin. This is an output pin. A wire connected to the GFI test pin should take two loops through the GFI CT and then connect to ground. Toggle this pin at 60 Hz to simulate a ground fault as part of the GFI test procedure.
    • 27 - The GFI reset pin. Pulse this pin high to clear the GFI. You cannot do this while the vehicle power is turned on.

    In addition to the above, the MCP3004 ADC is connected to the SPI system, on device zero (/dev/spidev0.0). The first three channels are connected to:

    • 0 - the pilot feedback. You should sample this a few hundred times, taking the high and low values found. The high value can be used to detect vehicle state changes. The low value should remain near -12v (when the pilot is oscillating) or else it's a "missing diode" test failure.
    • 1 - the current sense transformer. You should sample this pin to obtain samples across two zero crossings (512 is zero), perform an RMS calculation, and scale the result to determine how much current the vehicle is drawing.
    • 2 - the AC voltage sense. You should sample this looking for the peak. This will allow you to determine the AC voltage and with the current sense, determine how much power the vehicle is drawing.

    To make a proper pilot, you must configure the Raspberry Pi hardware PWM timers (the PWM functionality in the Python GPIO library won't do).

    To make the ADC available, you must use raspi-config and enable SPI. In order to turn on the hardware PWM on pin 18, you need to add:

    dtoverlay=pwm,pin=18,func=2
    

    to /boot/config.txt. 

  • GFI testing

    Nick Sayer10/05/2019 at 23:05 0 comments

    To perform a GFI test, start with the GFI cleared (if it's set, clear it. If it won't clear, the test fails). It should stay clear for a few dozen ms or so. Then, toggle the GFI Test line at 60 Hz (so change it every 8.3 ms) for 10 cycles. At the end of that, the GFI should be set. If not, the test is a failure. Wait 100 ms or so and clear it. If it doesn't clear, that's a failure. Watch it for another 100 ms. If it doesn't stay clear, that's a failure. If after all of that it hasn't failed, it's a pass.

    This should be performed immediately before every attempt to turn the power on. Since the GFI is left in the clear state after the test, it's ok to turn the relay power on at that point and start toggling the power watchdog pin.

View all 18 project logs

Enjoy this project?

Share

Discussions

Similar Projects

Does this project spark your interest?

Become a member to follow this project and never miss any updates