 Cirmall
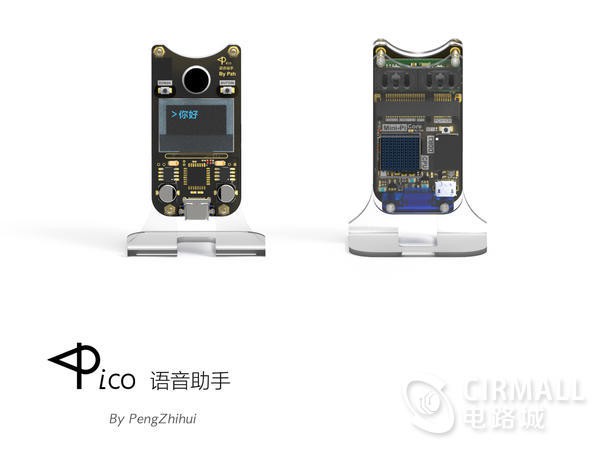
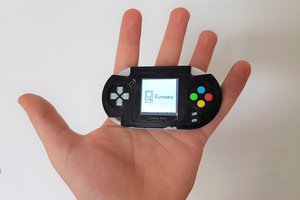
A small mini voice assistant robot to solve the troubles in individual use of intelligent speaker.
As I want to have a voice assistant that can be customized started from the hardware and need to access to the voice assistant and control my own devices (self-defined protocol), it should have good expandability and be convenient for subsequent upgrades (whether hardware or software), and it should be as mini as possible...
Therefore I spent five months on design it,and Pico was born!
The features of Pico are as follows:
- The self-designed circuit hardware which can be added or deleted necessary hardware module conveniently, such as adding multi-microphone module and gesture recognition module, or deleting the unnecessary bluetooth speaker function etc.
- The voice function can be realized from the bottom layer, all codes are able to be opened as SDK.
- It uses Mqtt protocol which is the most popular used protocol in IoT to realize the access of customized hardware, and uses the result of voice recognition to control anything. (the performance will be better if adding NLP fuctions)
- It has an OLED display screen.
- It has a small and exquisite size, just a little bigger than a gum.
Description of the Structural Design:
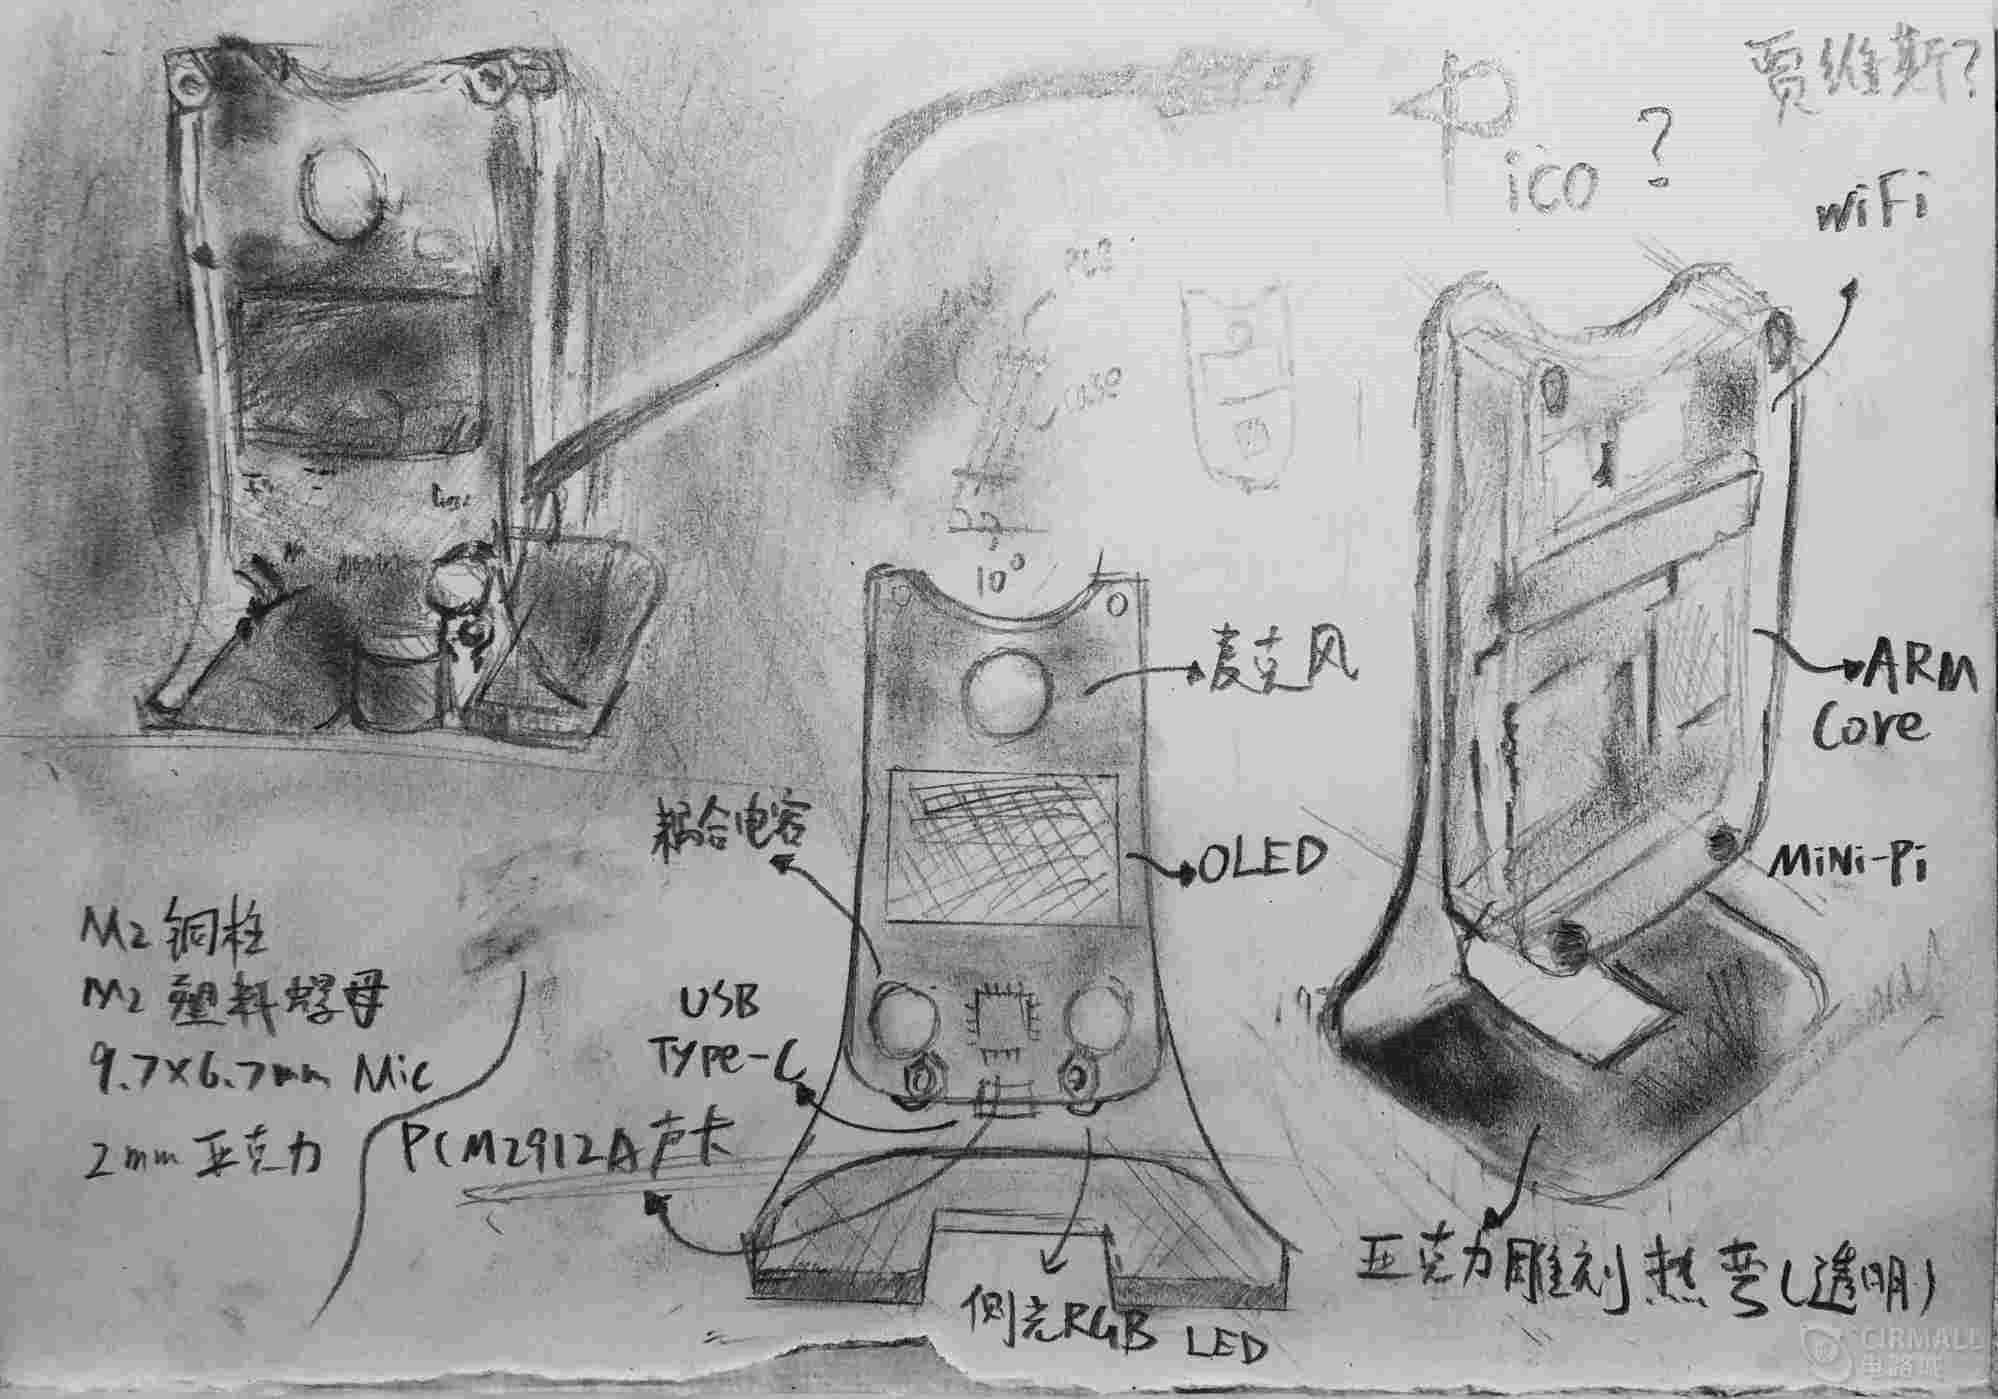
Sketch of Pico’s structural design↑
I have devised several plans to the ID design of Pico:
- It can be processed by using alloy CNC to form a cube shell model similar to a rubik's cube.
- It can be designed as a mini cylindrical shell similar to the Tmall Genie by using DLP resin and 3D printing, as the precision of SLA printing can also produce good texture.
- It can be designed as a sandwich-typed stack design by using the transparent acrylic to cut into desired shape, this is also the final plan I adopted.
There are some reasons that I finally determined to choose acryl as the shell structure:
- First, this plan has the strongest “fashionable visual impression“ as it directly uses a transparent cover plate to display PCB circuit, from my own perspective, such appearance is simplified and consilient with my personally aesthetic philosophy.
- Second, as CNC processing and 3D printing have been adopted in my previous projects, while the acryl design model is a new one, a try of unknown techniques is an important consideration factor.
- Third, the whole volume is compact, small and exquisite, so if using a closed design, heat dissipation will be taken into consideration, but no need to worry about if the sandwich-typed open design is used.
- The last reason lies in that acryl is cheap.
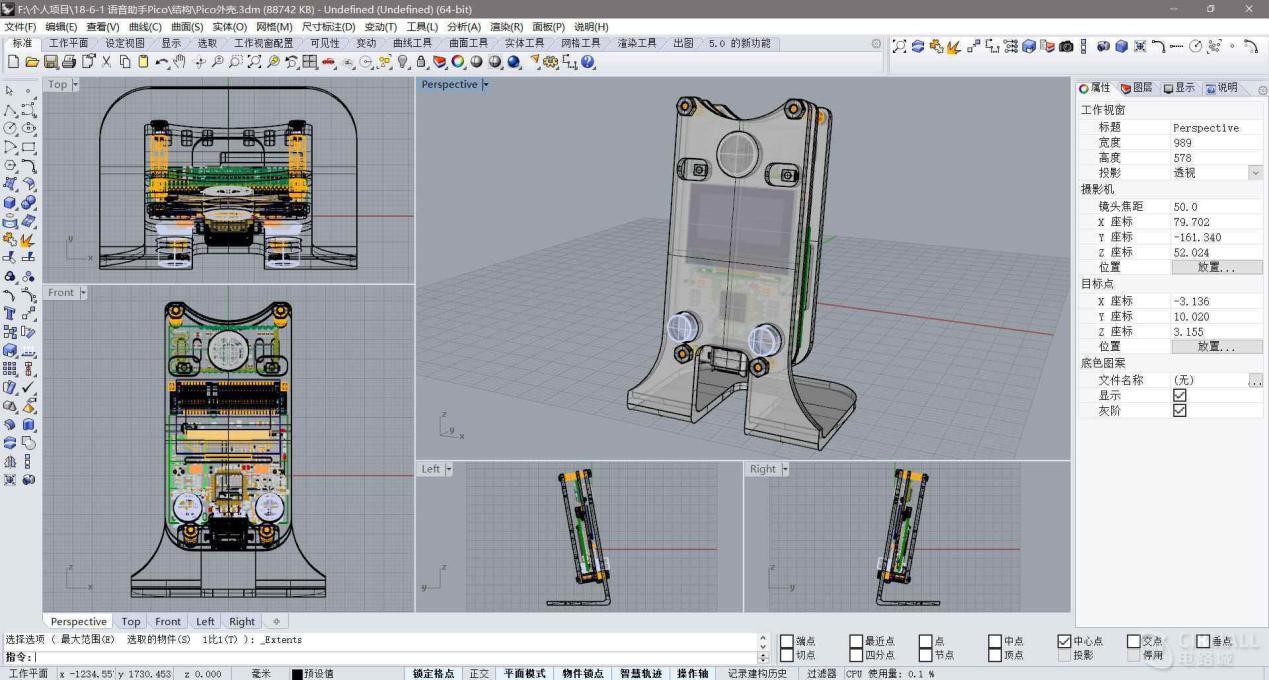
As shown in the above Sketch, there are three components: Acrylic front cover, PCB circuit board and acrylic back cover, it uses M2 roll rachis copper cylinder to make a combination connection, the front cover is curved about 10° through heating to form a pedestal, and the rear is connected by USB-Type C cable. The design of mechanical structure is completed by using Rhinoceros software ↓
The thickness of the acryl is 2mm, I invited a partner to operate machine tools to carve it into the desired shape, then heating and bending it by electric soldering iron. It is noted that the melting point of acryl is about 300 ℃, but when the temperature reaches around 100 ℃ , it will soften, so the temperature of the soldering iron is set as 100 ℃ as the soldering iron without the function of adjusting temperature cannot be directly operated.
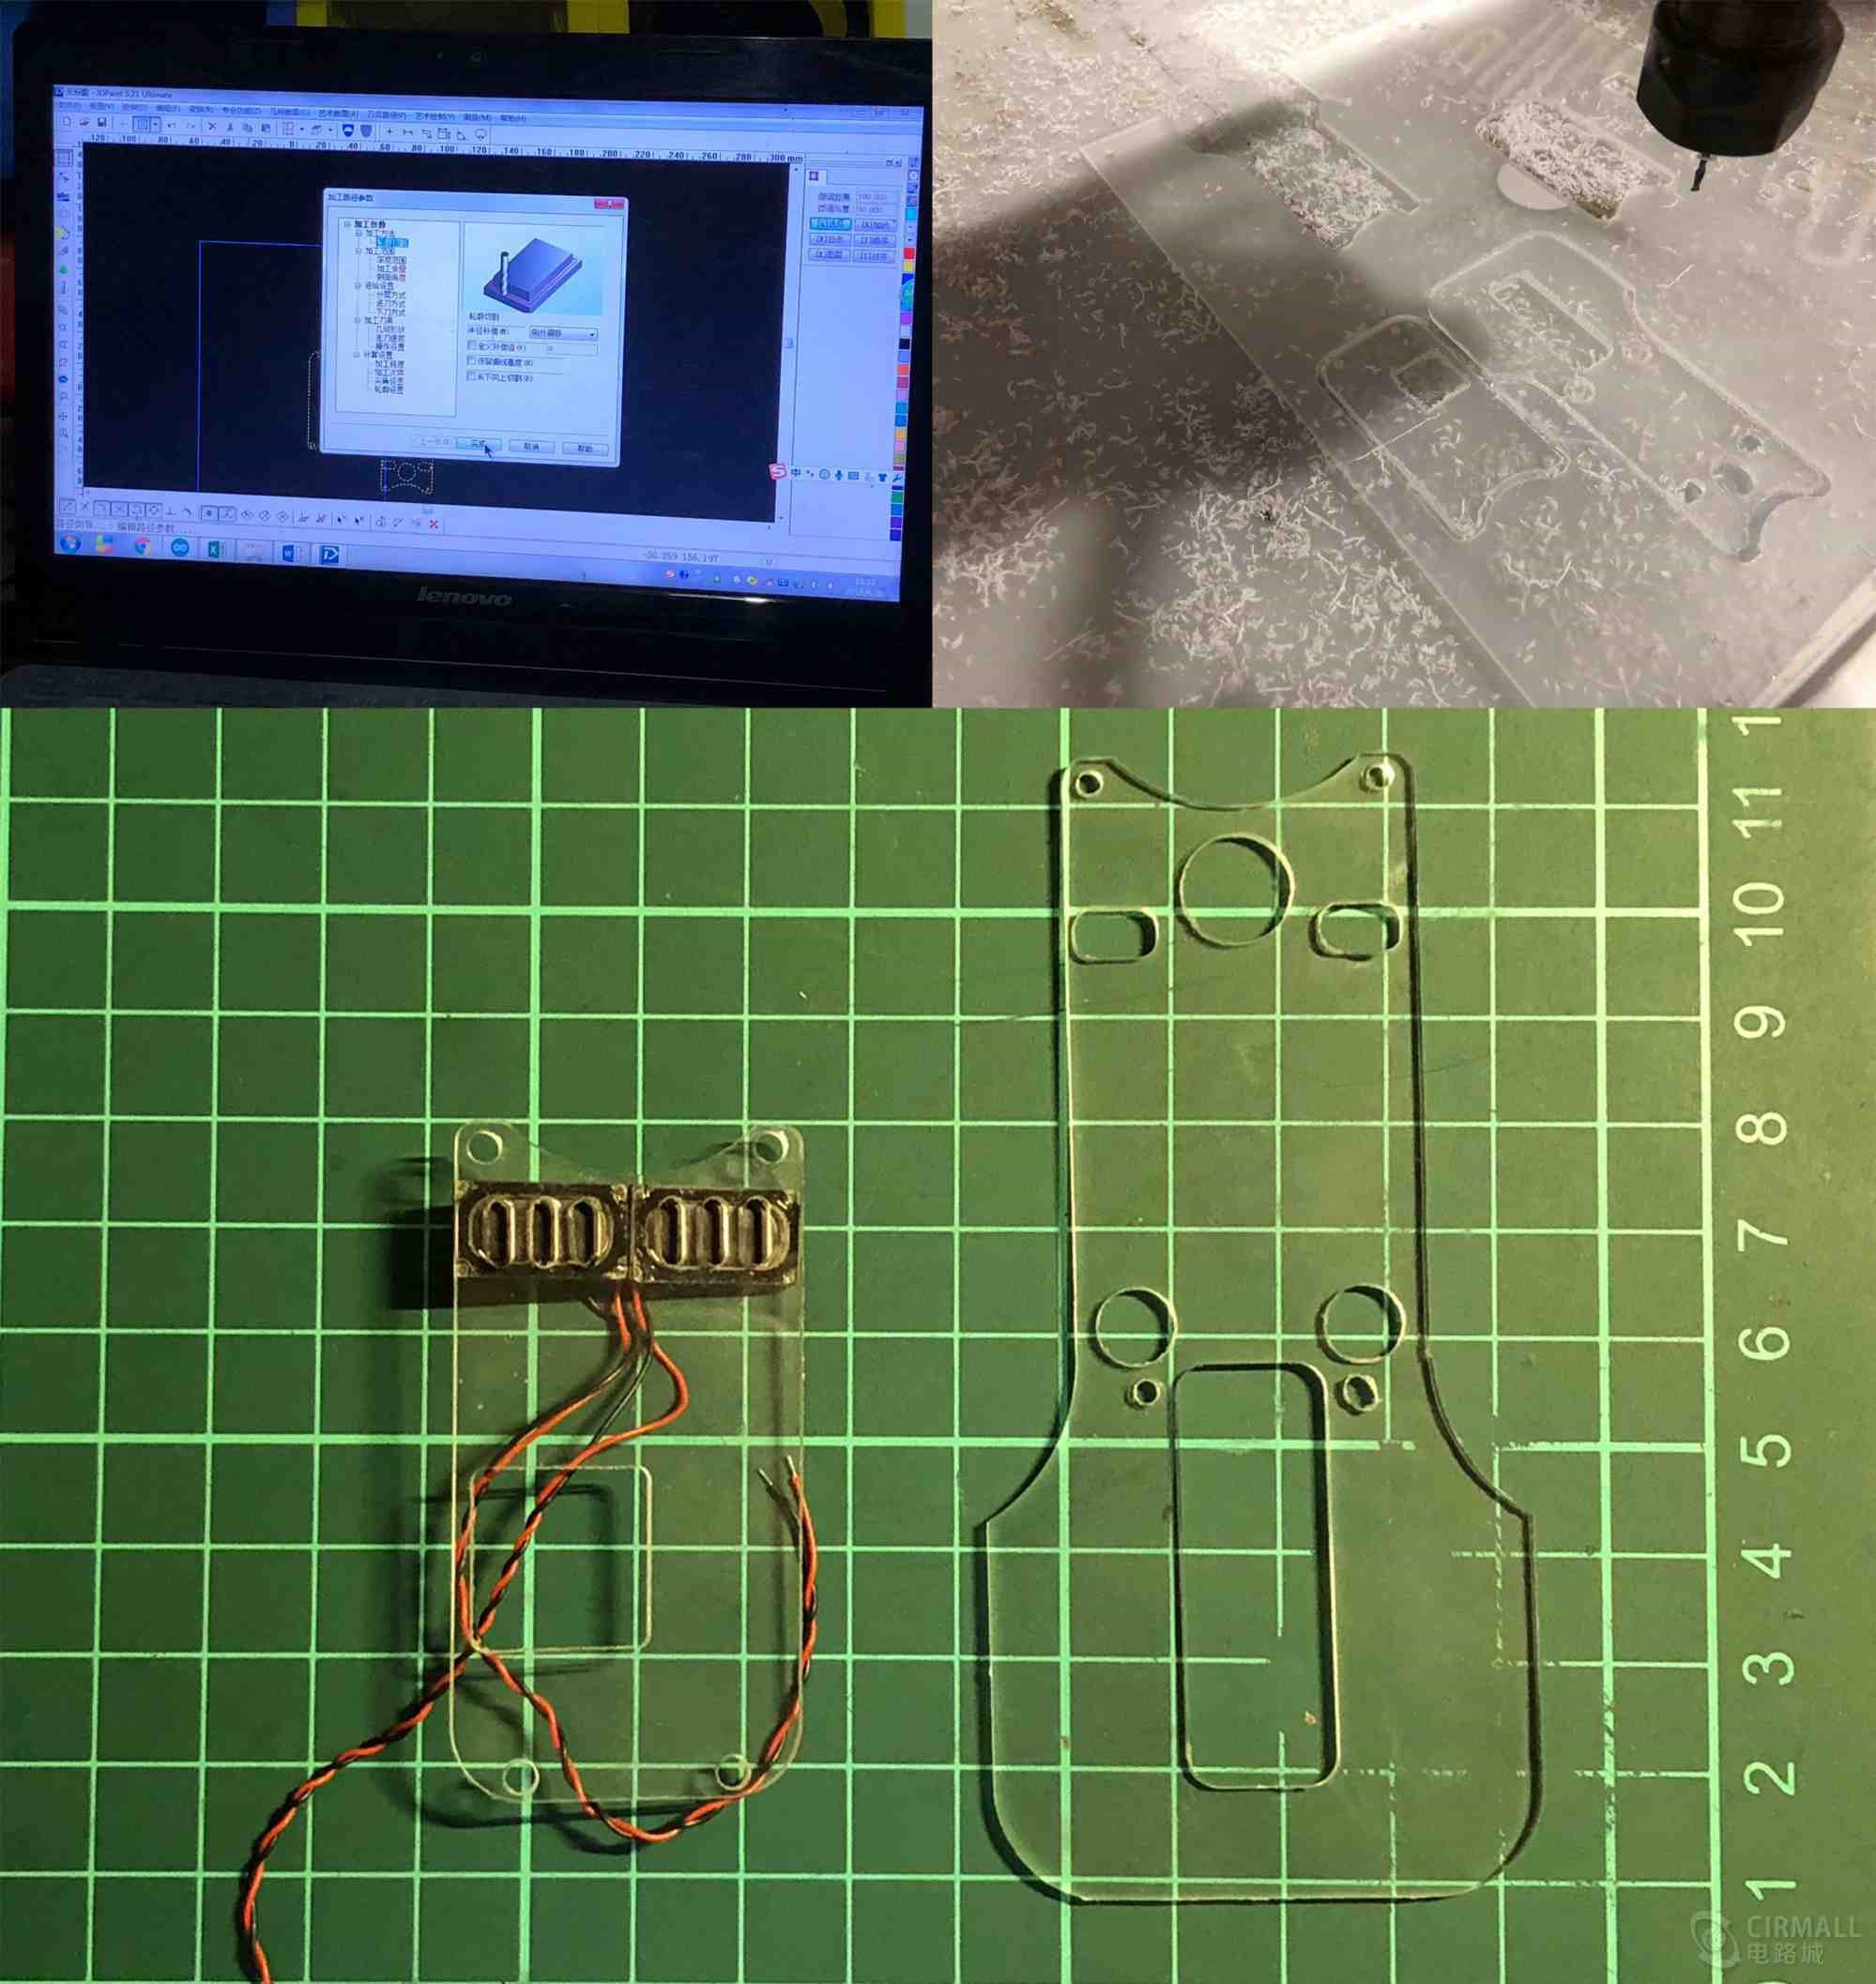
The acrylic shell carved by a machine tool

It was bent through heating by using an electric soldering iron↑
Description of Circuit Design:
As for the hardware circuit, a super-mini ARM-Linux core board MiniPi designed by myself is used.↓
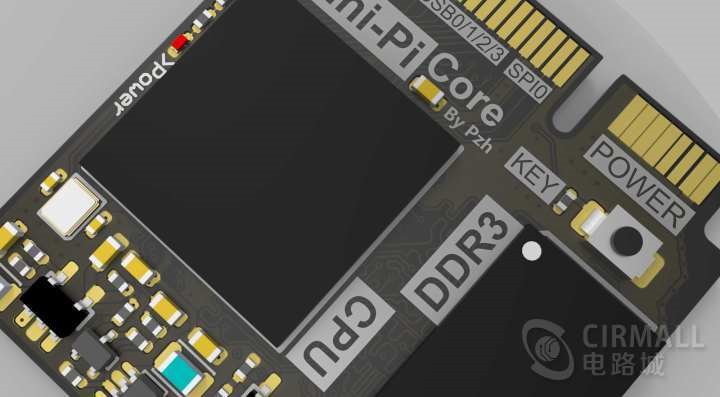
Minipi as a core board, runs Linux system and leads out the needed IO by encapsulation using the golden finger of mini-PCIE.
The Pico mainly uses two USB interfaces (one to connect USB sound card, the other for WIFI), a serial port (for debugging and serial console), several GPIO (for driving buttons and LED), an I2C interface (remain,...
Read more »
 Casey Banner
 DIY GUY Chris
 c.Invent
请问你得到别人授权了吗?原项目链接地址:http://www.pengzhihui.xyz/2019/07/15/pico/