 deʃhipu
The diodes actually arrived the next day, and I soldered up everything, but I didn't have the energy to program it, so I let it sit there for a while.
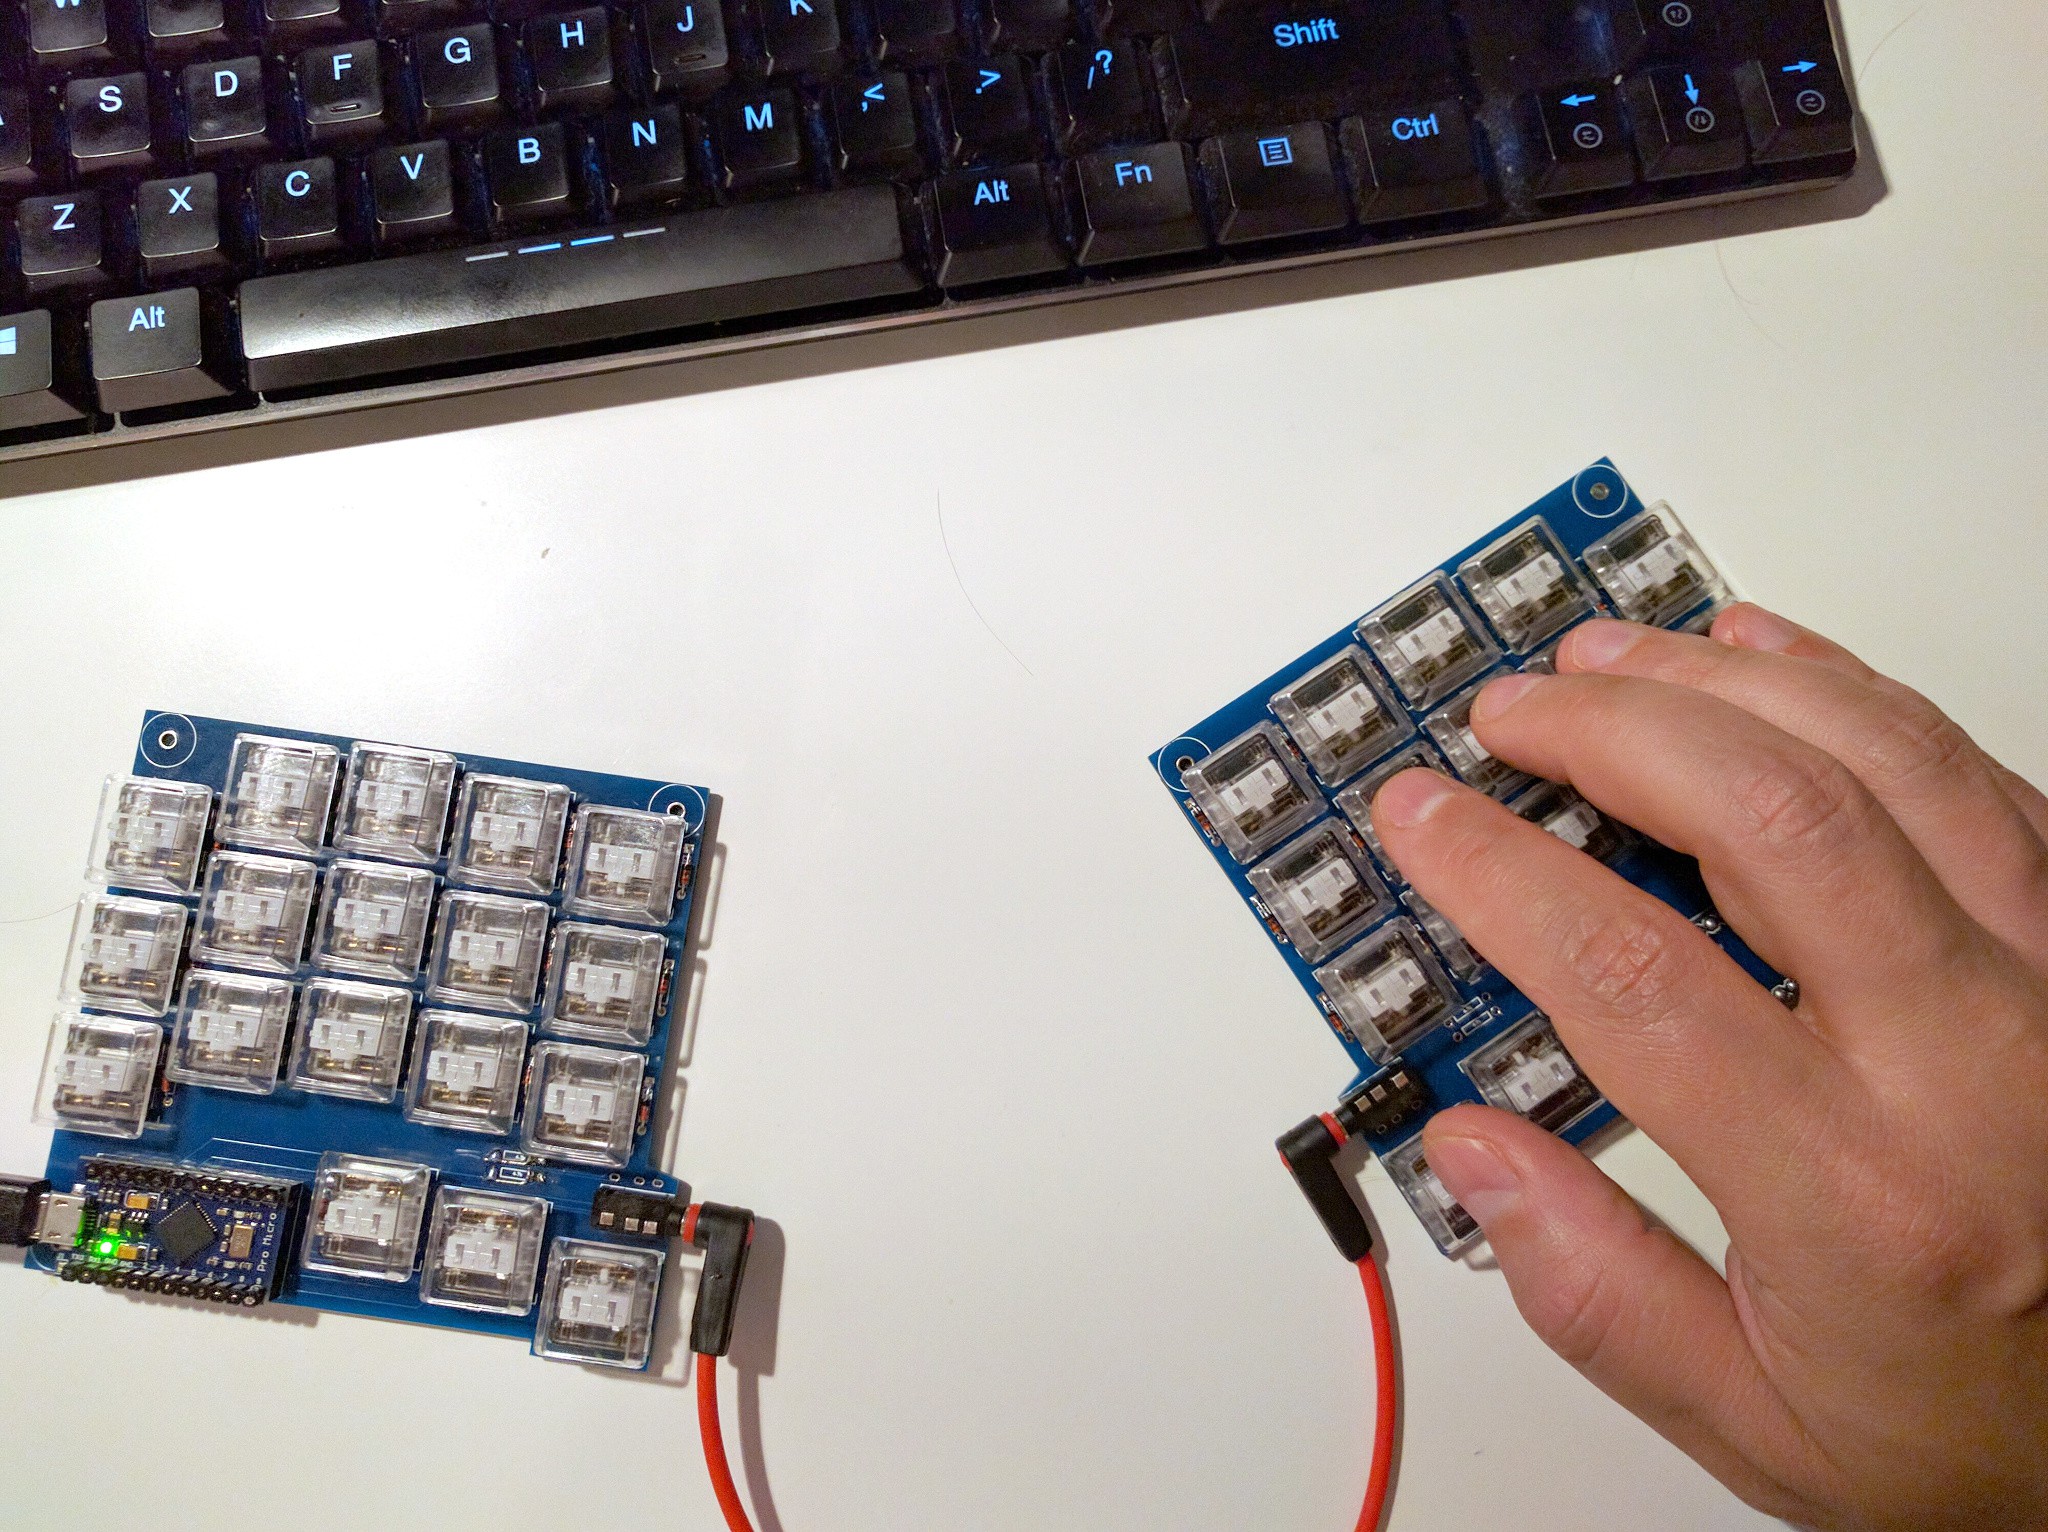
Today evening I finally decided to look into programming it. It turns out that there is actually a repository for this keyboard on github, with a ready configuration for the qmk firmware for it (there are also the Gerber files for the PCB there): https://github.com/larrbo/odd-rocket/tree/master/5plit%20-kailh
The way you use it, you first need to get the firmware from https://github.com/qmk/qmk_firmware and then copy the keyboard definition file to the "keyboards" directory. Then just run "make 5plit:default" to compile it, and "make 5plit:default:flash" to flash it — reset the pro micro when it tells you to. You have to program both pro micros, and the one that has the USB connected is the left one.
The default layout looks something like this:
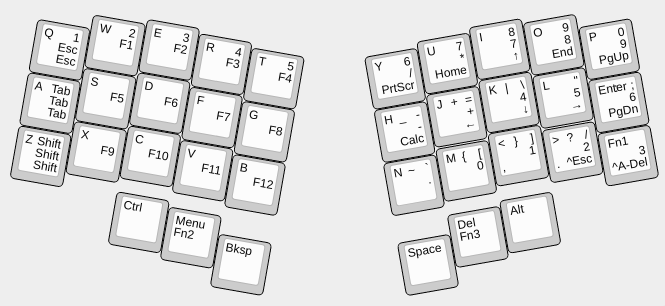
The legend and the upper left is what you get by default, the one in upper right is what you get with Fn1, middle right with Fn2, and bottom right with Fn3. Middle left is what you get when you hold down the key instead of just tapping it, and upper center is what you get with Fn1 and Shift.
I will need to actually modify this a bit, to add right Alt key — because that is how you do Polish accented characters on the Polish keyboard. But I think I can just do it as holding down the Alt key.
I still need to learn this layout — I'm not normally a touch typist, more like a hybrid one, so this requires some getting used to.
Discussions
Become a Hackaday.io Member
Create an account to leave a comment. Already have an account? Log In.