 Dave Pedu
The reason I started this project was that the new Raspberry Pi 4 is incompatible with my previous Pi Rack. The ports are in a different arrangement and it requires far more power than the connectors I used are able to handle.
All of that additional power needs somewhere to go too. Since the older generation of Pis sip power and don't produce much heat, I made no accommodations for active or even passive cooling in my previous rack. Even so, the Pis stayed cool enough.
Luckily enough, adding accommodations for cooling won't require a large design change. In the rack, the Pis are stood on edge and sandwiched next to each other. This is actually a good arrangement for passive cooling - air warmed by the Pis, if unobstructed, would rise and be replaced with cool air from below. That is, if it wasn't for the solid top and bottom plate holding them in place.
So, without further ado, here's the next set of teasers! First, the "base" plate:
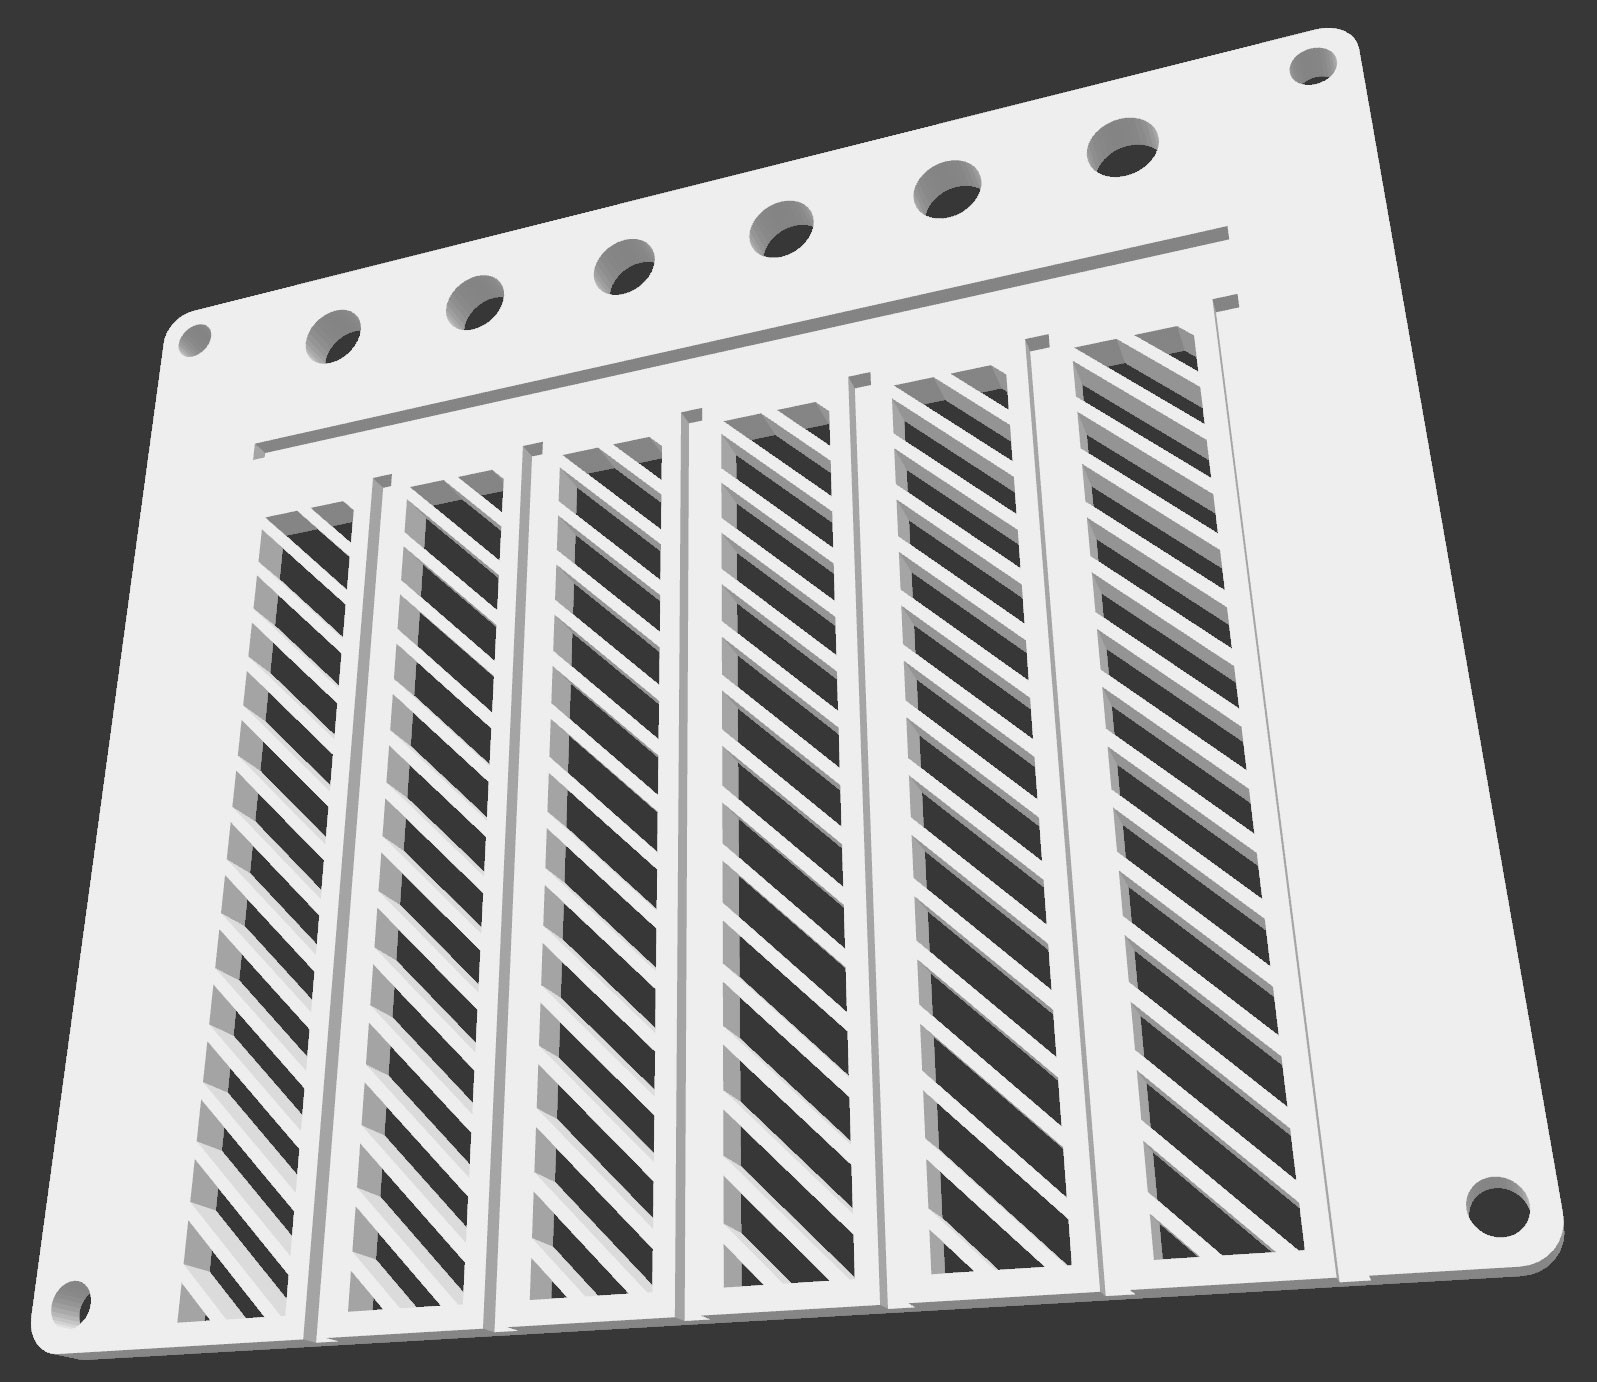
This piece would sit under the row of Pis. The 6 parallel slots are rails for each sled containing a Pi to slide into. The vent grill allows cool air to enter the space between Pis; it will exit out a matching grill on the top plate above. The other holes and slots are a mix of mounting and wire routing; you'll see what they're each used for soon enough. Here's an image of the same part from the previous rack.
Next teaser: the updated sled!
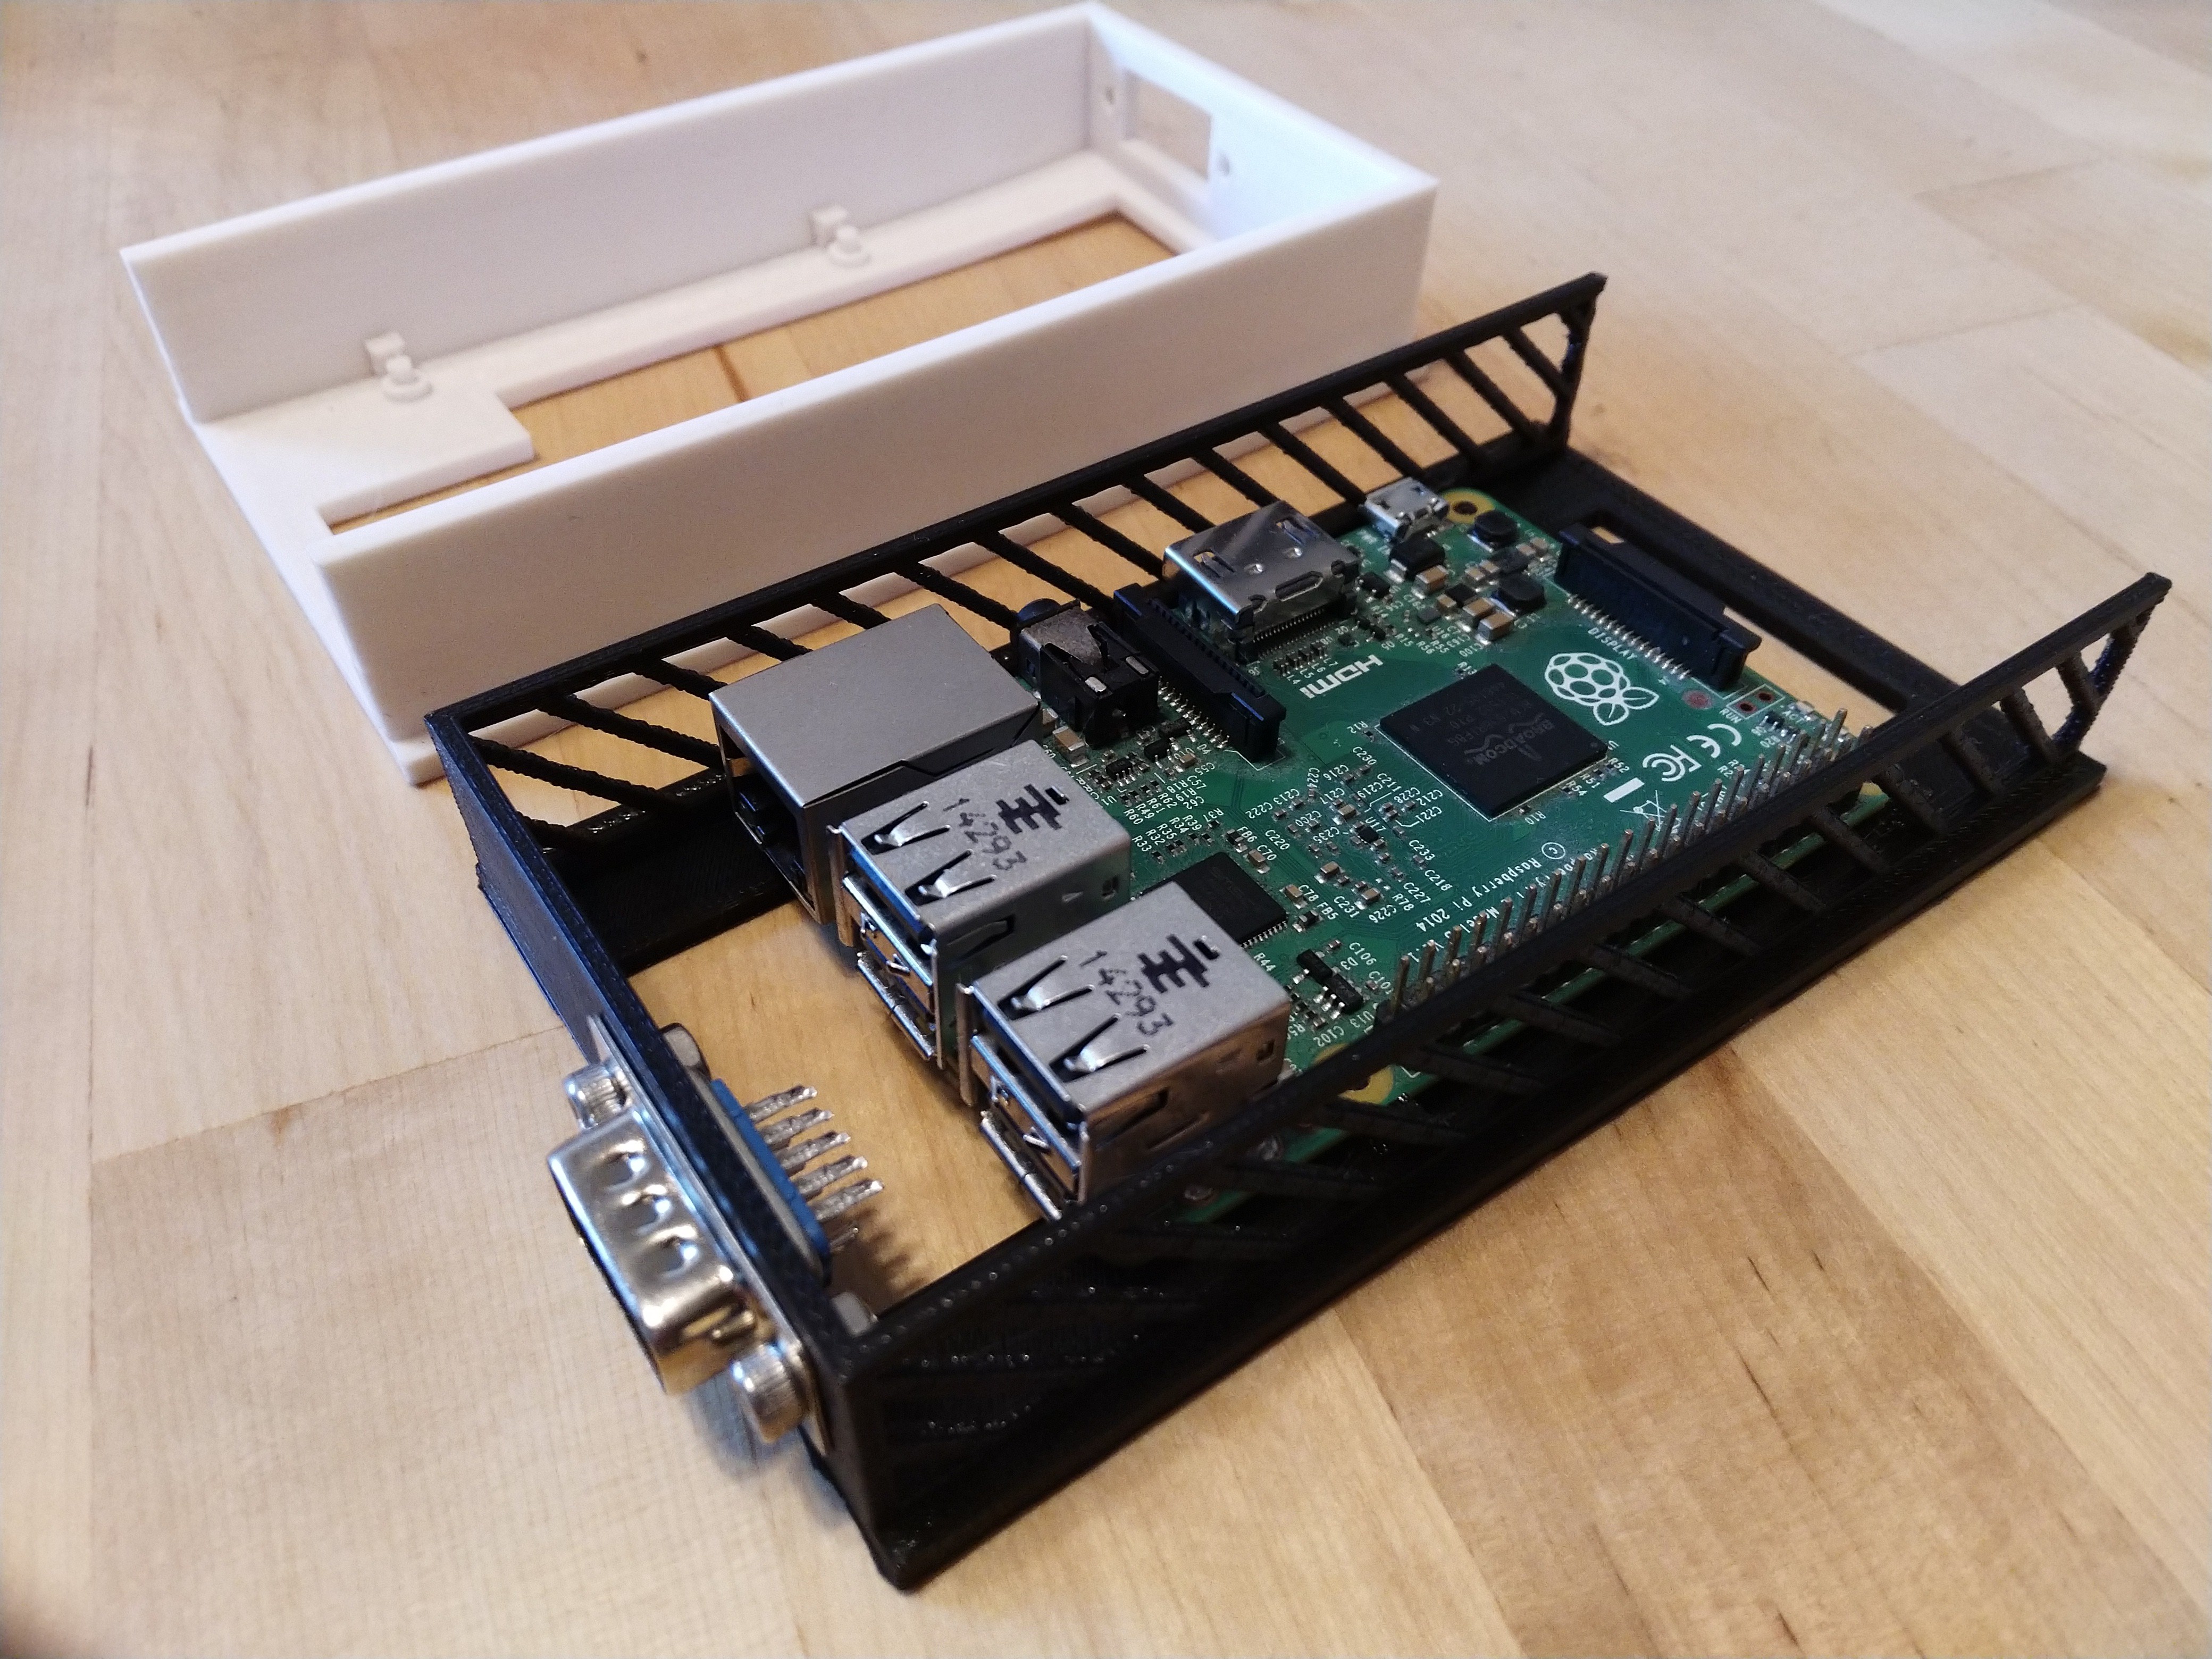
Here we have the hot-swappable Raspberry Pi holding trays. The Pi above is a model 2B, but the PCB mount hole footprint is identical to newer Pis. You can see the vented sides that align with the baseplate.
There's still a few things missing - I'm planning to add some kind of locking mechanism that can keep the tray snugly in the enclosure. The wiring between the dsub connector and Pi needs to be done too.
I've also been playing with the idea of adding additional hardware to the sleds. They're already approximately the size of a 2.5" SSD - I'd have to add a few millimeters to their height. I could probably fit 2 or 3 SSDs if I made a double-wide sled. I'm not sure if I'll pursue this.
The white print in the background is an earlier iteration. I tweaked a few dimensions and thicknesses as well as adding the vented sides between the two prints.
Funnily enough, the black filament I used to 3d print this prototype is the exact same reel my original rack was printed from. It's scrap material now - 4 years of sun and humidity is not kind to PLA - it turned extremely brittle. Prototype prints like this are great way to dispose of your excess filament.
On another topic - I've received the components I'm planning to use for the backplane. I have an ethernet controller, some mux/demuxers, and some relays. I'm planning to design some of the electronics next. In the meantime, check out the previous project log entry if you're curious what these parts will be used for.
Discussions
Become a Hackaday.io Member
Create an account to leave a comment. Already have an account? Log In.