 Valentin
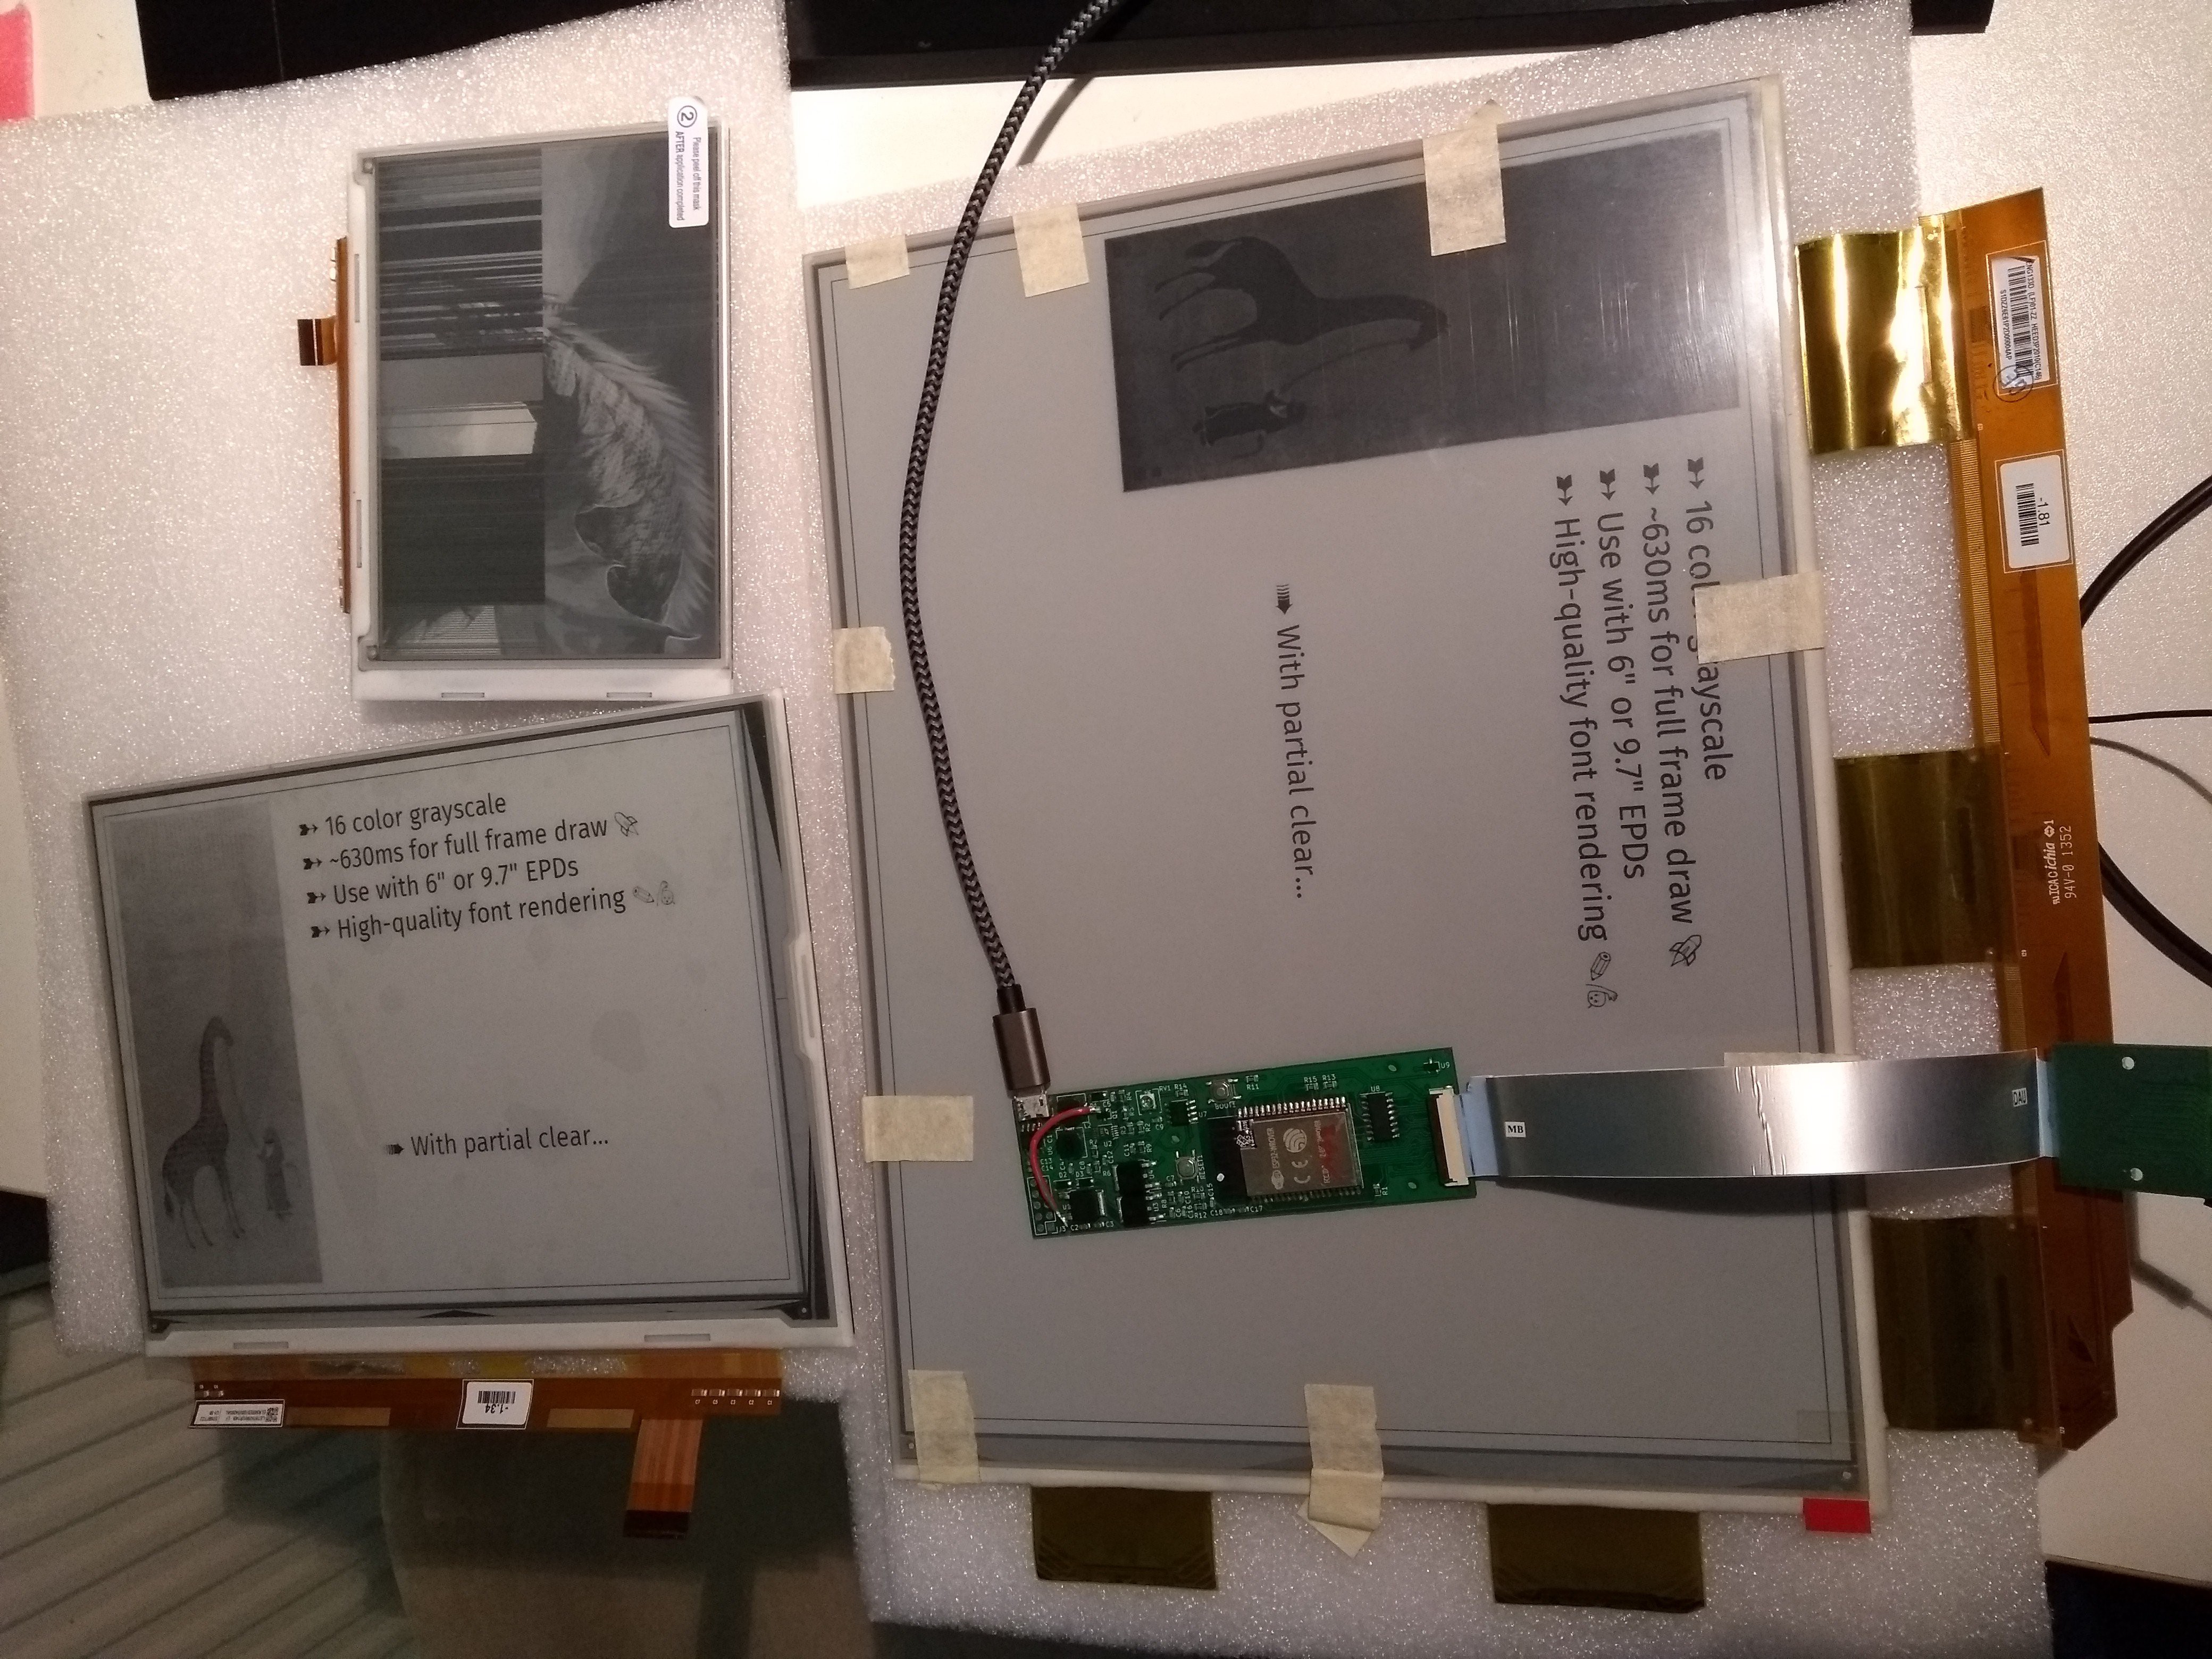
When it comes to E-Ink screens, bigger is better, right? One of the goals of this project was to be able to step up from the 6" screens of previous designs to 9.7" Kindle screens. But why stop there?
E-Ink makes even larger screens, with the next size being 13.3" panels. So compared to 9.7" panels, they have about double the surface area and are roughly A4-sized. These would be very nice for E-Paper dashboards and the like. I also want to build a portable E-Ink terminal, so this would be perfect, right? Well, it depends. But I'll go into that later.
First: How do you get such a thing? This was actually quite difficult. Yes, E-Ink offers these Modules on their Website as samples, but 500$ was just not worth it for me. When you request quotes from some big suppliers, they usually ask how many thousand pieces you want.
But then, I stumbled upon a listing for a 13.3" E-Ink screen on AliExpress, with the model number PENG133D. Of course, there is absolutely no information available under that name, but the picture looked awfully like the E-Ink ED133UT2. Additionally, since E-Ink still holds some Patents and is afaik the only manufacturer currently capable of producing these screens, there is not much else it could be. So, a friend and I decided to spend the 200$ on an experiment. Still not cheap, but this is probably as cheap as these screens go, considering they are not mass-produced in an order of magnitude the Kindle screens are.
When I received the display, aside from the label, it seemed to be indistinguishable from the ED133UT2. It features the same connector as the 6" screens, however some pins are wired differently, so just connecting it directly to the V2 board will create a short through the display! So, I had to design an adapter board first, which is then bridged to the control board. If the setup in the picture looks hacky, that's because it is:
The current revision of my adapter board has the connector facing the wrong way, requiring the cable to be connected to the rotated adapter board. Furthermore, 33pin FFC cables are not available at any local electronics shop, so I used a cable from an old laptop and cut it down to 33 pins. Then, just to be sure, I hacked my prototype board to use 5V for the boost converter (In the current gerbers, there is a jumper for that).
Adapting the firmware to get a first picture was actually quite simple, though I have not yet calibrated the grayscale timings.
But: Is it worth it?
Well, it depends. 200$ is a lot of money for a screen. Well, compared to a Dasung Paperlike E-Ink monitor which uses the same screen and costs 1000$, this is way better, but nevertheless. And for that price, it suffers from some problems:
- It's on a glass substrate. So if you want to build a mobile application,
you'll need a tough case to support that thin, A4-sized glass panel. - It has a glossy surface finish, somewhat invalidating the sunlight-readability we expect from E-Ink.
- Those flimsy flex PCBs have to be mounted somehow.
There actually is a version on Plastic substrate and with anti-glare surface finish, the ES133UT2. If someone knows a reasonable way to get by these, please let me know :)
Firmware support and the KiCad project for the adapter will be published after some more fixing and testing.
Discussions
Become a Hackaday.io Member
Create an account to leave a comment. Already have an account? Log In.
"It has a glossy surface finish, somewhat invalidating the sunlight-readability we expect from E-Ink."
There are paper-texture films sold for Cintiq drawing tablets and the iPad Pro, for artists drawing on the device. One of those might cut down on glare without harming the screen's legibility too much.
Are you sure? yes | no
great work!
Are you sure? yes | no