 Angela Sheehan
The first item in the collection that I started working on back in September 2017 was a hacked wedding dress. I had my heart set on creating some kind of color changing dress in this project and spent a few weeks trying on wedding dresses at thrift stores until I found the perfect one:

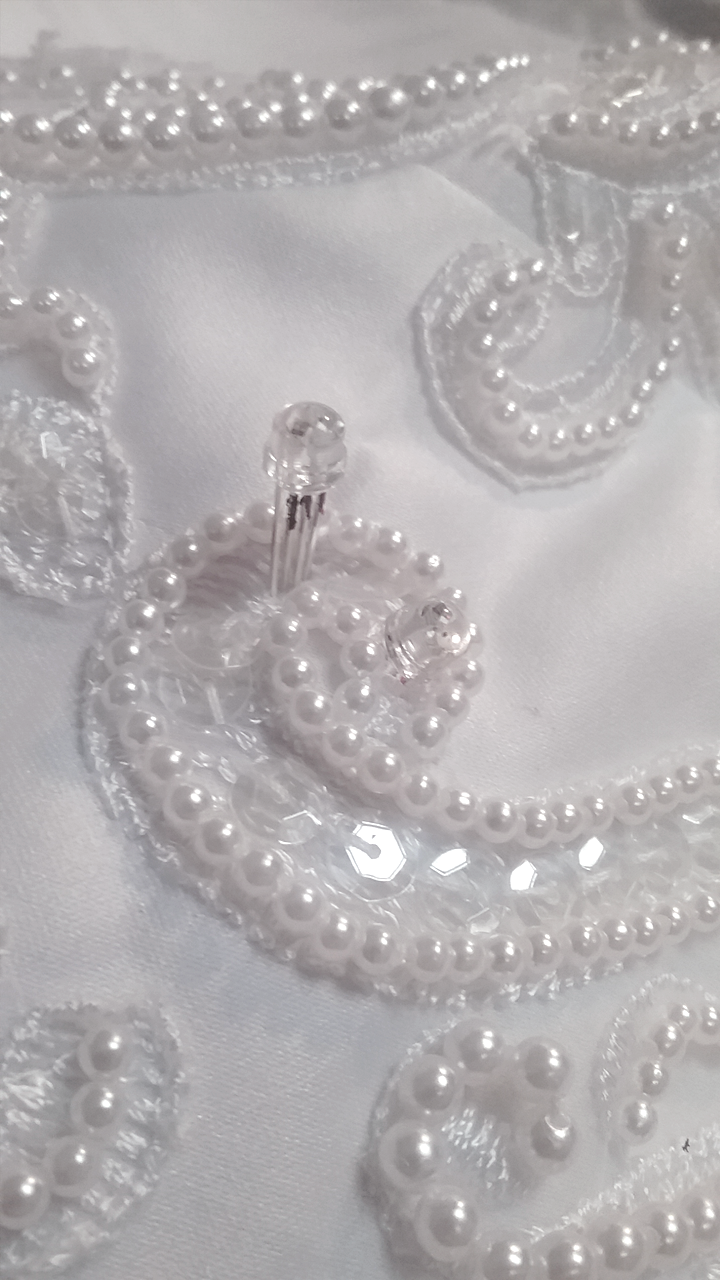
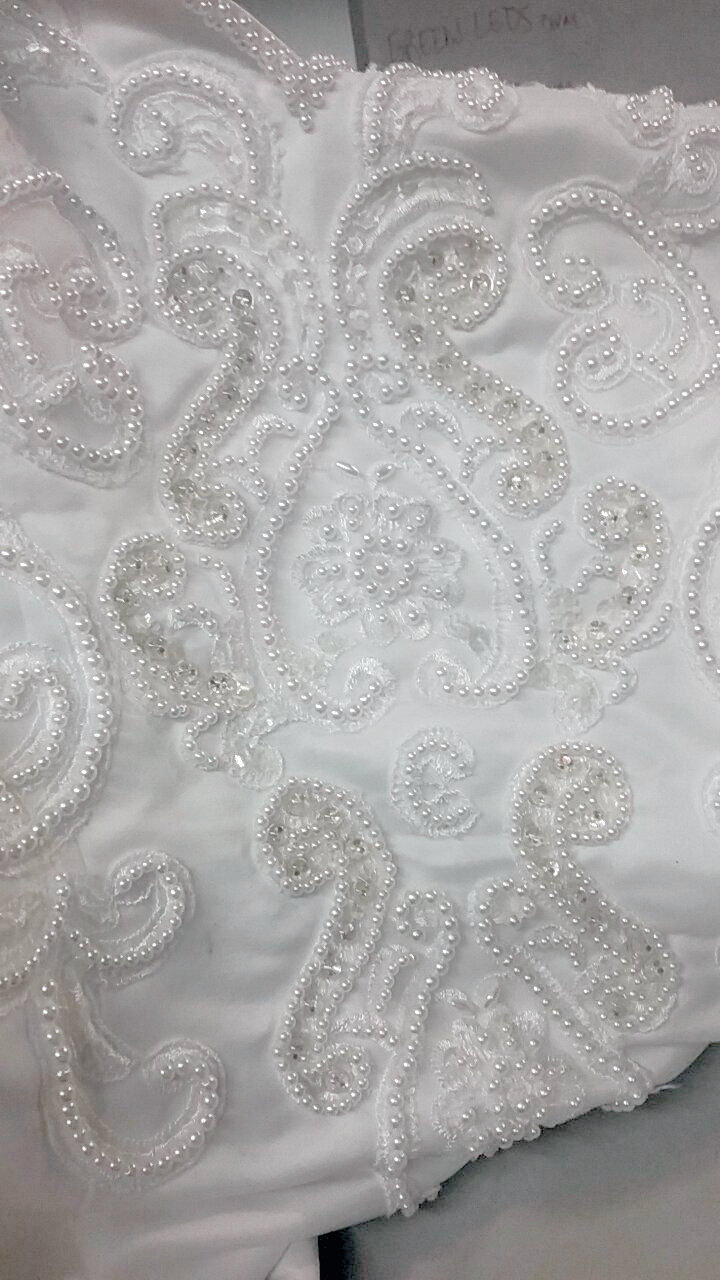
I really loved the beaded appliqué and they would be a great design element to strategically embed LEDs into. Most importantly, it fit without major alterations (which rarely happens when I shop for formalwear at thrift stores).
After saying yes to the dress, I set out brainstorming LED integration. Rather than install LED strips underneath the fabric for a diffused glow, I chose these low profile addressable RGB LEDs from SparkFun to integrate throughout the beadwork.
")
In the end, the effect was quite nice, but I didn't realize how much work I was truly in for...
The Great LED Install
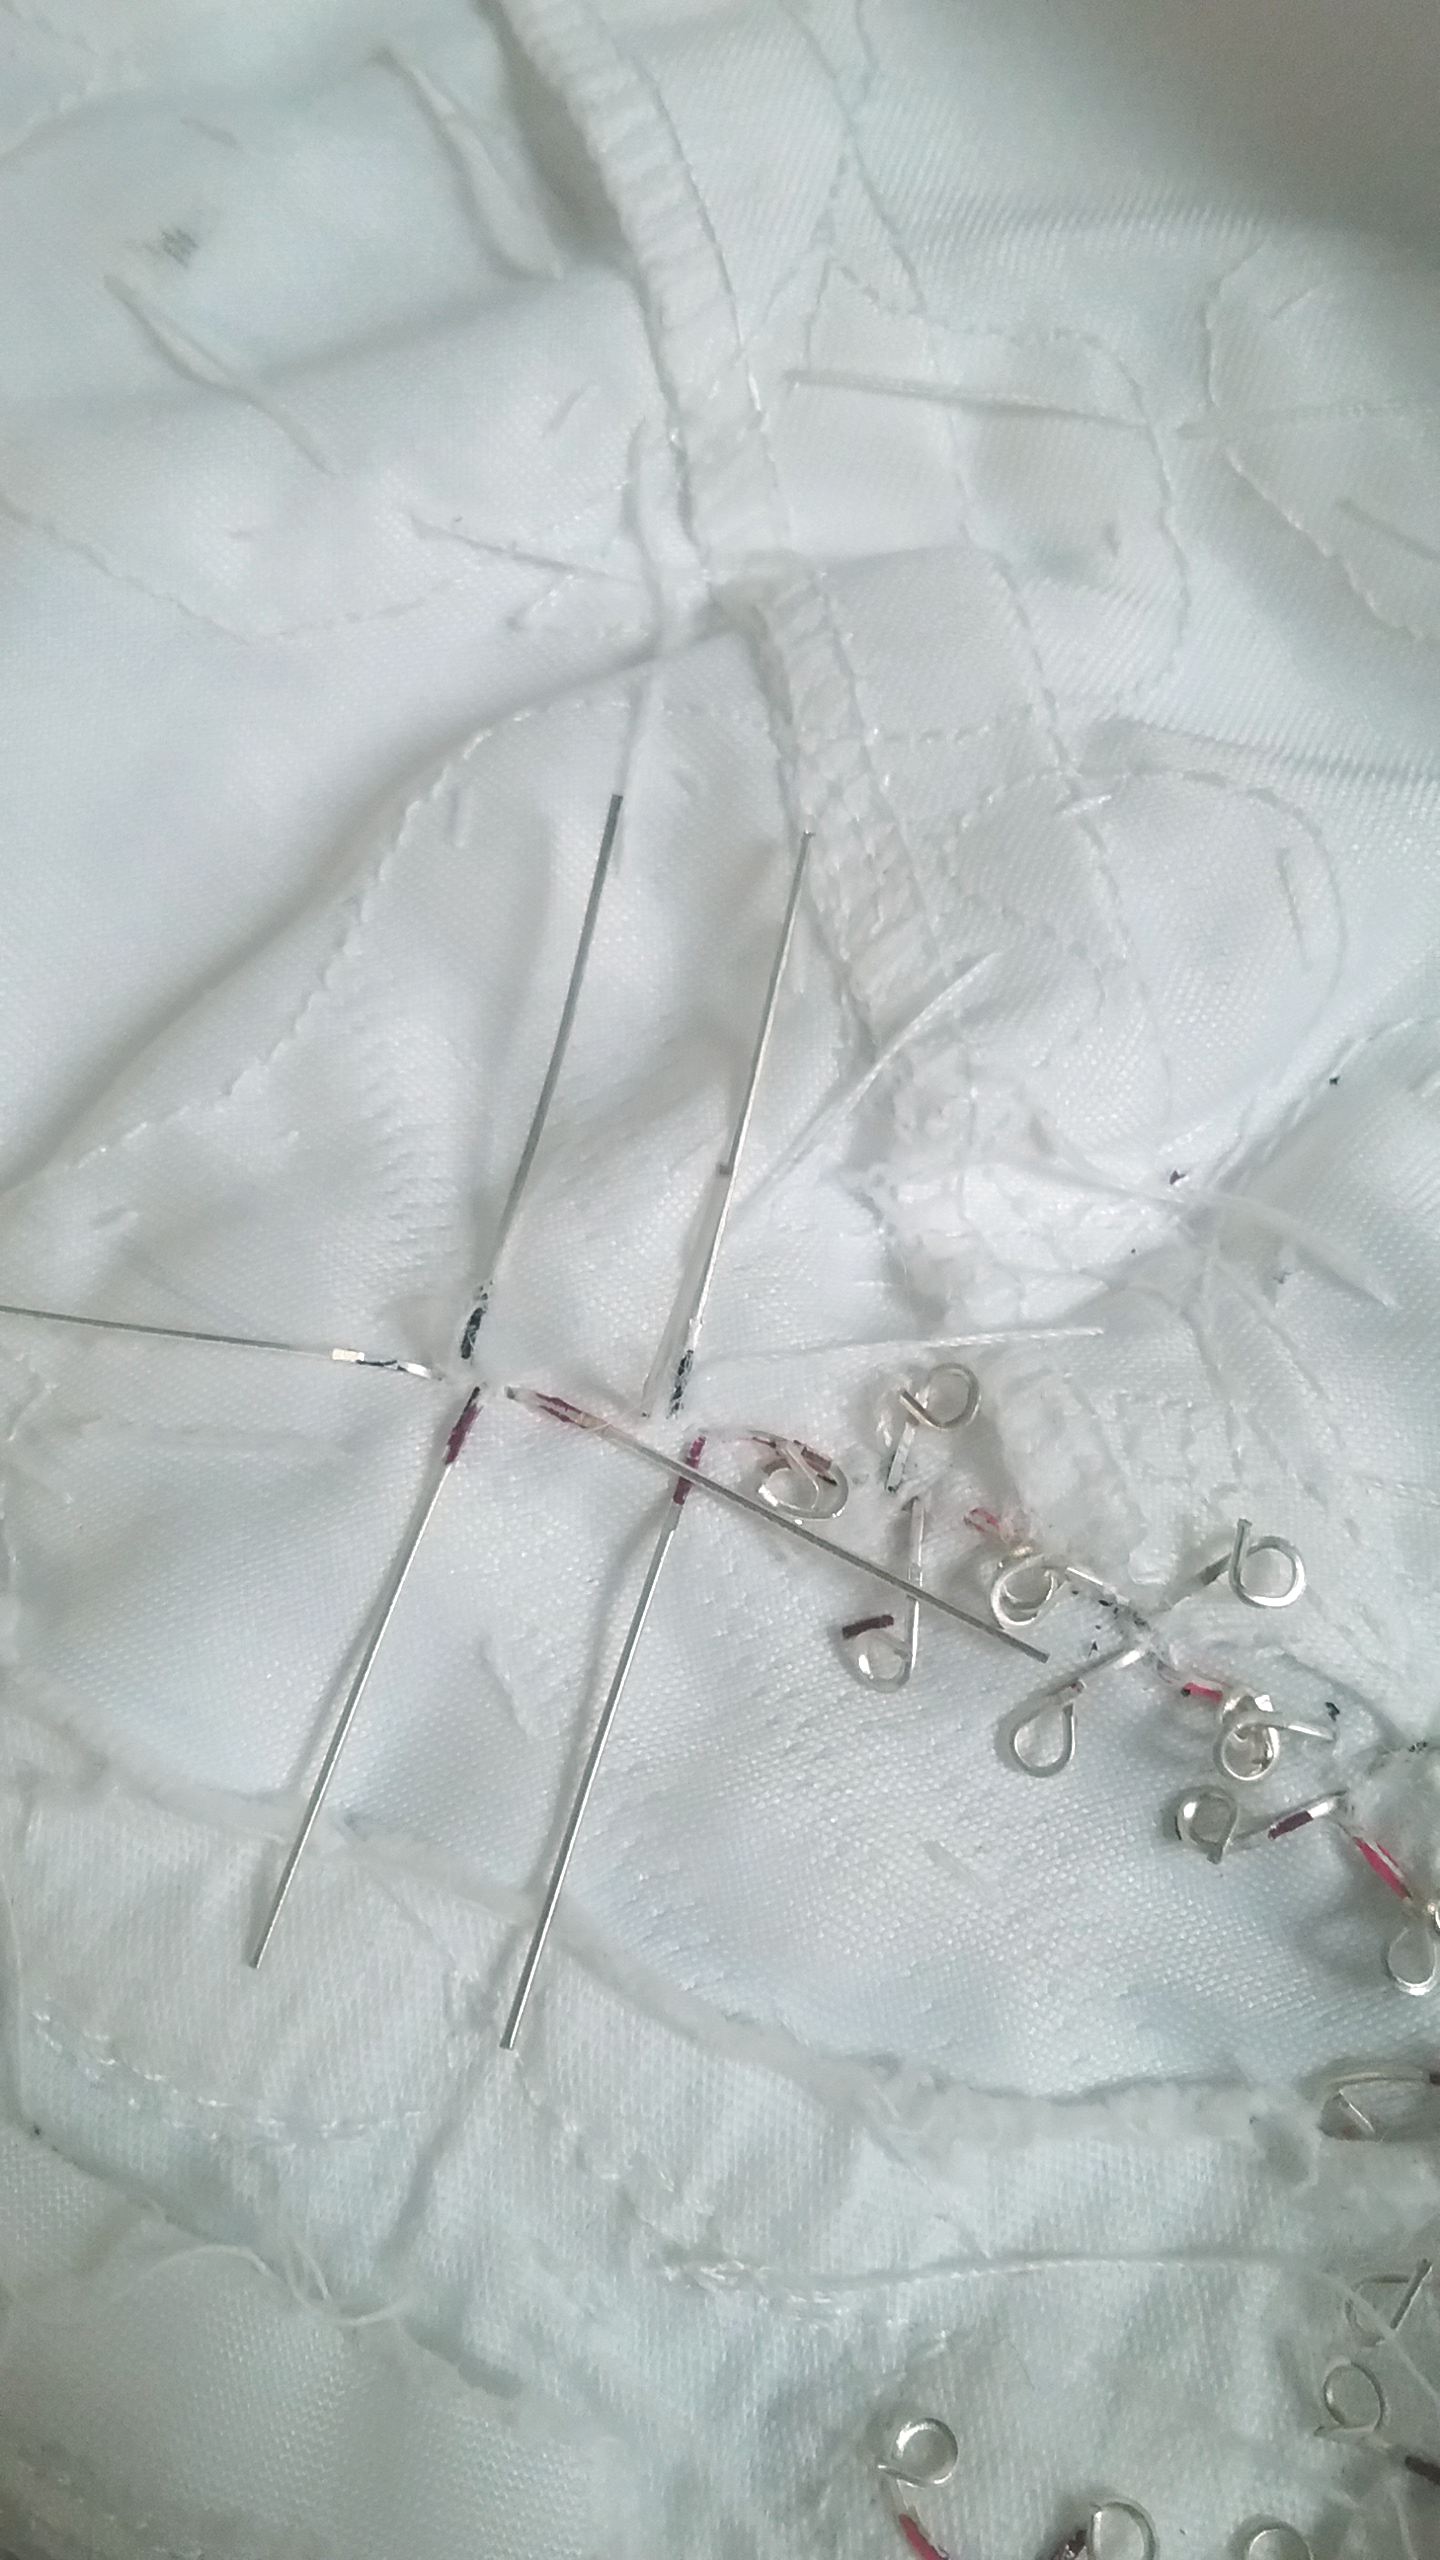
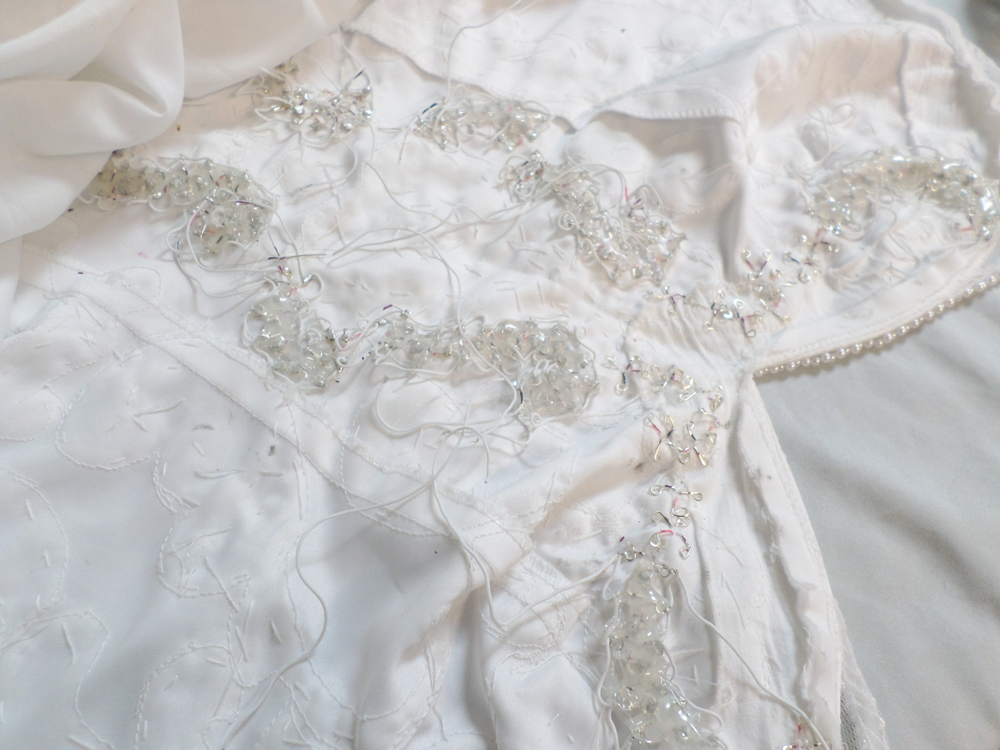
To prepare the LEDs, I used nail polish to color code each of the legs for when I poked them through the fabric. The ends weren't quite sharp enough to pierce through layers of the thick bridal fabric and occasional sequins, so I pre-punched the four holes using a large needle.
 After pressing the LED flat agains the fabric, I flipped the dress inside out and used pliers to bend the legs flat against the fabric to hold it in.
 To create an easier area to solder to, I spiraled each leg into a circular shape.
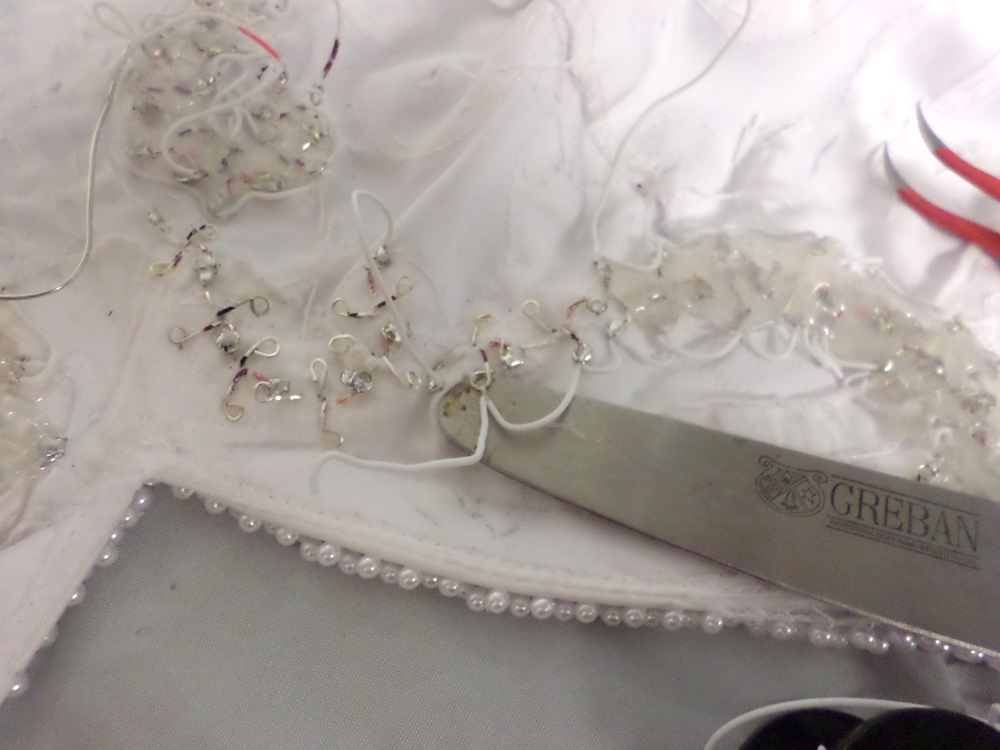
I configured the line of LEDs along the inside of beaded spiral details on the dress with all ground lines to the right, power to the left, and chaining the data lines along the middle. I then painstakingly soldered each row with silicone covered stranded wire.
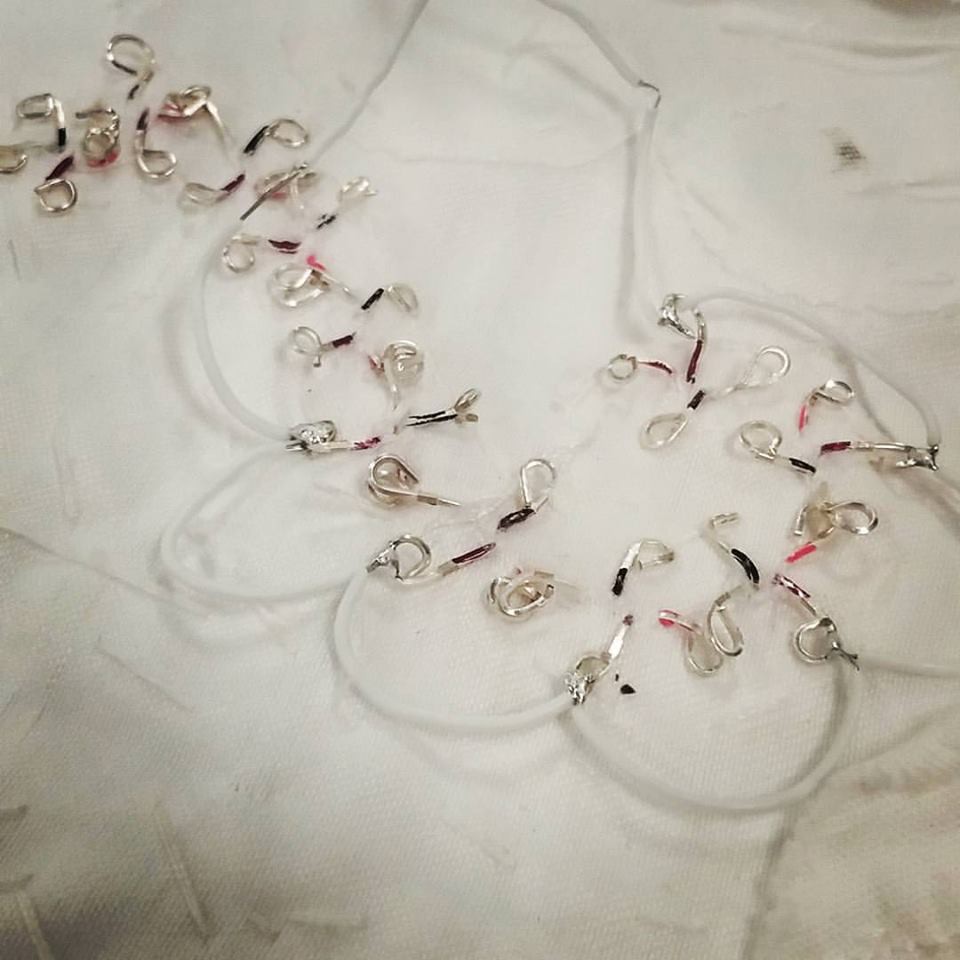
Pleased with how the first rows turned out, I continued to solder and test more and more until I ended up with two rows cascading down the dress, for a total of 94 LEDs.
To prevent scorching on the fabric while I soldered the LEDs together, I used a stainless steel spatula inserted behind the area I was working on.
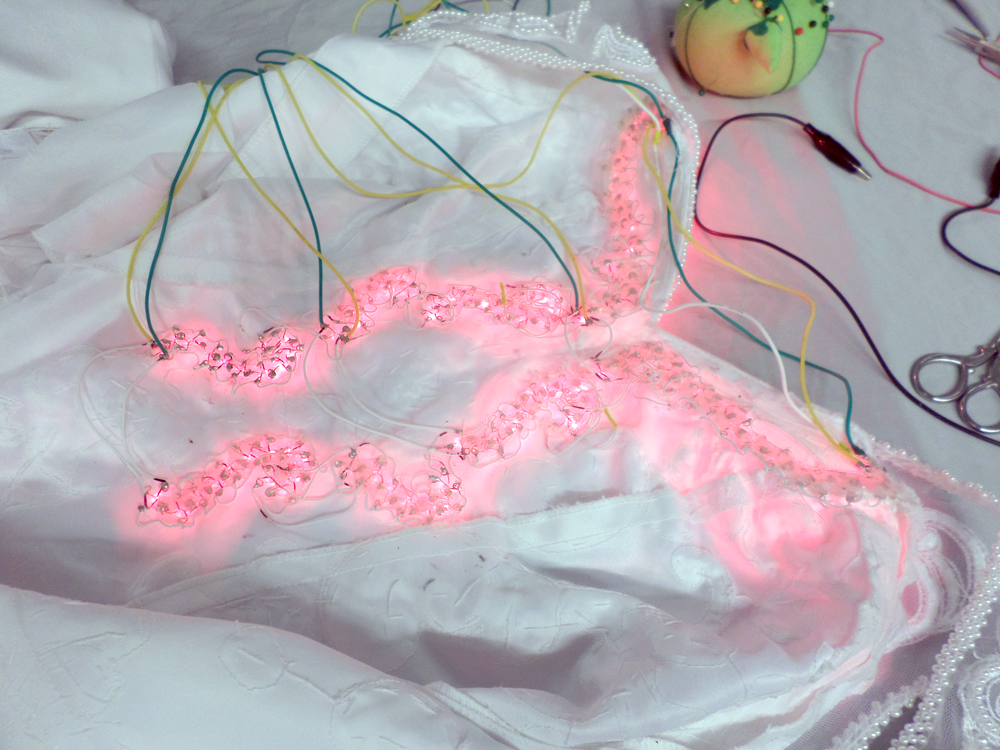
When turned off, the LEDs blended beautifully with the beading, I was really happy with how they turned out. The bodice of the dress had some structure to it (not quite a corset) that felt sturdy enough to discourage too much stretching or bending while wearing which would put strain on the LEDs.
To try and prevent any shorts I covered the whole thing in hot glue, a plan which I almost immediately regretted after some of the LEDs snapped near the base and needed to be pulled and replaced. Lesson learned.
I am now actively exploring options for creating breakout boards for these LEDs that will act as a baseplate but that are still small enough for wearable use. The LEDs can easily snap at the base and need to be replaced after a lot of folding or bending over.
Power Management Woes
After getting carried away with the LED install and short tests of each batch, I realized these things would be a hassle to power with the tools I had been using. My initial build of the dress tried to use a Qduino Mini and 3.7v LiPo which was pretty insufficient. Up until this point I had been testing using the USB connection to my laptop or a wall wart, and it wasn't until demo day that I tried it on battery power.
Not pictured in the above images are some capacitors I later placed at the neckline.
At the time, I was unable to get everything working consistently with the power source I had available for our big Halloween party at my office. The stress of a deadline (plus a last minute bout of the flu on the week of Halloween) left me in a fog where I was just not ready to hack on it anymore and ran out of time to grab alternative options for power.
I set the project aside for a time while I worked on upgrading the wand and building the wing accessory. The dress didn't fit me after some weight gain over winter 2018 so it was de-prioritized until I could wear it comfortably again. About a month before Halloween 2019 I began updating the project with some new hardware and battery packs that I had worked with for my wings build in 2018.
The latest version swaps out the original Qduino and RFM69 radio module I had installed for an all-in-one Feather M0 with onboard RFM69. I ditched the LiPo and I am powering the dress directly from the 5V USB pin and using a beefy 10,000 mAh Anker PowerCore USB battery bank that I had selected to power my wings which lasts through a full event without needing a recharge. The battery pack sits with a second pack provided for the wings and secured in a custom thigh holster underneath the skirt. This eliminates any pulling or weight on the fabric or wiring inside the dress. The LEDs are running at around 15% brightness to match the rest of my accessories in visibility and to reduce power consumption. They are still quite visible at this reduced brightness.
I recently wore the functional dress to work for Halloween 2019 and it works pretty well if I maintain perfect posture. Lots of bending shifts the LEDs enough that the data lines on the lower half of the bodice get knocked out of place and need repairing. I'm hoping to slowly work at replacing the LEDs with something more durable for future wear.
The frustration I felt with myself for starting this intense build that didn't work at first, then didn't fit for nearly two years was actually a great inspiration to think about other accessories that may be more durable and not as dependent on fit. A few weeks before my original 2017 Halloween deadline I began crafting a headdress for the costume and a few months later I created the wings. Stay tuned for future posts for more information on those individual builds.
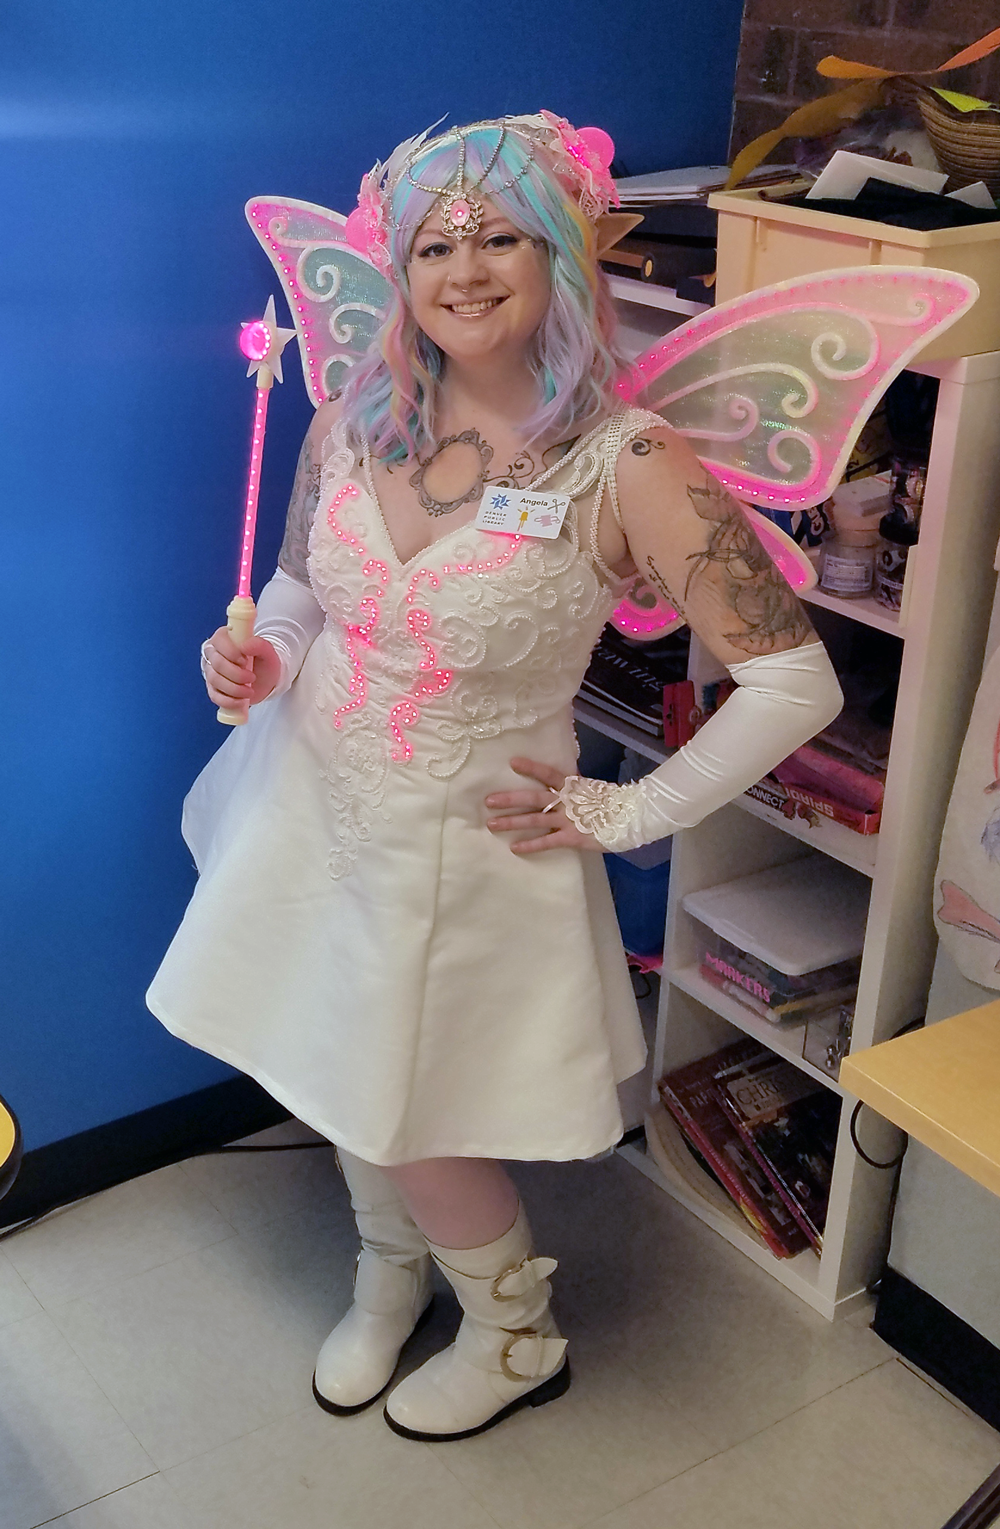
Current version of the dress. After initial LED integration I shortened the hem to give it a more casual and fun look. The flare and structure of the skirt works great to hide the battery packs on my thigh holster.
Discussions
Become a Hackaday.io Member
Create an account to leave a comment. Already have an account? Log In.