-
Removing the dampers
08/23/2021 at 17:42 • 0 commentsPrevious versions of the DRVR code would predict a course, move, stop and repeat. The time taken to start and stop the robot for each move was substantial.
This update runs the robot at 25% speed continually and updates the course every second. This has improved the traversal time from 15-20 minutes to less than 7 minutes. The video above is a 10x time lapse of one loop.
The choice of 25% speed for 1 second, was to keep the move time approximately the same (We were running 50% speed for .5 seconds) and to give the computation time to run (.2 sec) I also improved the performance of a few routines by using numpy functions version python loops. The computation time was taking around 1 second, before I made those easy changes.
One of my frequent pieces of advice holds true: Make it work first, then optimize. Using python loops was easy and let me understand the algorithm before I replaced it with numpy routines. It didn't matter until I started pushing real-time processing.
In the video you can see some oversteer by the robot where it zigzags a bit towards the grass and then towards the middle of the path where it should be going mostly straight. That's because the prediction algorithm isn't matching as closely as it should, which causes the turn calculation to over correct. The prediction algorithm relies on some hard coded numbers rather than being calculated based on the speed, direction, and time. I think that'll be the next refinement and allow me to dynamically change the speed. To do that I'm going to need to collect some measurement data and add some math.
The path planning is also very simplistic. While it goes around the bench nicely in this video, it sometimes cuts it too close and catches a wheel on the bench. It's a bit hit or miss. I need to increase forward margin, so it starts turning sooner in a future update.
On other notes, I've started playing with ROS (Robot Operating System). It appears to include a lot of useful functionality. I'm still investigating, but once these changes are working I may move to that framework.
-
Follow your path
08/09/2021 at 18:25 • 0 comments![]()
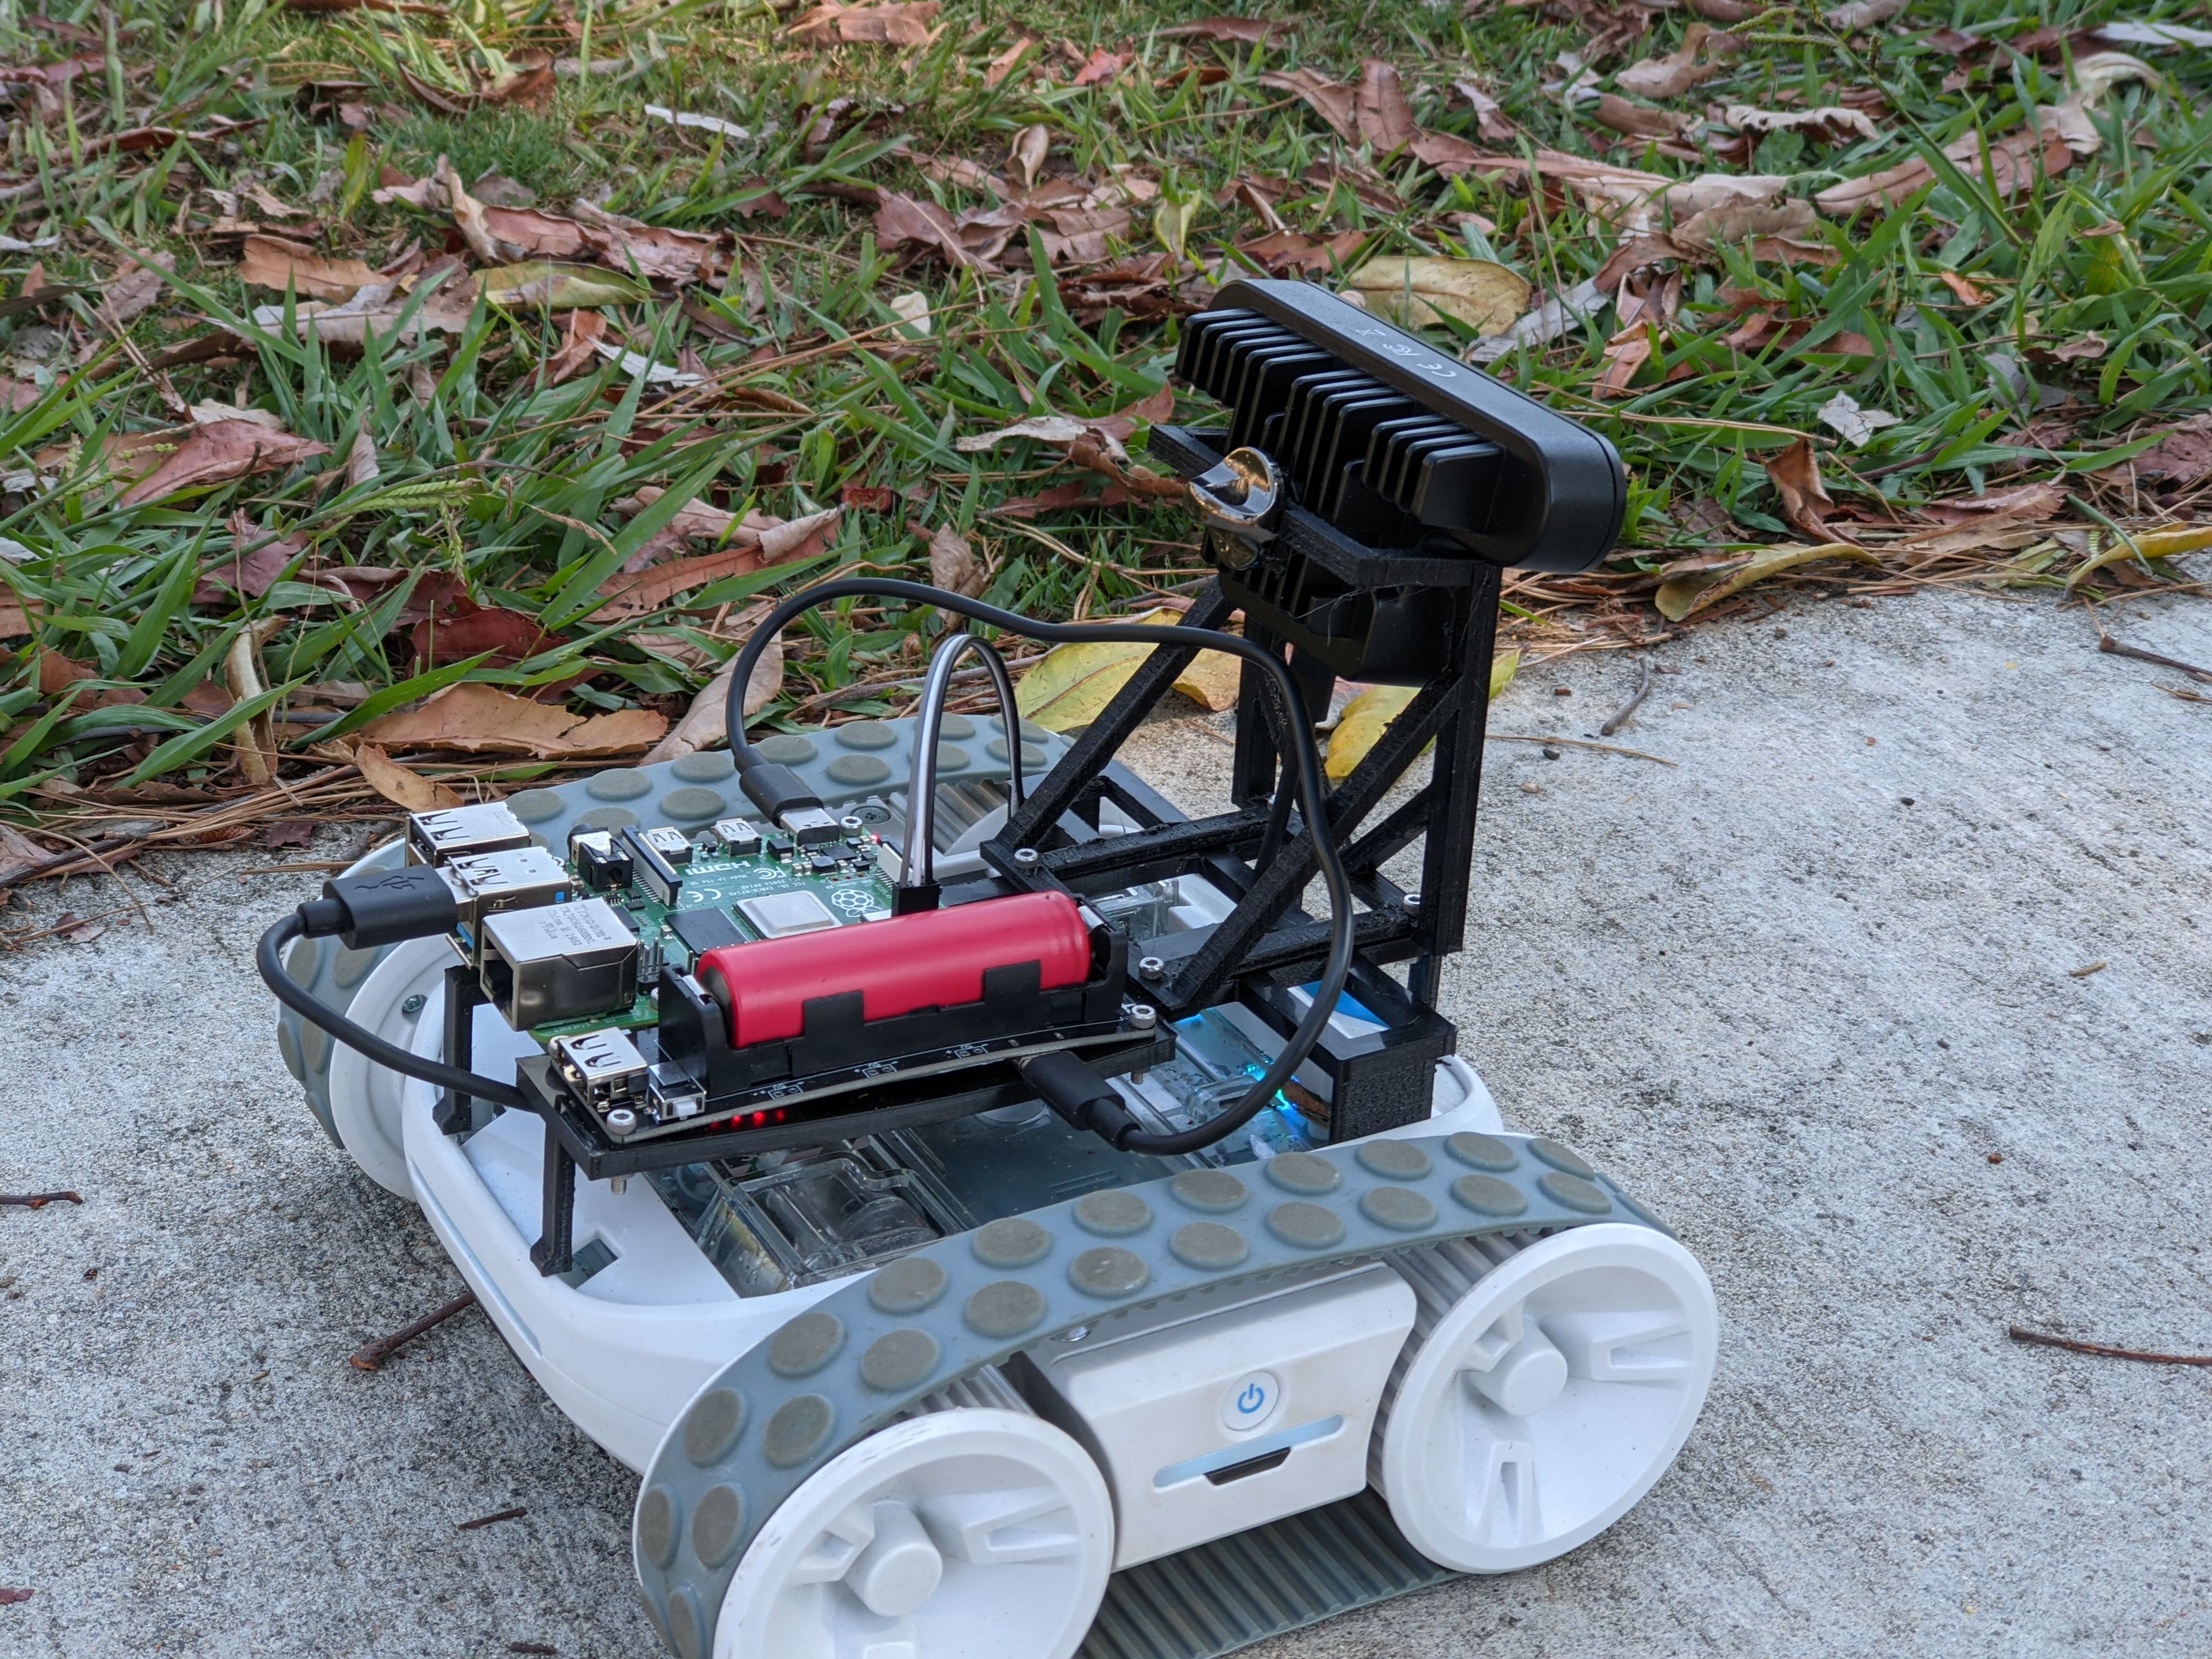
This is the updated design for the DRVR. We're still a bit overweight, but not much. The single 18650 cell can run the Raspberry Pi 4 and the Oak-D for about an hour, which is enough. The 3D printed parts are now very stable.
The path planning is improved in this version of the code improves the speed driving around the park to 15-20 minutes. Two big changes are included. First, by improving the stability of the camera we could remove the time the robot was spending waiting for everything to settle after each move.
The other change is that the previous code treated turning and distinct operations, and only knew how to turn left or right by a few degrees. It would:
- Take a photo
- Run machine learning to segment the image
- Find the left edge and decide if we're lined up OK to move forward.
- If we're OK, drive forward
- If we're not, the turn left 3 degrees or turn right 3 degrees
- Wait for things to settle
The new version replaces step 3 and removes the delay in step 4
- Take a photo
- Run machine learning to segment the image
- Find the left edge and decide where we want to be after the next move
- Calculate the angle change required to hit that point
- Turn and drive at that angle
There's still a bit of a delay between each step it takes, so I need to dig into that a bit more and figure out where it is coming from. The path planning still needs more work. It caught a wheel on the bench (its nemesis) but managed to correct itself. It should give the bench a wider birth.
-
That's Better
07/15/2021 at 22:27 • 0 commentsA quick update to the path planning code and DRVR can now make it around the park without human intervention. It's currently taking about 30 minutes to make a loop.
There were a couple improvements to the path planning algorithm to change the target line if we're not finding the path (like going uphill) and making sure there is a reasonable amount of path and not just a small section. This avoids the robot thinking it can sneak behind the bench near the grass which isn't nearly large enough.
There's a lot of room for improvement. The next ideas are:- The camera perched on vertical stilts. That means every time the robot moves, the camera shakes back and forth. I current have a .25s delay after each move to let things settle, but putting some supports that prevent forward back movement should improve that.
- The robot currently turns left or right 3 degrees, then waits 0.25s, and takes another picture to re-evaluate. Those small increments are tough for the RVR base. Sometimes it doesn't work, so the robot repeats the command, and eventually it works, but then it has overshot and corrects by turning the other direction. Each of those moves is also time consuming. I can use the image with a small bit of trigonometry to calculate a precise move instead of making multiple small steps.
- In fact, I can optimize turning further by combining the turn with the move command, since it takes a direction argument and time argument.
- The code tells the RVR to drive for 1 second, but that means the distance can be inconsistent. We could look at the inertial reference to make sure we've moved the desired distance, instead of always using 1 second.
- DRVR takes a photo at each step and writes the camera image and the analysis to files. Doing that asynchronously or making that an option would also improve performance.
We're not down to the 10 minute loop the previous version of the robot could do, but we're using tighter controls and I believe have potential to go much faster.
-
A Walk Around the Park (redux)
07/14/2021 at 01:25 • 0 commentsDRVR v2 is now making it around the park on its own (with just a few nudges from me). The loop is taking about an hour and luckily that's just about the limit of the power of the 3500mAh 18650 battery I'm using.
The video above (about 10x realtime) shows the camera image and a colorized version of the segmented image. The robot is trying to keep the grass at a consistent distance from the left edge about 3 feet in front of it.
- Green is grass
- Red is the path
- Blue is a bench
- The horizontal white line marks a point about 3 feet in front of the robot
- The marks the range of legal values for the grass on the left of the robot
- The L, R, S in the upper right of the image is the predicted action to turn left, turn right, or go straight.
The path planning is fairly simple at the moment. It tries to keep the left edge of the grass between the two vertical lines by turning left or right in small increments. When it is between the lines it goes straight.
There's a few interesting bits in the video:At 0:39 DRVR approaches the bench.
At 0:41 The grass is at the right place, but the code notices the bench and turns right until it's in the valid range.
Starting at 1:06 the algorithm falls apart because we're going uphill and the target line is above the horizon. I should angle the camera down to avoid that and perhaps move the target line closer when the robot is on an incline. It got stuck and I had to manually give it a few instructions.
At 1:47 there's a different (similar) path planning problem. The left edge of the grass is no longer visible 3 feet in front of the robot. It's locking on to the grass on the far side of the path and spinning to the right. That is going to require some smarter rules to understand the geometry.
I'm moving the RVR base in small increments (3 degree turns, 1 foot movements). That seems to be difficult for the RVR. The Pi sometimes tells it to turn and nothing happens. It accumulates the desired heading and eventually the RVR makes a larger turn and catches up to the desired position. I believe I'd be better off if I calculated the correct heading from the image and told it to turn to that. That would consolidate several small turns into one larger one and avoid some of the static friction.
Overall I'd call this a successful run. It's way slower than the previous generation robot, mostly because it is trying to steer a tighter path and moves in 1 foot increments instead of 3 foot. The Oak-D should be able to process the data in real-time, but since it is taking pictures each frame (to make the video you saw above) there are delays to avoid camera shake and to write the images to the SD card. I'm sure I can improve the performance.
-
Power & Weight
07/13/2021 at 19:18 • 0 comments![]()
I ran into an unexpected issue with V2 of the DRVR.
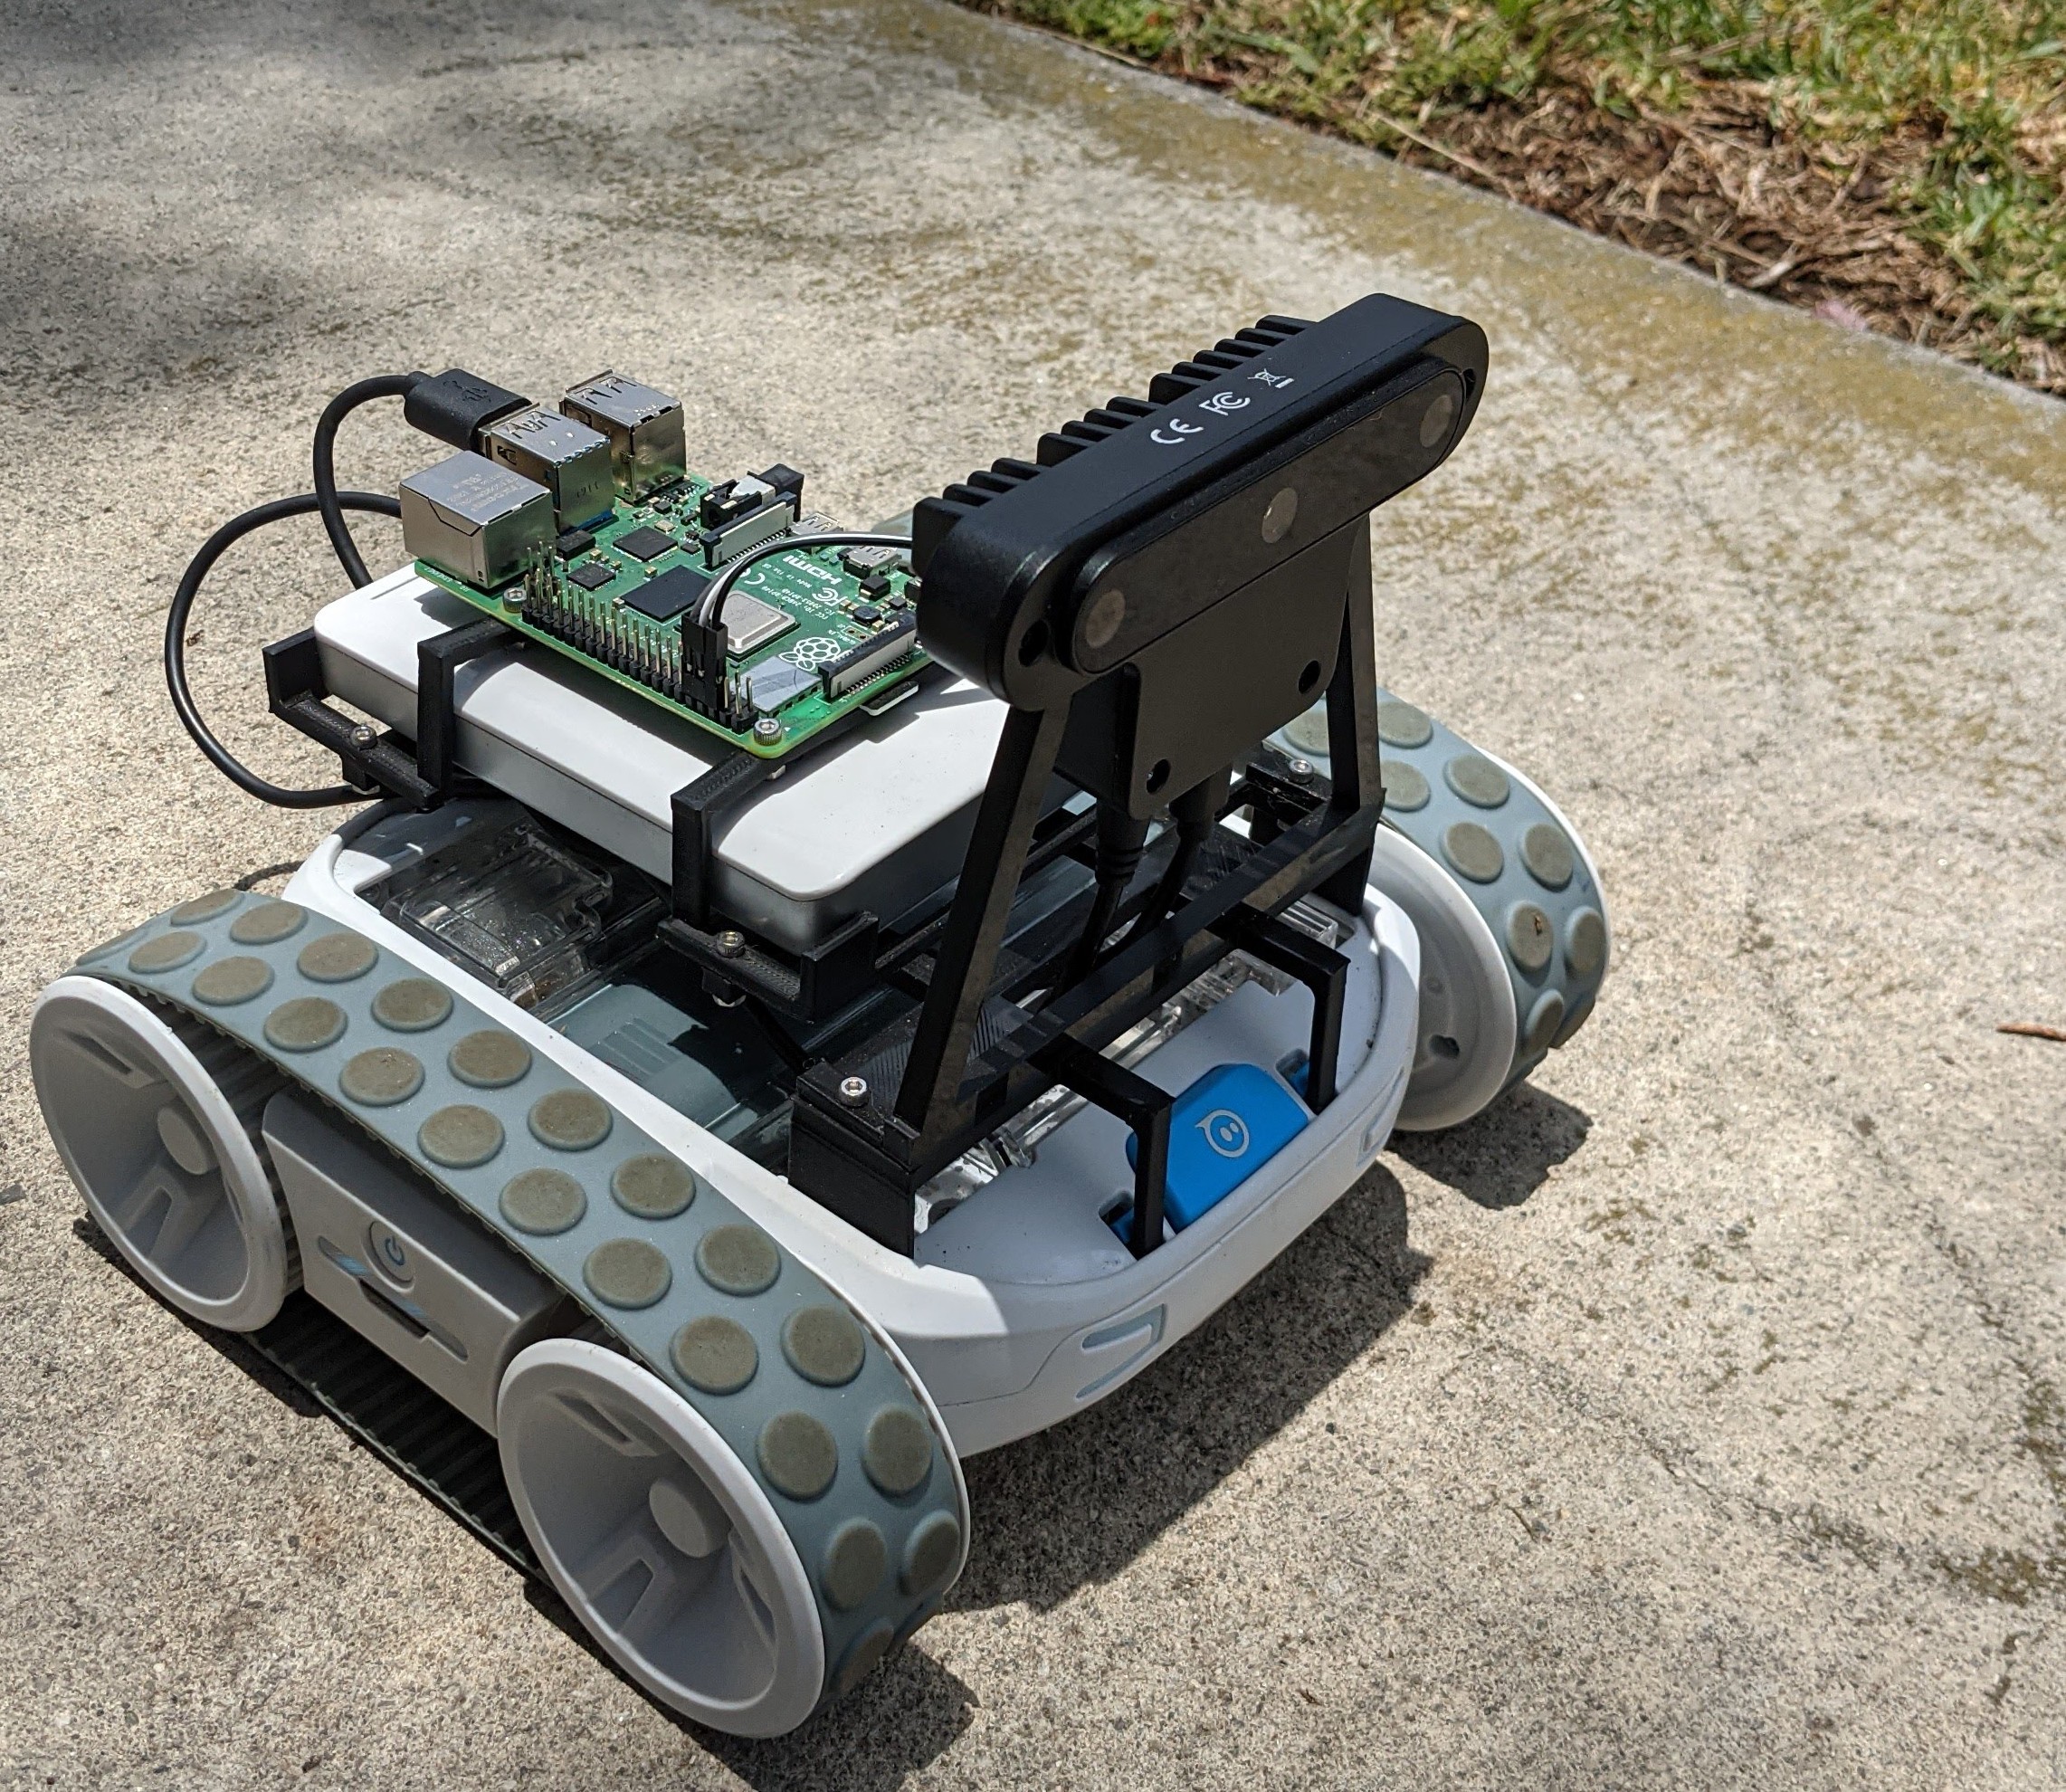
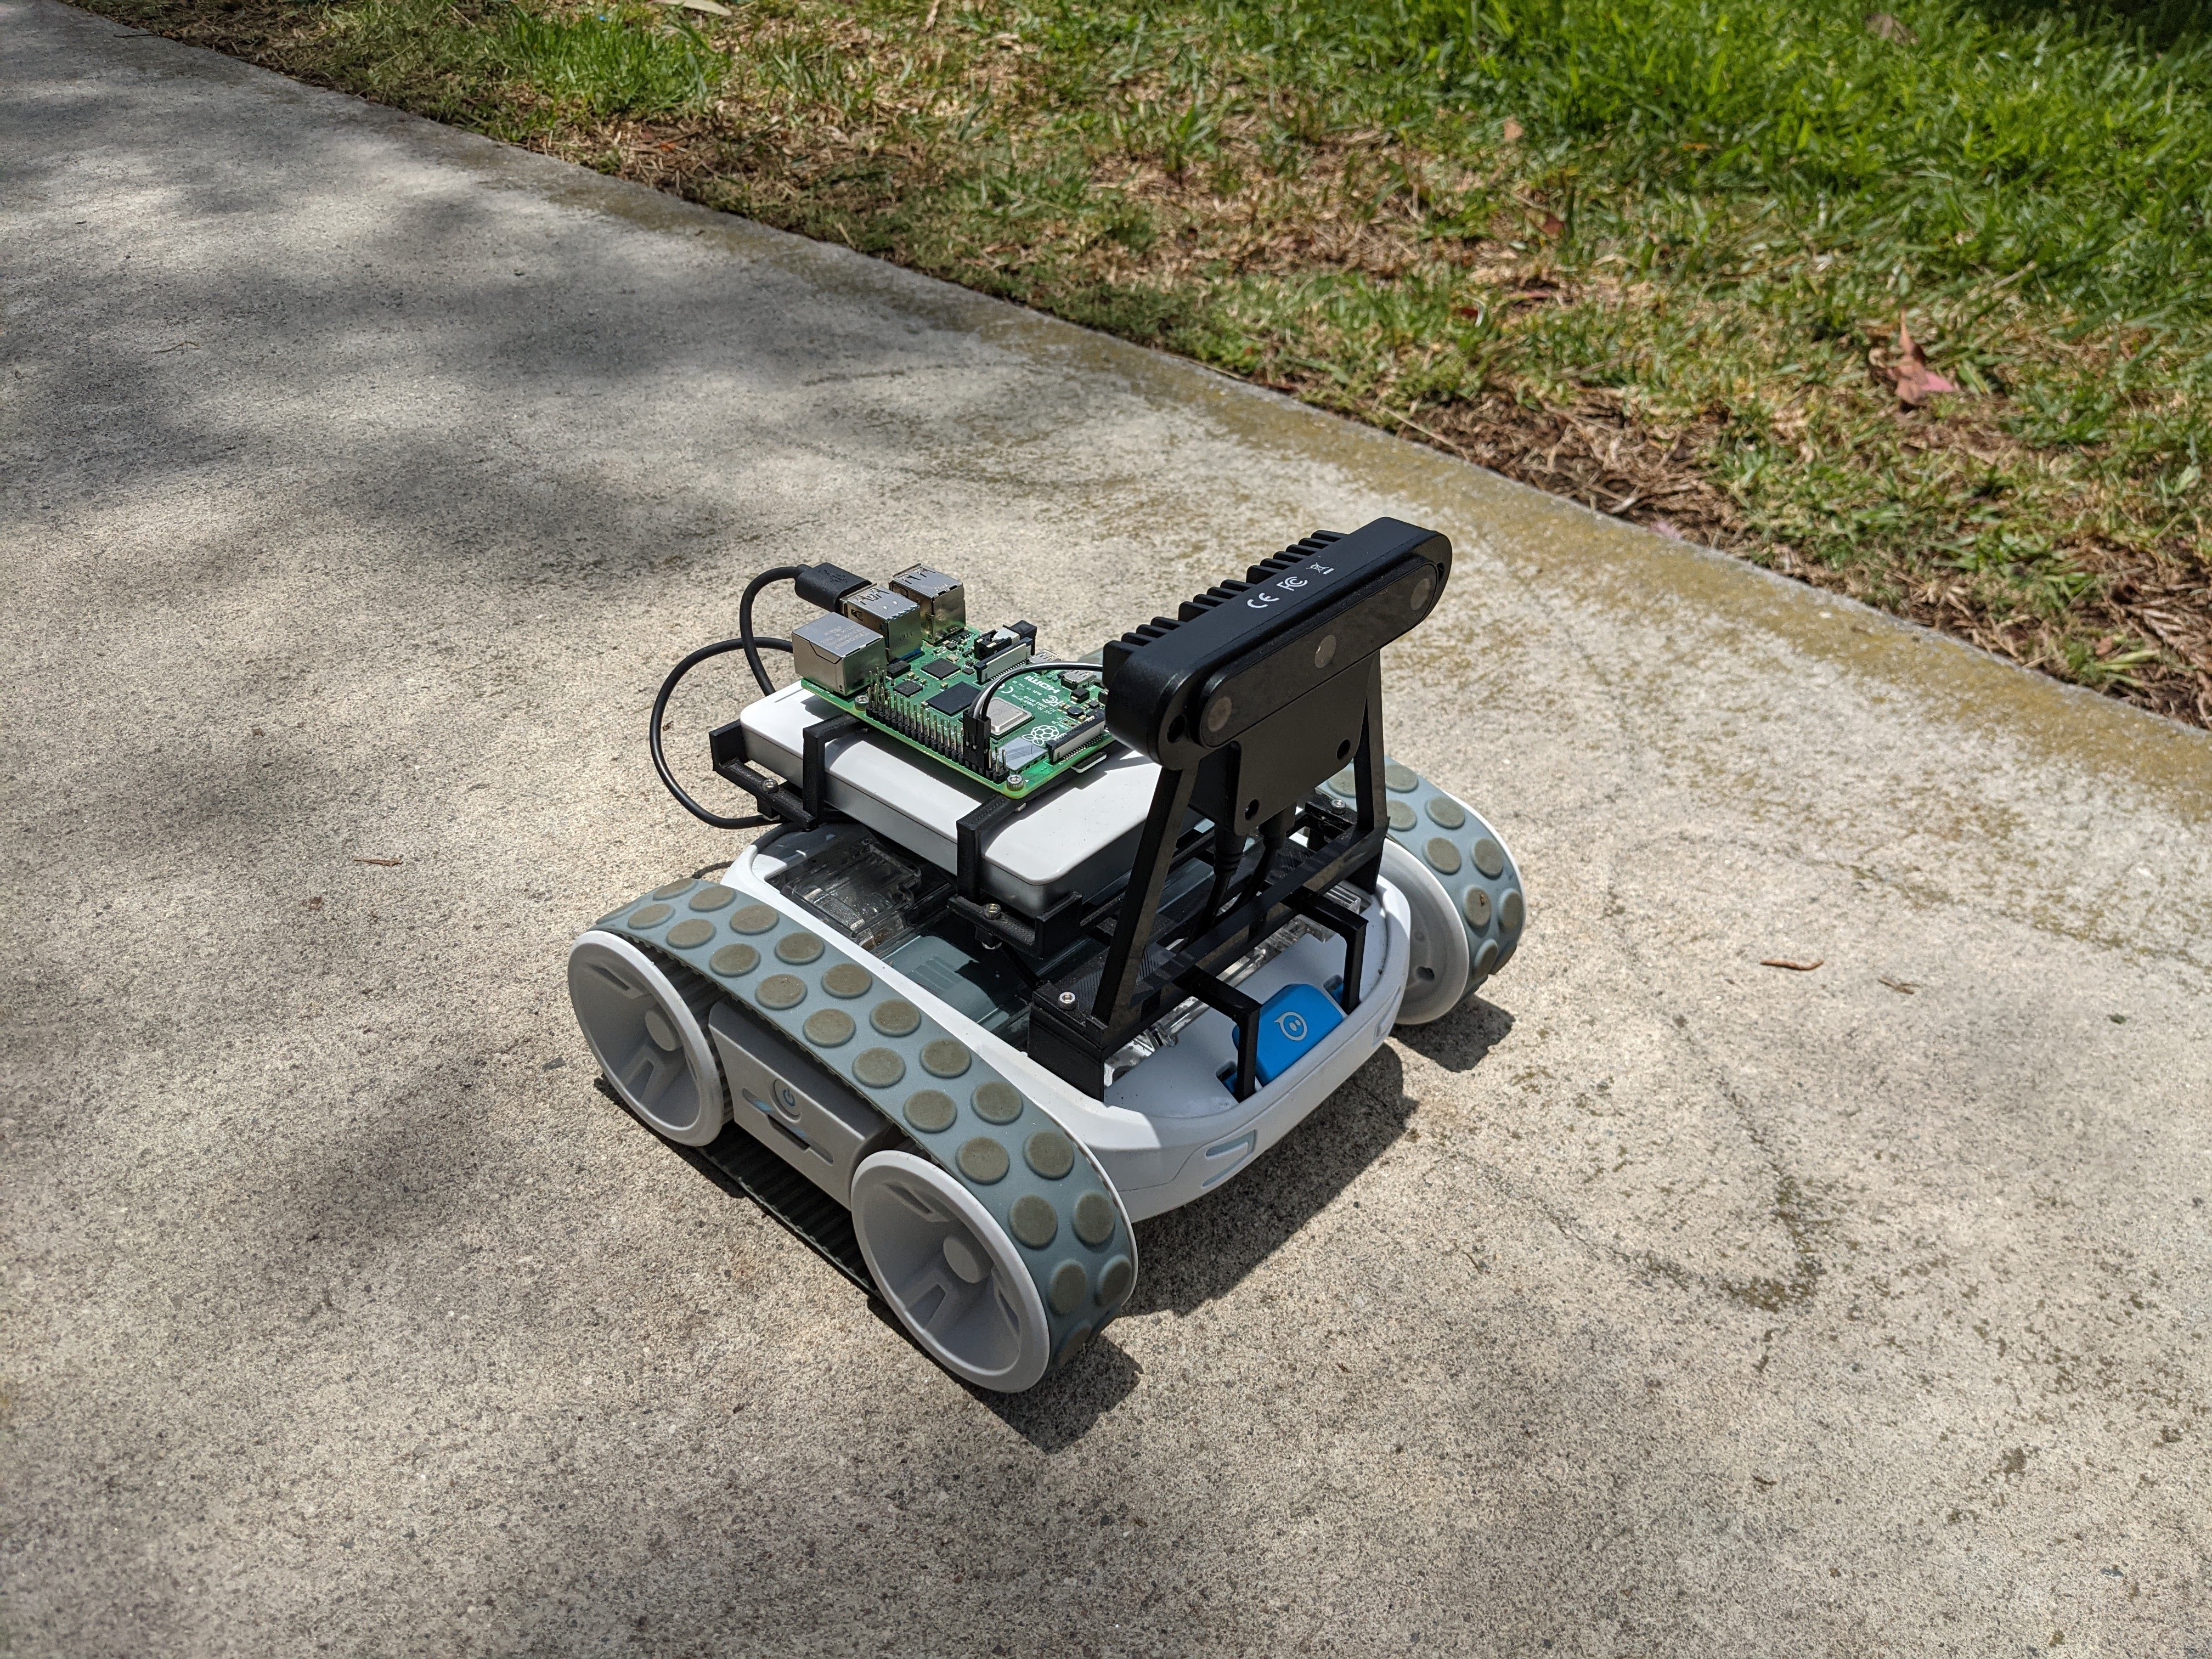
If you look at the image I posted recently, DRVR v2 is comprised of the following:
- RVR Base
- A Raspberry Pi 4
- An Oak-D AI Camera
- An 18000 mAh battery
- Some 3D printed plastic parts and cables
When I tried to run the robot in that configuration it struggled to turn and move. After a brief period, the RVR Base started flashing yellow and orange which is an overheat warning. It then waits for a mandatory cool down period. Oops.
Doing a bit more research, the RVR Base has a maximum weight capacity of 250g. The current configuration is 550g. 300g for the battery and 250g for everything else.
Why do I have the extra battery? I knew that the Raspberry Pi and the Oak-D could consume a lot of power. Up to 5v at 3A. The battery has a 1A port and a 2A port so I could feed the Oak-D 1A and the Pi 2A.
The RVR has a USB port you can use for power, but that's limited to 2.1A. I tried running that to the Pi and powering the Oak-D from it. The RVR would run for a few steps and then eventually stop communicating with the Pi. I suspect a large power load from the base eventually caused a brown out of some sort.
To verify my software was working and to feel like I accomplished something, I ran the robot while holding the battery in my hand, and running a USB-C cable to the Pi 4 for power. Sure enough that worked really well. It did look like I was walking the robot with the USB cable acting as a leash.
I tried a smaller battery pack which was 200g. The robot worked better in that case. Still stalling a bit, but it would have a hard time with the hills in the park. 50/50 whether it would make it.
I've now got a small power supply that takes a single 18650 cell. That's down to 67g, I left that running the robot code in my office and it drained the cell in about 2 hours.
I think that will be light enough to remain on the robot and still provide enough power for the Pi 4 and Oak-D. We'll see in my next run.
-
DRVR V2 (Coming Soon)
07/04/2021 at 18:48 • 0 comments![]()
I wanted some more power and smarter AI processing on my DRVR robot which led to V2. The Raspberry Pi has been upgraded from a 3 to a 4, but the real improvement is the Oak-D camera. This module has an Intel inference engine included in the camera itself. The new code is doing image segmentation to recognize the grass and the sidewalk on the camera, then does path planning to pick a route based on the segmented image on the raspberry pi.
The code has been updated in GitHub, but the path planning needs improvement and the UI needs to be updated to match. More reports coming soon.
-
Running on Auto
01/11/2020 at 19:04 • 0 comments![Updated Robot Updated Robot]() This is a big update to the code base with a many improvements. The big news is that it is running really well. It's fast, mostly correct, and has a much nicer interface. It's now down to 1.6s/step so it can make it around the park in less than 10 minutes with a bit more than 3 minutes spent running the motors to move. You can also do a full data collection run with all the photos in less than 30 minutes.---------- more ----------
This is a big update to the code base with a many improvements. The big news is that it is running really well. It's fast, mostly correct, and has a much nicer interface. It's now down to 1.6s/step so it can make it around the park in less than 10 minutes with a bit more than 3 minutes spent running the motors to move. You can also do a full data collection run with all the photos in less than 30 minutes.---------- more ----------The big list of improvements in this release:
- Using the video_port on the camera with JPEG images allows fast picture capture which was a big portion of the time.
- Cleaned up the control loop to make sure we did prediction and actions correctly. There were cases where the loop can stall and multiple actions could overlap causing incorrect behavior.
- The same angular app at http://HOST:8080/web/index.html can now be used for either autonomous or data collection.
- The control loop now runs without any additional delay.
- Doing a training loop down the middle of the path which always said "Turn Left" did a lot to improve the ML. Before it would wander out to the middle of the path and have left/right cycles which triggers the work around.
- Actions into automatic mode have strong probabilities.
- Training sets can now have custom routines for generating labels. That's allowed me to drive down the middle of the path and having the labels all say left.
What's next?
- The bench is still my nemesis. It will drive straight at it, so I have to manually drive around it. I suspect I just need a lot more training material around the bench to reinforce the need to move to the middle of the path, instead of follow the left edge.
- I'm curious what would happen if I flipped all the images horizontally and flipped the left/right and did a training run. I suspect that would allow it to drive along either the left or right side of the path, but it might zig zag.
- I could increase the speed and shorten the duration of drive steps to improve the speed around the park.
- I should make the new interface the default and remove the original interface.
- It's getting to the point I should test different models, so being able to switch models from the user interface would be a nice feature.
- If others want to contribute to the project, I'm going to need to create more documentation to get them started. Now is a good time to jump in if you're interested.
-
Around the Park in 30 Minutes
12/21/2019 at 19:51 • 0 commentsPerformance of the robot in driving only mode is about 3x better. The robot can drive itself around the park in about 30 minutes instead of 90. The vast majority of the time is now spent while RVR is executing motion commands. More details below.
---------- more ----------I made a several important changes to improve performance:
- Stop taking pictures. There's no reason to take all the photos when we're just trying around the park. Those 7 pictures took 15 or 20 seconds.
- New angular app is much nicer and is continually sending commands without a delay, instead of waiting a few seconds to allow a human to reject the command before sending it.
- Switching from InceptionV3 to MobileNetV2 saved several seconds.
- Lowered the delay after sending commands to the RVR.
- The code now detects left/right cycles and works around them.
A few caveats:
- MobileNet takes longer to train than Inception. Since that's a one time cost, it's not a big issue.
- My current MobileNet isn't quite as accurate as the Inception network was. I will have to try letting it train longer and see if that can be improved.
- The robot will occasionally get in a cycle of left/right operations. Because the robot turns 5 degrees at a time, it's possible to cycle past the optimal position to go straight. My solution is to detect which of the two options (left or right) has the best straight acceptance, and move straight when that occurs. This quickly works around the problem at the cost of being somewhat out of the "optimal position".
- There seems to be some sort of buffering issue in the control portion that was exposed by lowering the delays between commands. The symptom is that commands sometimes take a long time to execute, a command executes for a short period, pauses, and then continues, or a few commands fire off in a row.
It's 185 steps to go around the park, but that's not counting the left and right turns. My guess is that it's closer to 300 commands, which means it's taking an average of 6 seconds per operation. It's clear when the operations are flowing smoothly that we can do a move and a predict in less than 3 seconds.
It seems that if we can improve this buffering/control issue it should be possible to double the performance. I think that's the next thing to look in to.
-
A Walk in the Park
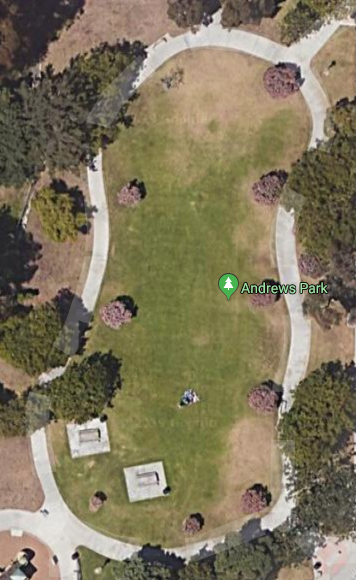
12/04/2019 at 20:24 • 0 comments![Park Path Park Path]() Yesterday my autonomous robot successfully drove itself (*) around the park. 90 minutes to do a loop. There's more information on what I've done and my plans below.---------- more ----------
Yesterday my autonomous robot successfully drove itself (*) around the park. 90 minutes to do a loop. There's more information on what I've done and my plans below.---------- more ----------
One detail I realized is that the image I was taking at 10 degrees left of the current path was problematic. I defaulted to including that image in the "turn right" class, but in many cases going straight when seeing that picture would be a perfectly valid choice and would often result in the robot following the left edge more closely.So this time when I ran my training, I left out the 10 degree left images all together. Training with the 3 previous loops around the park took about 60 minutes with images on an SSD and a K80 GPU. I got to about 93% accuracy on the validation set.
Taking this to the park, I ran the existing code which takes all 7 pictures, shows me the predictions, and then waits for me to take action. It's about 185 steps around the park and this cycle takes about 30 seconds. So a 90 minute loop.
(*) There were about a half dozen spots in the loop where I had to correct the behavior of the robot. In a couple places it would get caught in a loop doing repeating left, right cycles. I noticed that often the drive straight choice was a close second option in one of the two cases. Therefore I believe this can be solved by noticing this pattern and picking the drive straight case in the correct position.
My robot's other nemesis is a concrete bench that sits on the path near the bottom right of the image. That spot requires that the robot move to the middle of the path to traverse the bench, then return to the left edge. It is learning the behavior, but is not quite there yet and needed a couple human "nudges."
My goal at this point is to lower the lap time. There's a few modifications that should make a big improvement.
- Don't take all 7 pictures. Turning, waiting to stabilize, and storing the images are time consuming.
- Don't wait for human intervention. Give the operator a moment to veto the operation, but trigger the next step automatically.
- Currently the prediction loop stores the image on the SD card, then reads it back to run predictions. Keeping the current image in memory should be faster.
- I'm currently training an InceptionV3 network for the image processing. That network is large and slow to run on a Raspberry Pi. I'd like to try using MobileNet V2, which should remove a few seconds per iteration.
- A bit more training material may handle a few of the problematic cases better.
I think getting operations down from 30 seconds to 10-20 seconds should be doable pretty easily. -
Successful Deep Learning
11/29/2019 at 19:59 • 0 commentsThe DRVR code base and robot can now be operated with a cell phone to collect training data, and the training results in a neural network that produces what I think are good results. The code is in the git repository.
---------- more ----------The DRVR is operated in steps where it drives forward for 1 second at half speed, then takes 7 photos (3 left, 1 straight, 3 right) which are used in the machine learning process. The web interface lets the operator adjust the direction left or right, and trigger each step.
It's about 200 steps to drive around the park near my house. That results in 1400 images that can be automatically labelled as left, right, or straight. These images are used to train the InceptionV3 network.
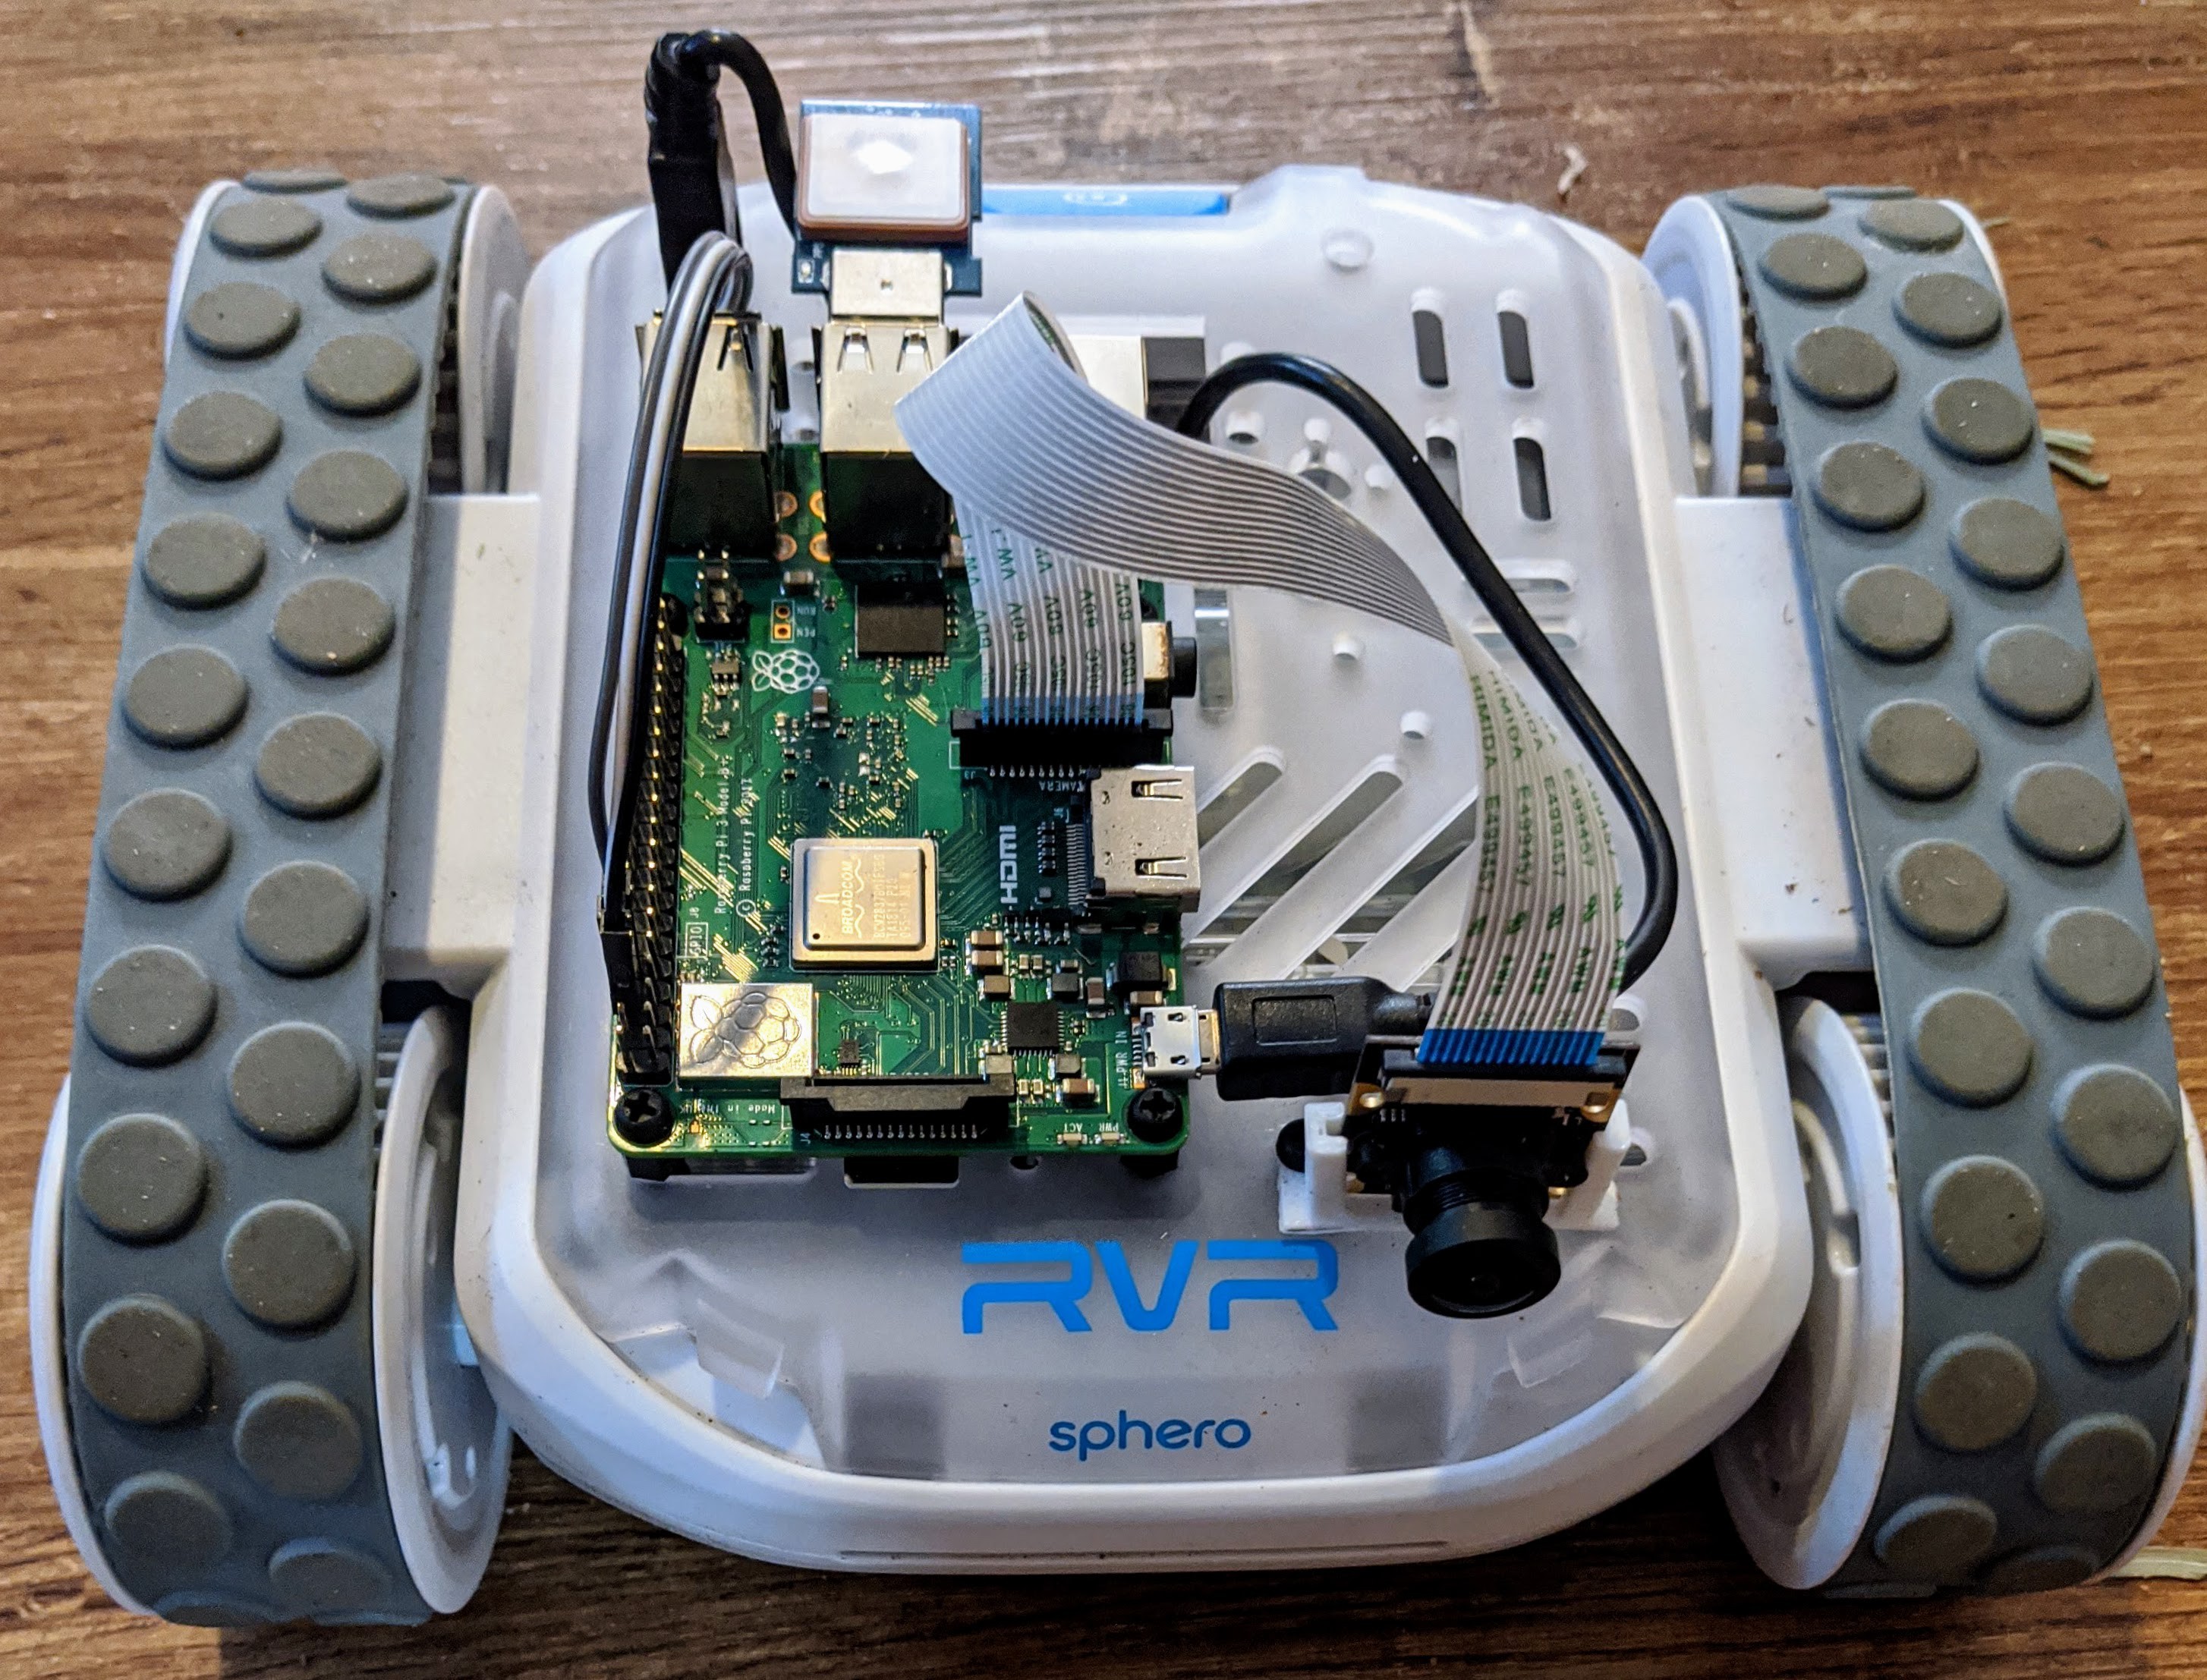
I've done this twice, one with the standard Raspberry Pi Camera which as approximately 40 degree field of view in portrait mode. (Portrait mode was a mistake on my part with the 3D printed holder) driving down the middle of the sidewalk. You can see a time lapse of the path I choose here
The second run I replaced the camera with one that has 160 degree field of view where I drove it down the left side of the path. Timelapse:
In both cases the machine learning algorithm was able to reach approximately 92% accuracy using the automatically labelled images. Reviewing the errors, the choices made by the algorithm seem to be "reasonable" choices such as choosing to drive straight when faces +/- 10 degrees off the "optimal" path. I'm surprised the narrow field of view and wide field of view performed equally well so I need to investigate that further.
At this point I'm excited to update the code to allow the system to predict a choice and have the operator approve the action.
 Daryll
 This is a big update to the code base with a many improvements. The big news is that it is running really well. It's fast, mostly correct, and has a much nicer interface. It's now down to 1.6s/step so it can make it around the park in less than 10 minutes with a bit more than 3 minutes spent running the motors to move. You can also do a full data collection run with all the photos in less than 30 minutes.
 Yesterday my autonomous robot successfully drove itself (*) around the park. 90 minutes to do a loop. There's more information on what I've done and my plans below.