ElephantJay
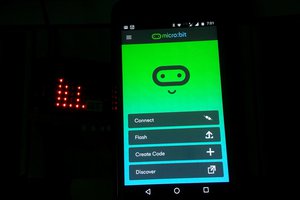
Tiny:bit microbit robotis a robotic car for the micro:bit education market.
It is compact, easy to assemble, and easy to move in tight spaces. The Tiny:bit smart car is based on the micro:bit development board design and uses the online code programming of MakeCode Editor.


 talha
talha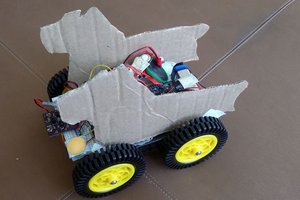
 Orlando Hoilett