 joey castillo
[GitHub] [Patreon] [Mastodon] [Mailing list]
0%
0%
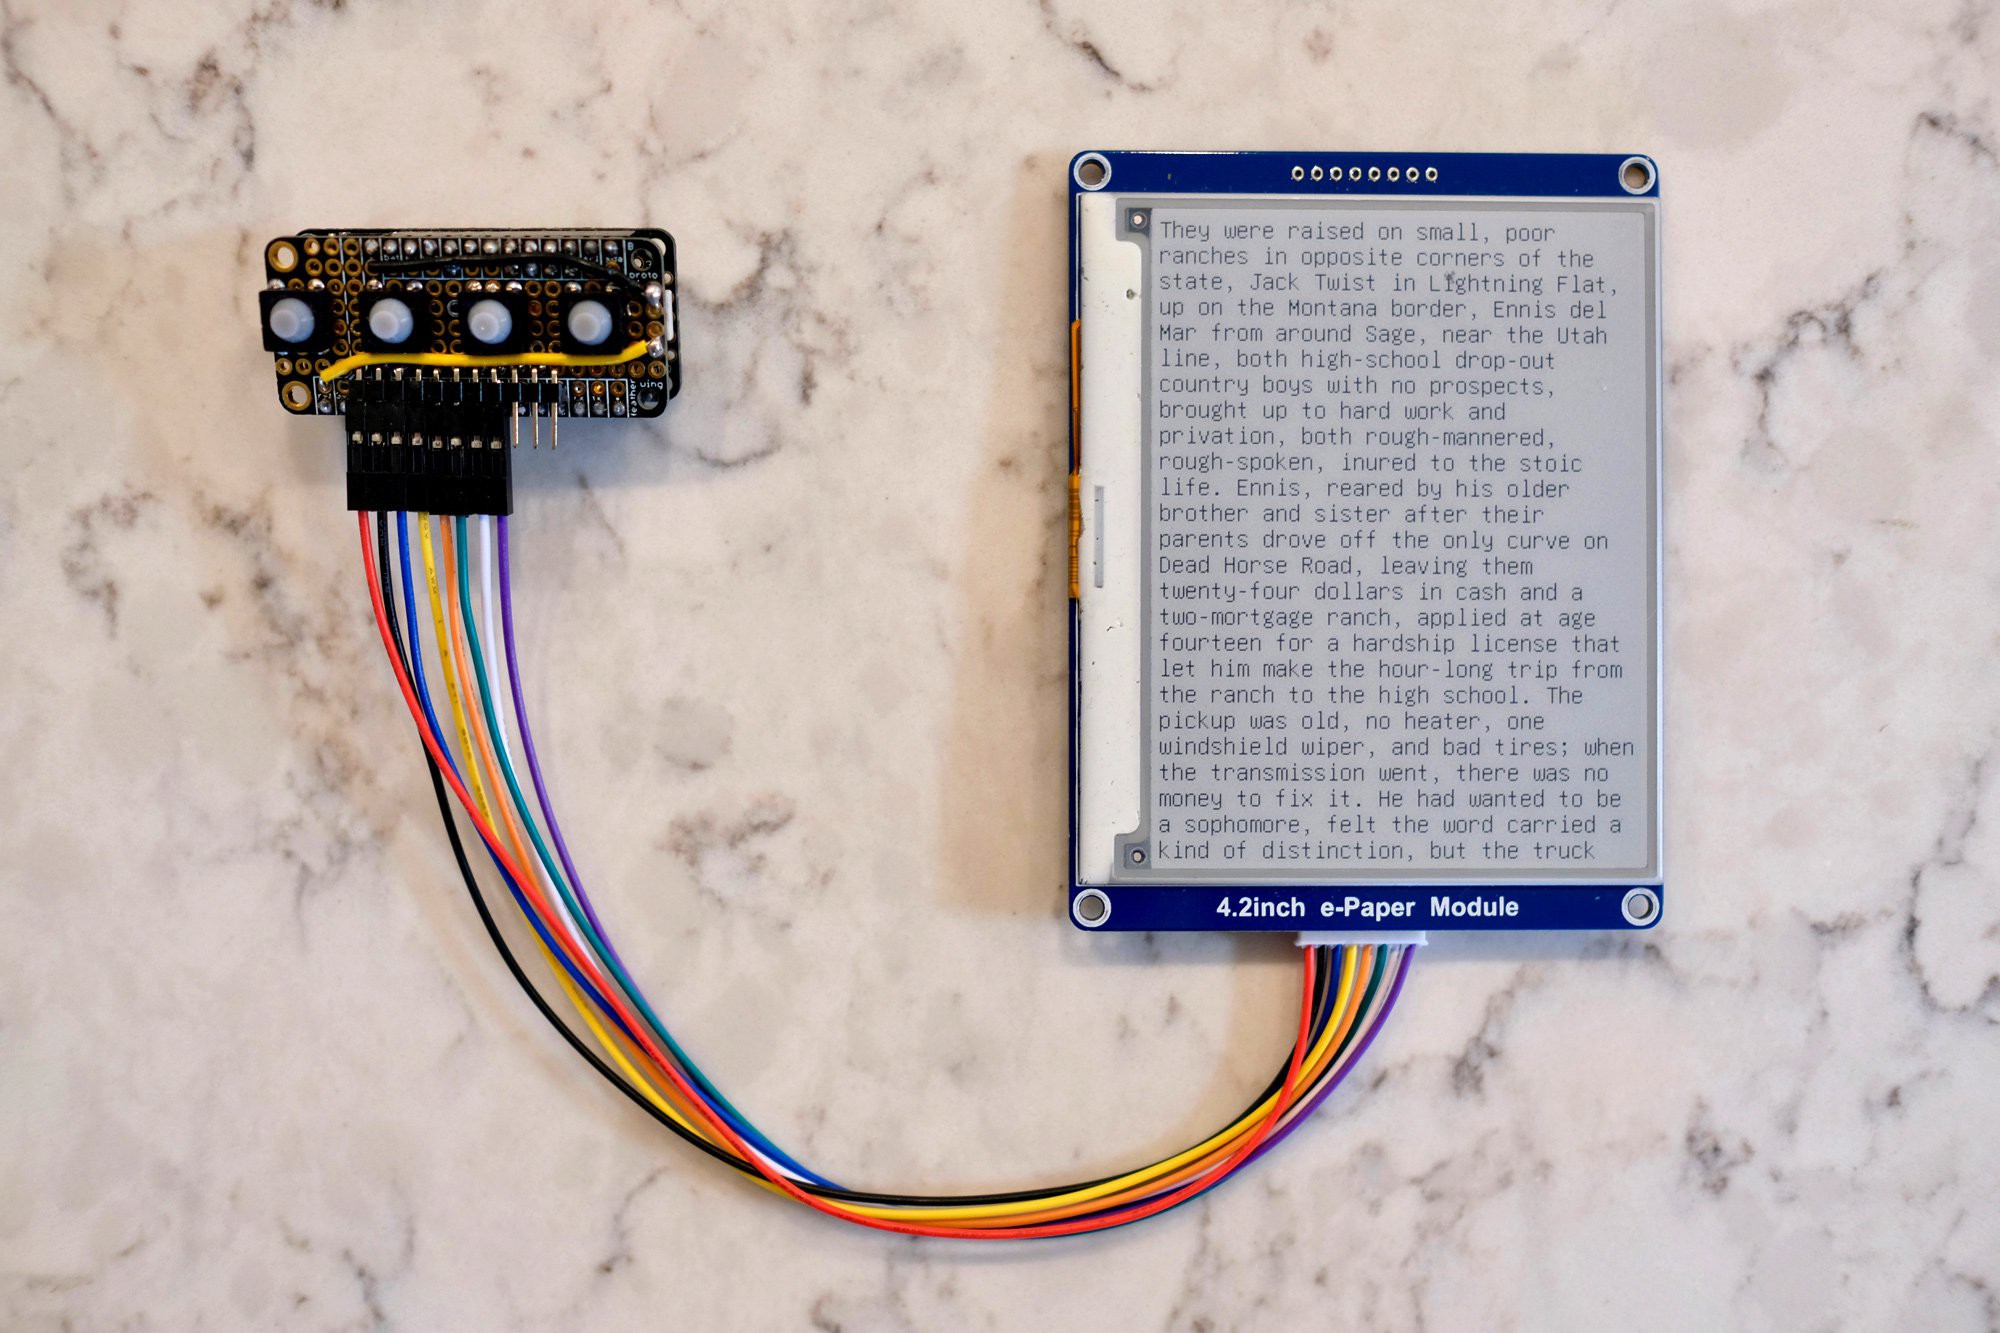
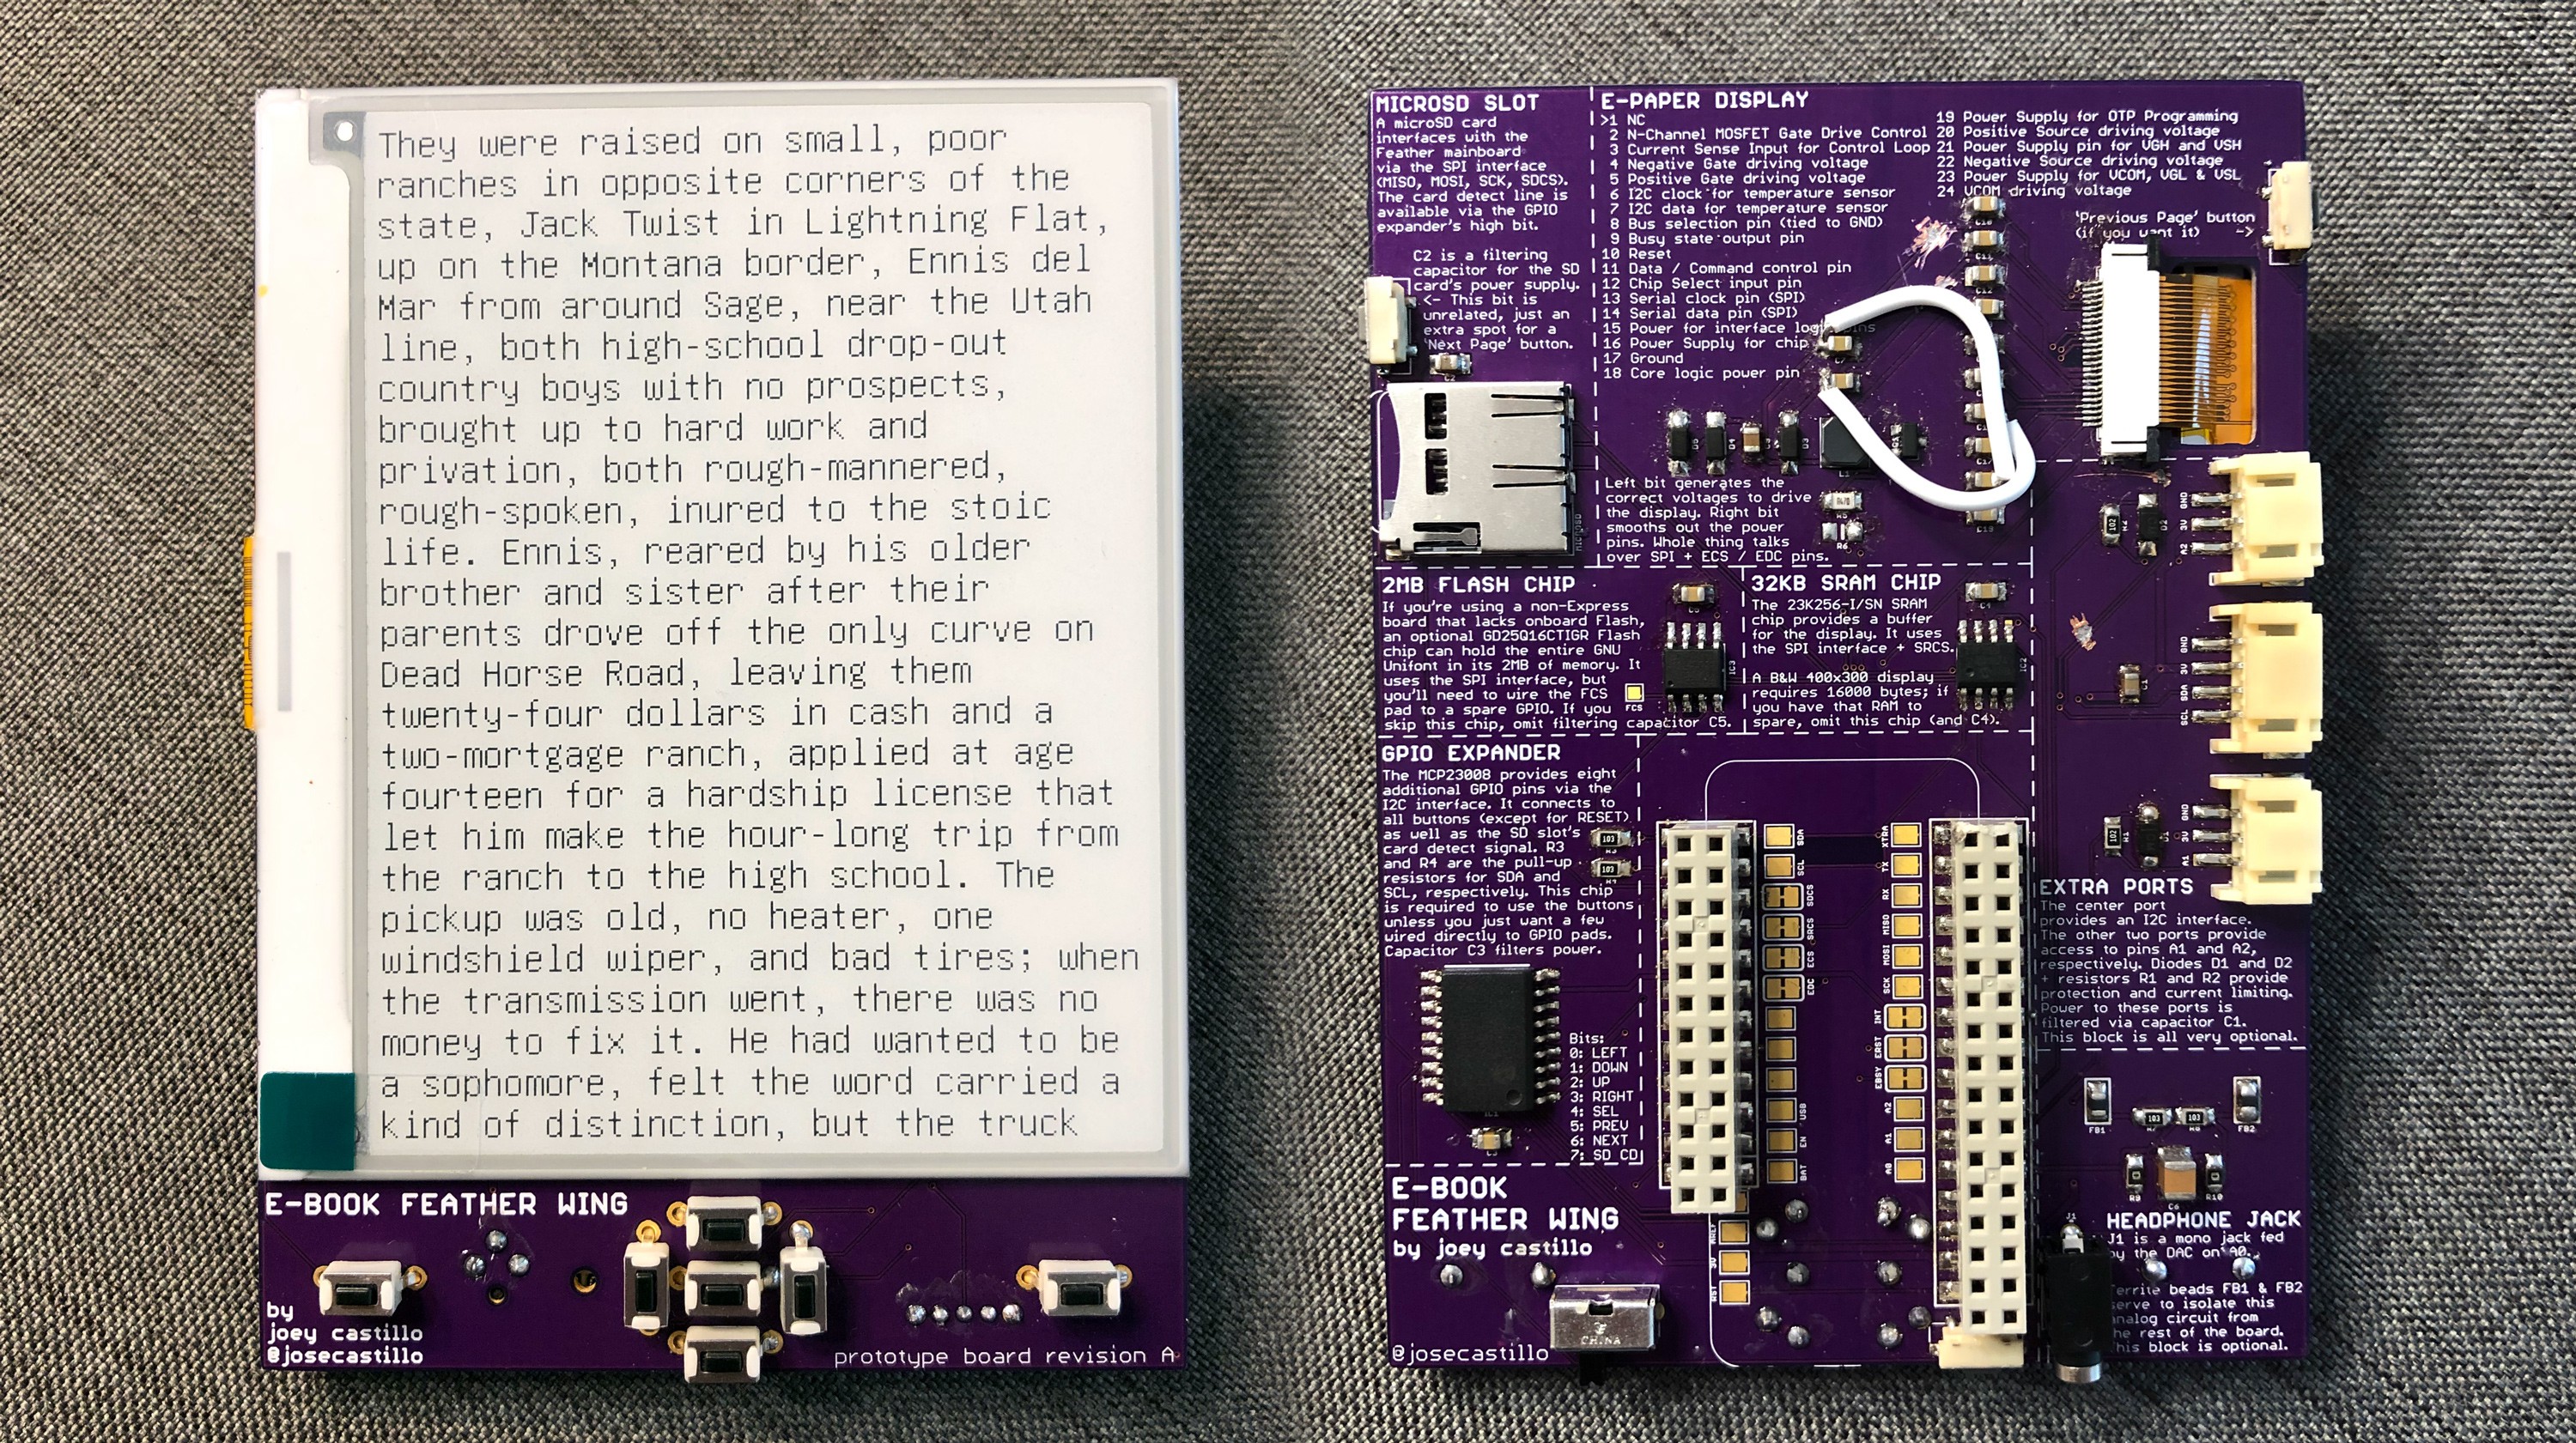
The Open Book Feather
An open hardware reading device rooted in Adafruit's Feather ecosystem
Become a Hackaday.io member
Already have an account? Log in.
Just one more thing
To make the experience fit your profile, pick a username and tell us what interests you.
Pick an awesome username
hackaday.io/
Your profile's URL: hackaday.io/username. Max 25 alphanumeric characters.
Pick a few interests
Projects that share your interests
People that share your interests

 Radu Constantin
 2bluesc
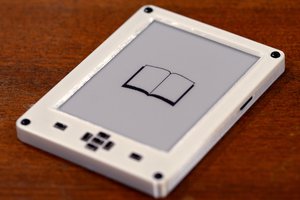
 BART
BART
I'm really happy to see this project documented here, because I want to steal that display for my own projects! (And great work, by the way!)