After several years of running my small Taig CNC machine without an enclosure, I was tired of both cleaning up wood/copper/aluminum and plastic chips, and having to cut metals dry. I decided to build an enclosure to contain the chips, and if I was going to do that, I figured I might as well go all the way and build it to handle flood coolant.
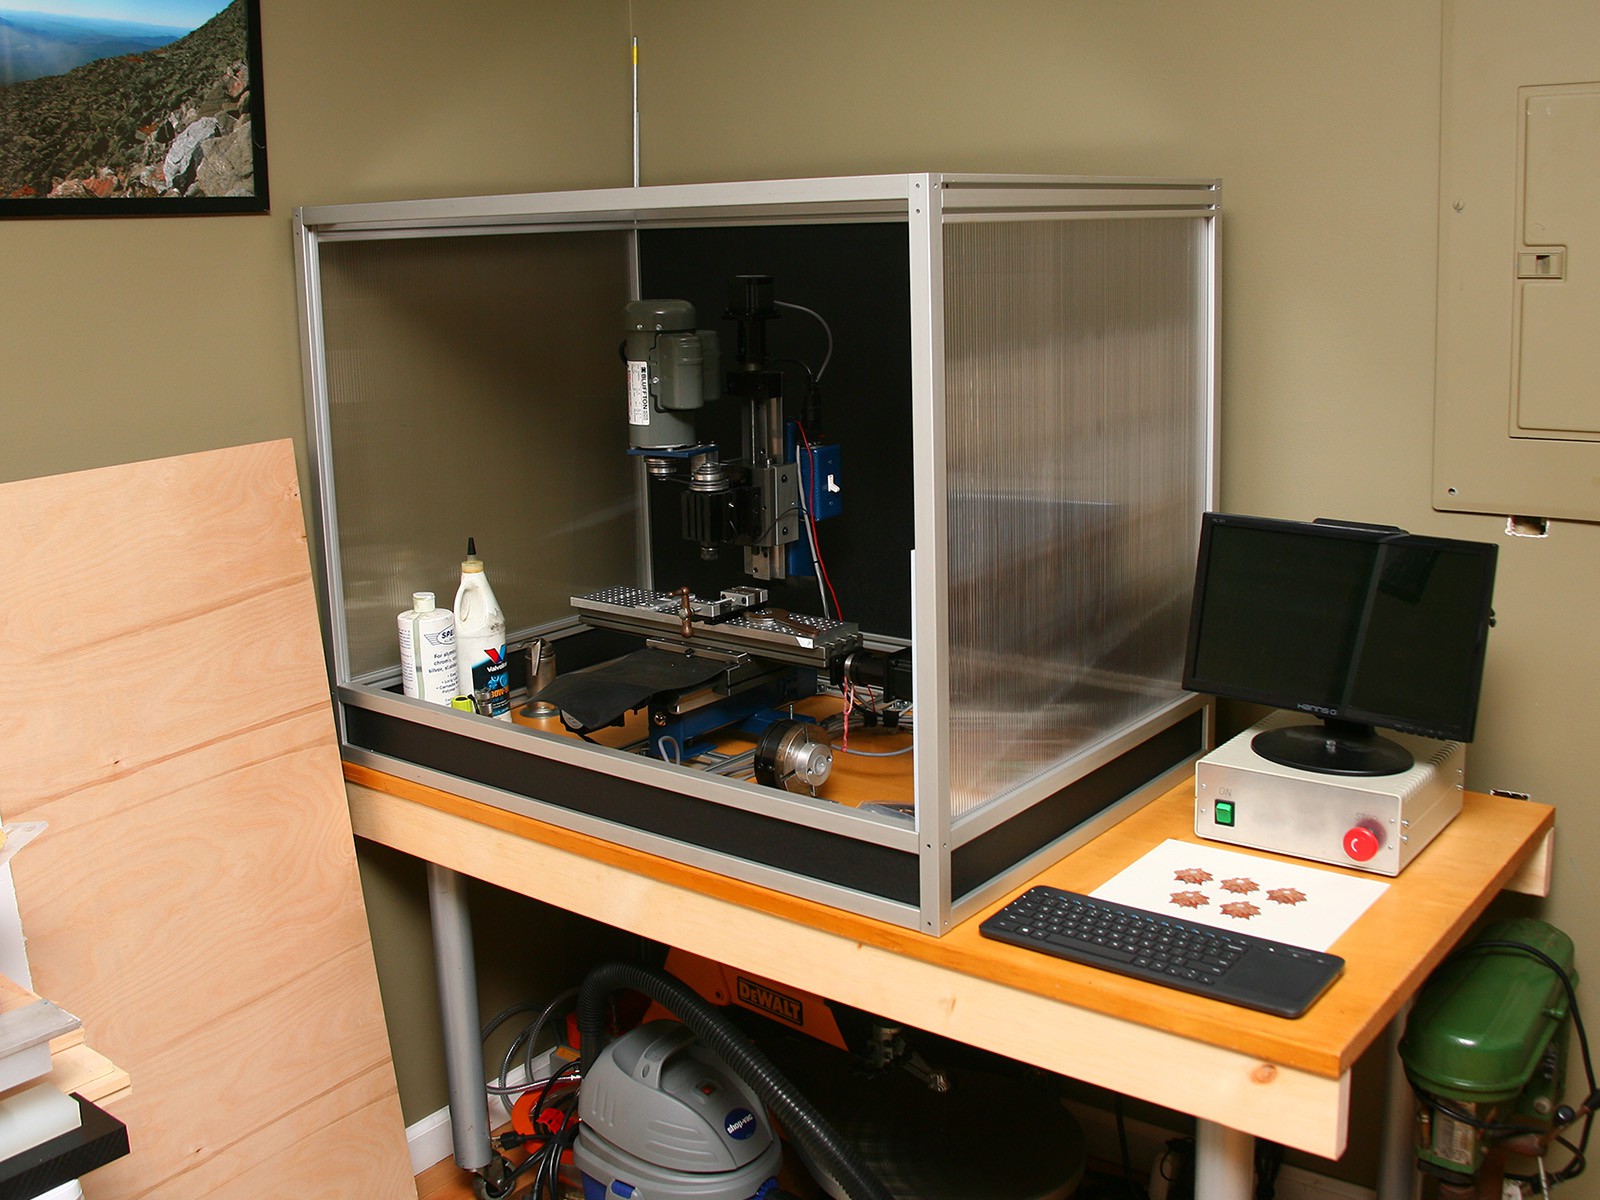
The enclosure itself is just a basic box made from T-Slot aluminum from 80/20.net. The biggest challenge was making the floor pan to drain coolant back to a holding tank. I didn't think I could seal a flat bottom well enough to handle standing coolant for long periods, and I wanted to keep the mill up out of the coolant as much as possible. I called around locally to price out having a thin sheet metal pan made up, and was quoted prices above what the mill itself cost! That wasn't going to happen.
As I typically do, I thought "screw it, I'll make it myself" and started researching vacuum forming. I knew I could build a wood form, and I thought if the vacuum forming didn't work, I could always lay up a fiberglass pan in the form.
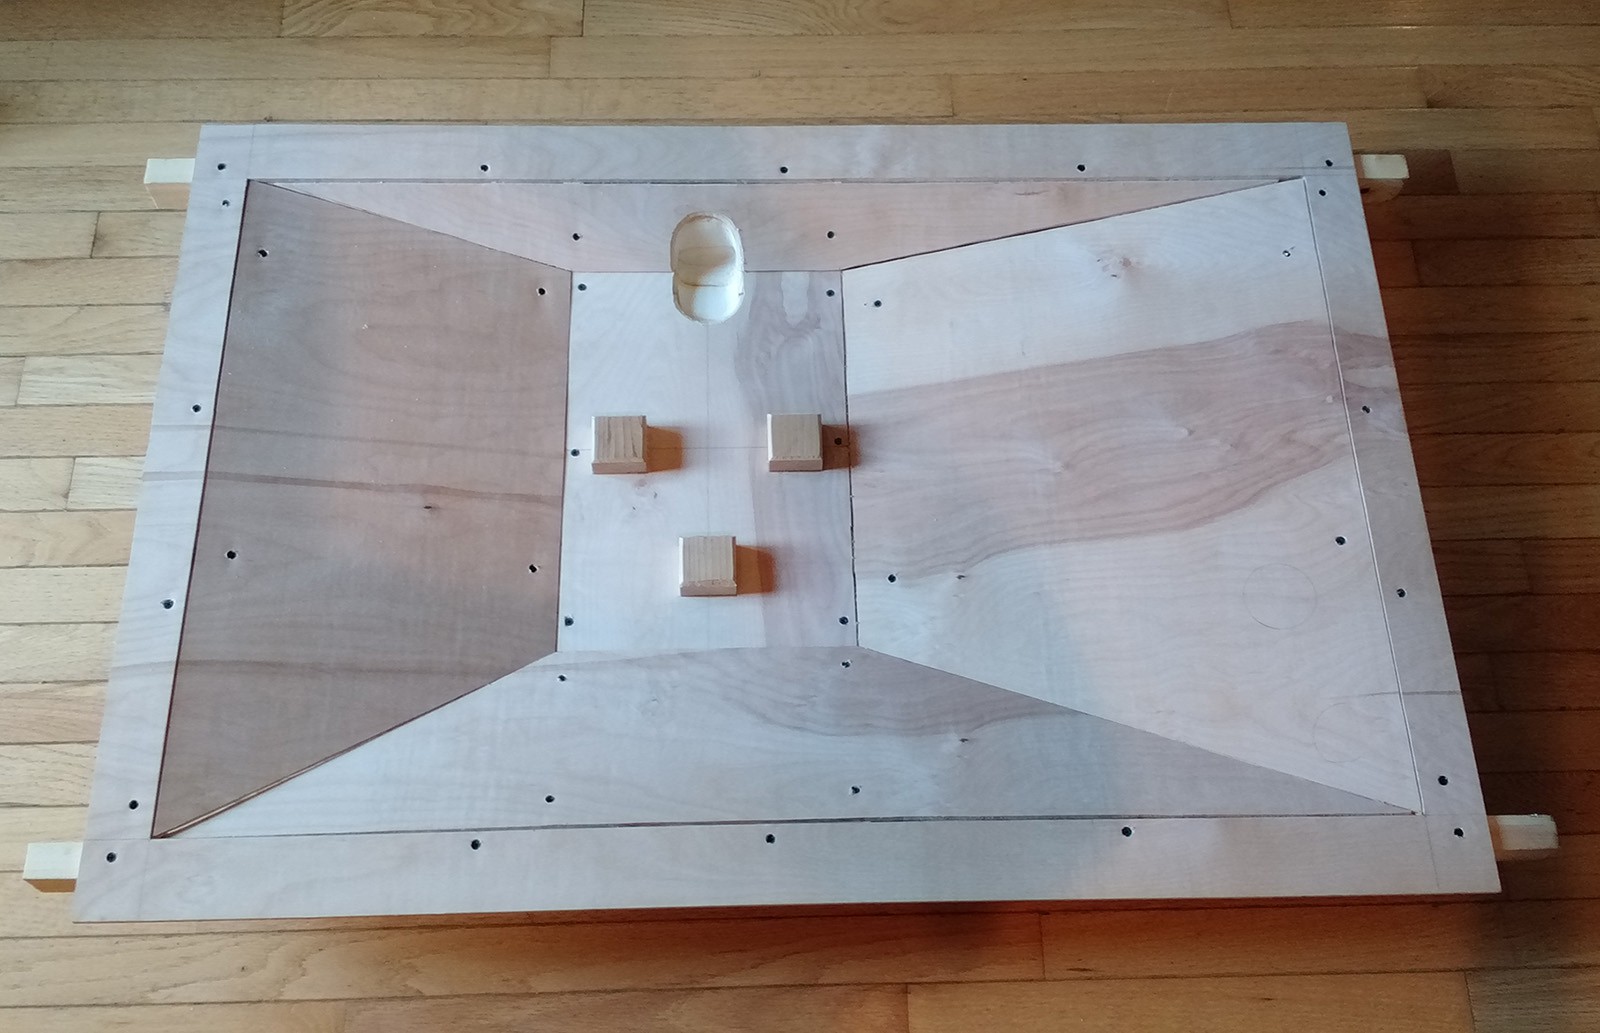
This is the wood form. I sealed all the seams on the back with epoxy and fiberglass. I had ordered a 5mm thick ABS sheet from 80/20 along with the aluminum. There was a stated tolerance on the sheet, and I had hoped it would be on the thinner end to make forming easier. Unfortunately, it turned out to be every bit of the 5mm thickness and then some. My research into vacuum forming suggested that with anything thicker than about 2mm, it's absolutely necessary to heat both sides of the material evenly until it's very soft, and then form it quickly. Given that I planned to use my BBQ grill, I started to think fiberglass layup was going to be my best bet.
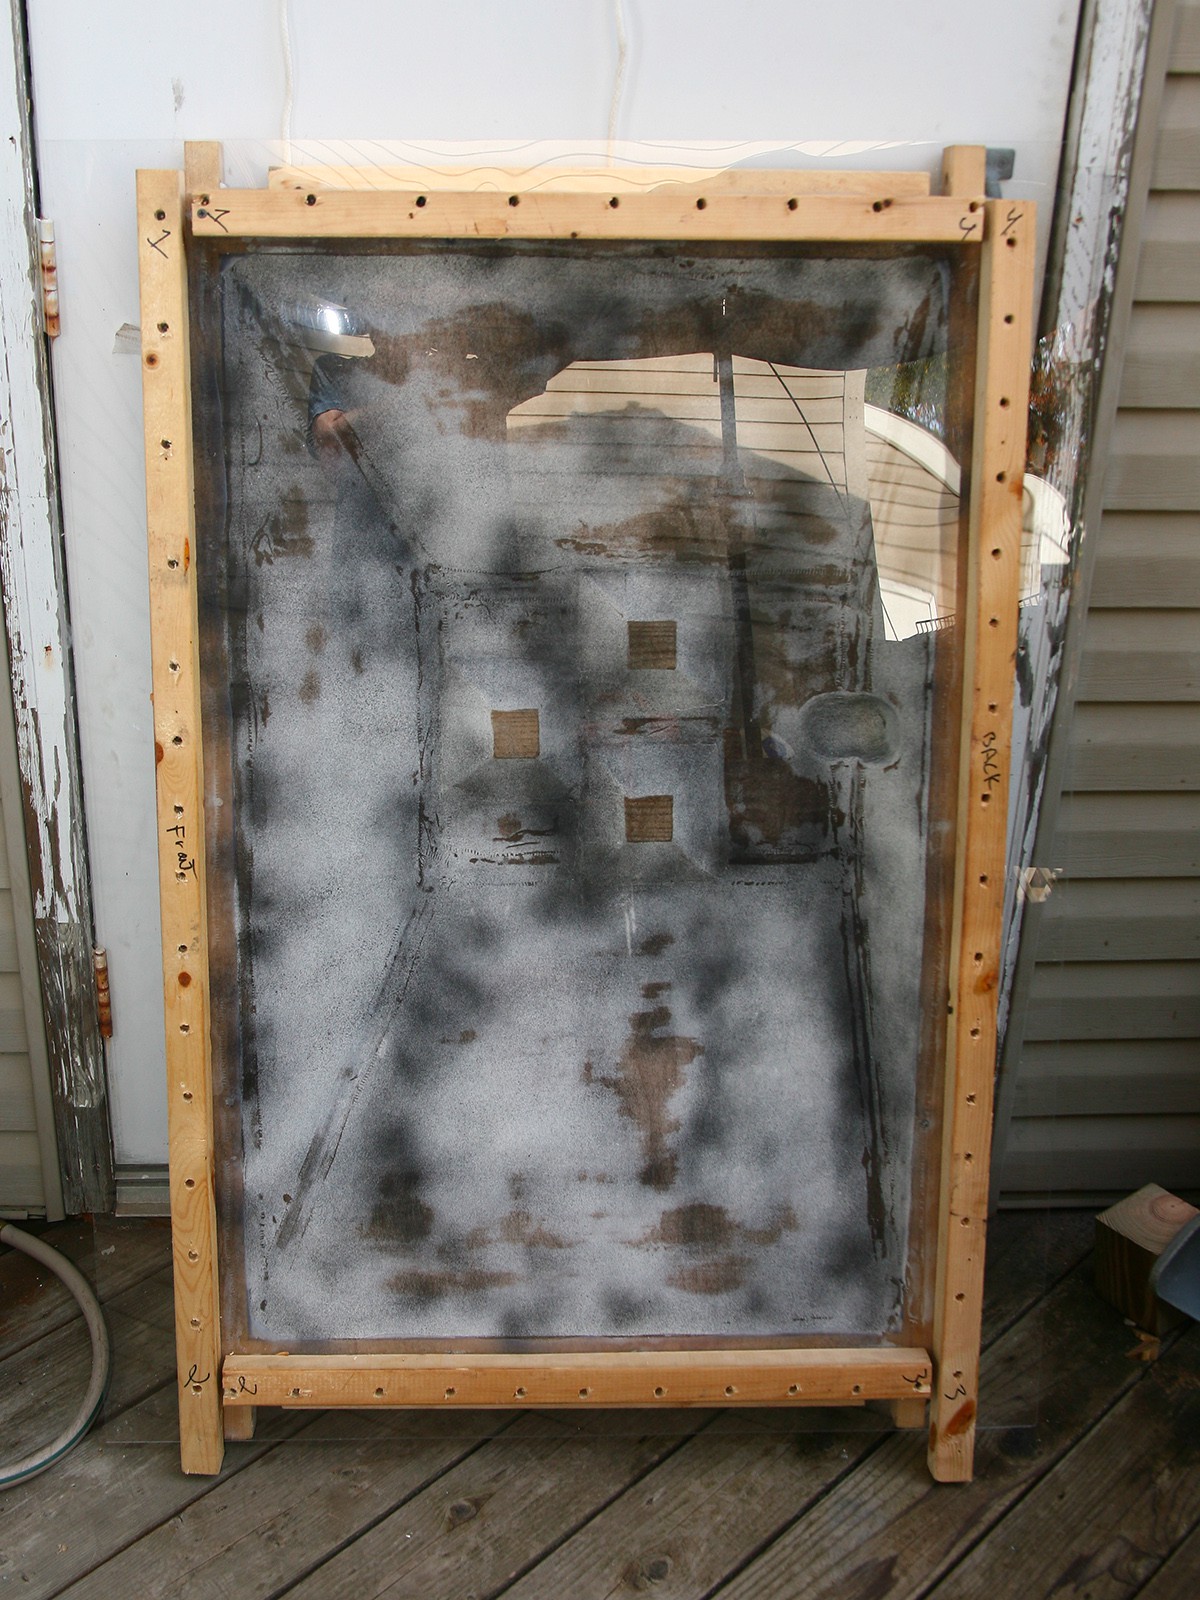
But not wanting to give up too soon, I found 3mm clear acrylic sheets at a local home improvement store. Here's a sheet in the form. I had filled the grain of the form with some joint compound just to smooth it out a bit and sprayed it with some high-temp paint (that I quickly ran out of). I used some silicon caulk to seal the sheet to the form, and then braced it with lengths of 2x2s.
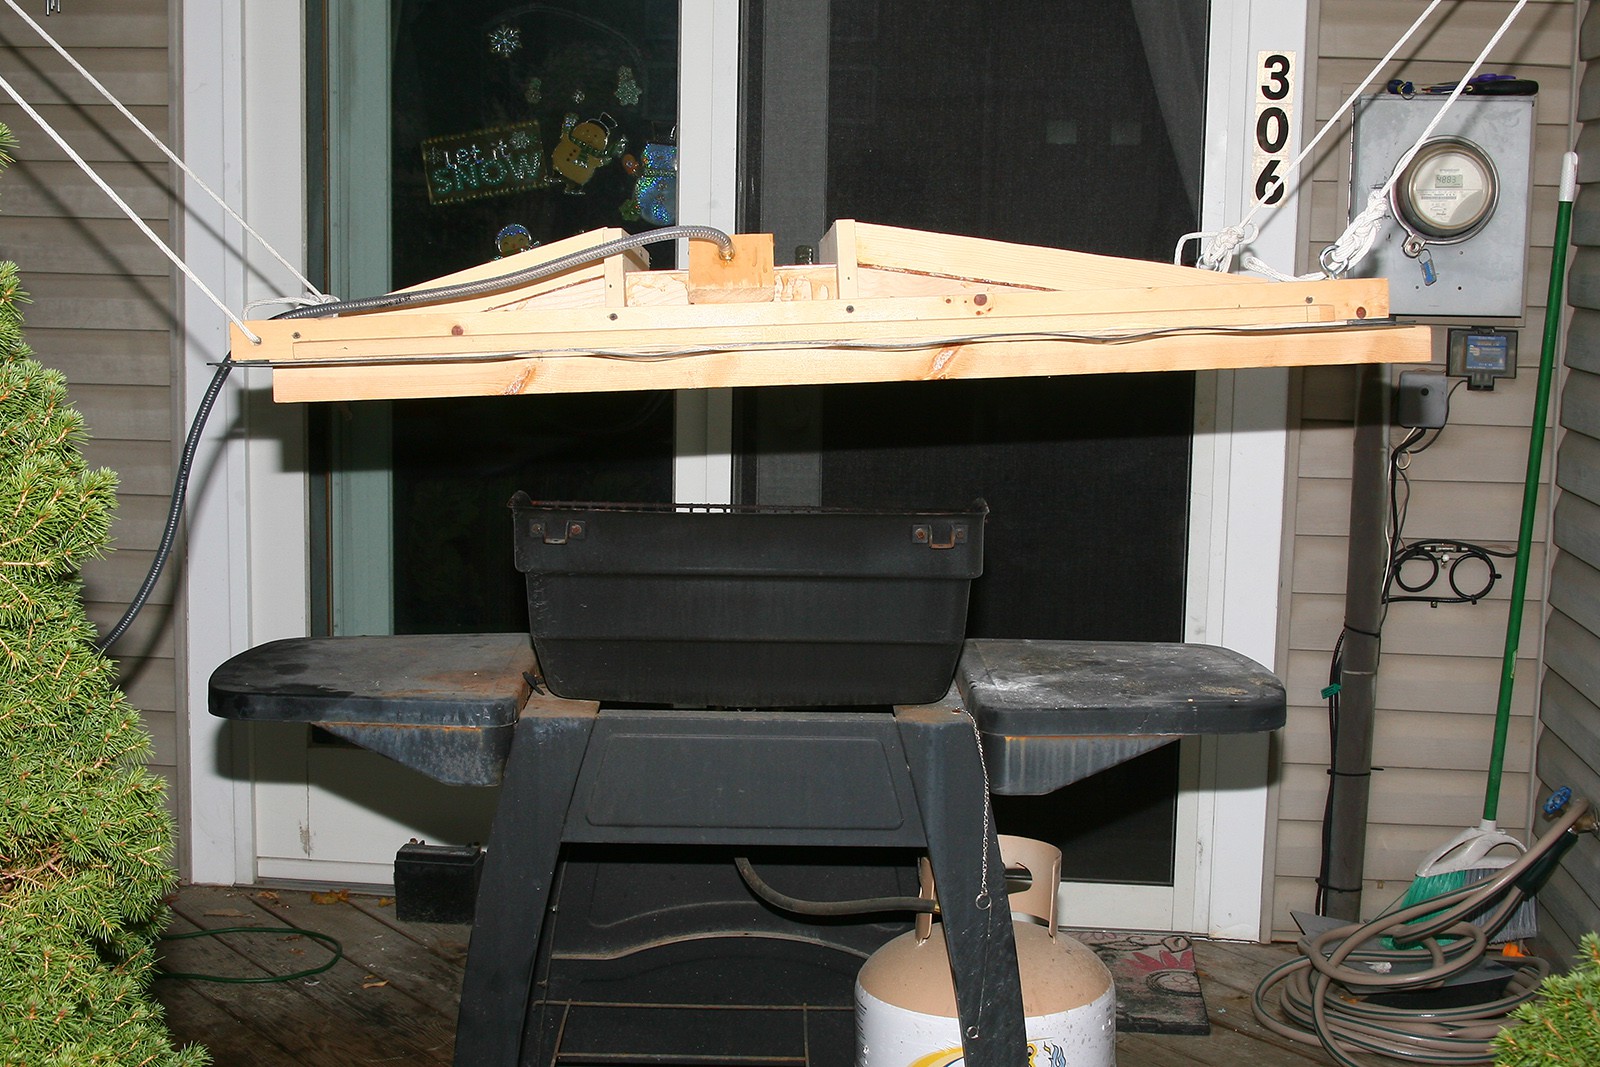
Here's the form, hung upside down over my small BBQ grill. You can see the hose going off to my vacuum pump. I fired up the grill and slowly moved it around to make sure the acrylic sheet heated as evenly as possible (given the absurdly shoddy setup!). To my surprise, before too long, the sheet stated sagging down. Once it would sag a few inches, I'd turn on my vacuum pump which would quickly pull it back up. Because it was quite a large area, as the sheet would start resisting the vacuum, the form would start creaking and I'd turn the pump back off to avoid breaking the form. The sheet softened more and more each time I'd let it sag down and then vacuum it back up. As the sheet made enough contact with the form, I was able to leave the pump on and focus the heat in the areas still not quite to the form.
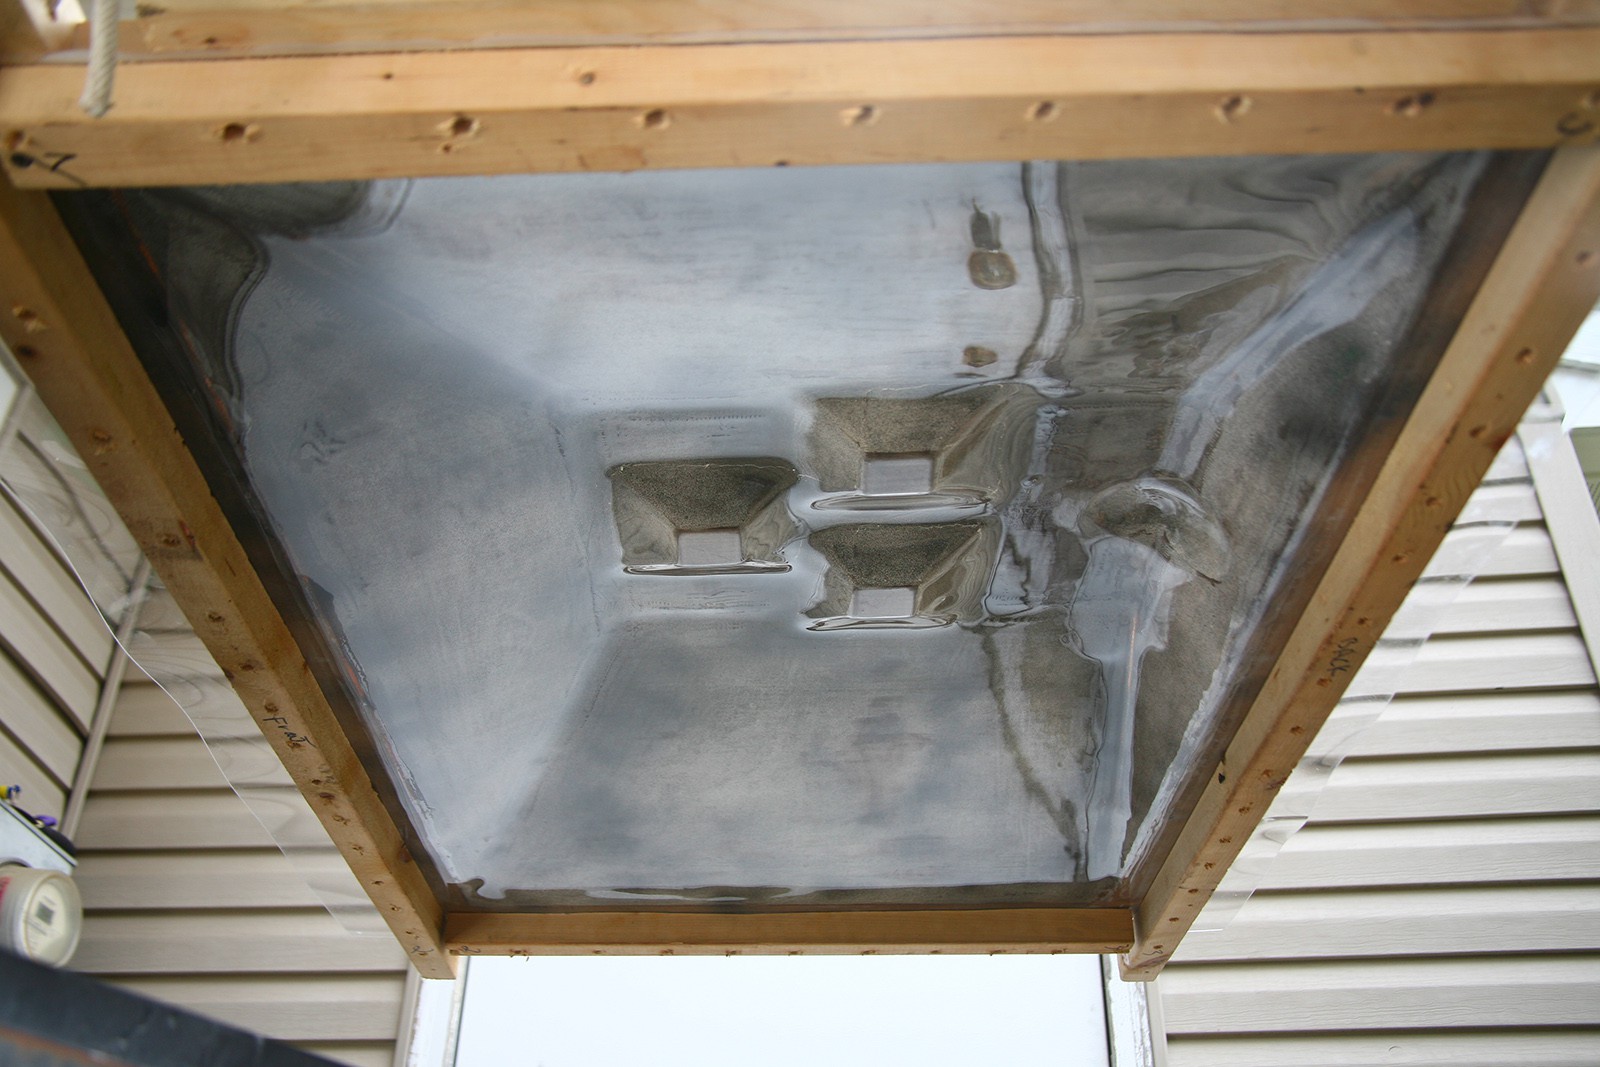
To my surprise, it ended up forming amazingly well. I removed the heat but left the vacuum pump on while the acrylic cooled. One thing I discovered was that Acrylic will shrink back quite significantly as it cools, so I'd touch up the main creases with a heat gun.
Thinking I had it licked, I let the acrylic cool overnight. The next day, I set about removing it from the form. This is when I discovered another property of acrylic plastic - it's brittle. Very brittle. I had drilled holes through the sheet to screw on the 2x2 braces. Just removing these cracked a large section of one corner right off. Discouraged by the failure but encouraged that it worked so well, I bought another sheet, fired back up my grill and repeated the whole process. ...


 Scott G
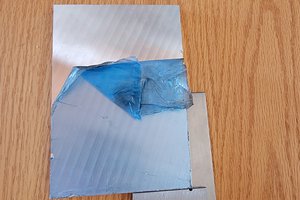
 Daniel Grace
 Jan
Jan
The vacuum forming that I learned to know almost 30 years ago never applied PMMA (acrylic) but rather PVC or ABS. Now I know why.