 Max.K
Max.KHow do you add keyboard and mouse inputs to a tiny device? With a Gyroscope!
This new version brings some interesting new feature to the ESP32 handheld while also nearly doubling the standby battery life.
Gyro Pointer
Since I started the project I always wondered how I could integrate some more precise controls like an analog stick. Because of size restrictions I had to settle for the 5-way SMT joystick. For the new revision of the device I first thought about adding a capacitive trackpad but I quickly abandoned the idea. There was just not going to be enough room on the PCB, even when moving the battery. A capacitive or resistive touchscreen is also not widely available for this screen size.
The approach that I went with instead is a movement sensor for controlling the device. As it turns out a gyro sensor can quite easily be used to emulate a mouse, just be tilting the PCB. This actually is not a novel concept. Many mobile games use gyro sensors for precise aiming, most notably "Ocarina of Time" for the 3DS. To implement this I picked the MPU6050 which is still one of the cheapest (3€) and most commonly available motion sensor. It does not only contain a 3-axis gyro but also an accelerometer and a DMP motion processor that can fuse all 6 axes together.
In software making a mouse pointer move with the sensor is as simple as it gets. I just add the gyro value, which is the speed of rotation, to the pointer's x and y coordinates. This way the pointer moves with the device, regardless of its orientation. I added a button to the back of the device that can be used as a shoulder button to enable the gyro movement. When the button is released the device can be rotated without the pointer following, just like lifting up a computer mouse.
Having a controllable pointer enables lots of cool functionalities. I already added a few "tech-demos" to the firmware:
A simple drawing app lets you move the brush with the gyro and paint on the screen. I had to get creative with the actual pixel drawing to keep the frame rate high. With every frame the ESP32 saves the canvas area under the brush, then draws the brush and finally rewrites the cached area to the pixel buffer. This way, the entire canvas/pixel buffer doesn't have to be refreshed.

The gyro pointer can also be used to press buttons on a virtual keyboard. This means that any text can be entered into the device without the need for a physical keyboad. There are lots of possible applications for this, e.g. command lines and writing code directly on the device.

Better Standby Time
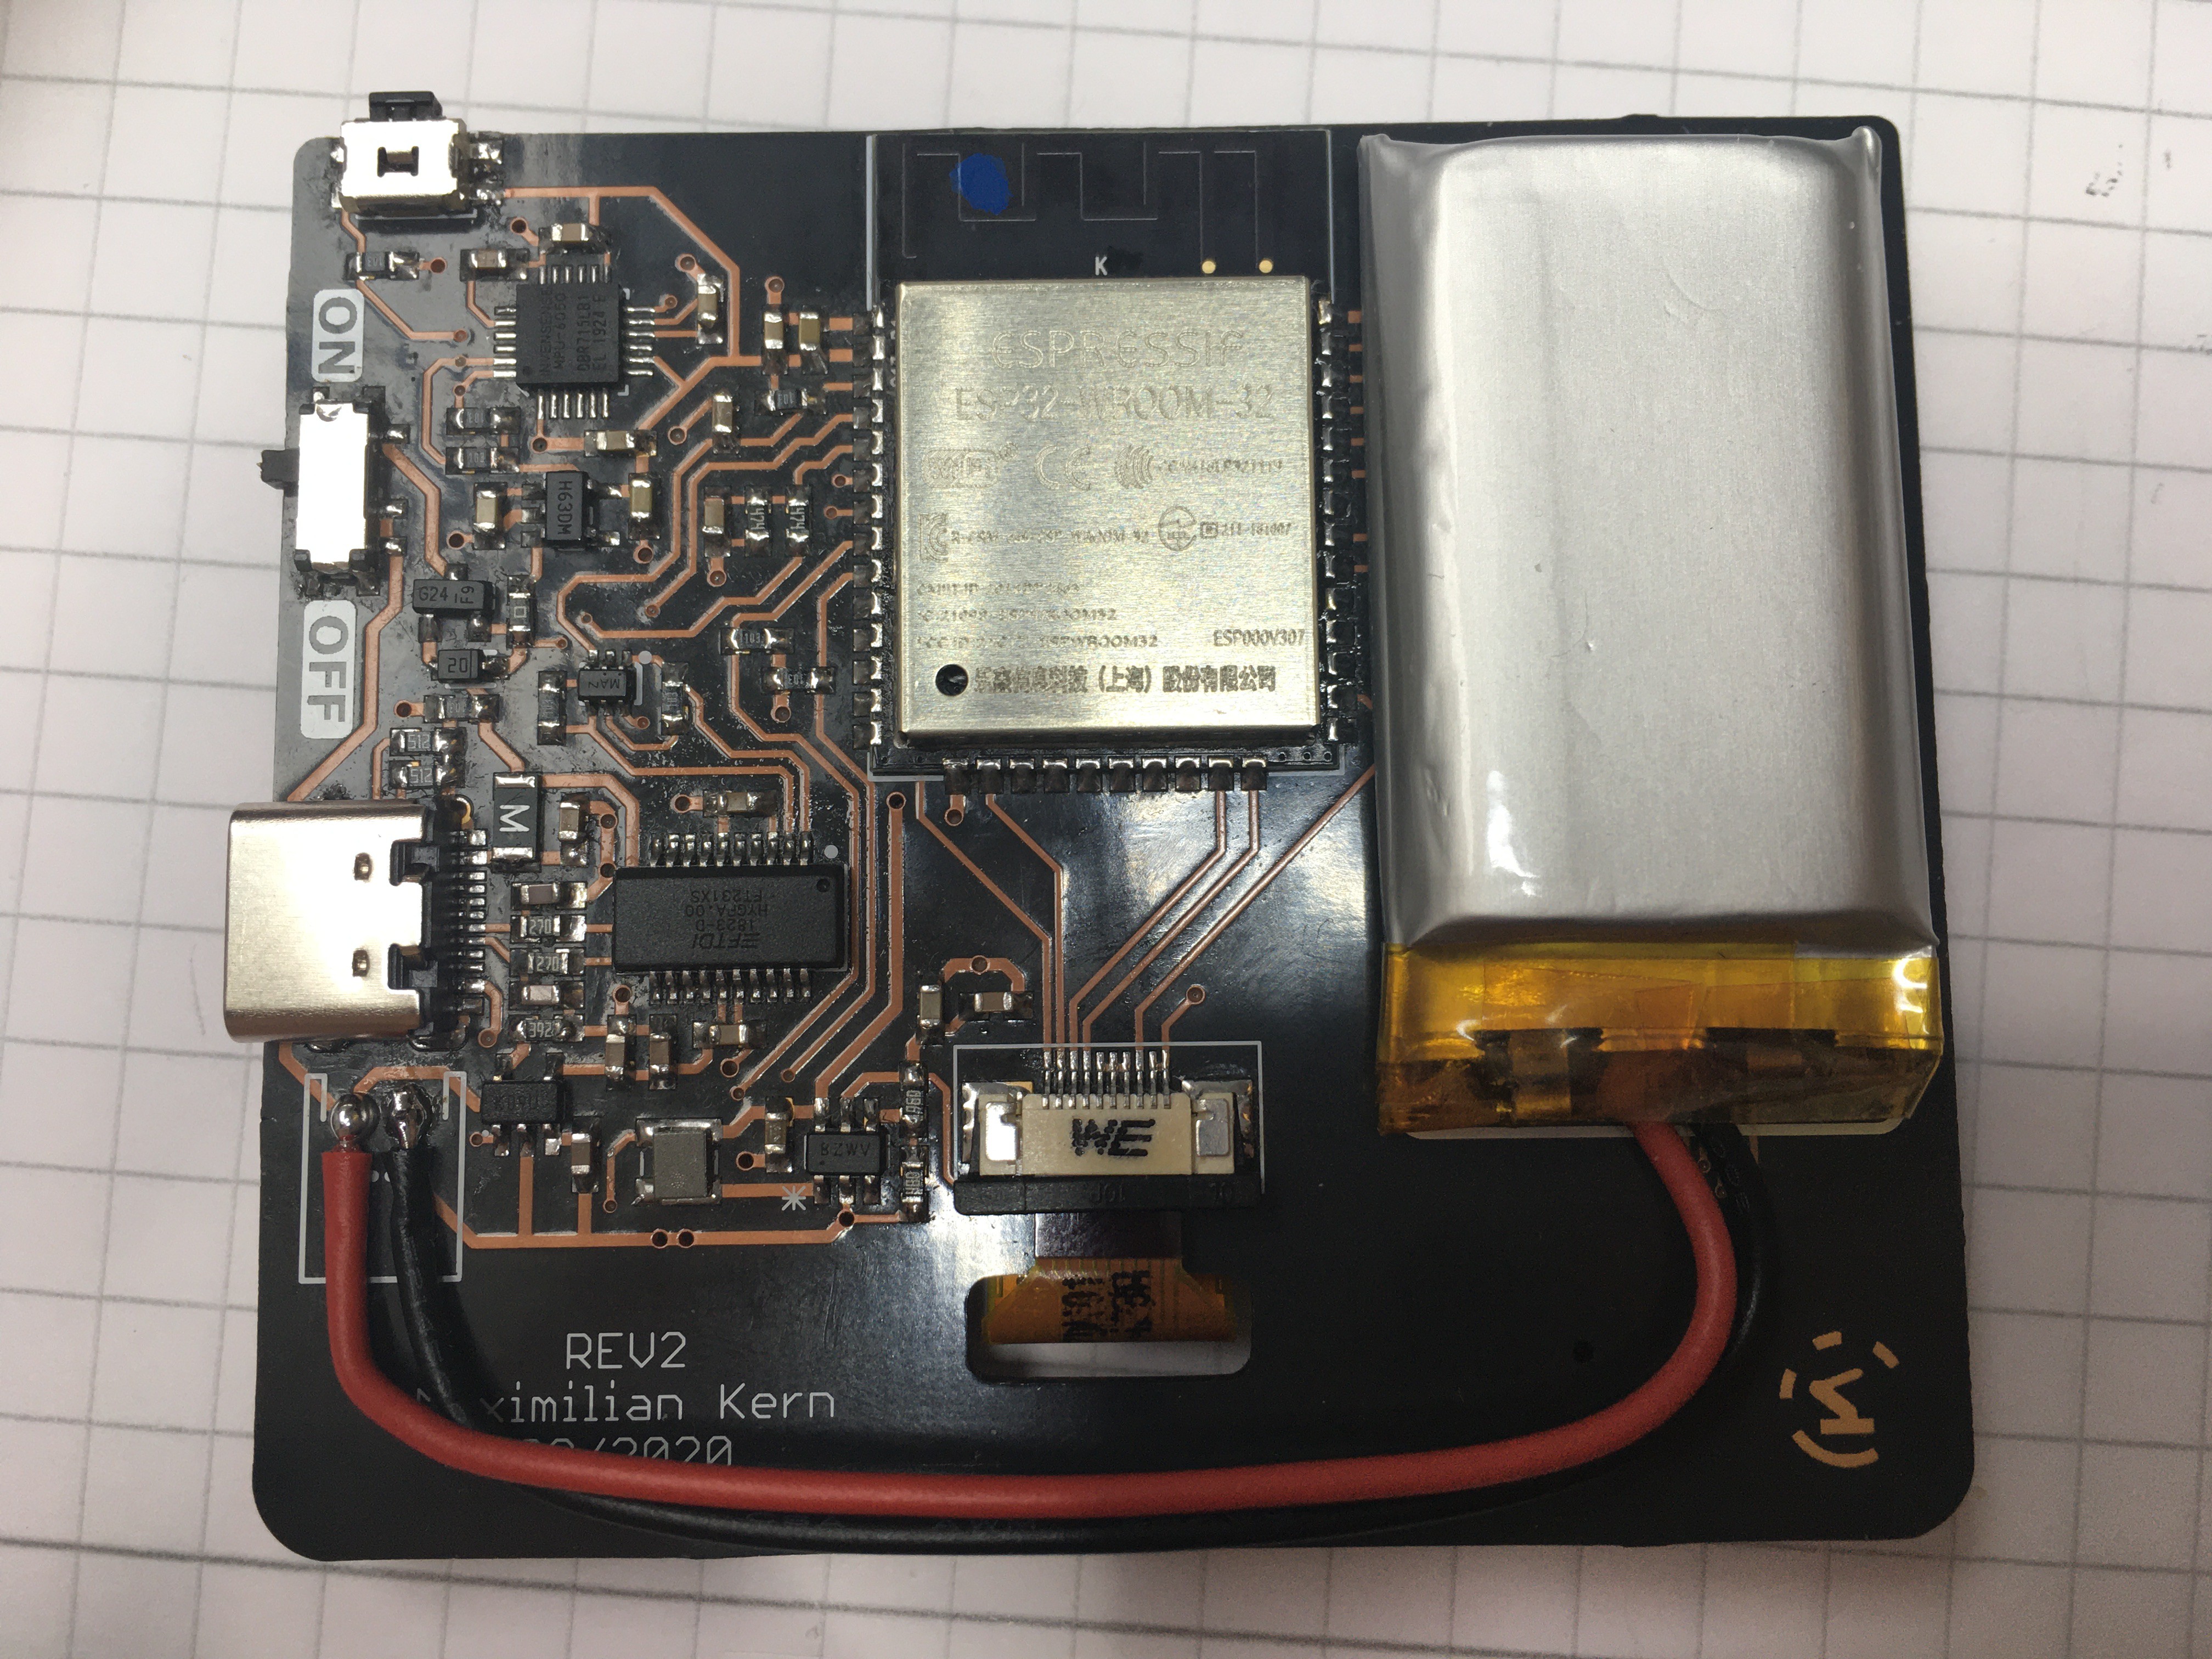
At less than 100µA the current draw of the device was already acceptable. But it was still bugging me that the voltage regulator wasted almost half the standby power with its 55µA quiescent current. Good regulators are hard to find if you are looking for high current in on mode and low Iq in a package that can be soldered by hand. Thanks to Hackaday.io user Jose Baars suggestion, I switched to the XC6220B33 which has an excellent quiescent current of 8µA while still supplying up to 1A to the ESP32.
Power consumption:
- MPU6050 8µA
- ESP32 in Standby 10µA
- LCD: 10µA
- XC6220 Iq 8µA
- voltage divider 3.7µA
- Charge pump Iq 19µA
-------------------------
theroretical total: 58.7µA
actual total: 56.2µA
With all parts combined and assembled the new version of the device draws around 56µA in standby. Even when considering that the display needs to be refreshed by the ULP core once per minute the standby time should exceed 200 days. There is still no accurate real time clock (I kind of forgot to add one), so synchronizing with NTP time every few hours costs precious power. The device should still run for more than two months easily.
Other improvements
Some minor changes include switching to a USB Type-C port. It is a bit more robust than Micro USB and a cable can be plugged in both ways. Because I didn't like the way the battery cable was running over the entire PCB I also moved the connector pads to the bottom. OSH-Parks have again done an amazing job with their After-Dark PCB. The silkscreen is so sharp that the QR code that I added can be scanned very easily.
Discussions
Become a Hackaday.io Member
Create an account to leave a comment. Already have an account? Log In.
It's a digital Etchasketch!
Are you sure? yes | no
Coooooooool
Are you sure? yes | no
Wow, this is really impressive stuff! You've optimized the power efficiency like you wouldn't believe. Is that a regular monochrome LCD or an eInk/ePaper display? It's hard to tell from the video. I saw ESP32 powered eInk displays approximately this size on AliExpress for a dozen or so dollars. Looked interesting for extremely long battery life projects/experiments.
Are you sure? yes | no
It's a special kind of LCD made by Sharp. The display is transflective, so in bright environments you don't need a backlight. It also has in-pixel memory, so it will retain the display content while the microcontroller is sleeping. But unlike an EInk, without the few µA that it needs it will turn off completely.
Are you sure? yes | no