Close
0%
0%

DIY 100 KWh PowerWall

an old datacenter UPS can make a decent powerwall for the house I live in.

Similar projects worth following
A Power wall that can store 100 KWh of electric power from old lead batteries and a UPS scavenged from a datacenter

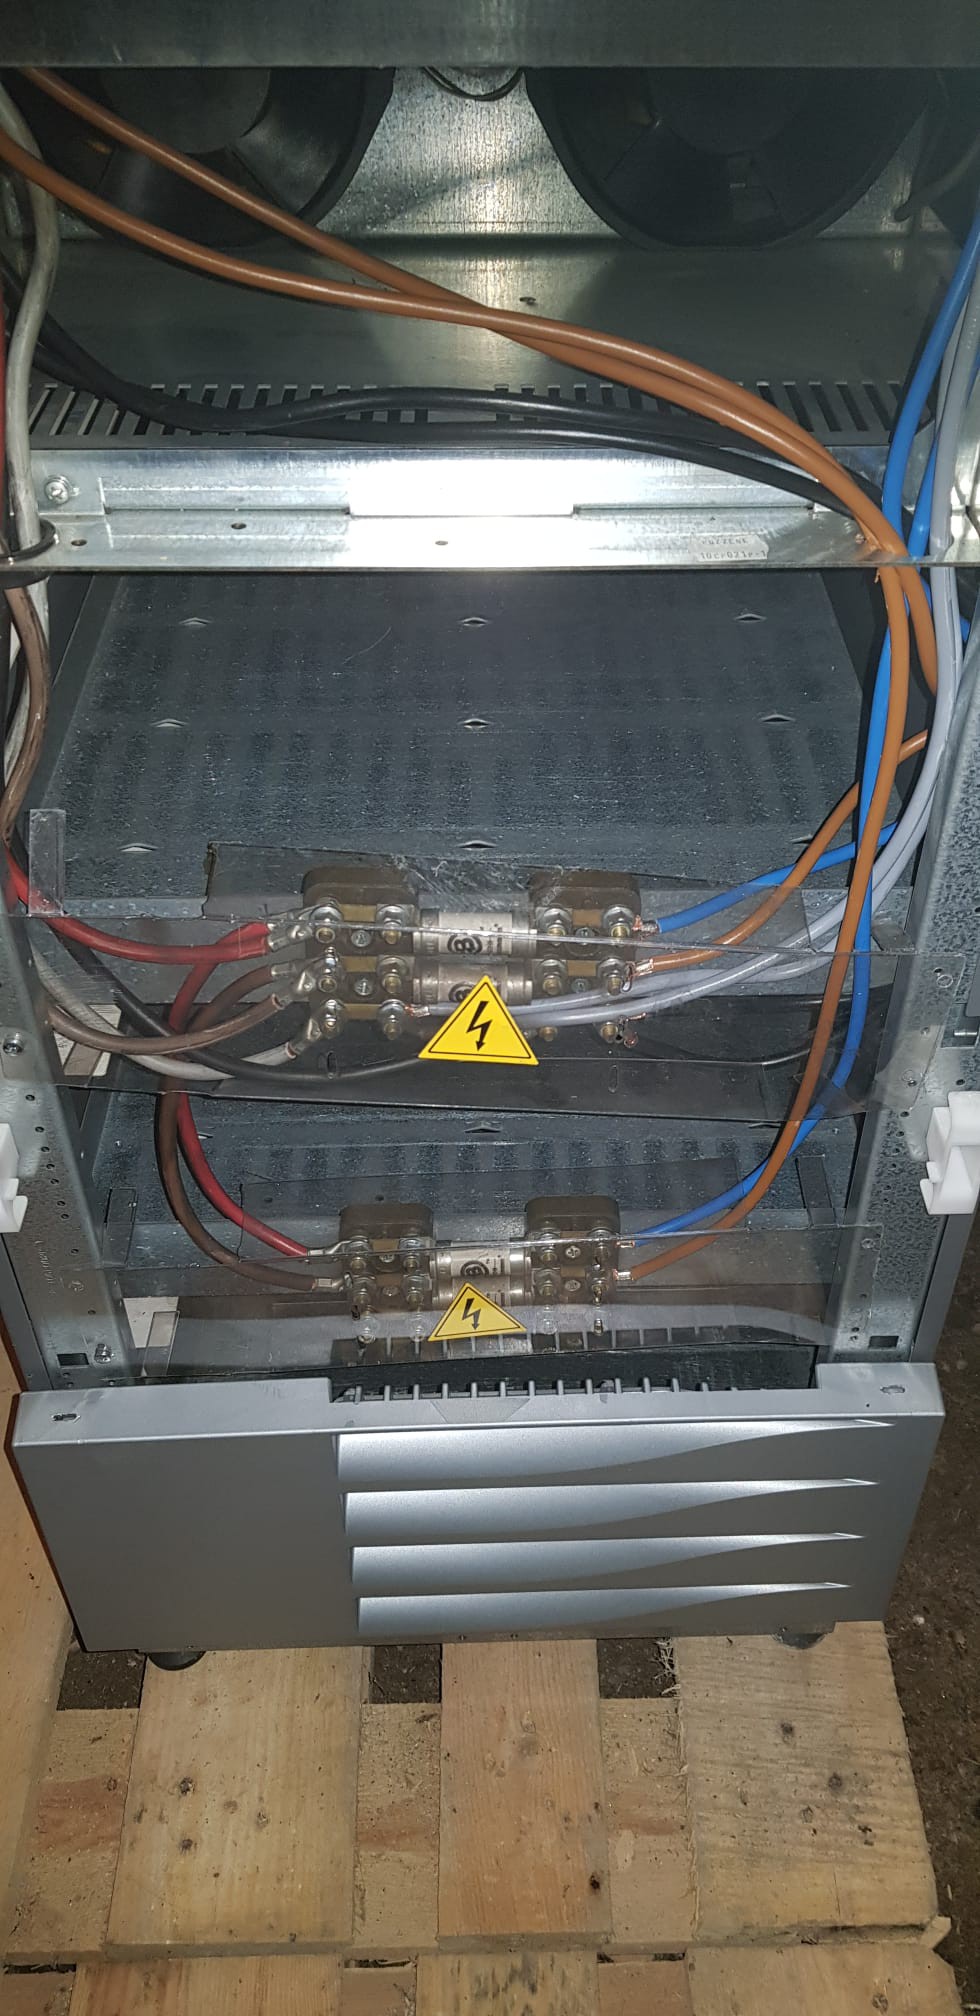
1) Reverse the UPS to understand how battery were wired internally

2) make a nice terminal to connect the new battery externaly (that UPS was made to have internal smaller battery)

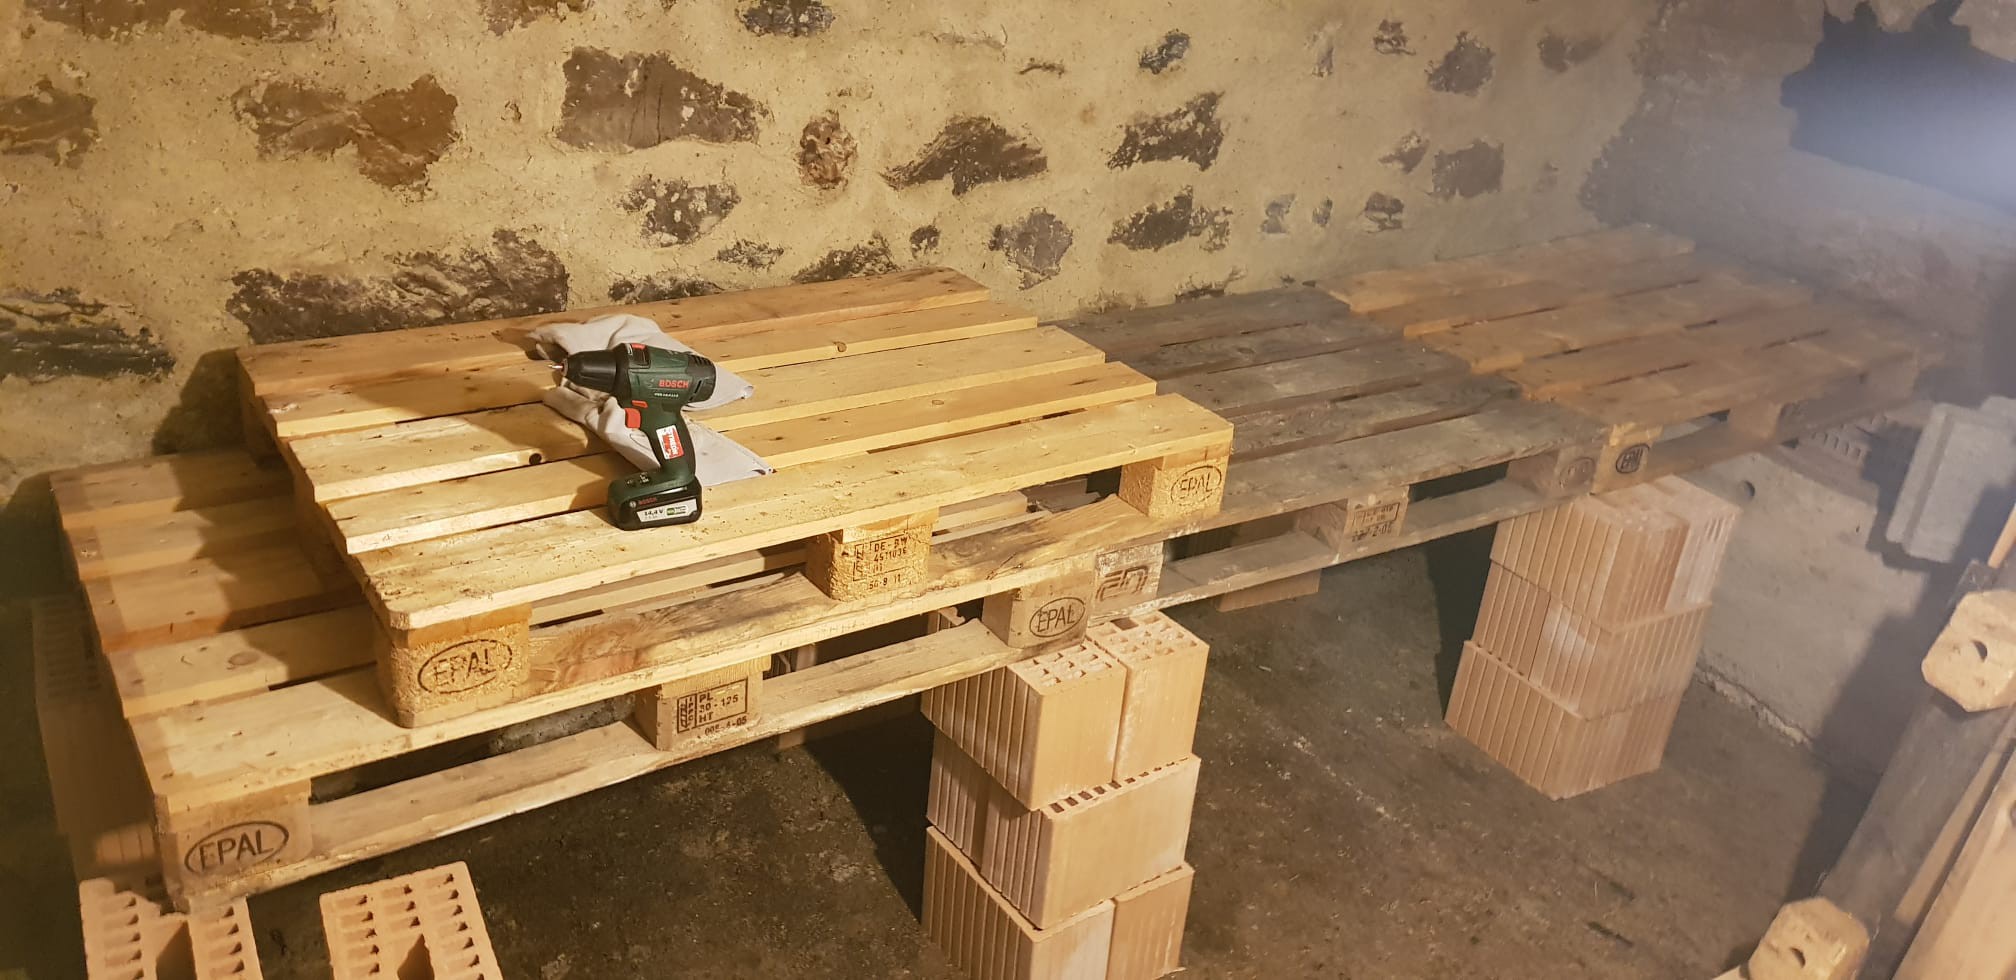
3) make a dry floor for the battery

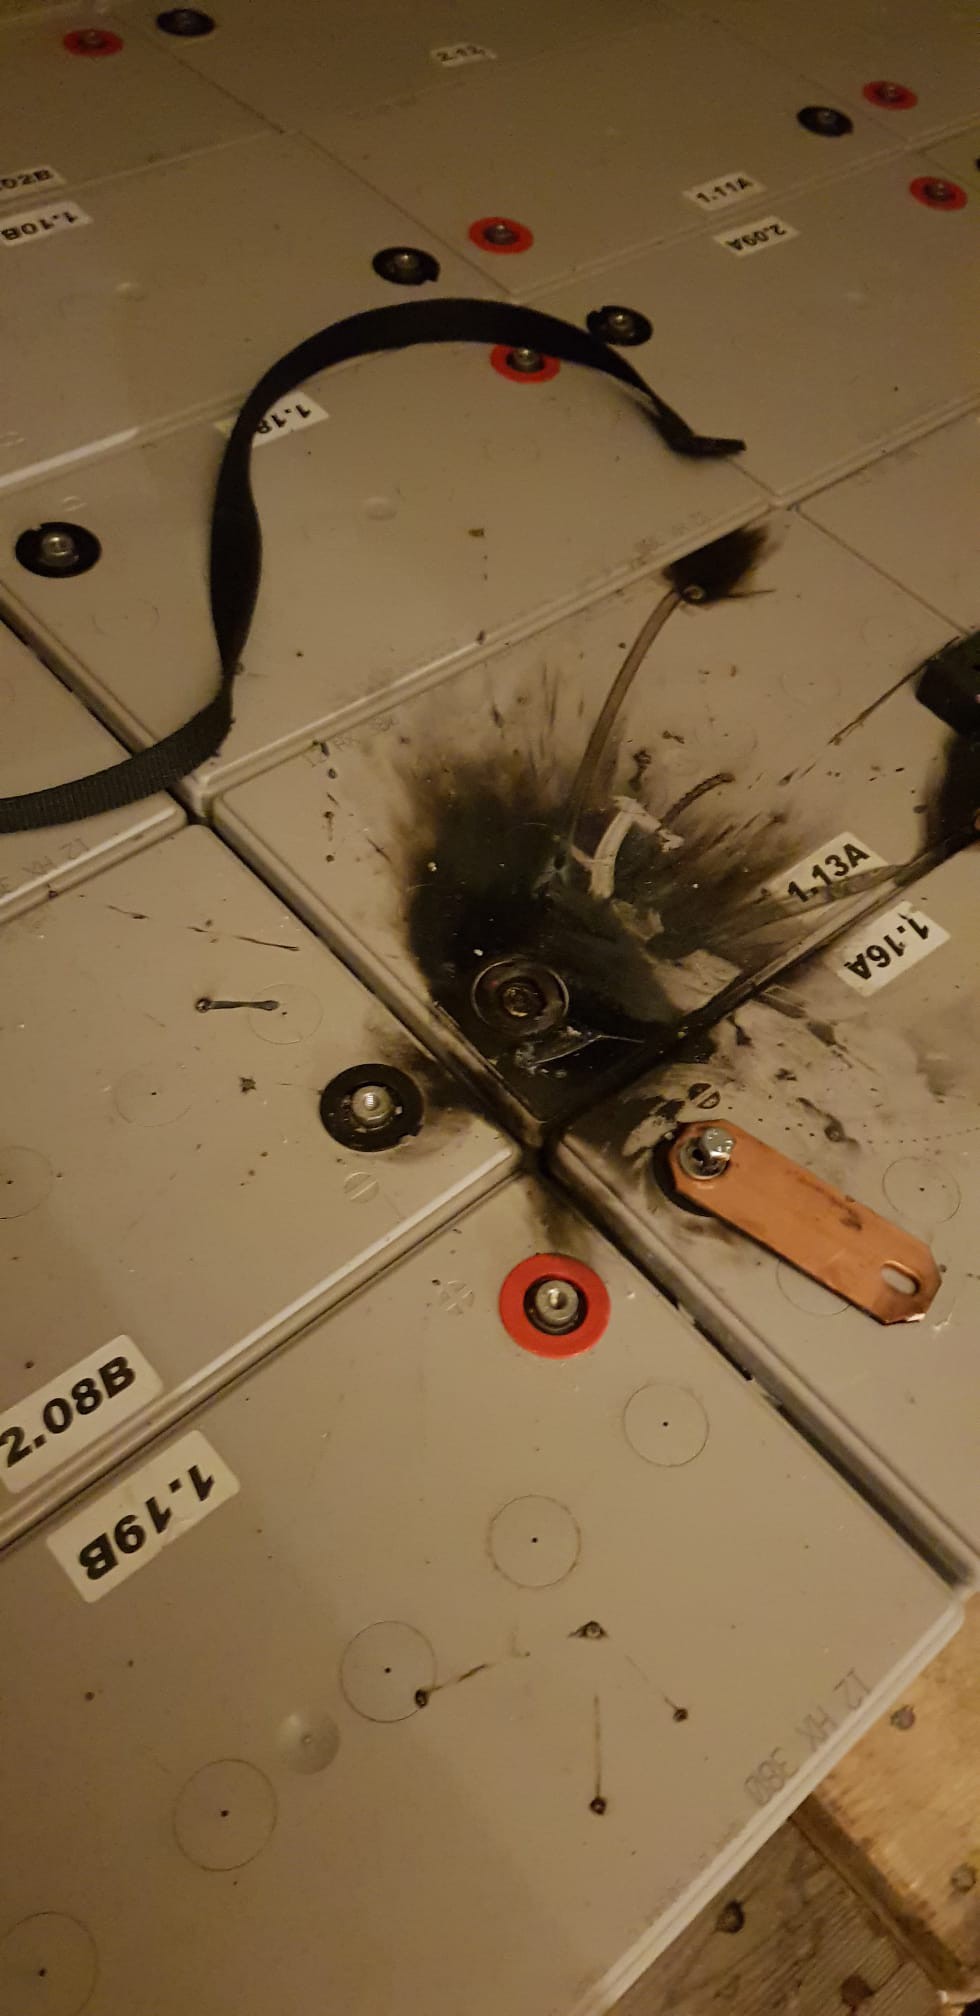
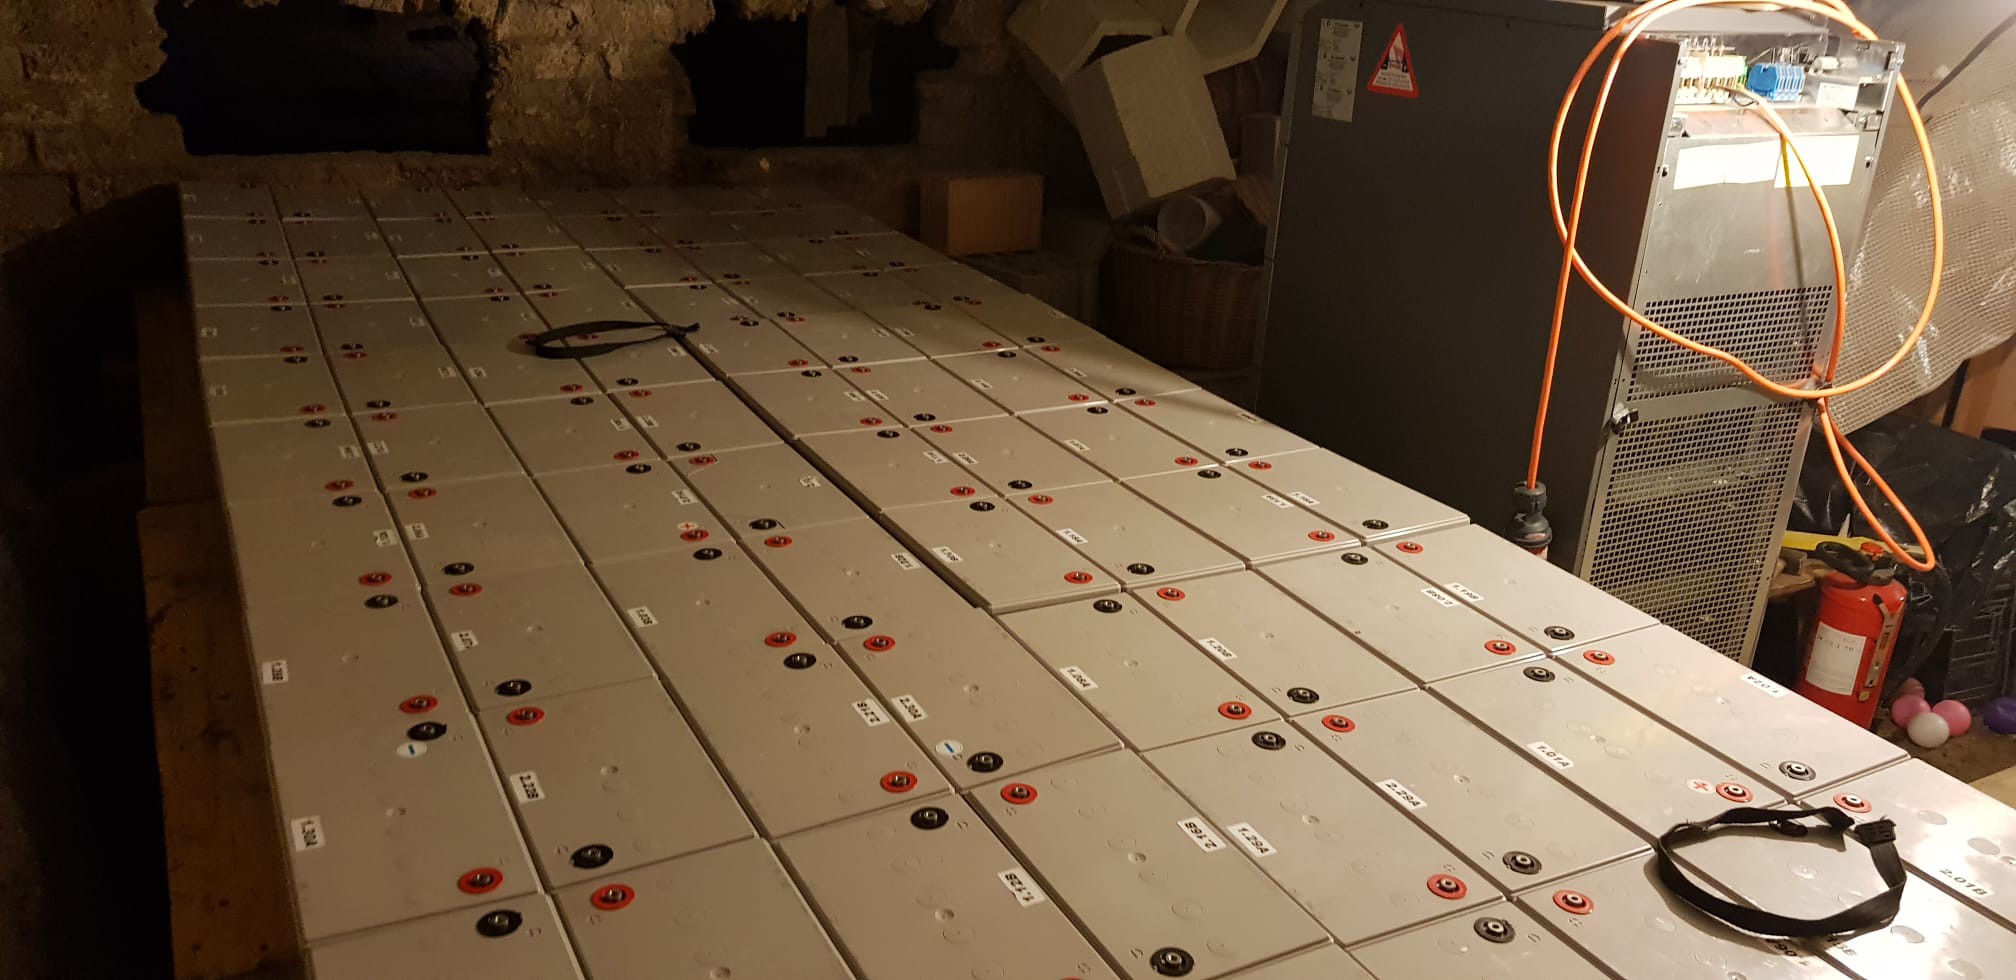
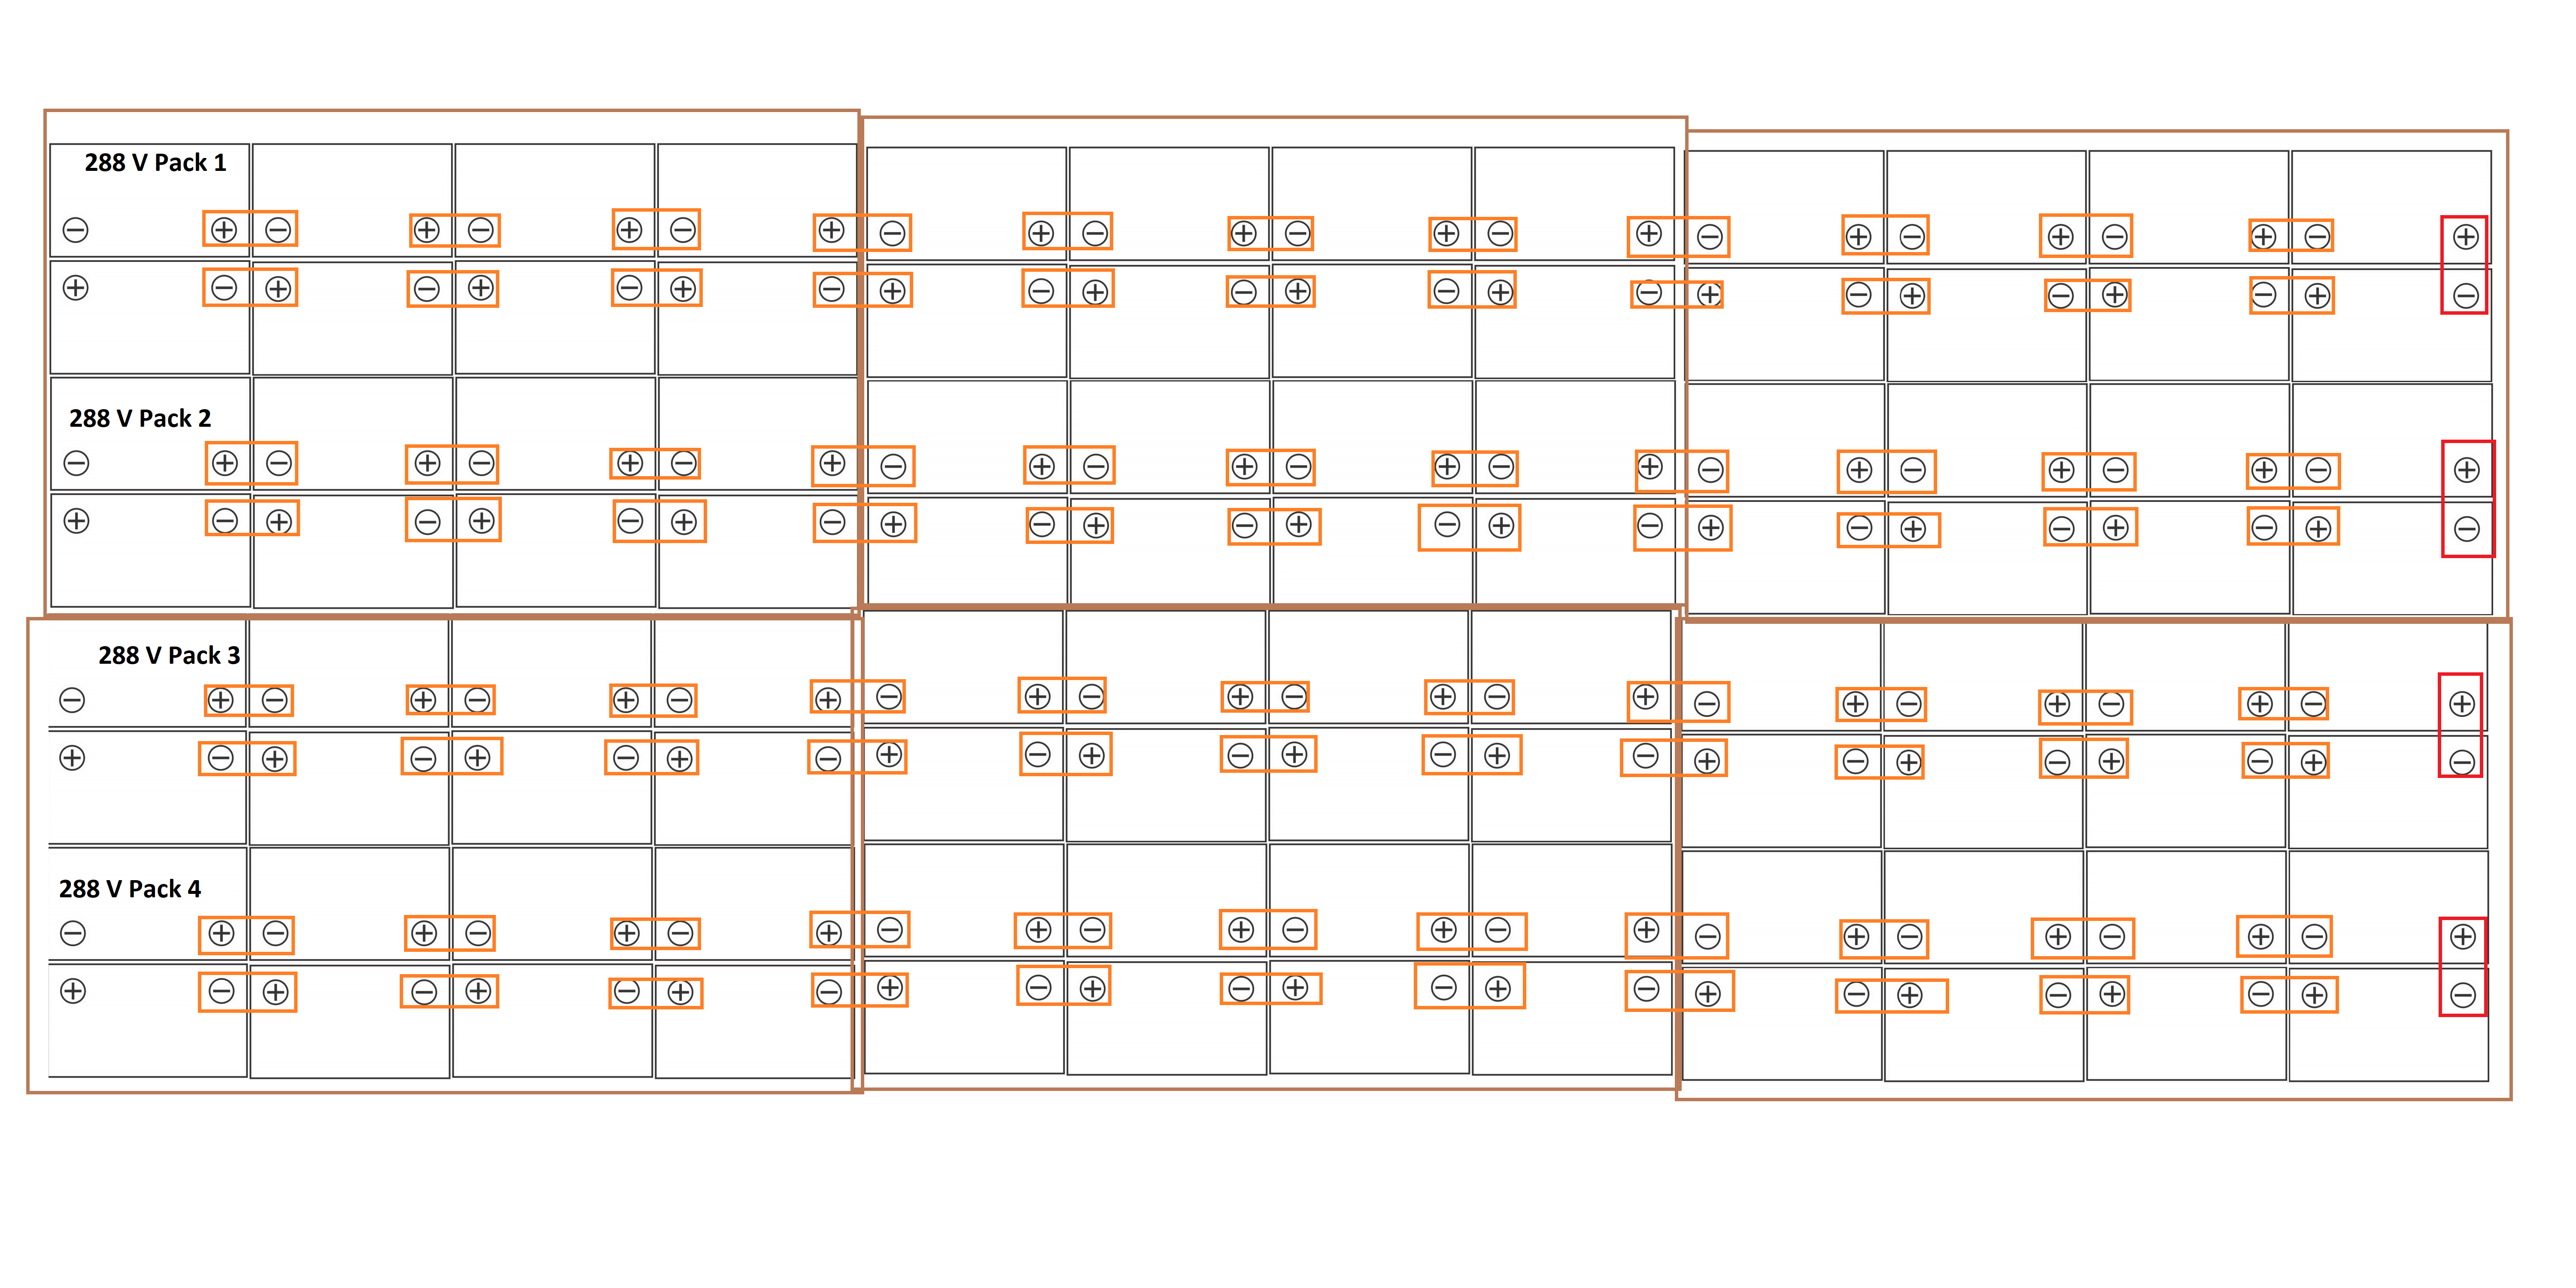
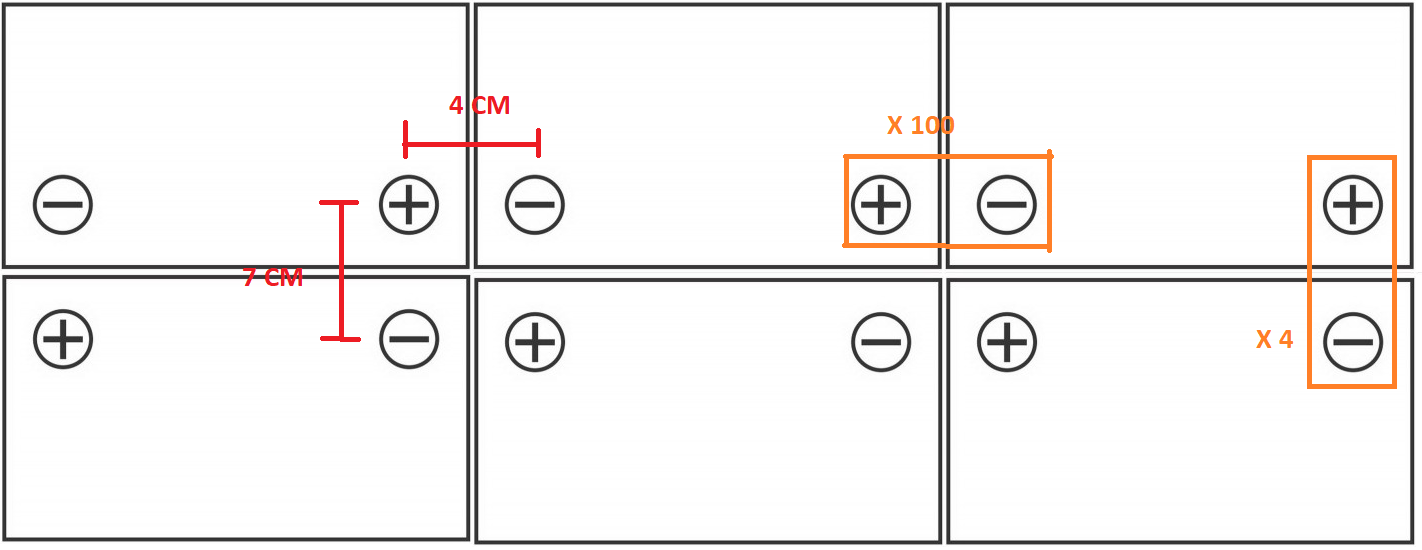
4) wire the battery together and to the UPS

5) fire up the system and pray that nothing catch fire

6) add a bit of monitoring (smoke detector, flood detector, get the state of the battery from the UPS

7) connect it to the house electric network

  • 96 × 12V 93 Ah Lead Battery Datacenter need to change them every 5-10 year
  • 1 × UPS Connectors and Accessories / Power Connectors
  • 20 × meters of 10 mm^2 cable amp's gotta pass

  • a few years later

    Nathann06/15/2022 at 21:05 0 comments

    The component to wire this to the house electric system are slowly being gathered.

    I top off the battery every few months, but the leakage current seems minimal. Only a loaded test will tell how much capacity is still usable from the battery.


    I also need to find a way to power this with renewable energy. The water wheel seems to be the best options in terms of cost benefit and complexity, but finding a copper line to cover the 200-300 meters between the house and the water stream is not easy when you have no budget.

  • The reversing of the UPS

    Nathann01/01/2020 at 19:25 0 comments

    This should have been one of the first log... better late than never.

    During this phase a learned a bit about how that UPS worked, Especially how the old battery where wired internally. 

    here is a look of it after the little modification. I added the cable on the right that go to the back of the UPS where there screwed to a terminal. Ready to connect the external battery.

     Originally the four cable on the left went to theses two fuse pannel (for lack of a better decritpion) and from there where wired 4 pack of batterys. each pack contained 24 battery wired in series for a total of 288V

    I believe that there pack where put half in serie and half in parallel and that a -288V was created with the two 288V pack put in serie . Then the juice went to the internal circuitry. from there i guess that a H bridge created the Sinus but this is only an educated guess as i didnt dive deeply into the circuitry...

  • It's Alive

    Nathann01/01/2020 at 19:07 0 comments

    after connecting all the battery correctly, dodging all the short circuit i finally managed to fire up the system and guess what : It work !

    the UPS accepted the new battery withouth complaining and after some poking around it even allowed to reprogram their capacity. The UPS can now deliver up to 40kW of power to anthing that is attached to it (the modest desk lamp you see on top of it for now) it would take up to 2 and half hours to empty the battery at full power but for the average consuption I expect more like 10 days of autonomy before we run out of power.

    Next step, Solar panel, wind mill and even maybe water wheel to charge the system

  • The big short

    Nathann12/30/2019 at 11:15 0 comments

    Ever wonder what a big oopsie can do ? hopefully only one battery was rendered unusable and I had 8 spare to switch them. 

    The incident lasted around 3-4 secondes but it was enough to vaporize a screw and melt the lead of the battery. the other battery dont seem to be affected. 

  • Hit the bench

    Nathann12/30/2019 at 11:12 0 comments

    I just had to place each of the 96 battery on the dry floor. each of them weight 35 kg and god my leg still hurt.

  • Dry floor

    Nathann12/30/2019 at 11:11 0 comments

    I dont have much experience with brick and mortar but after some try it worked

    On the next picture you can see the old clay floor that get flooded every now and then. I just dropped a few brick pillar to hold the palette in place dont worry the brick ended up well alligned

    and now finnished with the back of the UPS on the right

  • Flood

    Nathann12/26/2019 at 12:33 0 comments

    As we dismantled out old battery rack we discovered that water flooded around a centimeter under the pallet. Its a (very) old basement and we discovered that during winter water infiltrate it and let the floor wet. This is a problem since the wood rot in such humid environement and we have to adapt our plan.

    We are now forced to make some brick pillar to create a dry floor for the battery. preferably in a configuration such that we can connect all the battery longitudinally and make best us of the 4 horizontal connexion we can make.

    (I may have to forget to mention that the UPS need 4 battery pack at 288 V each this leave out 8 battery out of the 104 and 96 will be really usefull)

  • The First attempt

    Nathann12/26/2019 at 12:02 0 comments

    At first we had to prepare a nice rack to load up the battery, As you may see on the picture its made out of EuroPalette that you can get for free or pay 20 $ a piece depend where you ask.

    Unfortunatelly, we reallised later that the battery where bonded by a thick copper plate with two hole and we had to screw them between the battery terminal. Or we had around a hundred piece that allow us to bond them in lenght but only four that bound them laterally so we had to rework the battery layout

View all 8 project logs

Enjoy this project?

Share

Discussions

Olviae wrote 10/13/2023 at 08:45 point

How would you charge this? Even 3phases couldn't handle is.

  Are you sure? yes | no

Nathann wrote 10/13/2023 at 09:25 point

i charge it slowly. the is not point in charging it using 40 KW. it will work happilly with 500-1000 Watt of solar pannel but it's just slow. which is not a problem as long as i dont draw more than the average power produced

  Are you sure? yes | no

Jason Cho wrote 01/09/2020 at 02:13 point

This is super dope!!!

  Are you sure? yes | no

Similar Projects

Does this project spark your interest?

Become a member to follow this project and never miss any updates