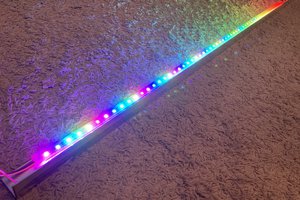
This project was quite a cool endeavor. Through it I was able to learn alot about (inaccuracies!) representing colors, what is a color, and how on earth do you transition between colors?(What intermediate colors do you show? What values to play with?).
Add to that, how on Earth do you know where the Sun is? No seriously, where is the sun relative to your position on Earth and time of day? Turns out astronomer's got your back with alot of floating point operations and equations (fun!).
Having (partly) answered the above questions, you can connect the answers in code and create a small colorful globe to reflect the sky's color above, using the Sun's relative position to guide your colors.
Where's the Sun?
Well with no frame of reference that's a really poor question. A better question, relevant to our project, would be "Where's the Sun relative to my position on Earth?" much better.
(A heavy inspiration for the math was from a blog post I found here : http://stjarnhimlen.se/comp/ppcomp.html This blog also has a better explanation and more details about the topic than I can understand)
To specify/describe the location of the Sun in the sky we need two metrics (usually we need three coordinates in space, but the distance to the Sun won't matter now), these are the azimuth and the altitude.
Azimuth is the direction to look in for the Sun (where to turn your neck to), and the Altitude is how "high" the Sun is (how much to turn your head back). Azimuth is 0° at North and increases in the clockwise direction till it hits North again (0-360°), while Altitude is measured from the horizon till above your head (0-90°).
Note there are certain ranges/values we are interested in for our project, namely sun rise, sunset, and noon as these three points provide "key frames" for the sky's color.
To calculate the Sun's coordinates we'll rely on a set of equations (from here) that use the location of the observer and the time of observation, to predict the Sun's position, and to also predict the time at which the Sun reaches these "key frames". Hence we know when the sun rises and sets, but also know when the sun will reach it's peak altitude (noon).
Choosing Colors
This ain't an easy task. The sky's color is dependent on the weather, terrain, and even pollutants in the atmosphere. For this task we chose a "fair" representation of colors with a reasonably smooth transition between them that ends with a gloomy blue to show a night sky.
I'm not sure how to transition between multiple colors in one go, so I ended up creating a transition between every pair of colors. To do this I used WolframAlpha to get linear equations for Red, Green, and Blue colors as their values changed from one color to the other.
This is why the snippet of code determining the color is just linear equations stuck together:
//#E7314D to #FFF360
else if (0.25< x <= 0.5){
    red = 96*x + 207;
    green = 800*x - 151;
    blue = 76*x + 58;
}
It's worth mentioning I've tried polynomial regression to go through multiple colors, but it always dipped to weird colors (green and brown).
I'm using a 12-pixel Neopixel ring so communicating to them is quite a breeze. If you feel the colors are too unnatural feel free to change them, but be sure to update the equations suitably!
Ideas and Improvements
- I believe the code is quite redundant on the math. We can minimize it and make it easier to understand.
- Incorporate the brightness of the LEDs to be part of the color display.

 Jon Kunkee
 Felix Raimundo
 Andy Oliver
 peter ward