 bobgreenwade
Variations
There actually are three basic variations on this device, each with its own advantages and challenges, and each serving a different purpose.
Helmet Voice Changer
This is a version that could be used by a Stormtrooper or Mandalorian bounty hunter from the Star Wars setting; a Dalek or Cyberman from Doctor Who; Iron Man or some similar power-armored superhero; or similar things. (I originally conceived of it for a costume as the Golden Age Sandman, even though he never used one -- which should illustrate how you can go ahead get really creative with this!)
Among the limitations of this version is that its placement makes it difficult to control directly; a separate control of some sort will be needed. The solution presented here is to use an Android app to control the device via Bluetooth; while the Bluefruit app can suffice, I expect to be working up an Android app specifically for this project. (An iOS version is a big maybe.) It should also be possible to control the device through some other method, such as XBee or even a wired remote, though I'll leave these to the reader's creativity.
On the other hand, this version has the benefit of being completely self-contained: the microphone and speaker can be kept in the same enclosure as the electronics. Since the device will be very near the user's mouth, and probably directly in front, some protection will be needed to stop breath and spittle from contacting the mike and electronics, but those concerns are easy enough to address.
Throat Voice Changer
But what if your character doesn't wear a helmet, or any other kind of mask? What if your costume is as the Monitor from the "Arrowverse" TV show crossover events (Elseworlds and Crisis on Infinite Earths), or a Goa'uld System Lord from the Stargate franchise, or something of that sort? What then?
Well, hopefully you can cover up your neck, because that's where the piezoelectric microphone comes in handy. For this, you'll want something very small, and most importantly thin -- and that goes for your speaker as well.
You'll also be doing a bit of sewing; have some lycra (spandex) ready. If you prefer, you may use some other stretch fabric, but lycra will work best for most purposes. (If the neckband is going to be visible, make sure it's the right color! Unless it's going to pass as a decorative neckband, it should match either your skin color or the color of an adjacent garment.)
However, keeping the electronics separate does have the advantage of allowing the user to control the device's parameters right from the box itself. The (arguably) simpler method is to use a touch screen, though it could also be possible to use buttons, switches, and wheels (though I'll leave the implementation to your own creativity). Of course, Bluetooth control is still possible, and the device could even be set up to use both.
Hand-Held Voice Changer
This is the version that isn't hidden; it's just a completely self-contained unit. It can be used to experiment with settings, demonstrate the device, or just have fun at parties.
Since there's no need to keep up any "illusion," there's no need to hide any part of this. The enclosure can include the mike and speaker from the helmet version, and the touch screen from the throat version; everything you need is in one unit, without having to connect up anything else.
Components
The heart of the project is the Sound Processing Shield, a separate project I've done here on Hackaday.
As listed, the project uses the Arduino Leonardo as the main board. It's the best option I've found that doesn't come with pre-installed headers. This can be important if you're using both the Adafruit PowerBoost 500 Shield for battery power and the 2.8" TFT Touch Shield for control; the former Shield doesn't allow for the SPI pins to go through, and using those pins for the latter Shield can keep things from getting too complicated.
Of course, if you're using the Helmet version,...
Read more »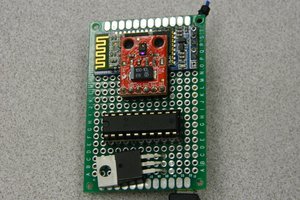
 Noah Pena
 AccidentalRebel
 RemoteMCU
 Fingoti