 Steve
SteveThe first challenge in designing this clock was to find a suitable motor. Old electric clocks use AC synchronous motors, but they are getting hard to find. I tried microwave oven motors. They are not designed for continuous operation and have semi-random gearing inside. The label says 5-6RPM, which would imply 6RPM at 60Hz, but one brand was 5.824RPM and another was 6.228RPM. It seemed like too much trouble to build a clock around them. The next experiment was to run a stepper motor as a synchronous motor. 6VAC was directly applied to one coil and a series capacitor was added to the other coil. It worked, but the output was a bit jerky between steps and the clock was noisy. I tried using a cheap stepper driver chip with micro-stepping to slow down the motor. The result was still too jerky.
I decided to build a smoother micro-stepping driver circuit around an Arduino Nano. It is small enough to hide in the base of the clock. Power is applied through a USB cable which is also used for programming. The stepper is driven directly with the Arduino output pins using resistors to limit the current to safe values. Each channel uses 5 binary weighted resistor values to provide 31 different settings. Both coils combined create a micro-stepping circuit with 62 discrete steps. The result is smooth movement that is significantly quieter than all previous experiments. The NEMA 17 motors are rated for 3A per coil, but the simple driver circuit limits the current to around 34mA. This still provides plenty of torque for driving a clock. The algorithm is relatively simple using uniform delays between each micro-step. The accuracy of the ceramic resonator in the Arduino Nano is not too great, so the exact delay gets adjusted manually for each clock to within 0.33 seconds per day. There is plenty of room in the case to add a real time clock reference if the Arduino clock drifts over time.
The clock is built around a three-piece frame. The front and back frame hold all the gears in place, dropping into the base to hold everything together. The design evolved over time starting with a 6.5” tall design, updated to a 9” version, and eventually the large 11” version. I really like the look of the purple silk PLA in the large clock. Total print times are around 25 hours, 50 hours, and 75 hours for the largest. The front frame on the large version completely fills the print plate on a Prusa MK3.
The stepper motor gear directly drives the second hand. The rest of the gears are used to divide by 60 for the minute hand and divide by 12 for the hour hand. Gear ratios were chosen for cosmetics as well as functionality. For example, the 60:1 ratio between the second hand and the minute hand is often done using a 60:8 and a 64:8 gear set. I decided to use additional gears and increase the sizes for a better look. This clock uses 45:15, 50:20, 50:25, and 48:12 to drive the minute hand. The hour hand is driven with 45:15 and 48:12 gears. The gears are arranged for symmetry with the two 50 tooth gears at the top and a 45 tooth gear at each side.
The gears used in this clock were optimized to print as cleanly as possible. The original profile started as cycloidal gears generated using Gearotic with small gears driving large pinions. This is be best for a motor driven clock but would be reversed (large gears driving small pinions) for a weight driven clock. A few surfaces were rotated to create parallel sides. As far as I can tell, they still obey the rule of constant rotational velocity. The rim and spokes were made the same width as the gear teeth and the number of walls was increased to 5. The resulting gears print with very few retractions. The teeth, spokes, and rim end up as solid PLA. ...
Read more »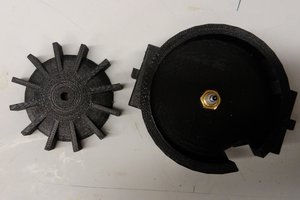
 Lex Kravitz
 Craig Colvin
 Henry York
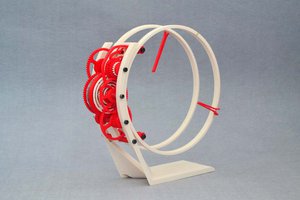
 ekaggrat singh kalsi