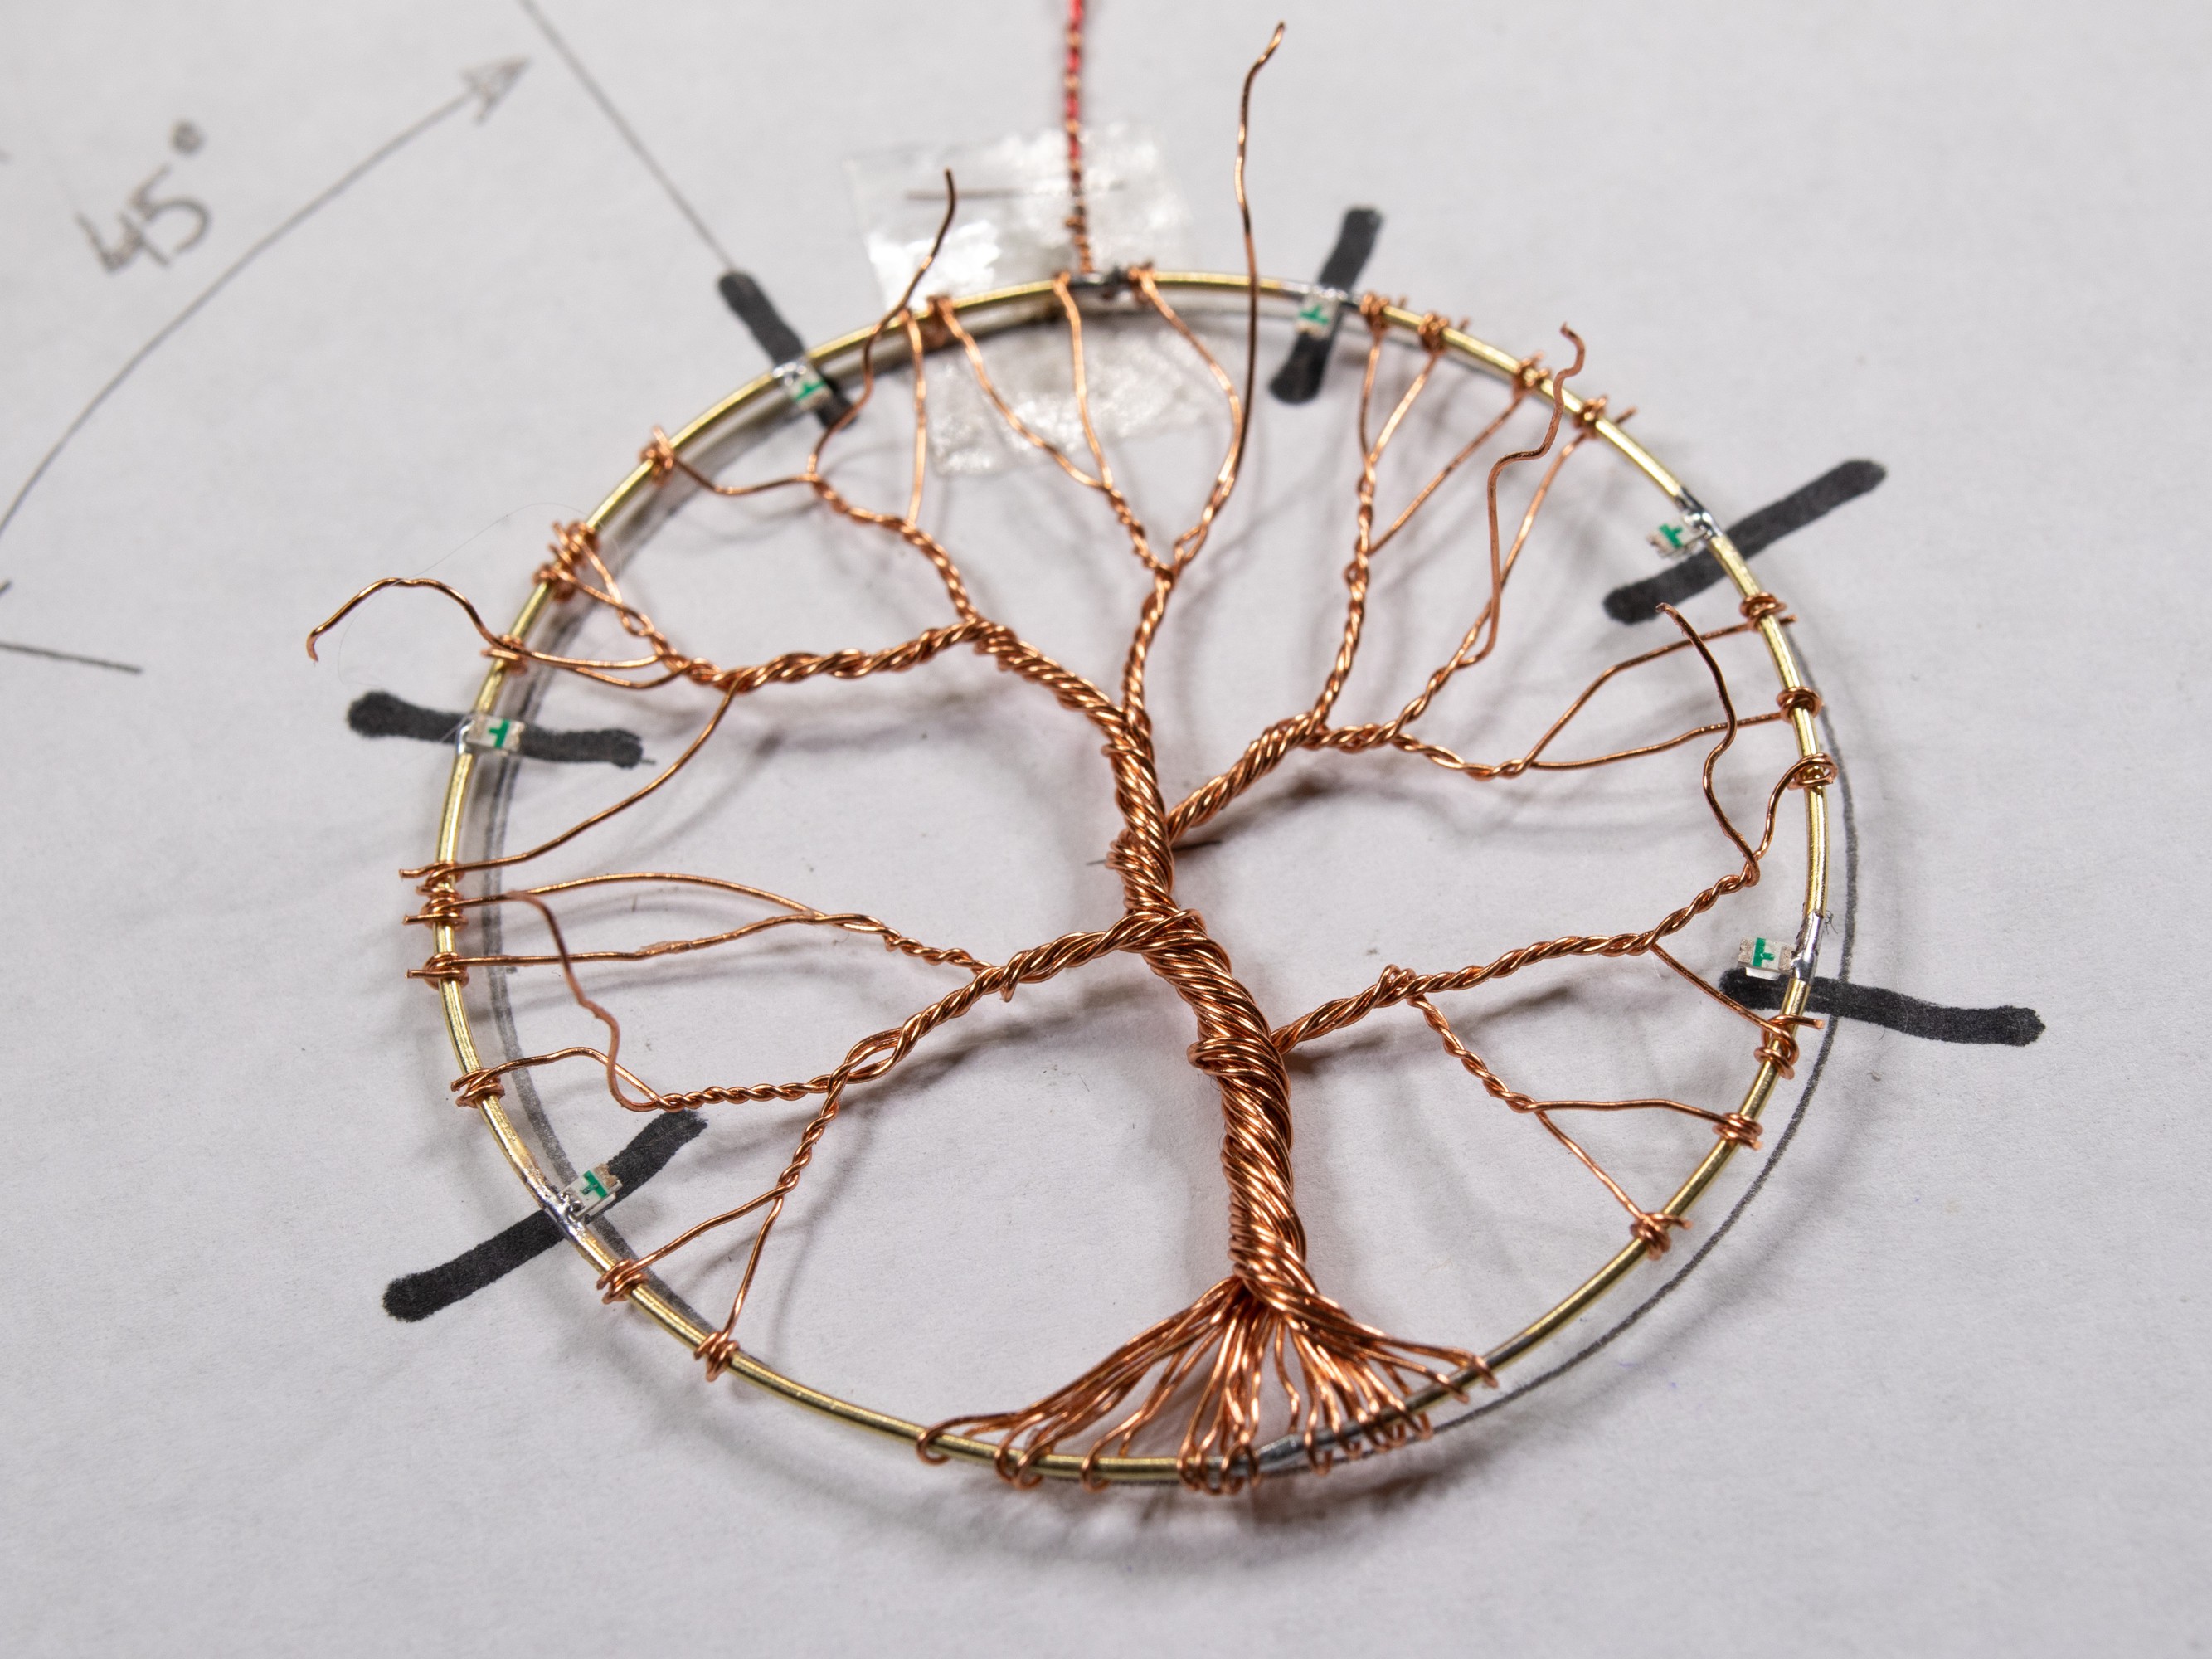
Create a 2" diameter circle an mark 6 spots for the LED's (approximately 45 degree from each other)
2
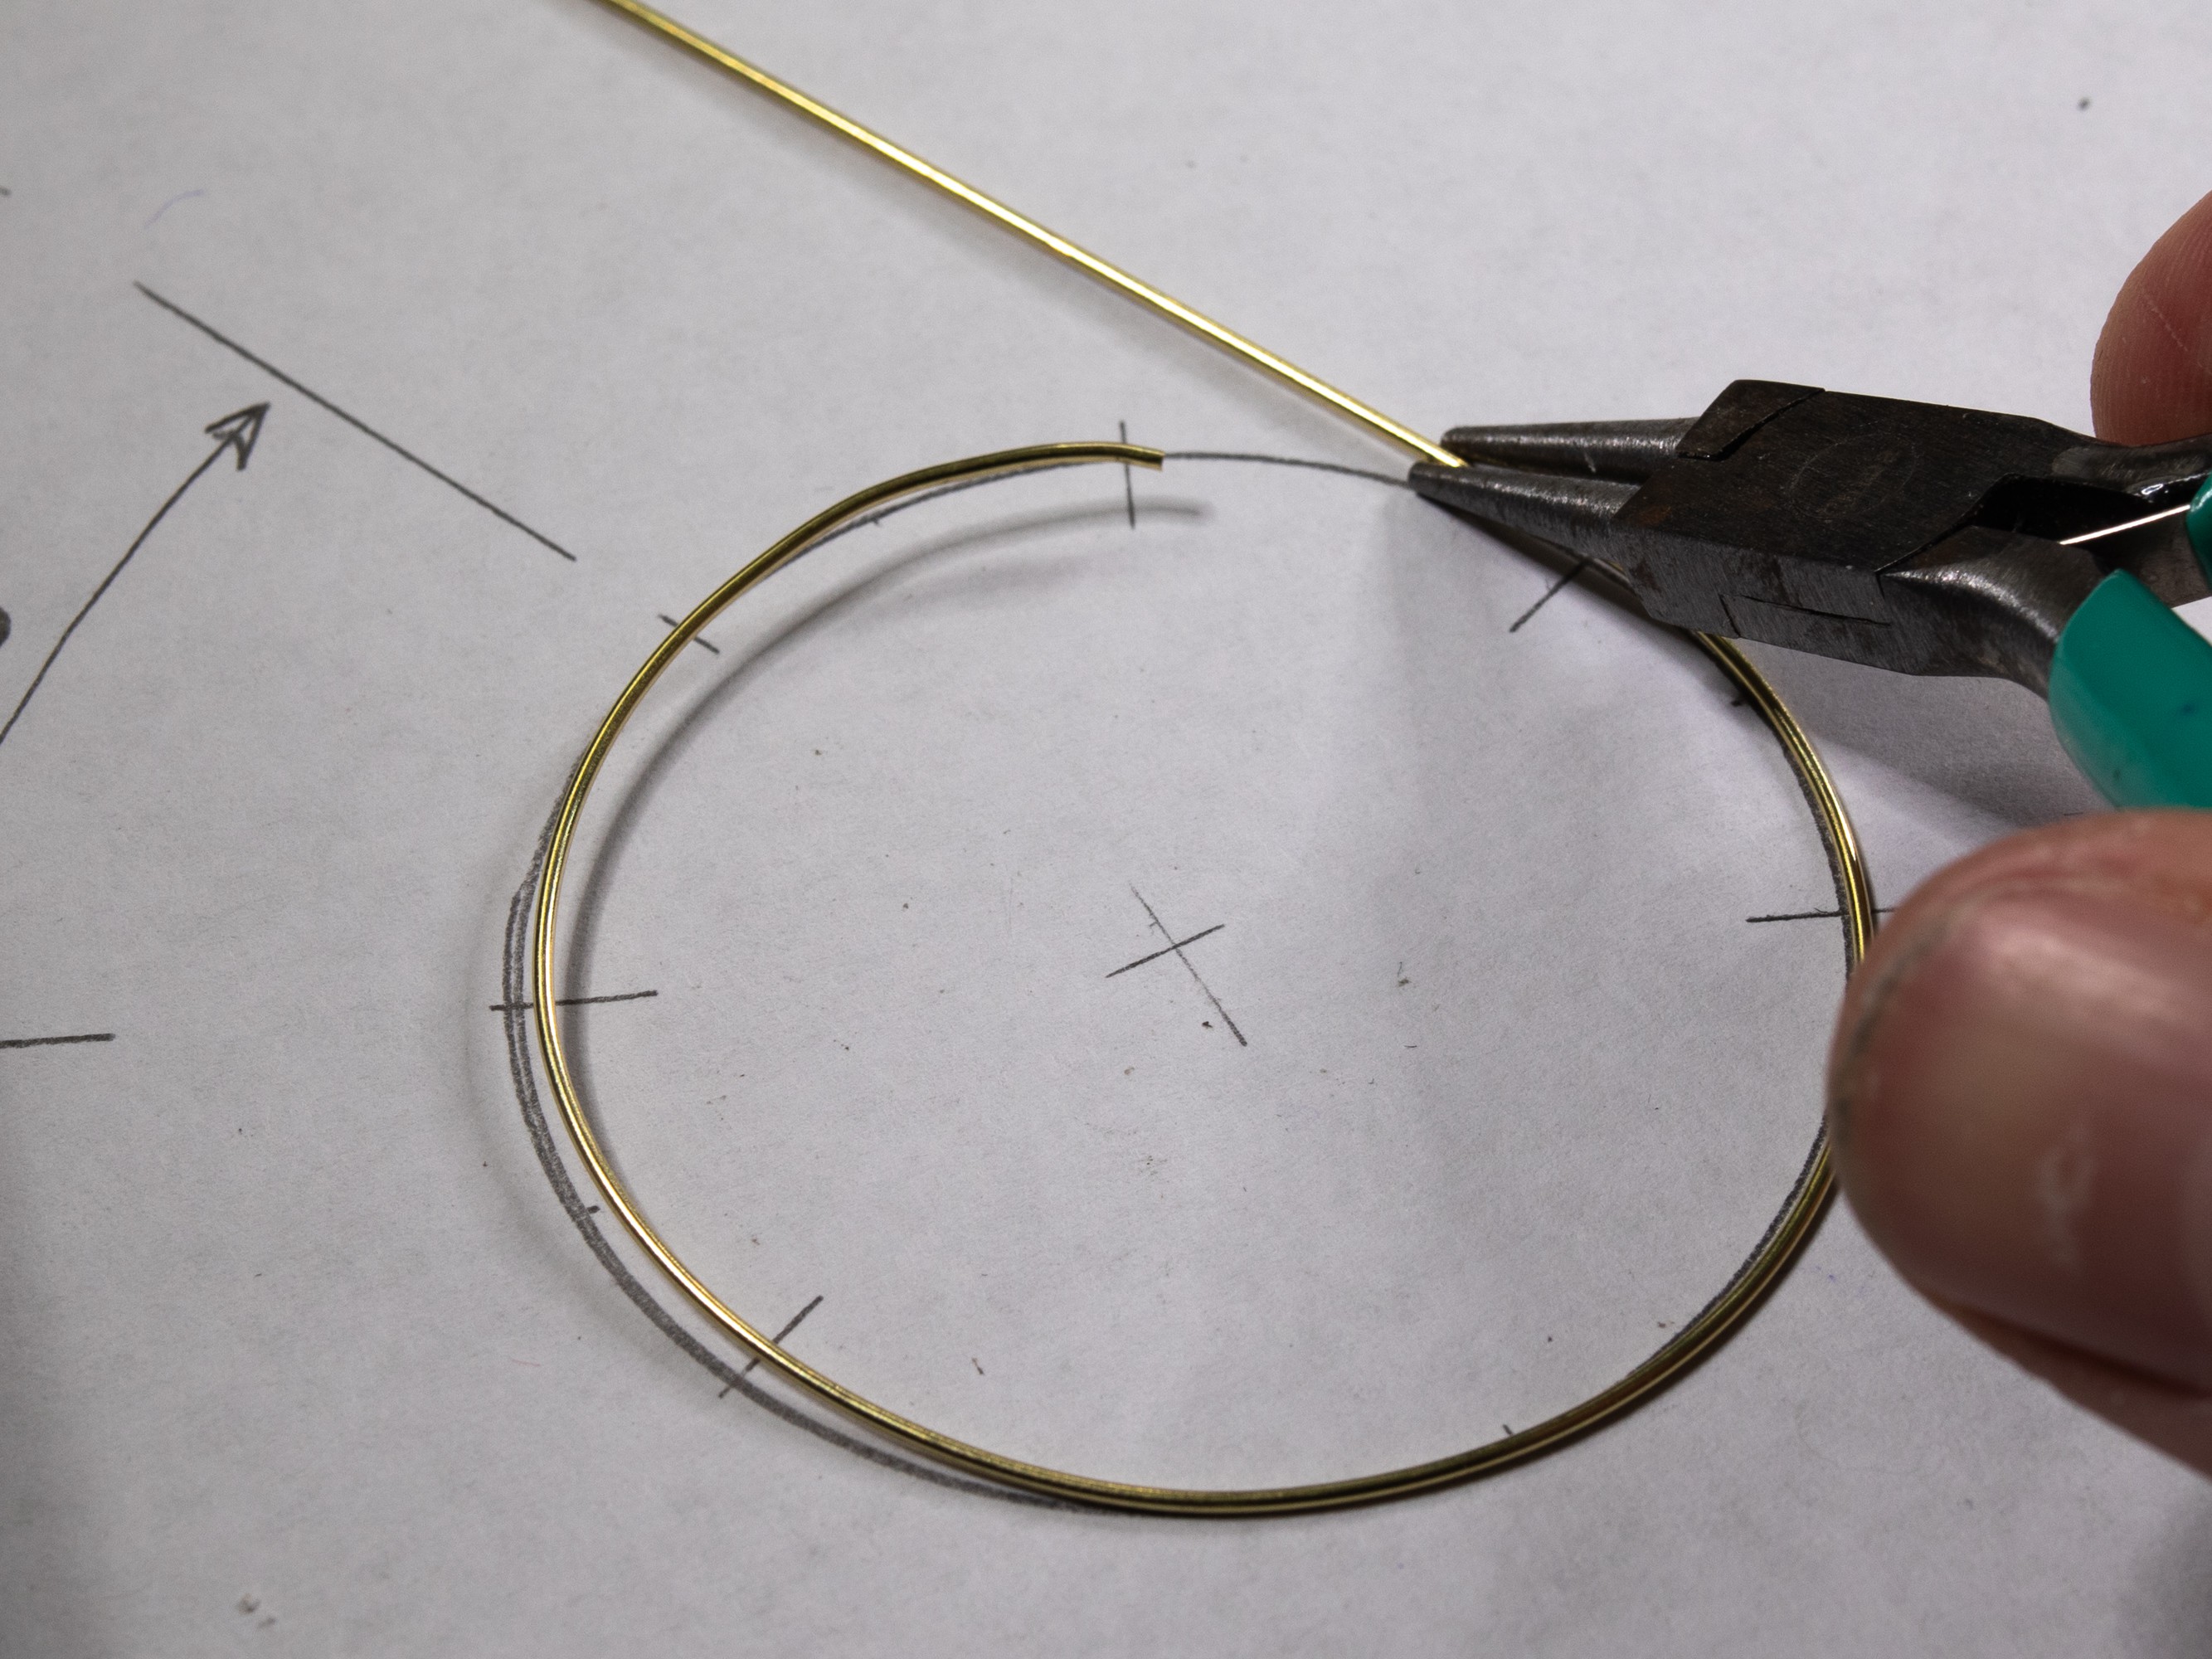
Bend the brass rod and solder the end
Use the template to bend the brass rod
It helps to use a round object as follows:
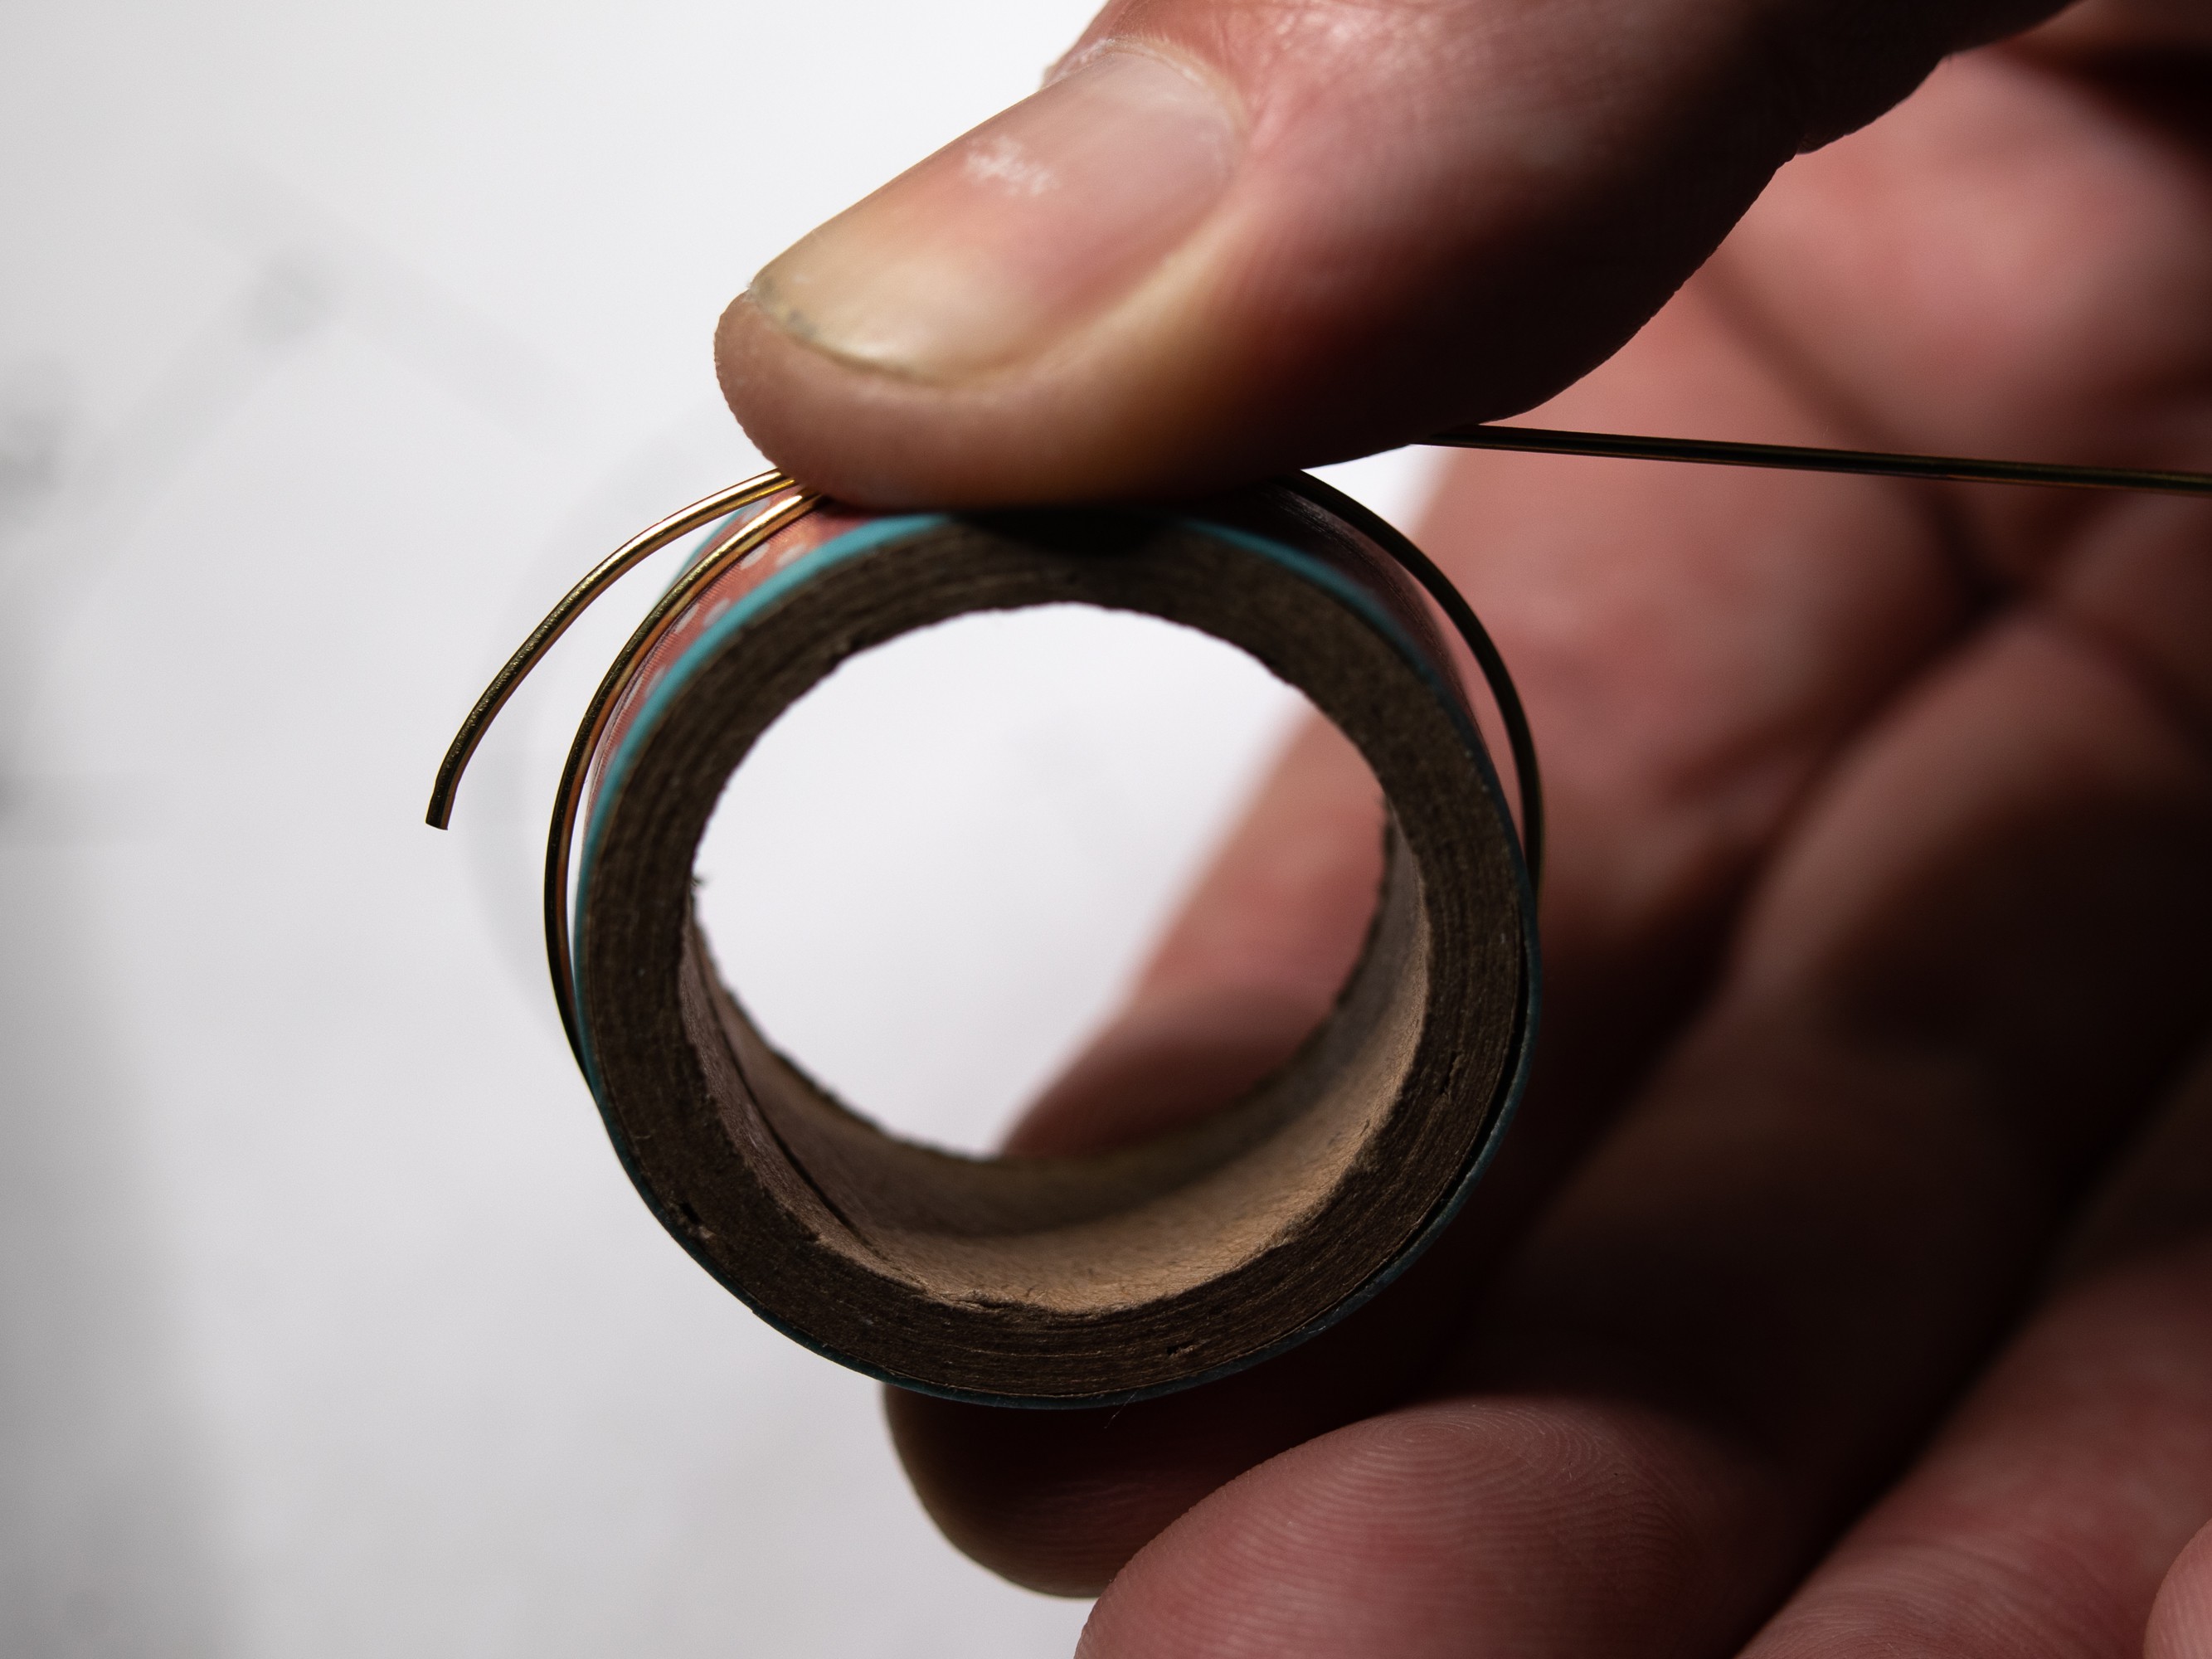
I used a small piece of double sided tape to keep the open ends together before soldering. Applying flux before soldering makes it easier to join both sides.
3
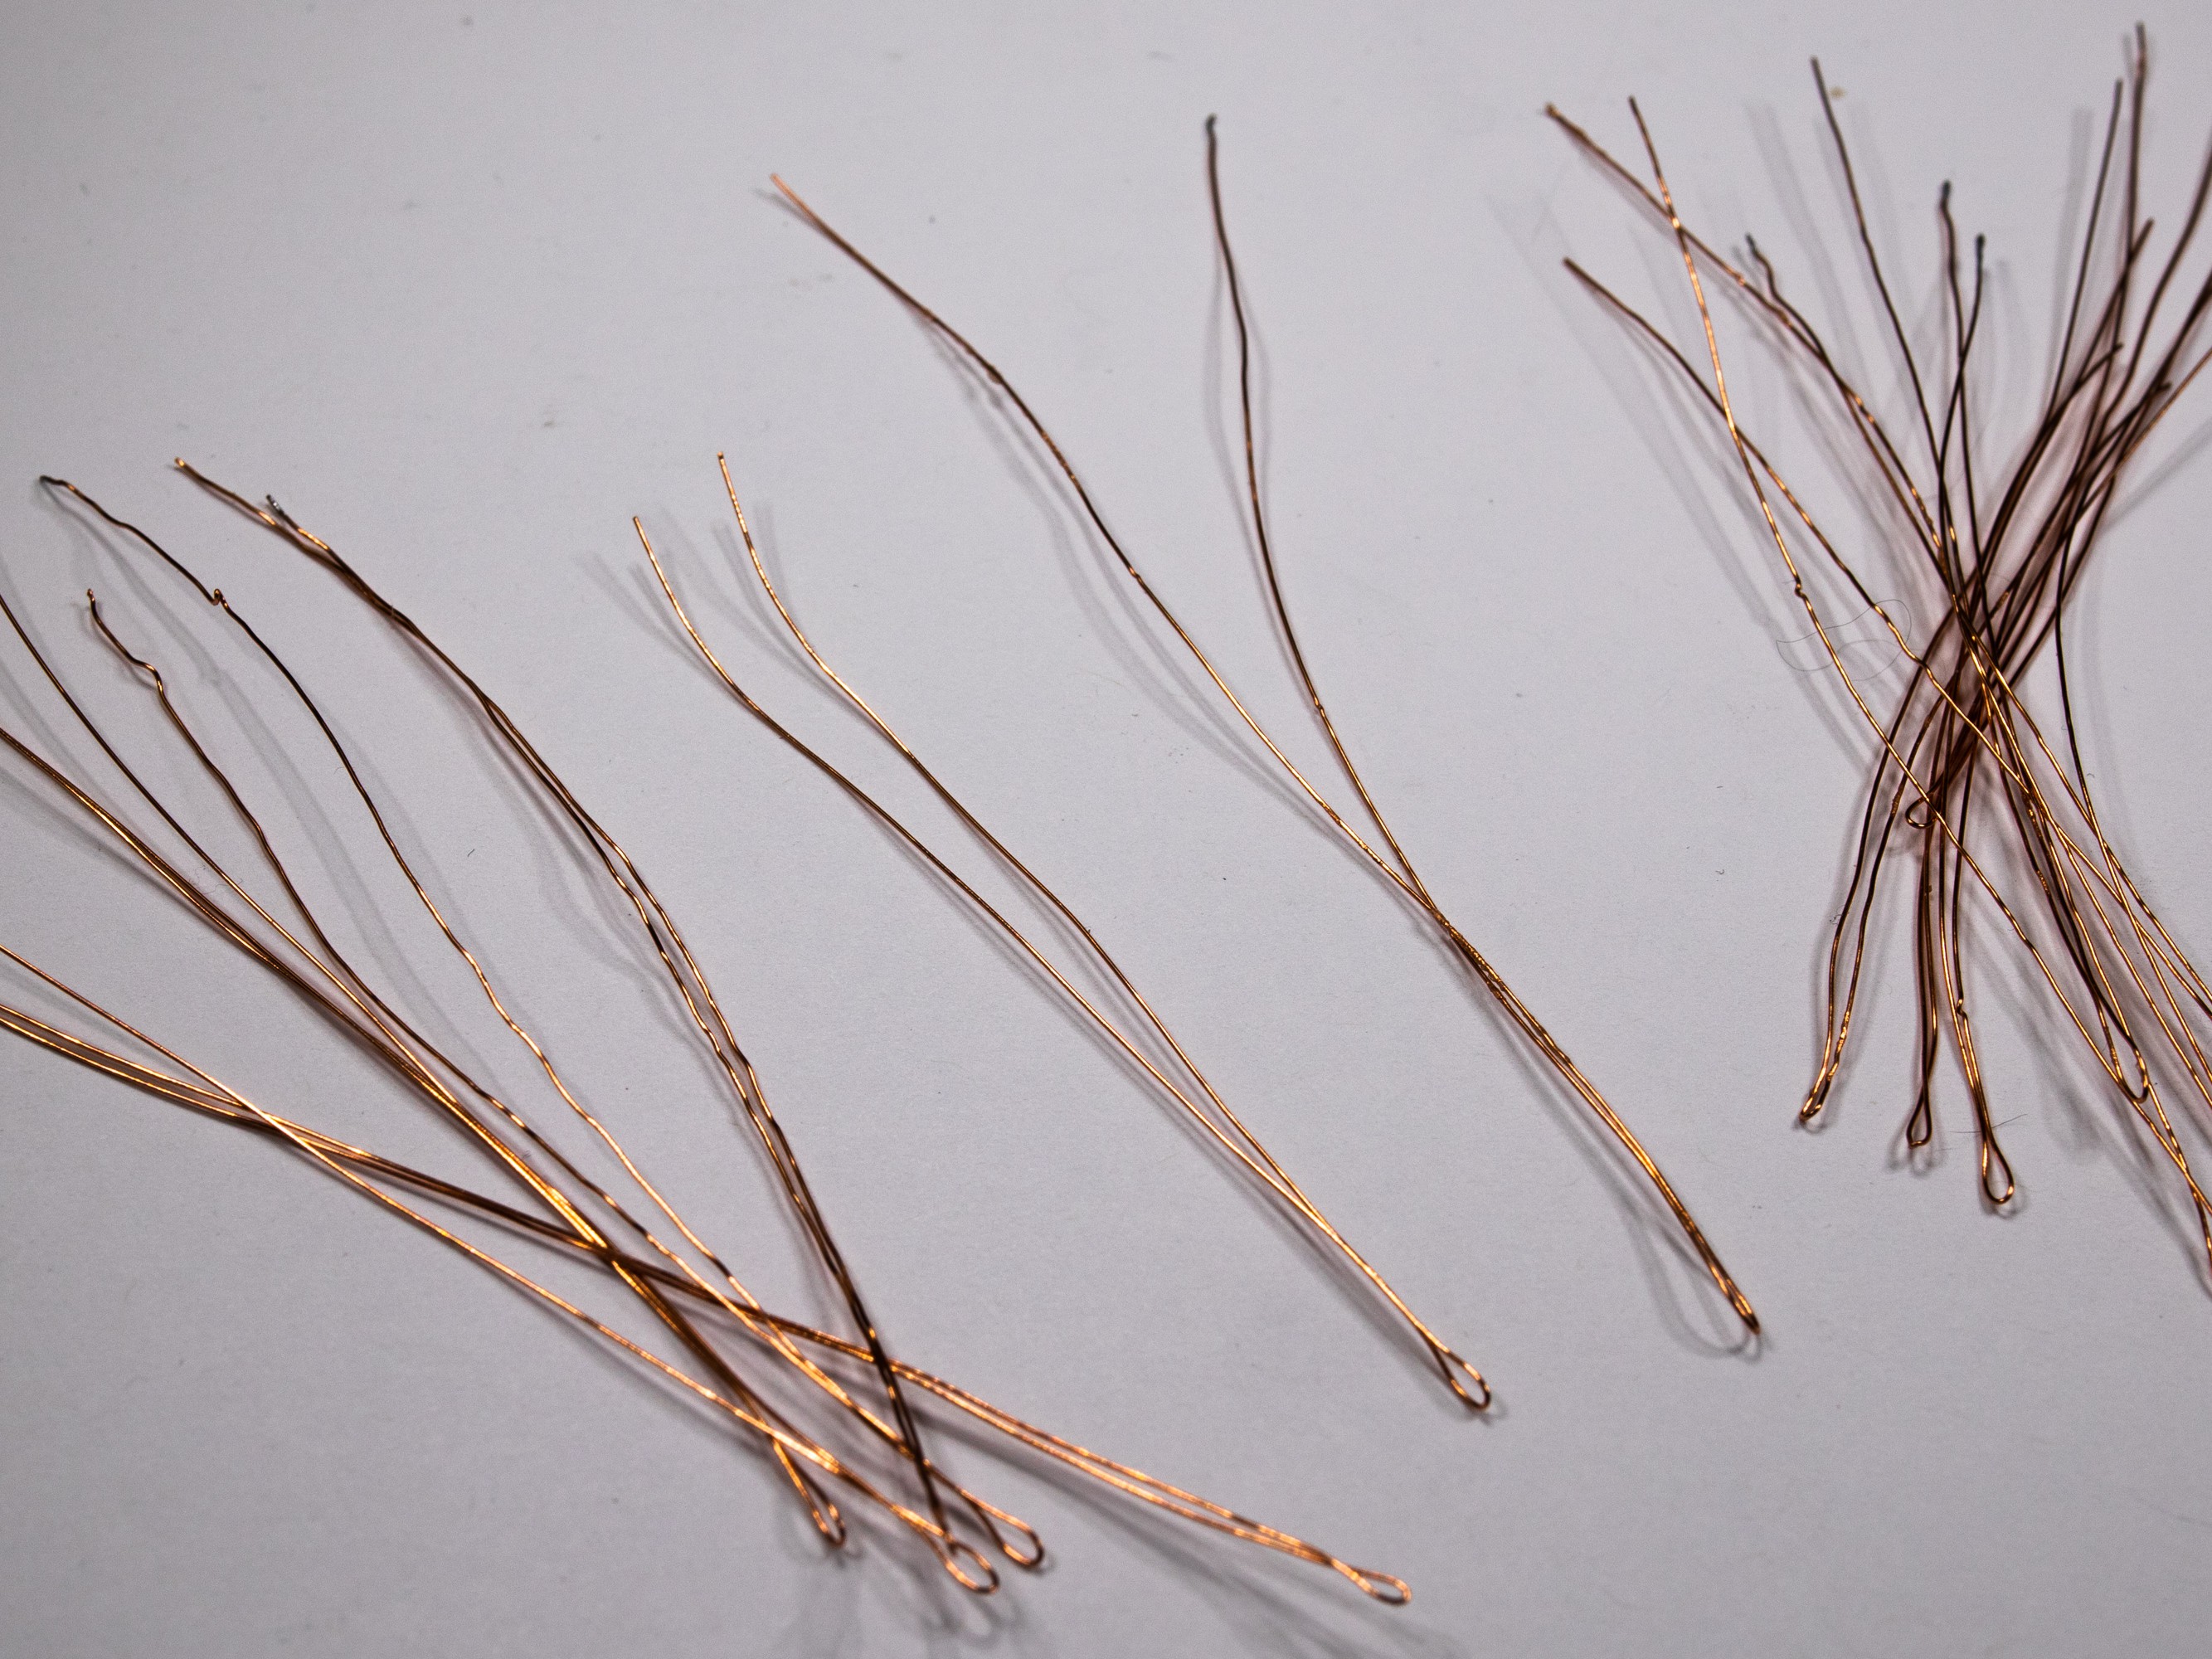
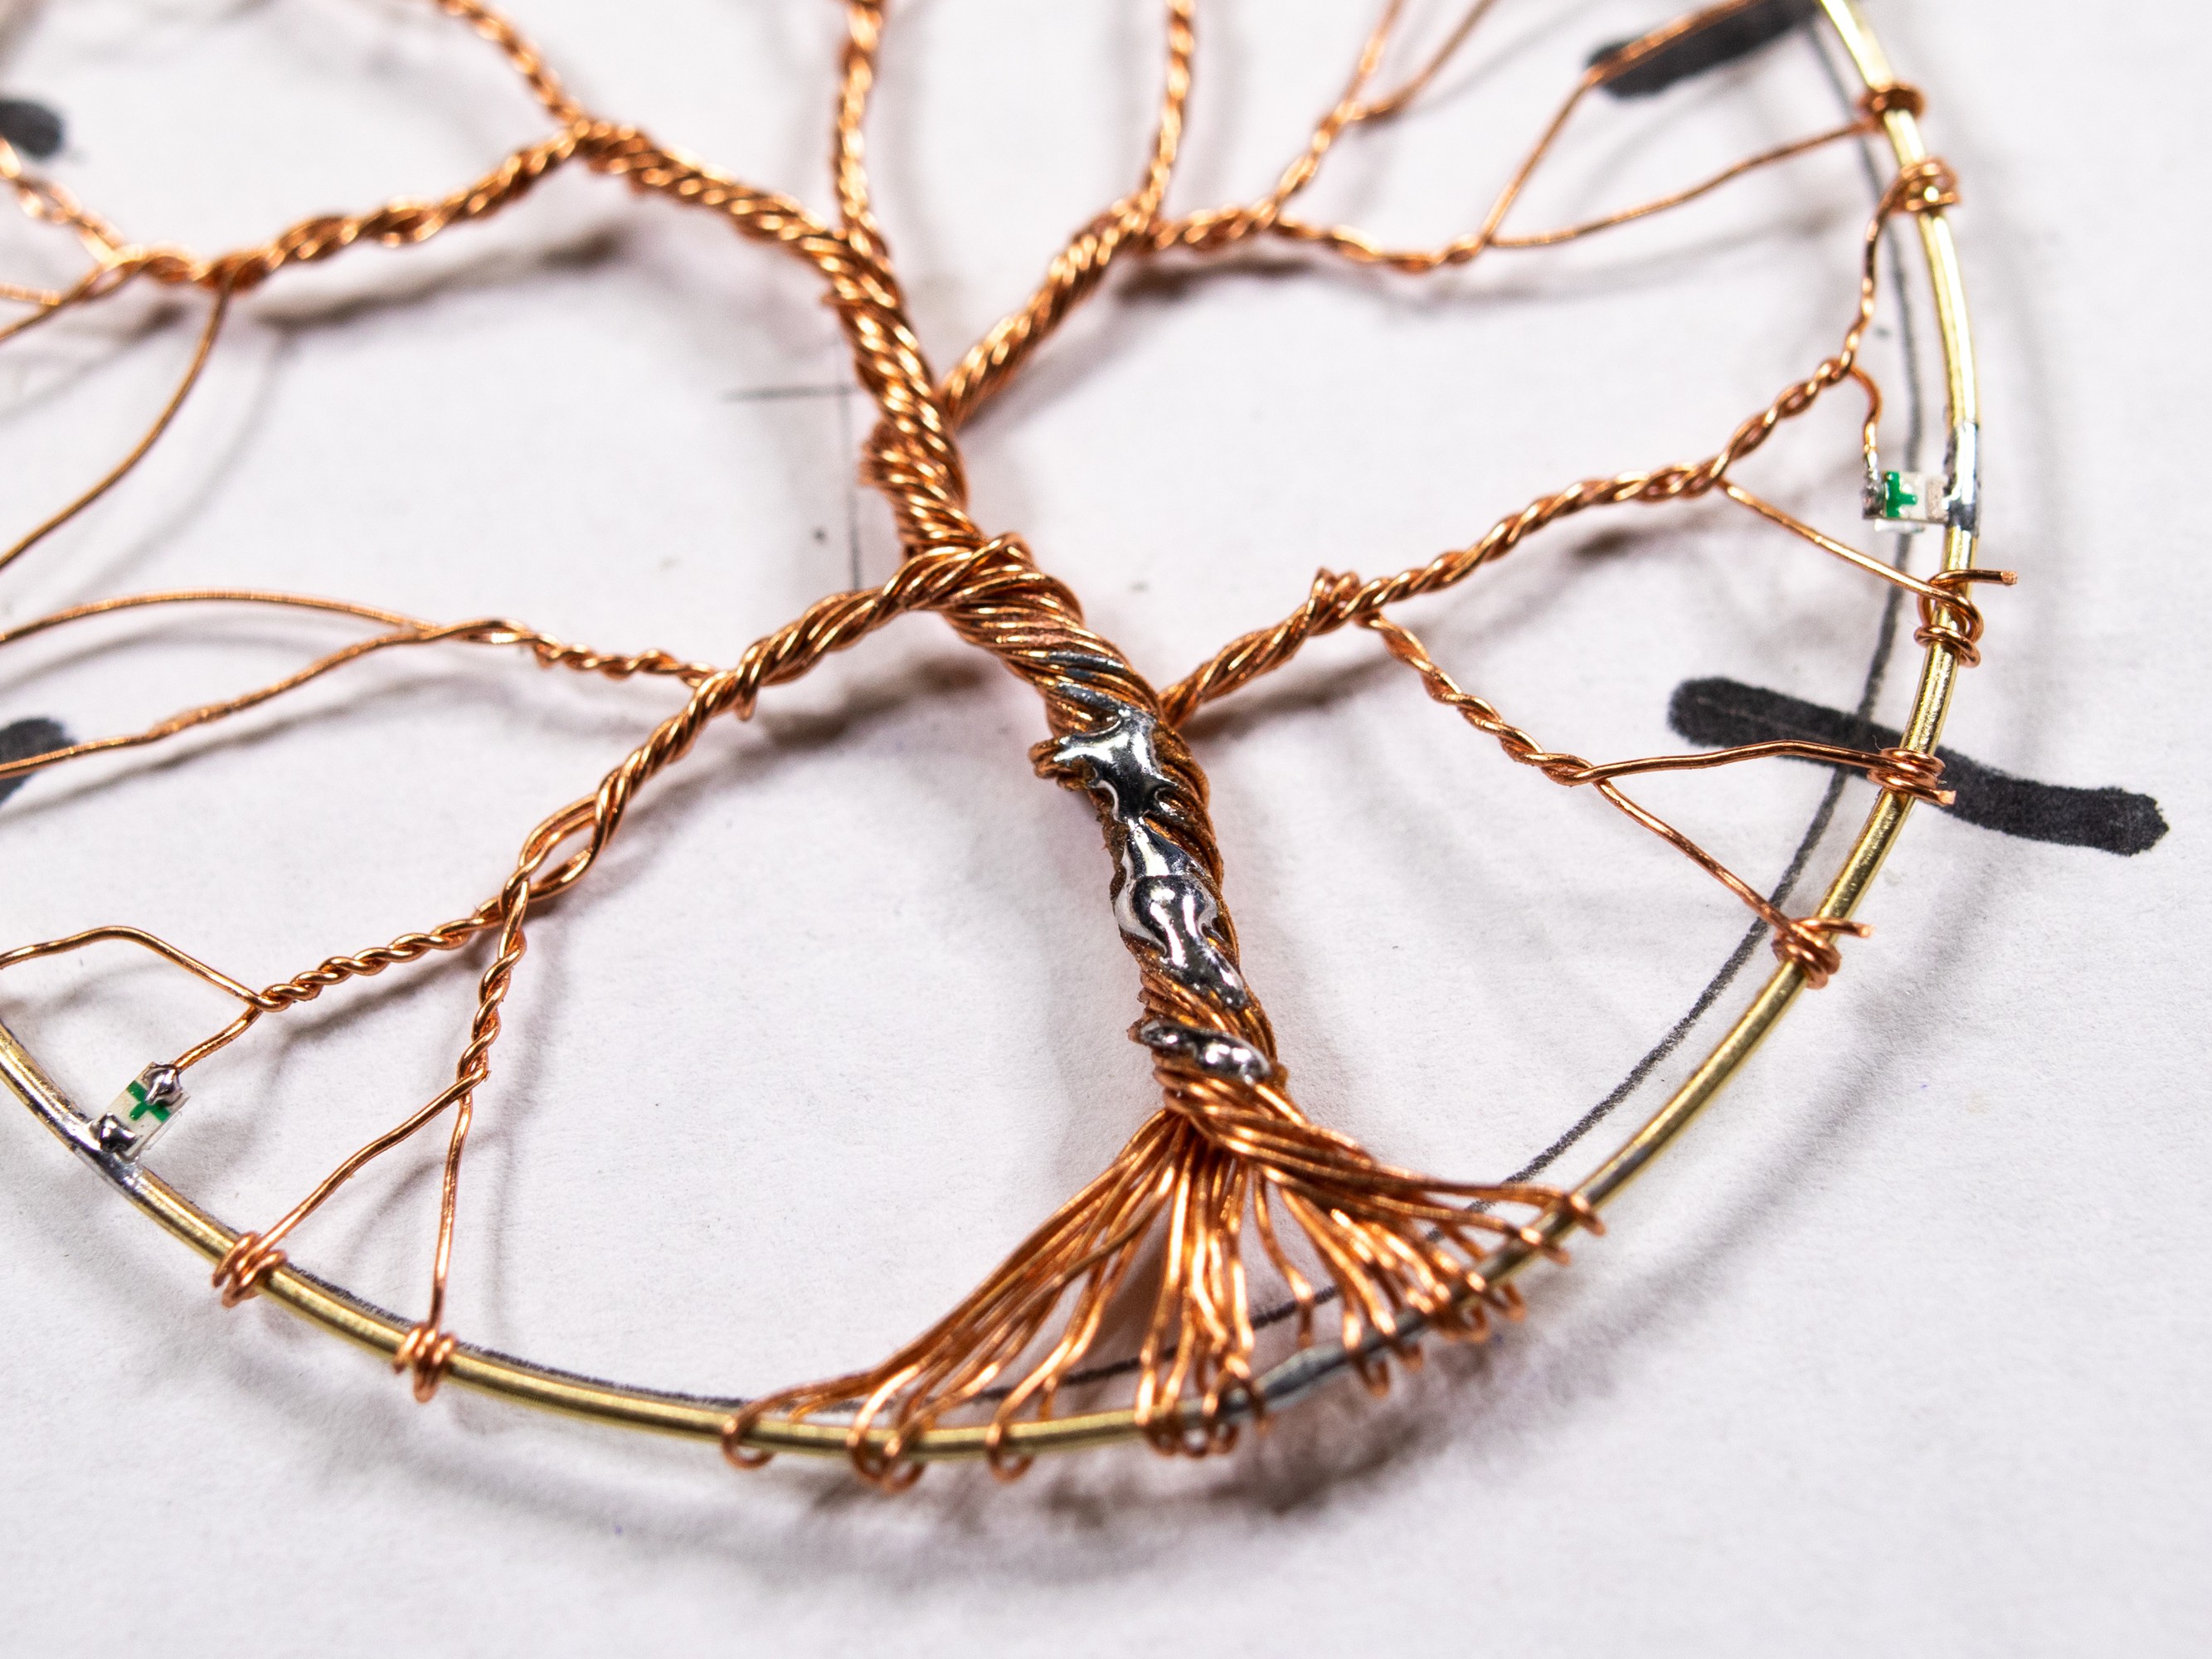
Cut and bend the branches
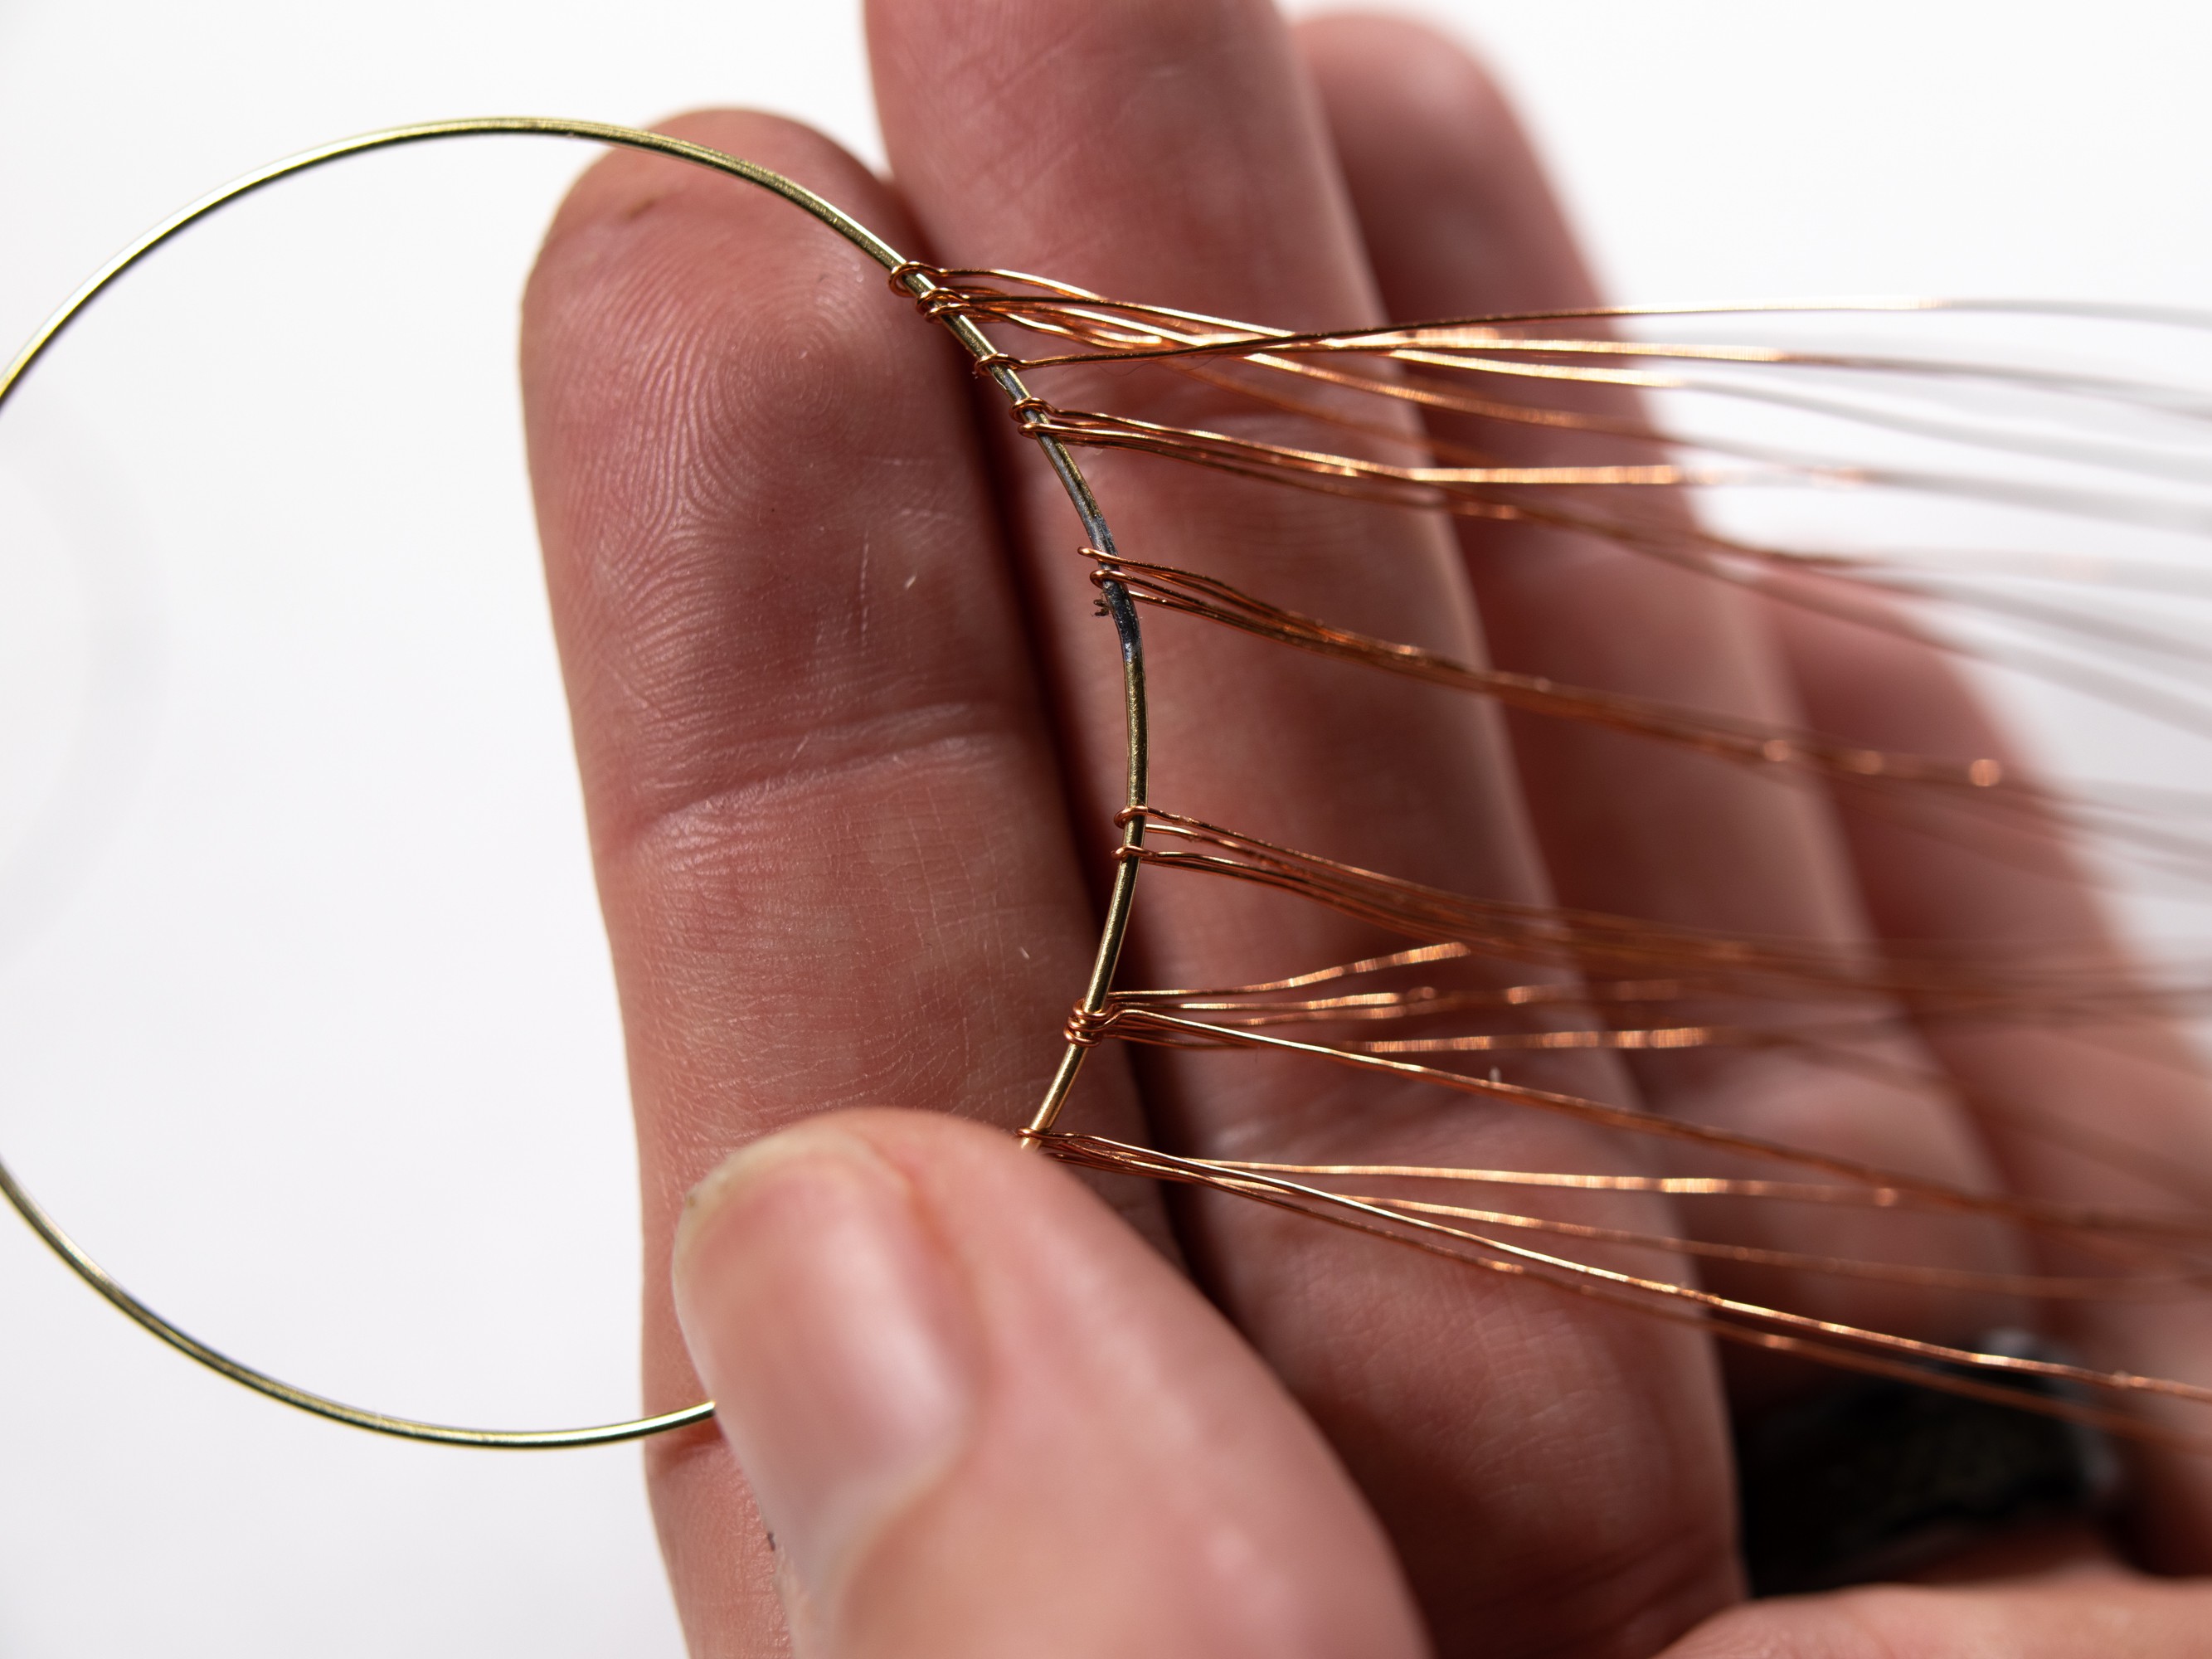
Cut 16 6" long strips and bend these in half as follows:
4
Place the wires on the round brass rod ring
Use the wires to cover the soldering joint on the bras rod ring. Space them even to the width of the trunk.
5
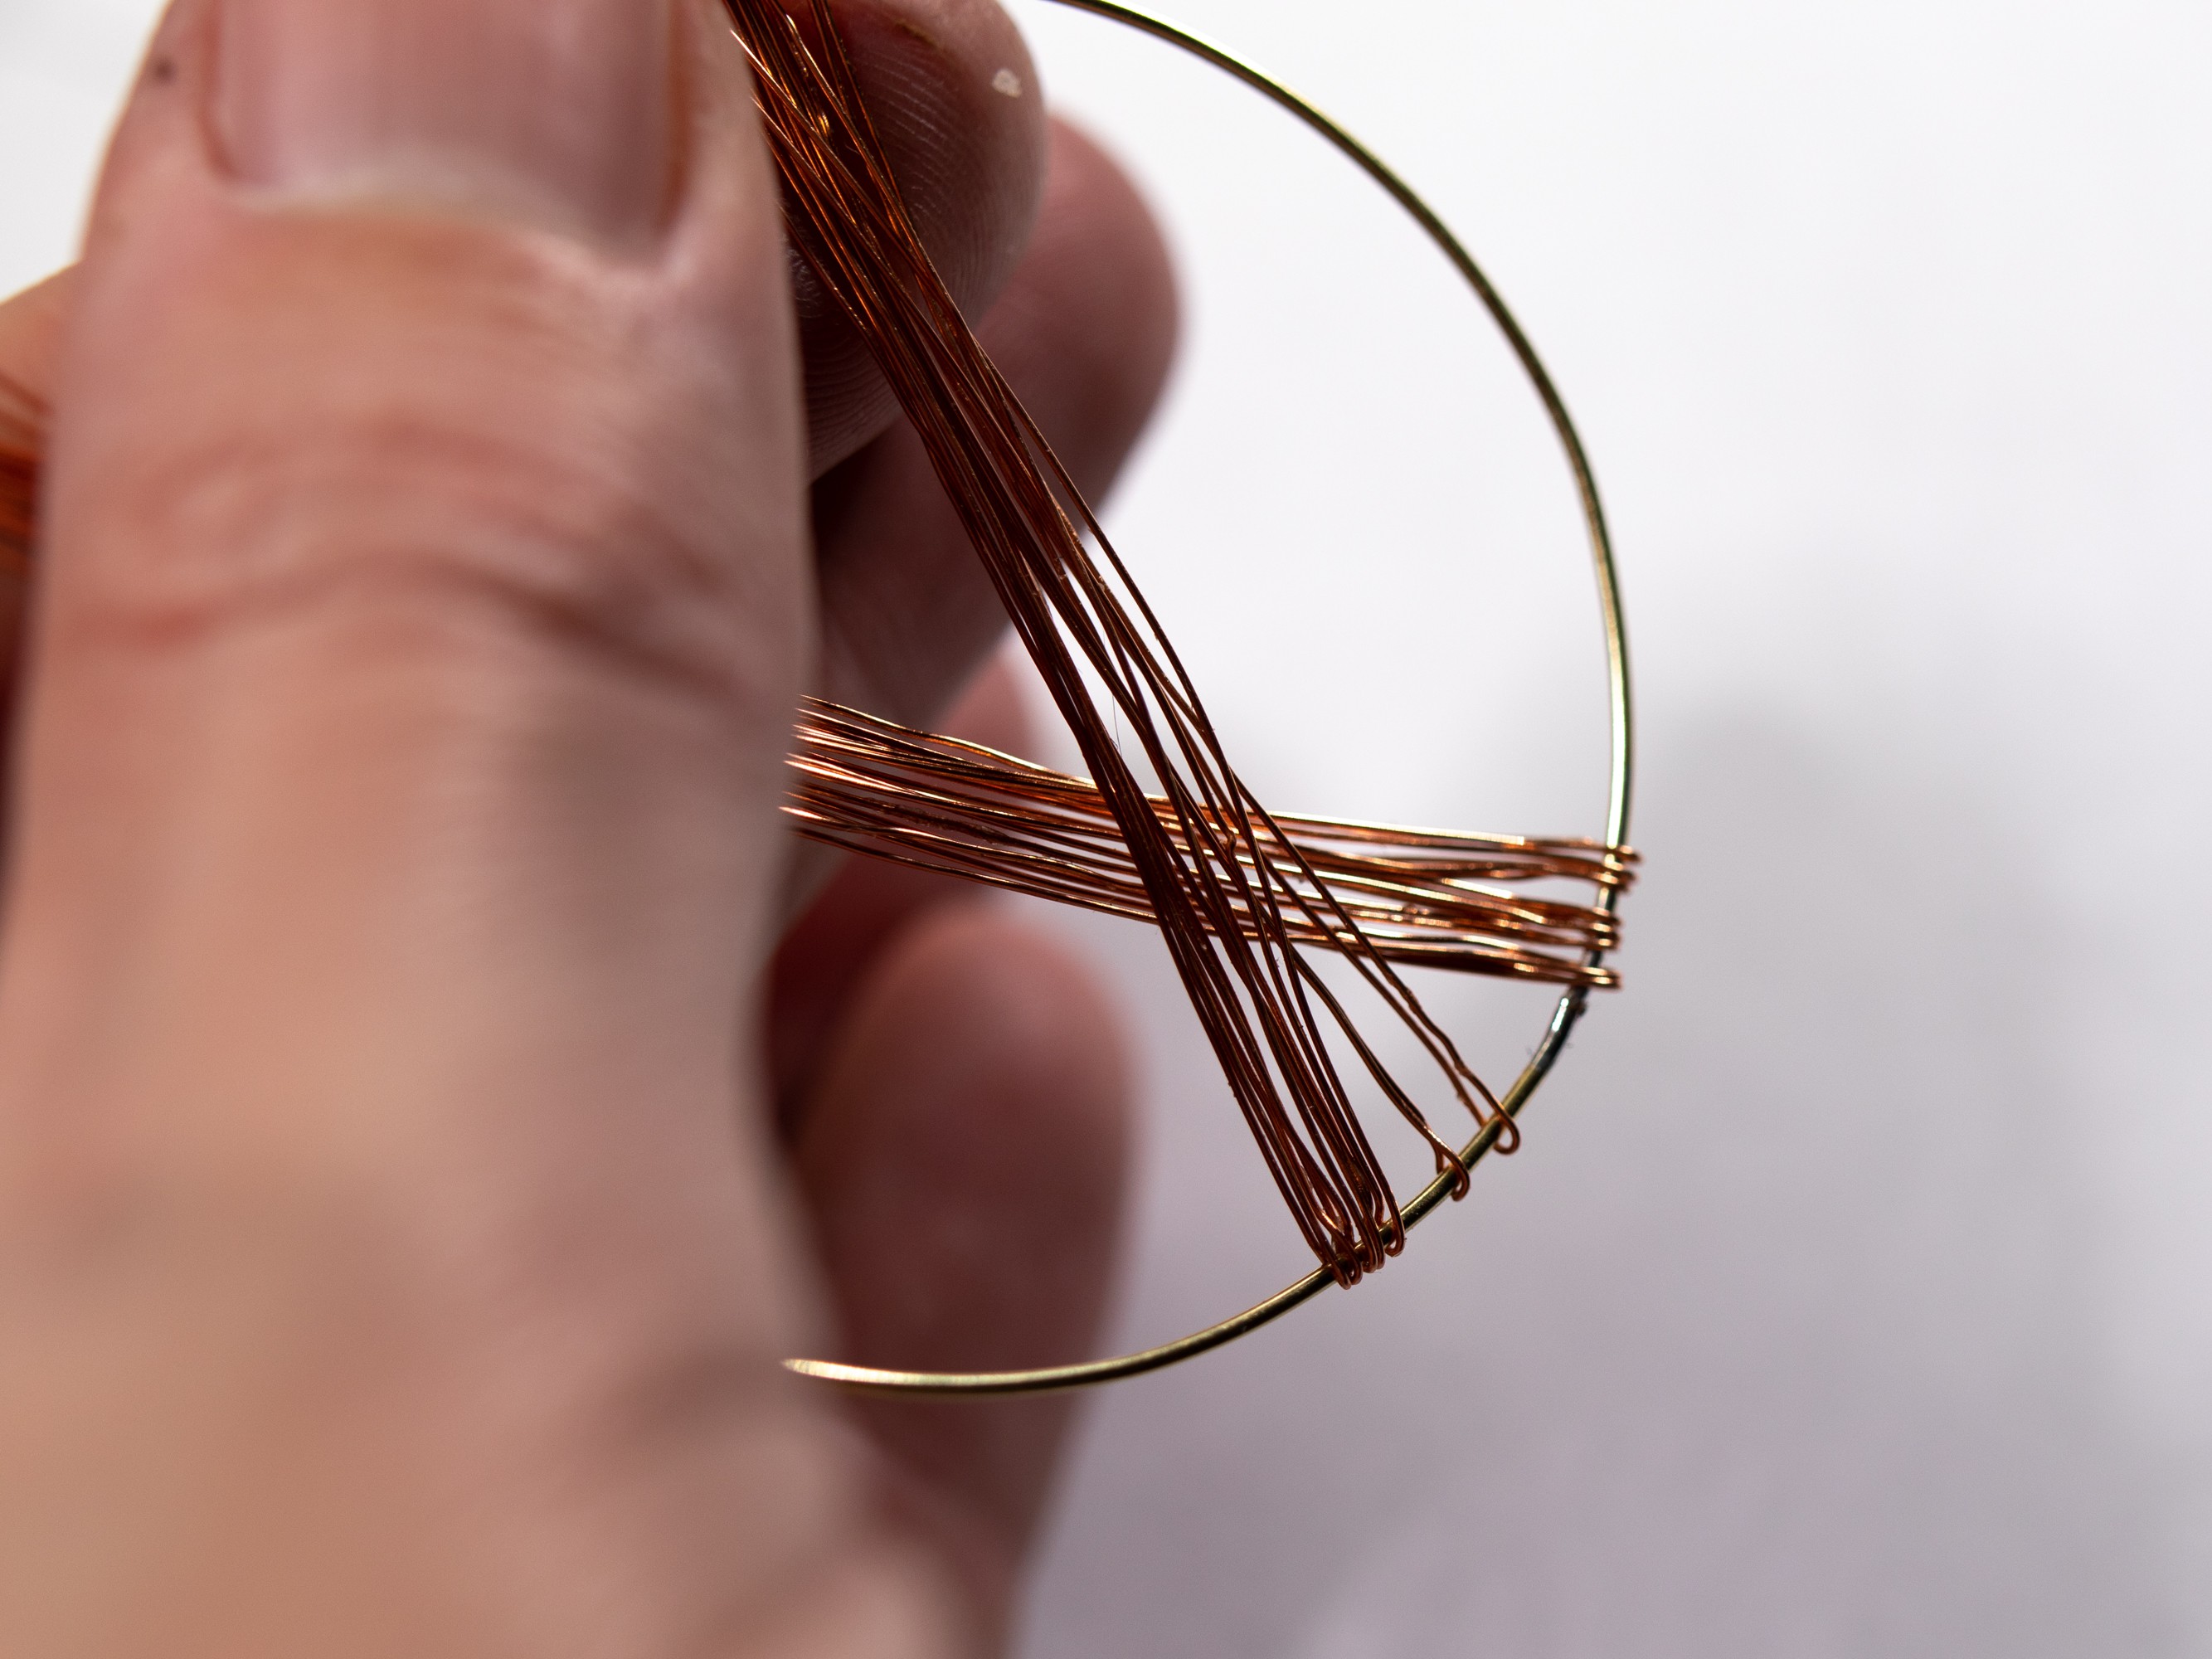
Twist the wire to create the tree
Twist the wires starting at the base of the trunk.
Make sure the base is evenly spread before continuing with the rest of the trunk.
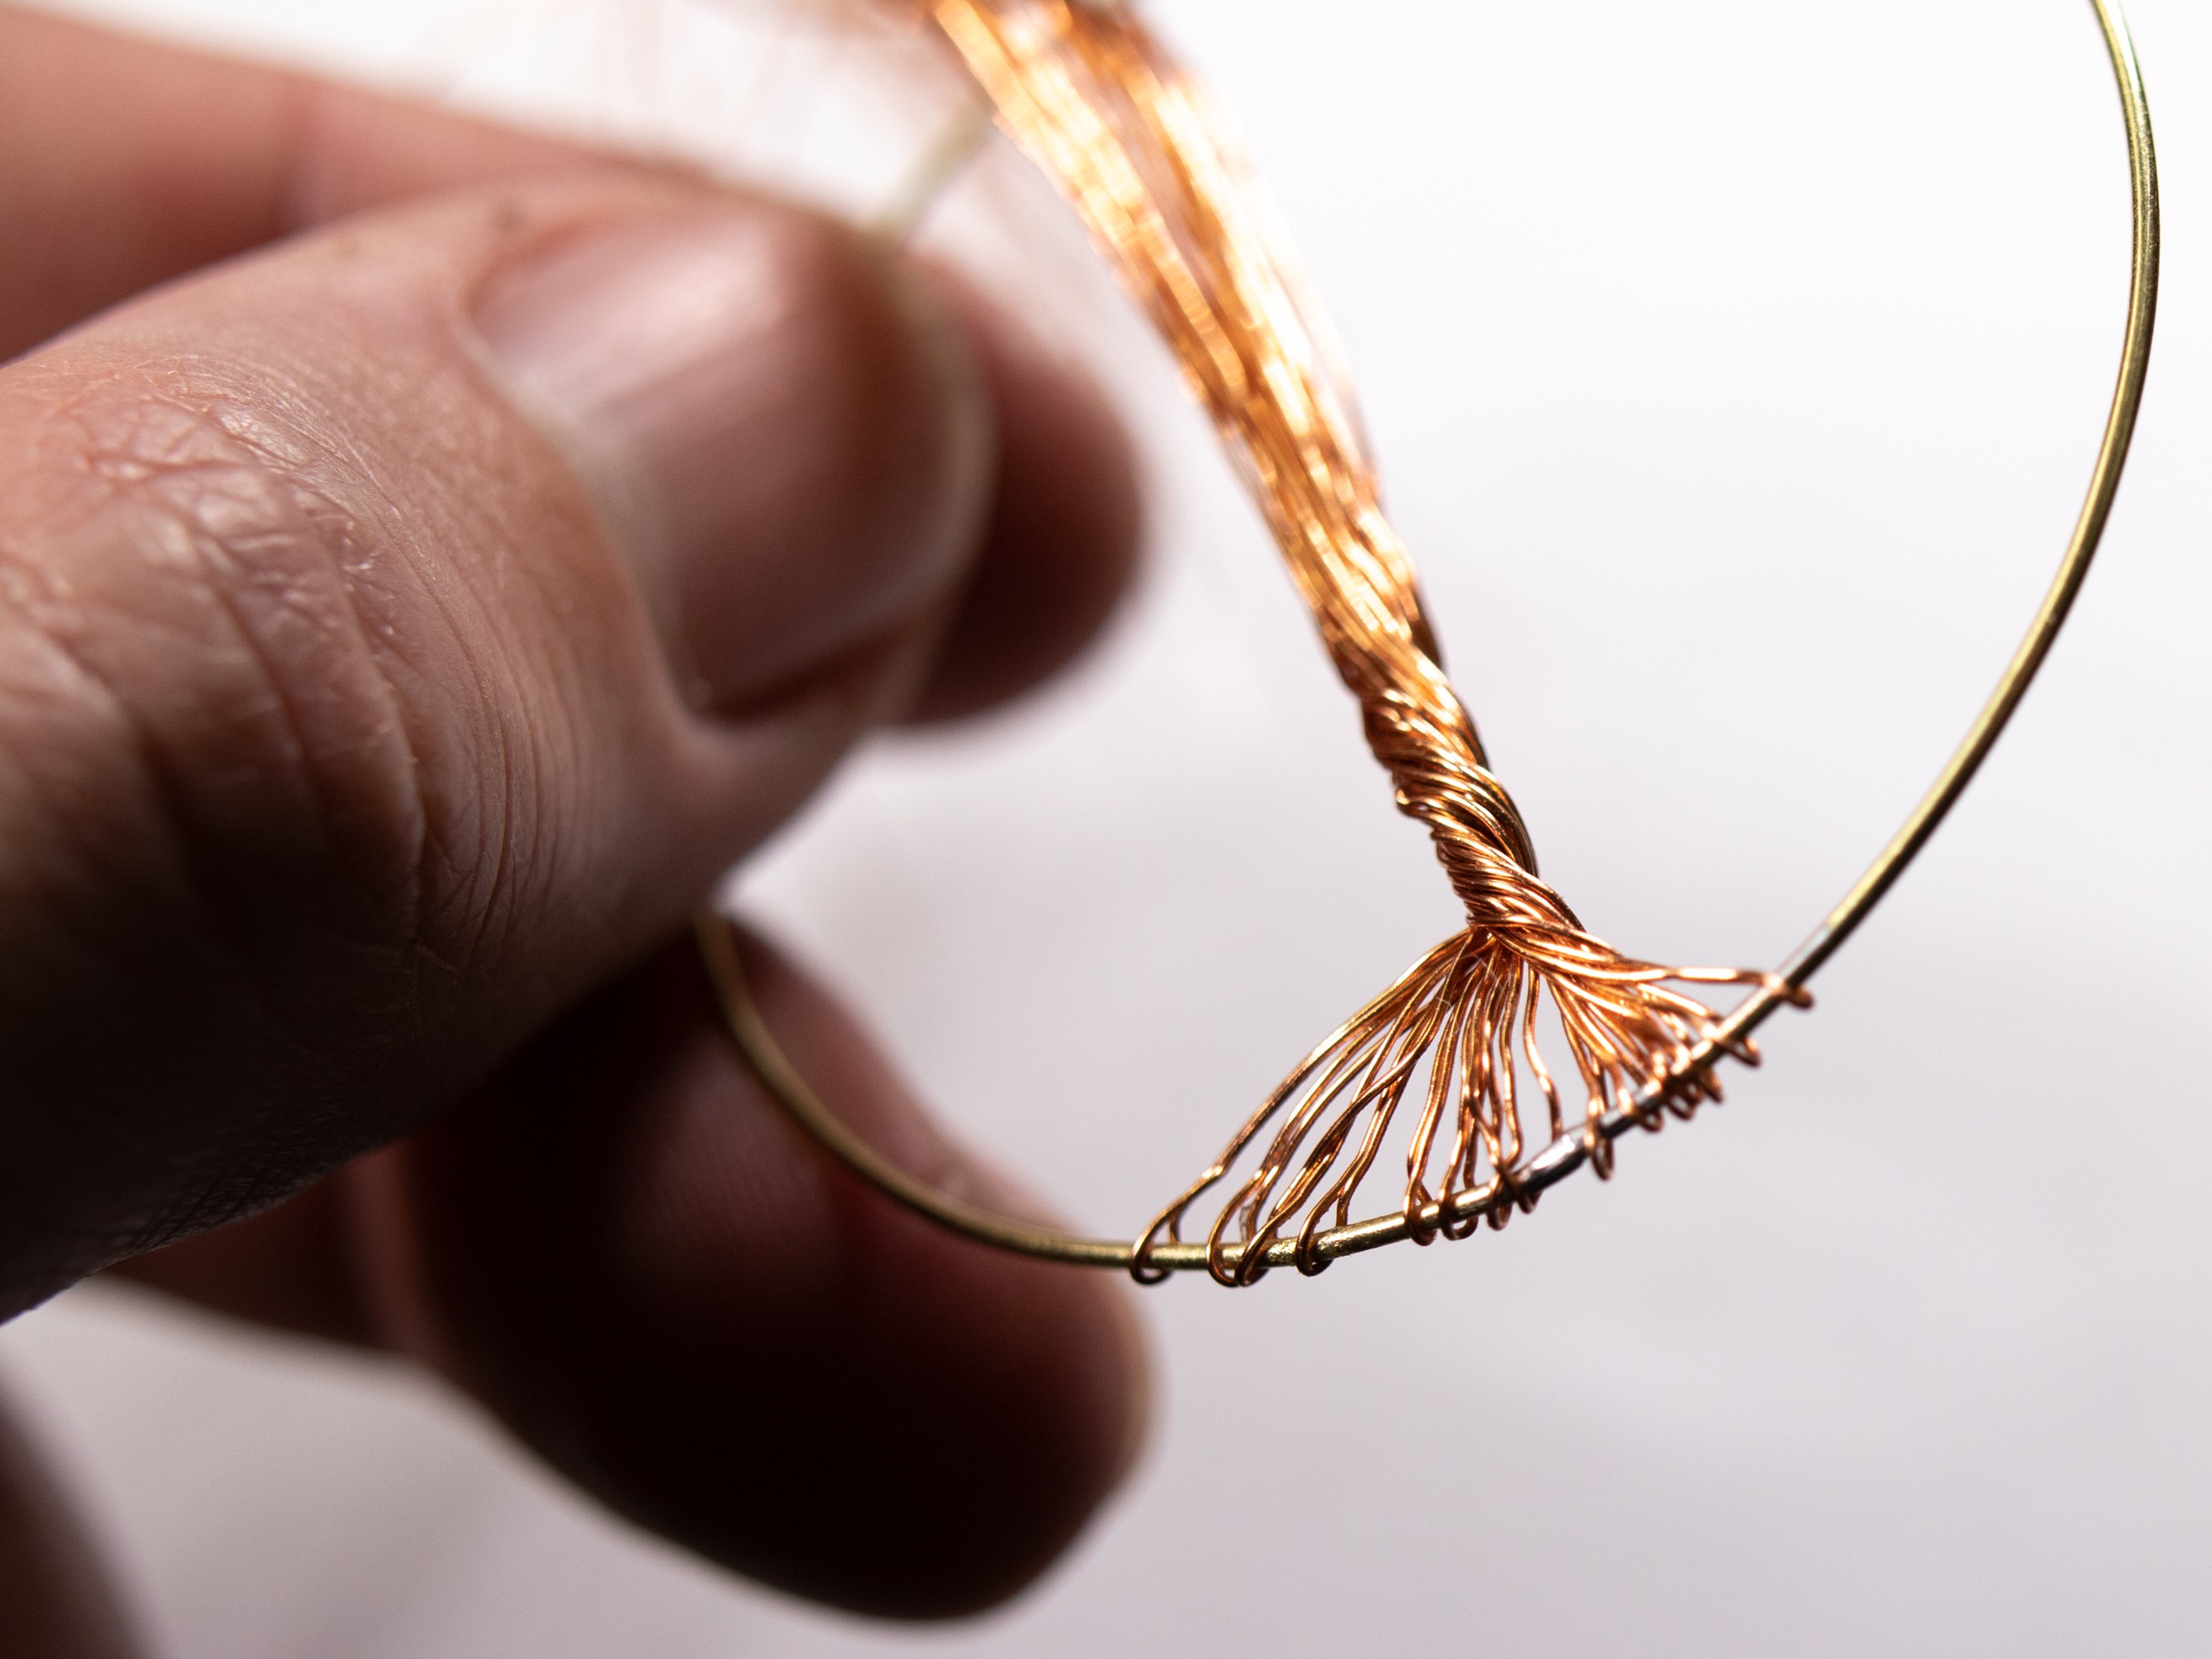
Pull out 4-6 wires at a time and twist these together into branches.
Twist the end of each branch around the ring.
6
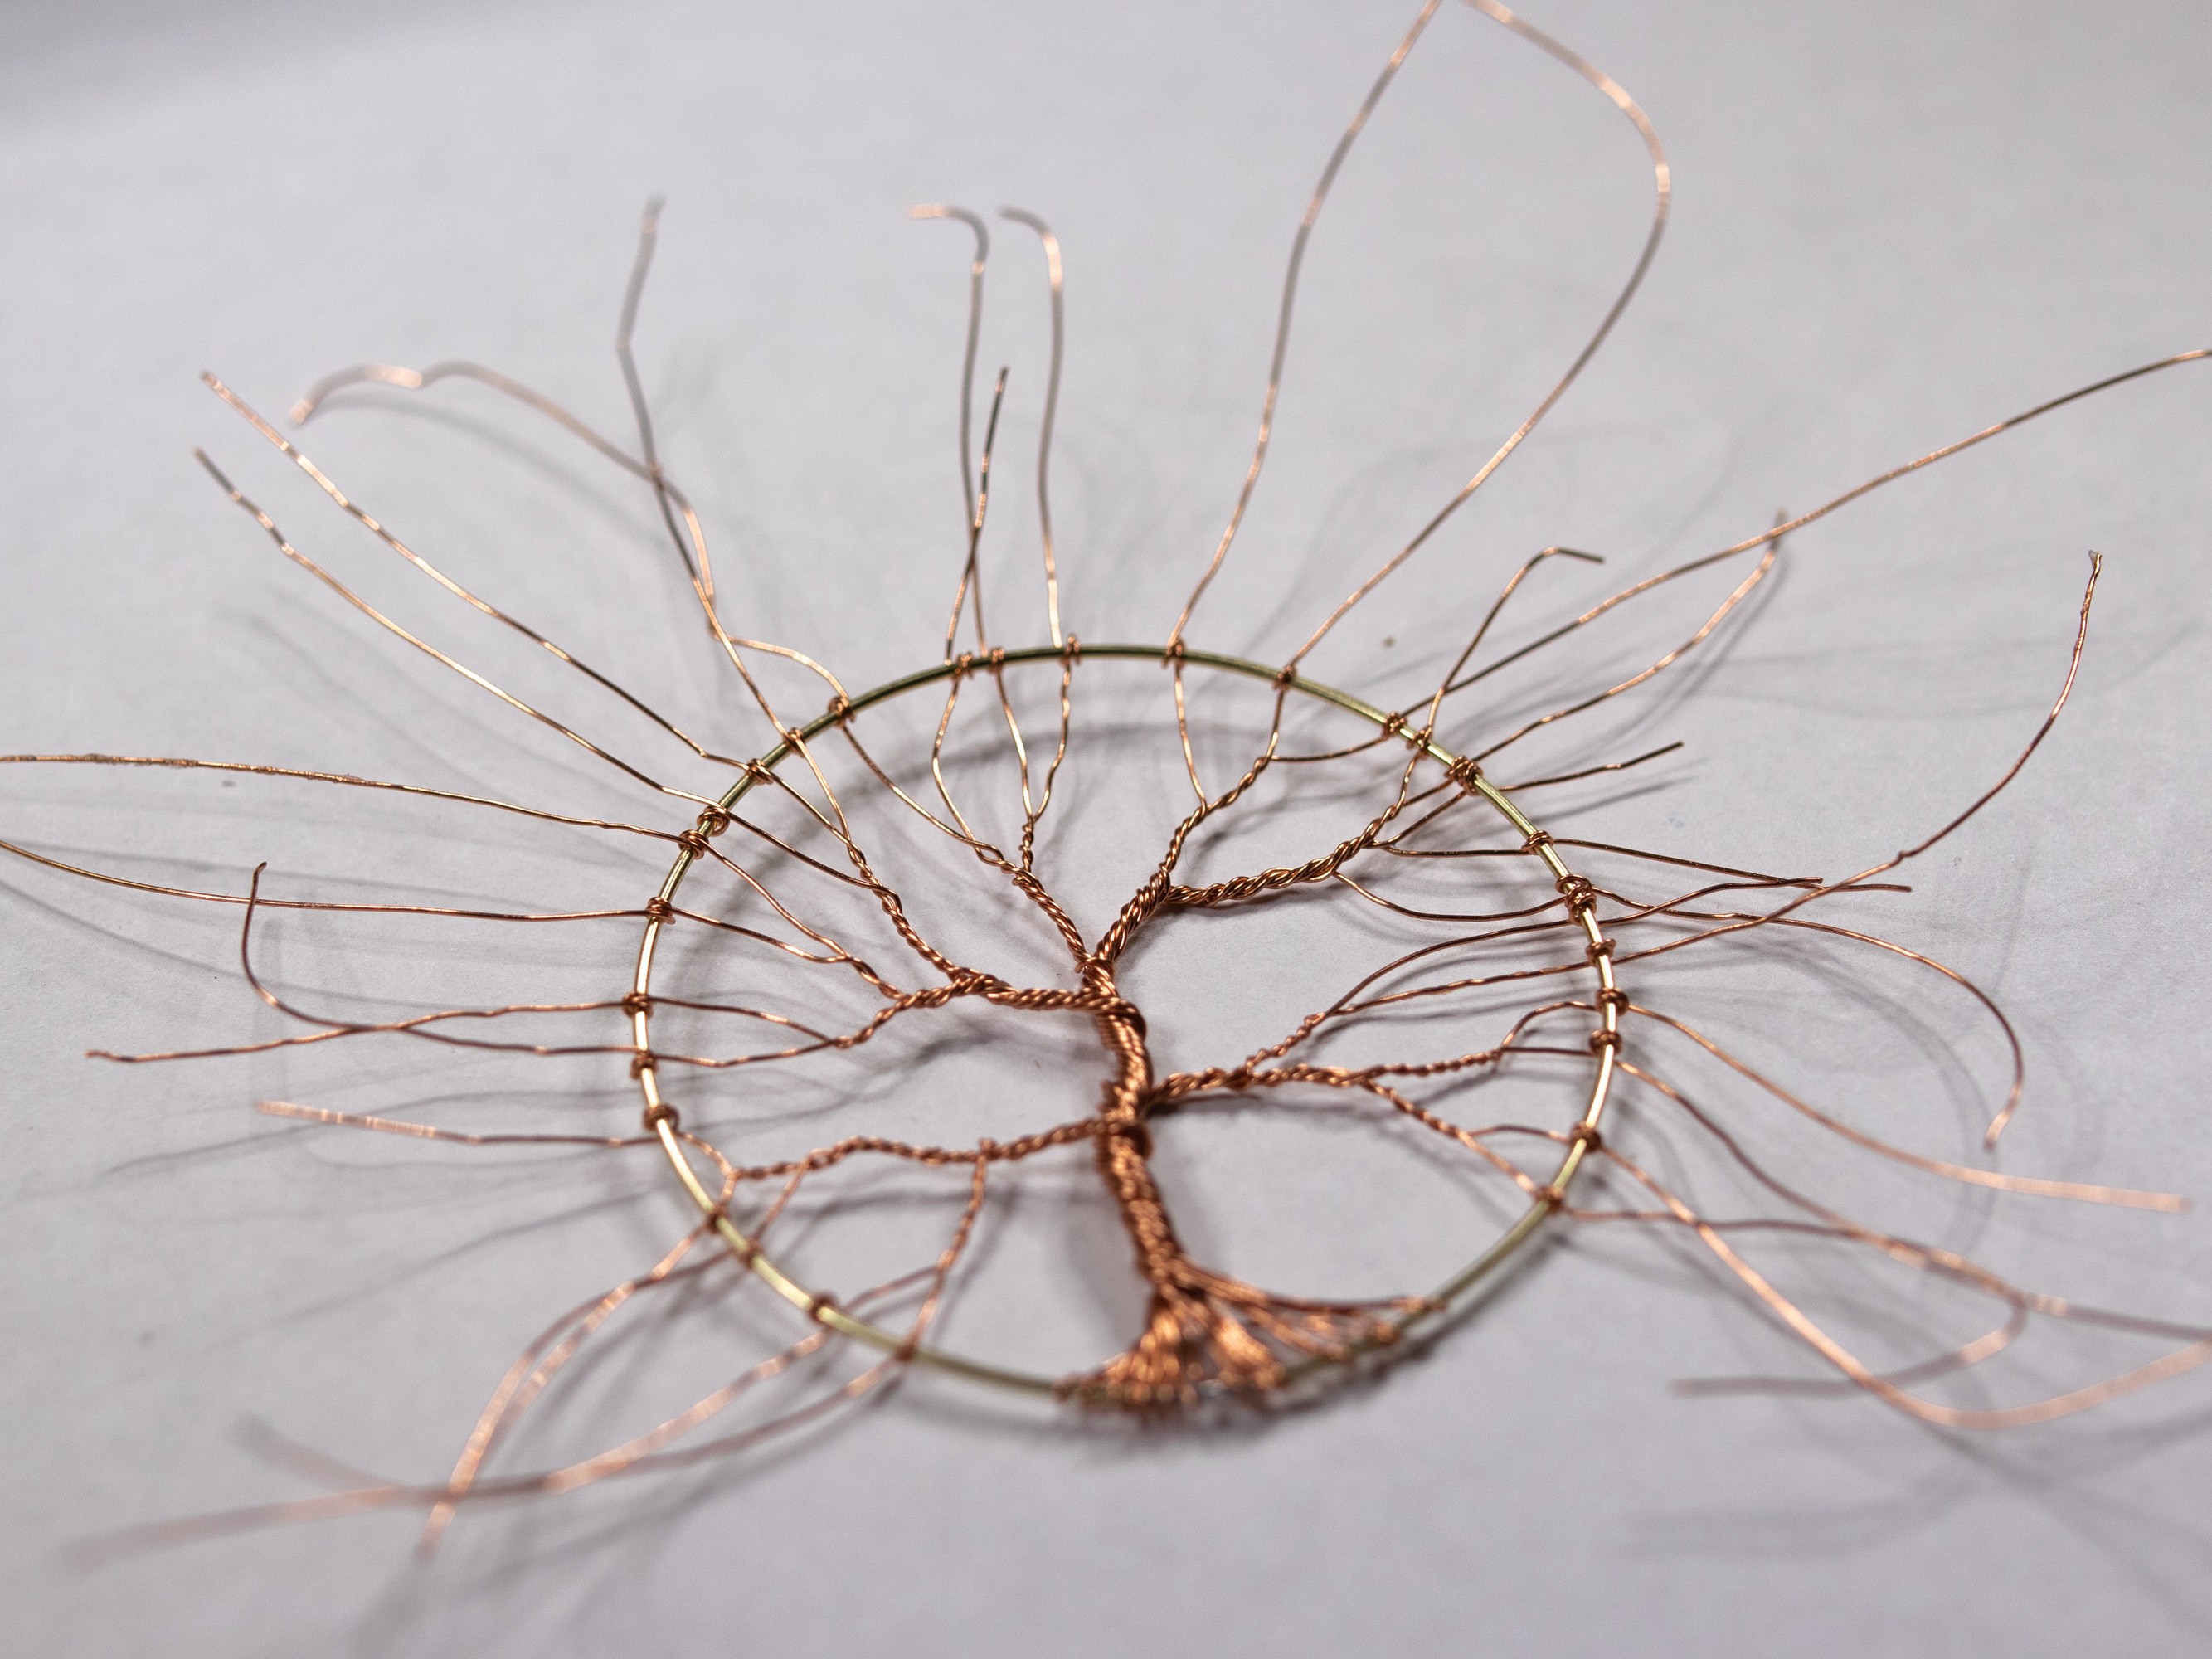
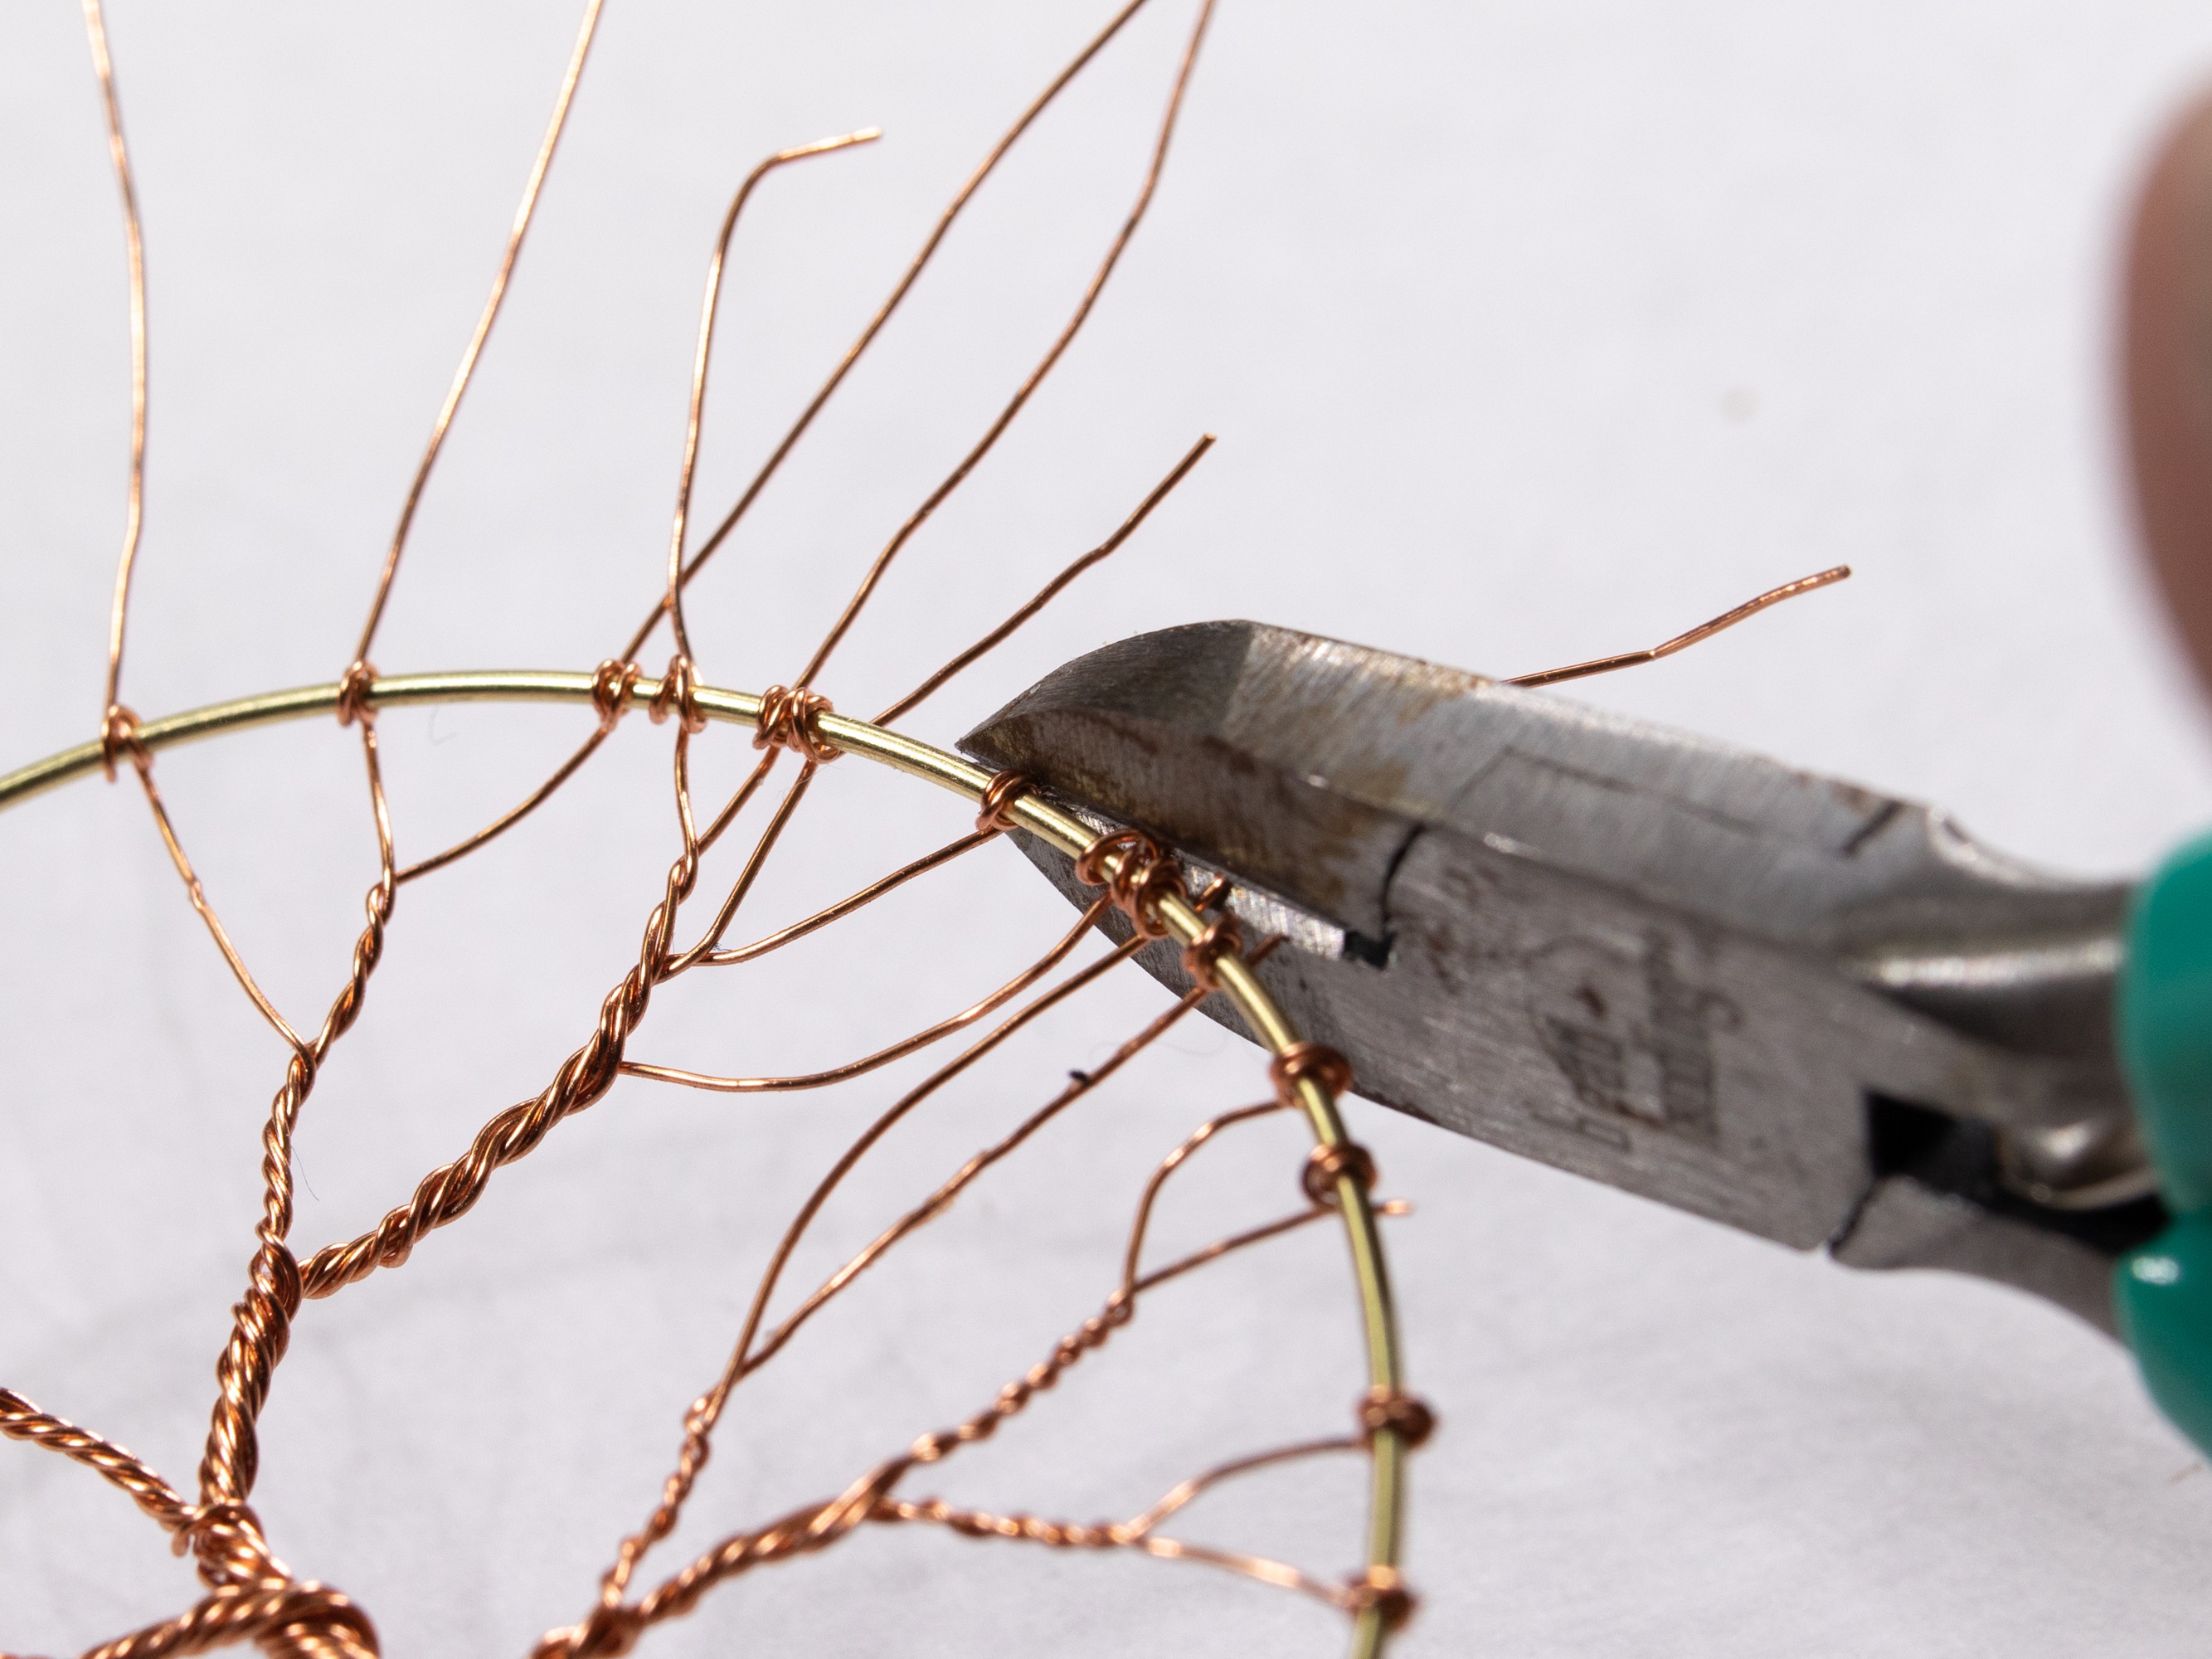
Trim the end of the branches
Trim the end of the branches. You could keep one branch long enough to connect it to a battery, but I decided to extend the branch with a red wire in the next step.
7
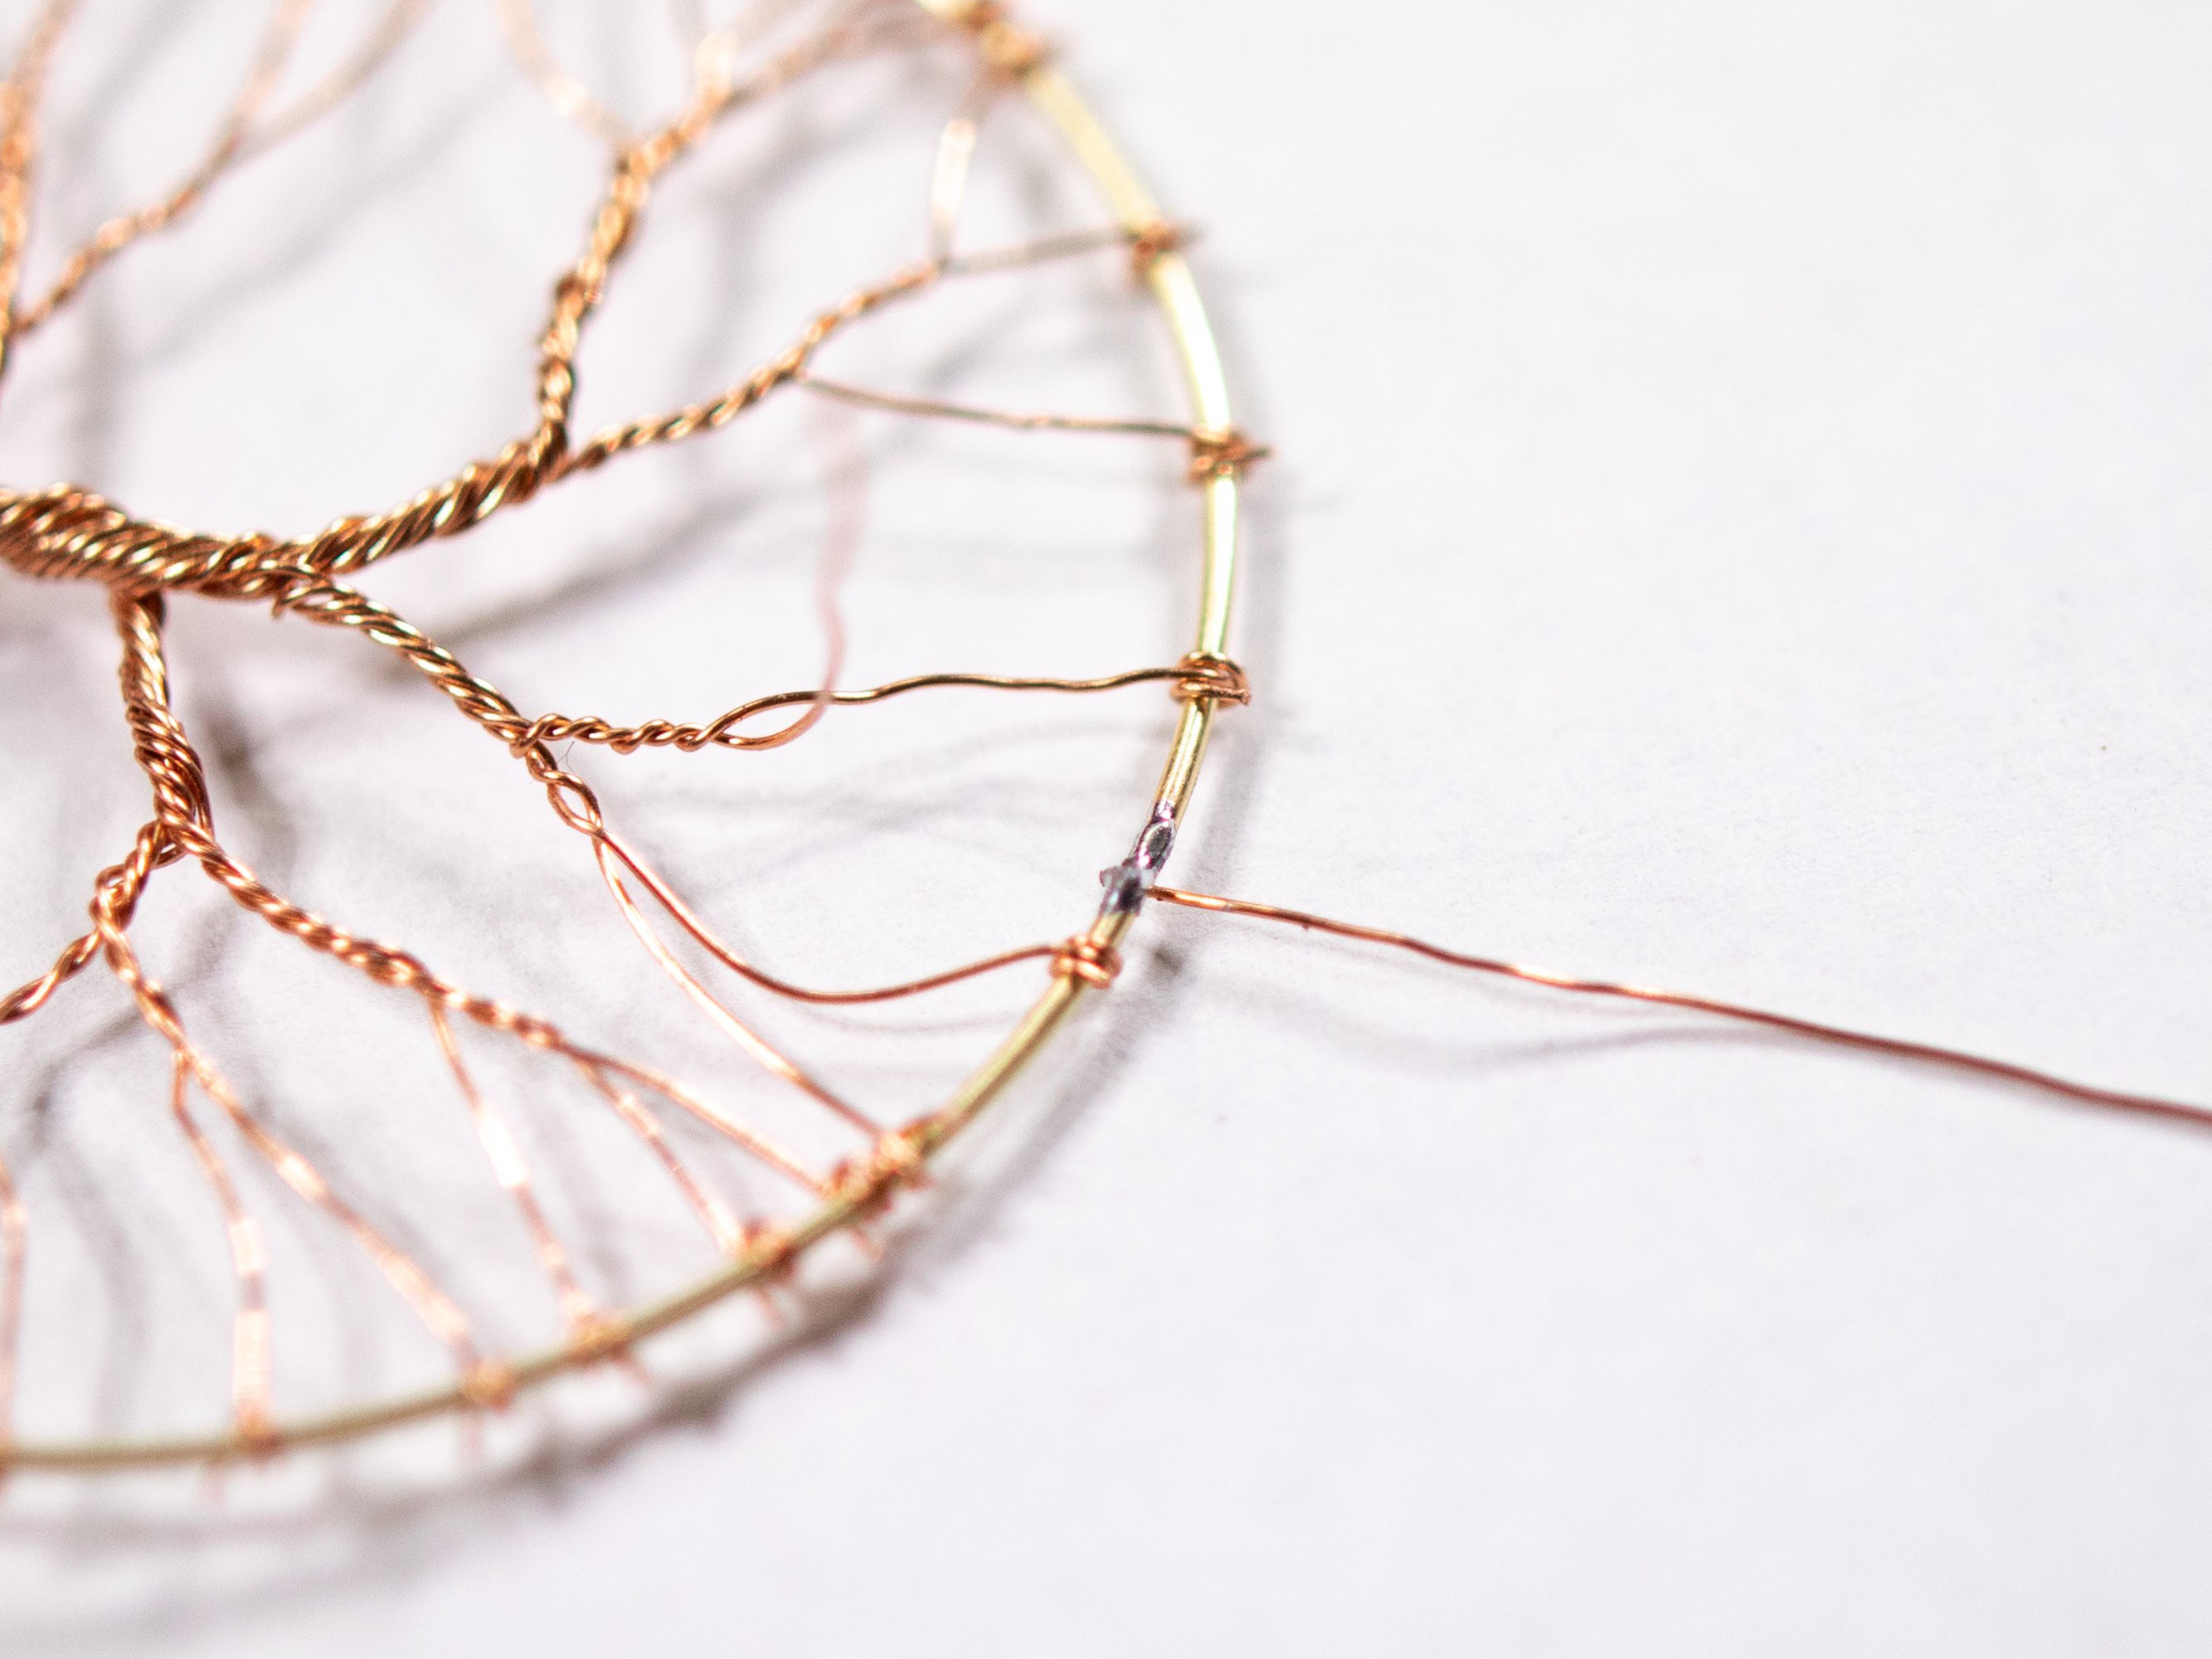
Solder the ground and power wires for the battery
The outer ring will be the ground while the branches providing the power. Solder a wire to the top of the ring. It is difficult to strip the insulation of the enameled copper wire and much easier to burn if off with some hot solder. Just increase the temperature of your soldering iron, clean the tip and apply new solder. Then hold the new solder of the end of the tip to the end of the copper wire till the insulation burn off.
Now solder this wire to the top of the ring.
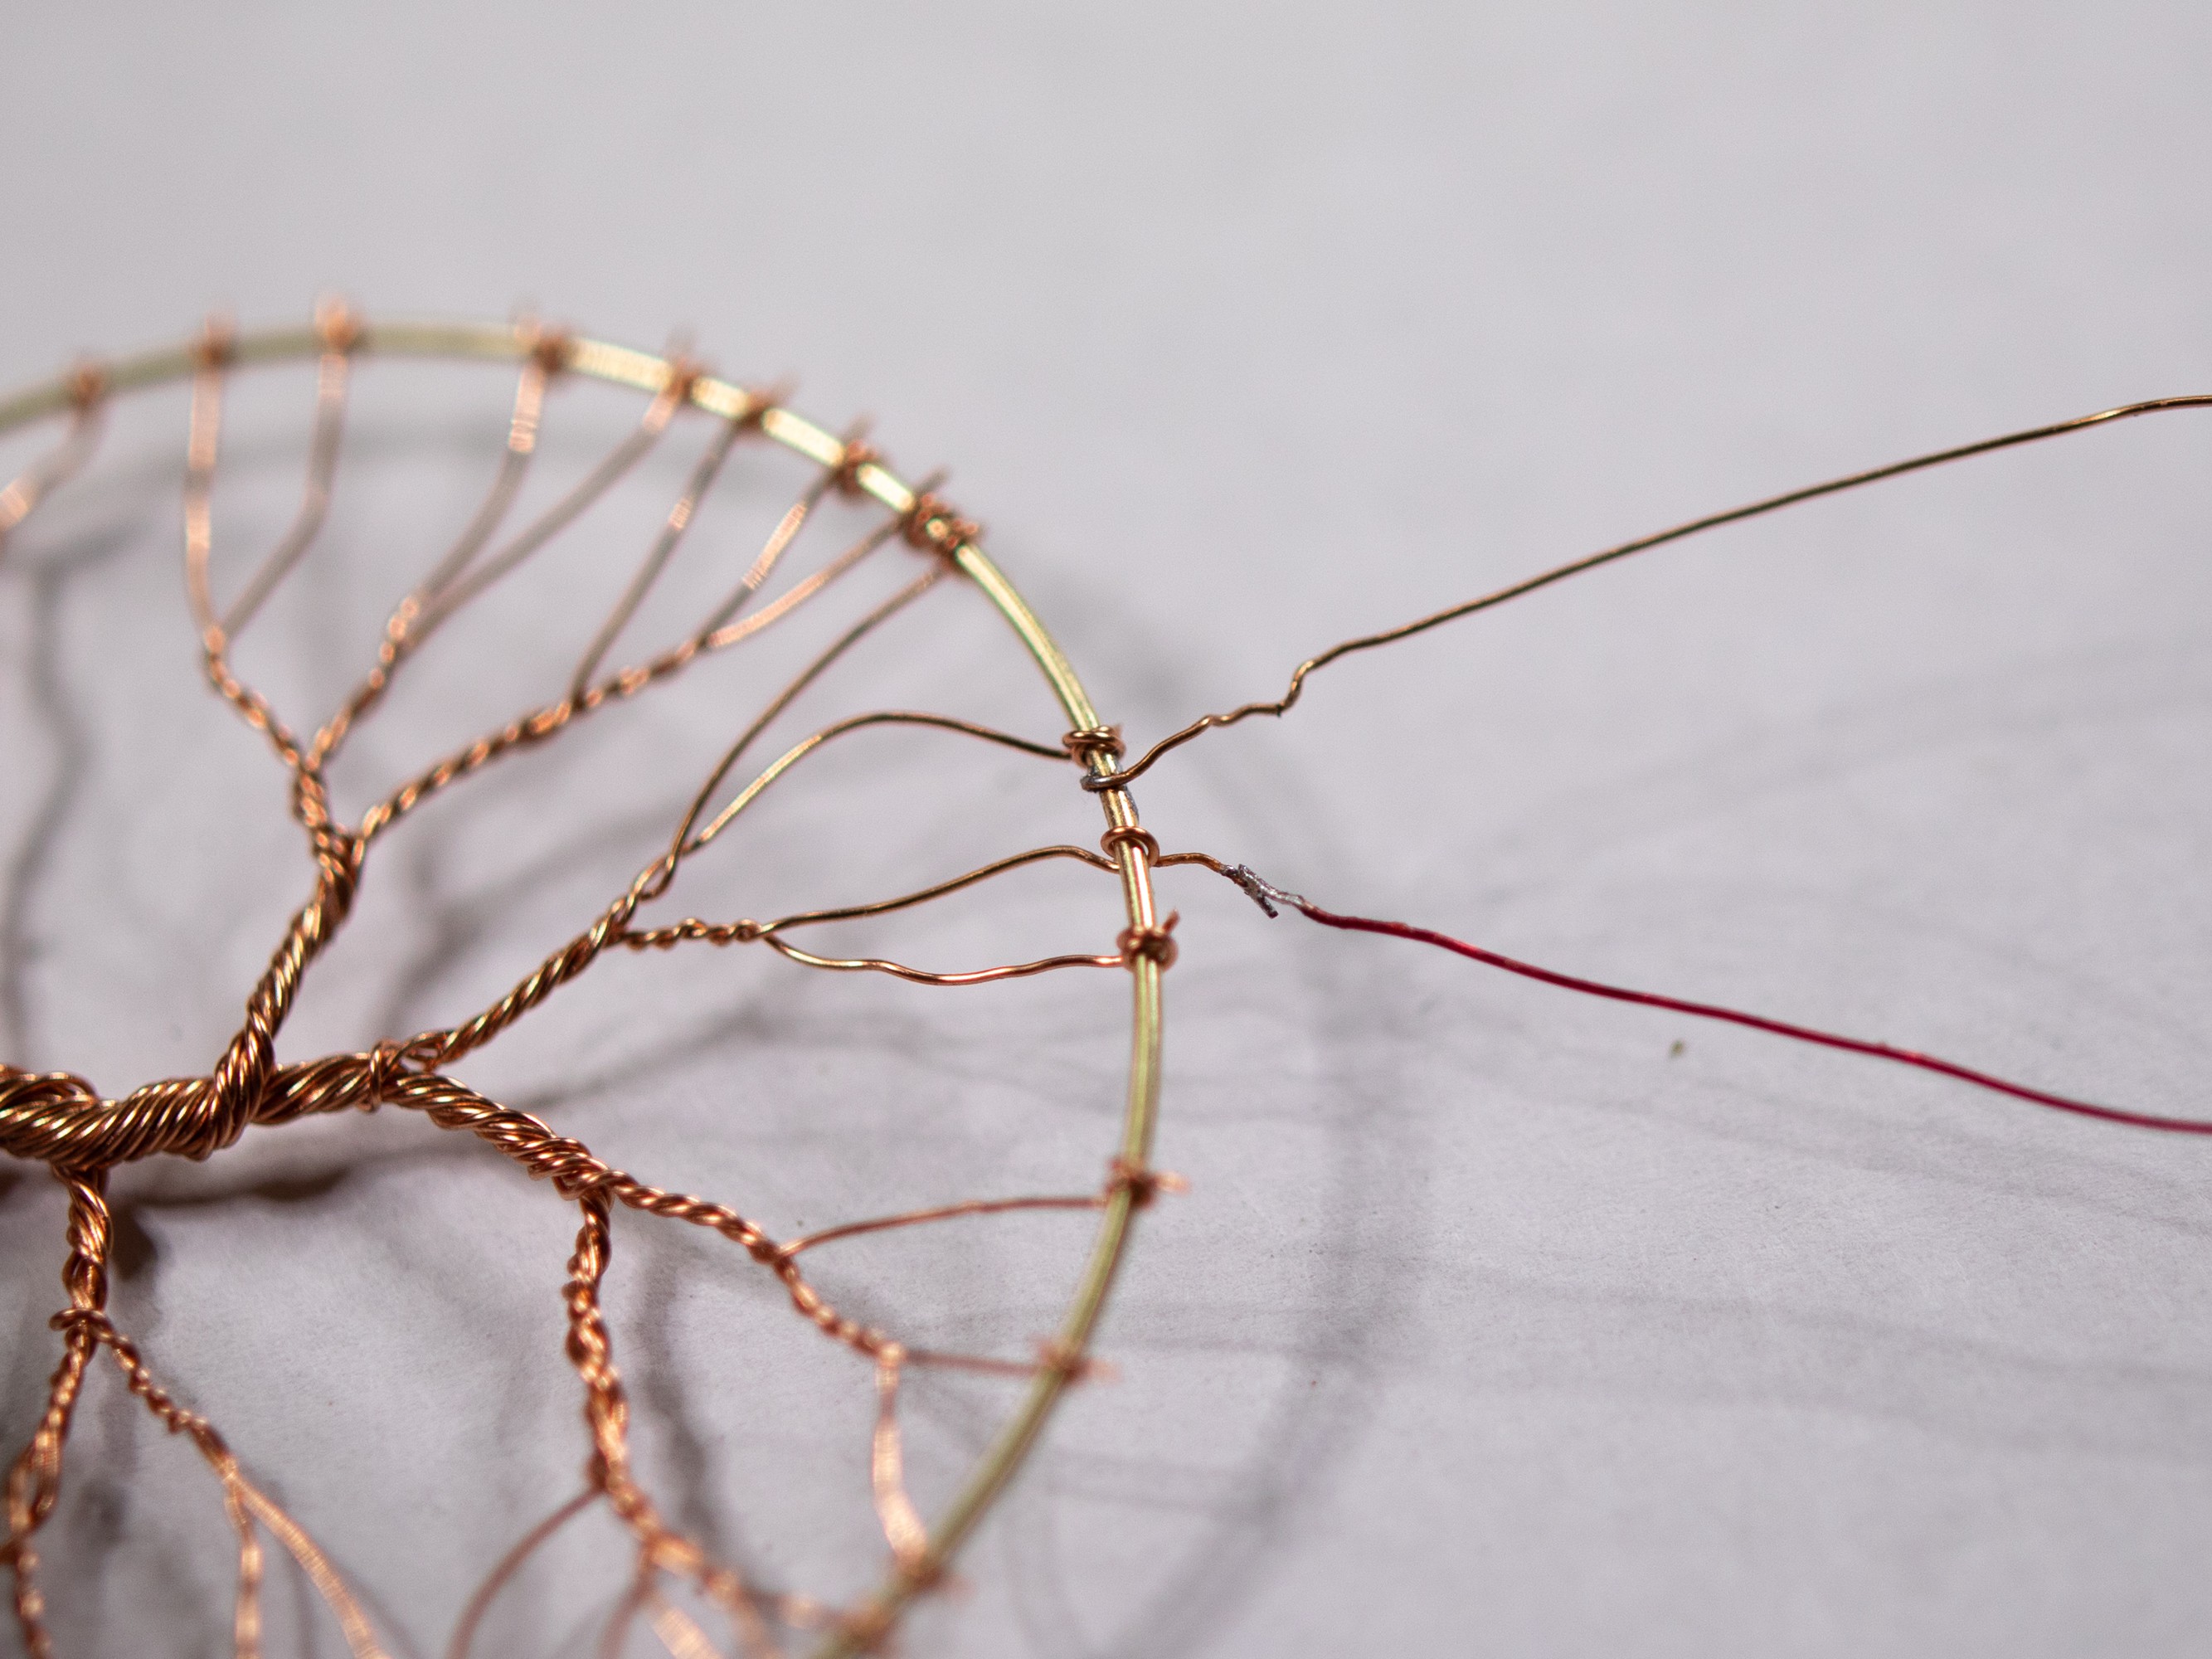
Take the nearest branch and solder a wire to the end. I used a red magnet wire that would connect to the positive side of the battery.
Now twist both wires together. Just make sure that the solder joints do not touch or you will end up with a short.
8
Solder LED's to the ring and branches
Use the template from step #1 to determine the closest branch to the LED location. Unwind these branches from the ring to make room for the LED's. Solder the cathode side of LED's to the ring.
Cut the branch that was removed from the ring so that is can be attached to the anode of the LED.
9
Solder all brances together
Currently only one branch is connected to the positive side of the battery. To connect the all together we have to burn of the insulation on all of them. We do this by adding a blob of solder to the back of the tree trunk with a lot of heat from the soldering iron.
10
Connect the battery
Connect the coin-cell battery to the end and make sure all LED's light up. A coin-cell battery can not provide enough current to damage the LED's, so no current resistor is required. When you want to use another power source (for example from the Arduino), then make sure to use a current resistor!
 Sander van de Bor
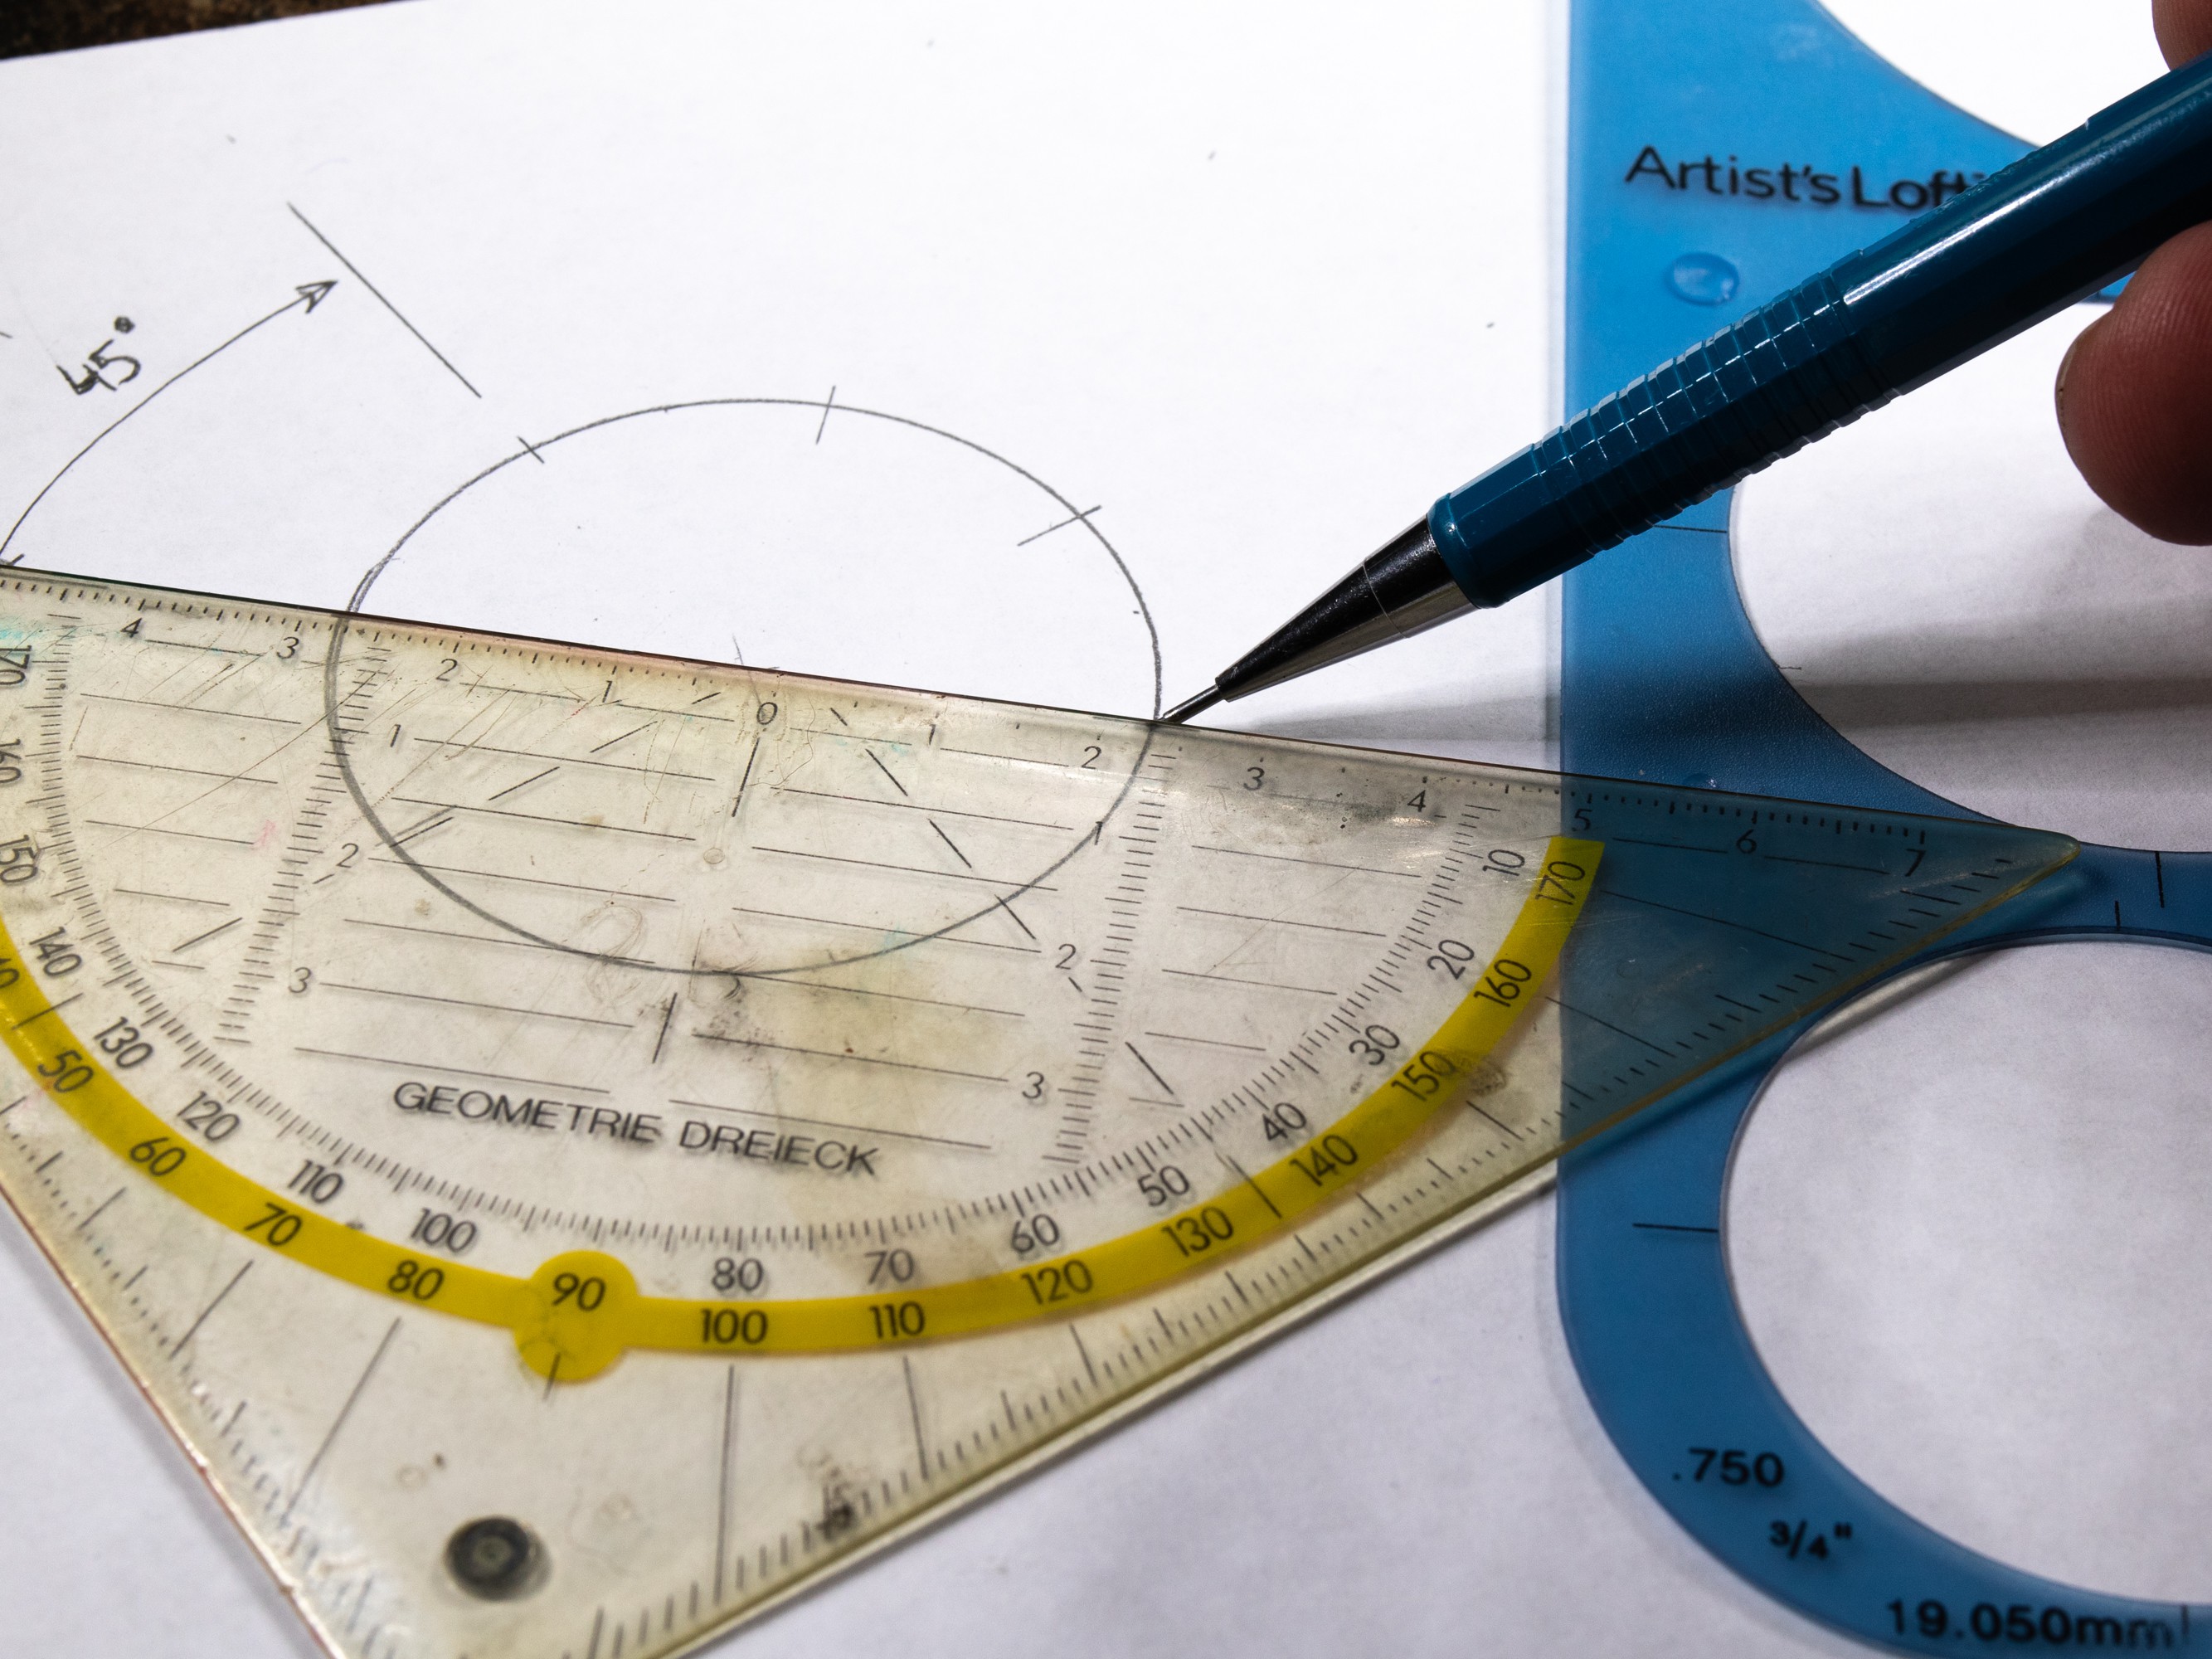


Discussions
Become a Hackaday.io Member
Create an account to leave a comment. Already have an account? Log In.
How long does the battery last if left on?
Are you sure? yes | no