 Robin Herrmann
Build the Circuit
Let's start set up the circuit. In my example, as you can see on the preview image, I've used a Arduino Mega 2560, but every other Arduino with at least eight GPIOs should be fine. Additionally, I've bought some 5V traffic lights at Amazon. Just search for Traffic Light Arduino. Otherwise, you can simply use six different LEDs. Furthermore, you need two push buttons and two 10k Ohm resistors.
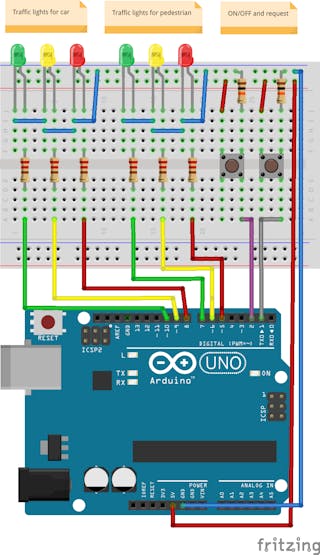
The three left LEDs are used for the car traffic and the three right LEDs for the pedestrians, where the yellow one can indicate a request.
Creating the State Machine
There are different approaches of how to define and implement the state machine. In this case I have chosen YAKINDU Statechart Tools, which allows to graphically create the model and generate C/C++ code.
The model looks like this:

So, as you can see there are two main states with composite members - state on and state off. You can switch between both states by using the event onOff, which is wired to the ON/OFF button. In the initial state, the off state, both yellow LEDs start blinking every second. Once the traffic light has been turned on, it starts in the Safe state. After 10 seconds the typical behavior of the traffic lights will be handled. The red and yellow LED will be turned on in the StreetPrepare state and the traffic light turns green after 2 more seconds. From now on, the state machine is waiting for the pedestrianRequest event, which is wired to the second button. After sending the event the request will be indicated by toggling the yellow LED every second in the PedWating state. 7 seconds later the traffic light will be switched to yellow first and then to red, until the pedestrians get the signal to go in the PedestrianGreen state. After this the PedestrianRed is activated and the cycle repeats. This can only be interrupted by turning the traffic light off again.
Running the Example
Generated Code
The generated C++ code is a classic switch-case to handle the logic of the state machine. This is just a code snippet of how it looks like:
void TrafficLightCtrl::runCycle()
{
    clearOutEvents();
    for (stateConfVectorPosition = 0;
        stateConfVectorPosition < maxOrthogonalStates;
        stateConfVectorPosition++)
        {
            switch (stateConfVector[stateConfVectorPosition])
            {
            case main_region_on_r1_StreetGreen :
            {
                main_region_on_r1_StreetGreen_react(true);
                break;
            }
            case main_region_on_r1_PedWaiting_r1_waitOn :
            {
                main_region_on_r1_PedWaiting_r1_waitOn_react(true);
                break;
            }

            default:
            break;
            }
    }
    clearInEvents();
}
Get the Example
The whole example is ready to compile & run. It comes with YAKINDU Statechart Tools, which is free for non-commercial use. After downloading, you can import the example directly in the tool:
File -> New -> Example -> YAKINDU Statechart Examples -> Next -> Traffic Light (C++) for Arduino
The example is also available in C.

 Rob Smith
 Alpenglow Industries
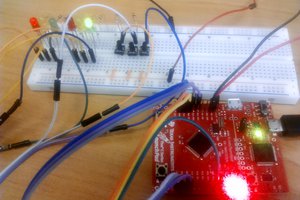

 Mukesh Sankhla