Much has happened in the meantime. I also restructured the project a bit and moved some items from the "Details" to the project logs. I hope to be able to show more updates in the coming days.
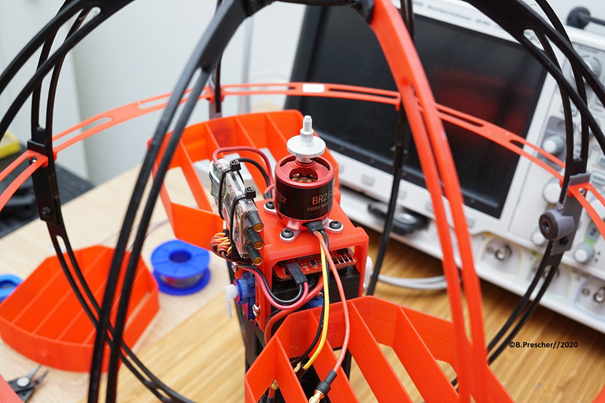
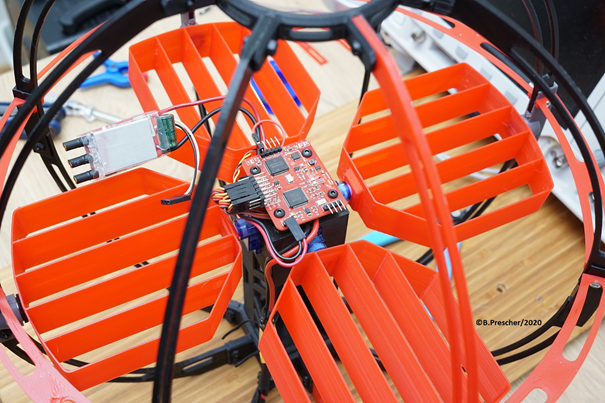
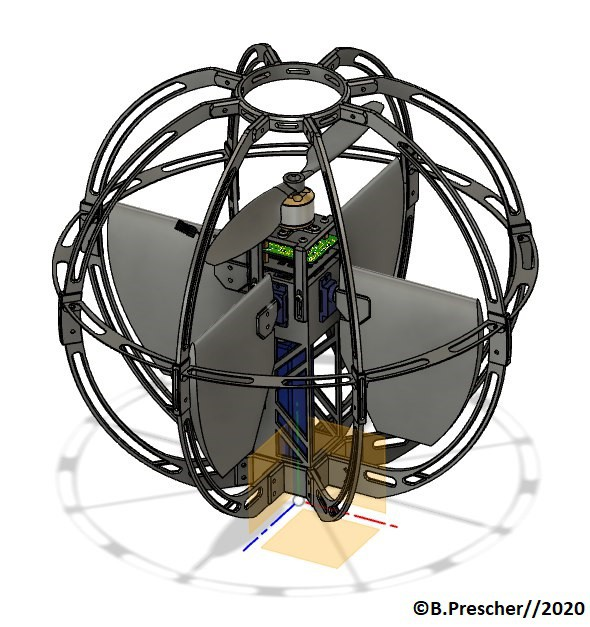
This gives a more closer look at the build, showing the flight controller in place, the settings with air vanes as well as the ESC and motor mounted on top:
With the fully assembled first prototype, the expectations regarding the functions were accordingly high. Unfortunately, the wings, along with the rigidity of the construction and the servos used, began to tremble, known as servo-jitter. In addition, radial bearings were installed on the opposite side of the servos for support.
But there still was servo-jitter. In the end, the challenge could be met with a different air vanes resulting in smooth vanes movement.
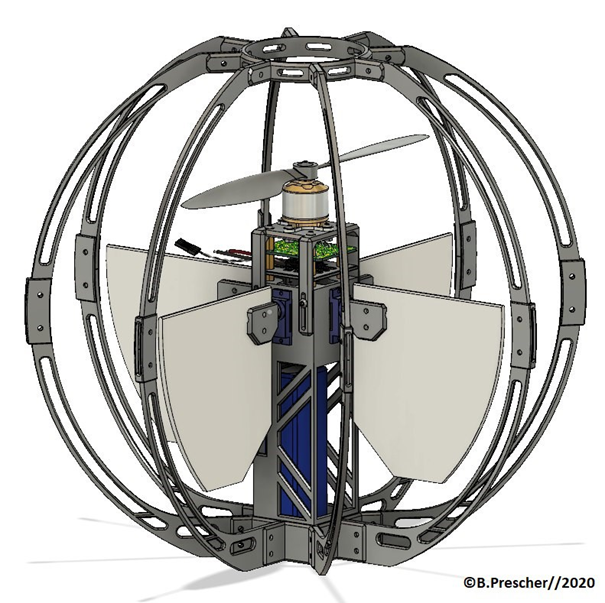
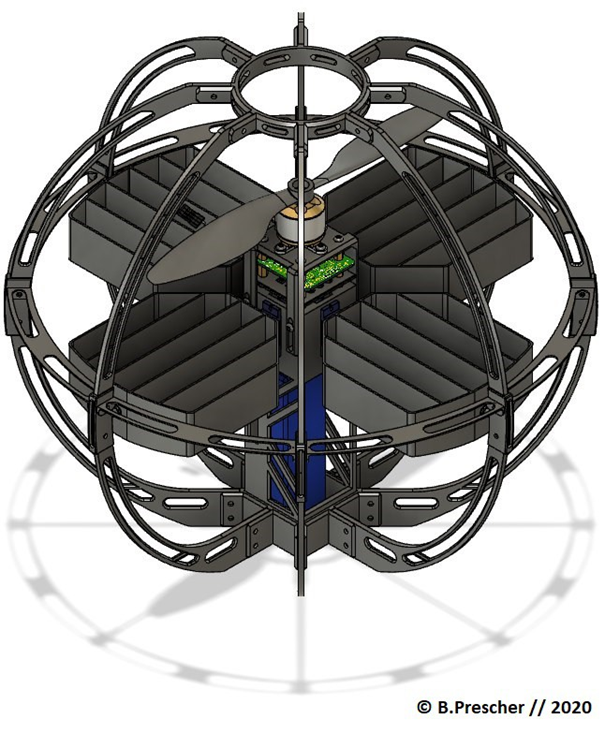
The idea behind the structure is to reach a low center of gravity with the battery underneath the rotor in order to not build an inverse pendulum. Furthermore, standardized components from the RC area had to be included in the planning (with the exception of the flight controller). The safety of the drone is an important aspect. Touching the rotor is made more difficult by a kind of ball-shaped cage, but the rotor can continue to rotate when the drone is pushed or flying against an obstacle.
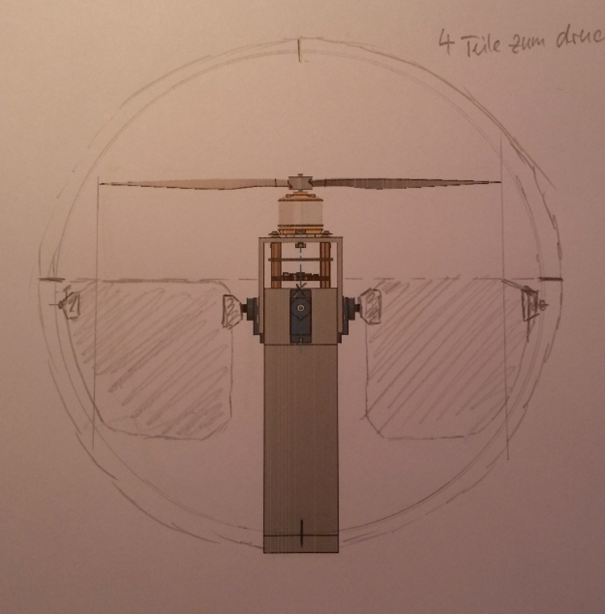
In an early state of design, plates were used to control the air flow.
In order to make the flow more efficient, a wing profile was modeled. Further bracing also took place.
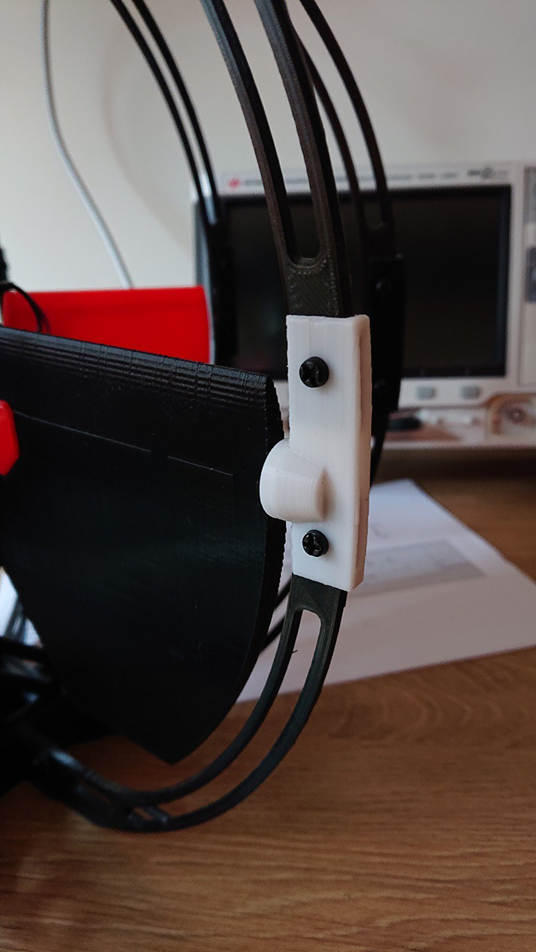
Everything was designed in FUSION360 and 3D printed.
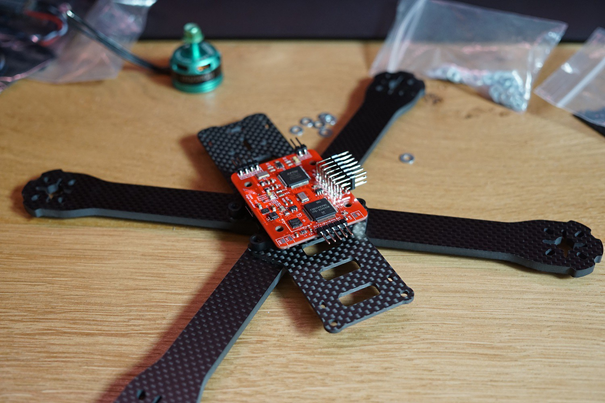
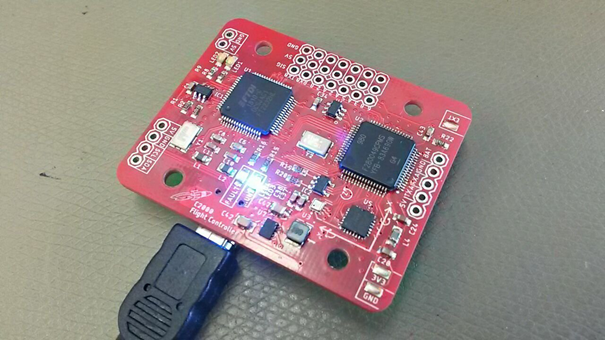
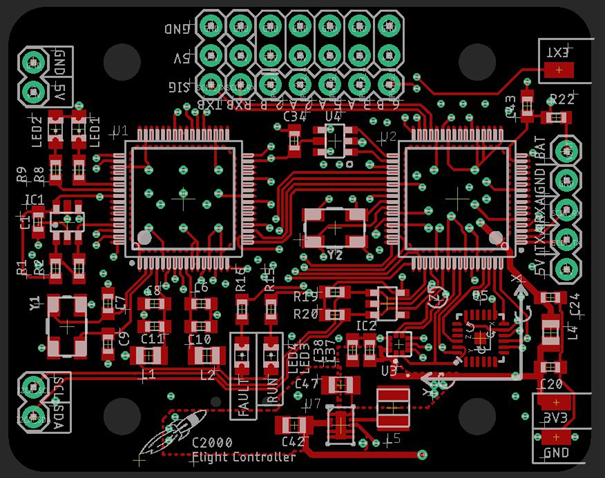
This build requires a flight controller with small dimensions and minimum 5 ESC or servo connections. The development of an own flight controller was one of the goals anyway. So the decision was to downsize a TI launchpad and limit it to the required connections. In addition, an InvenSense ICM20689 and a Bosch BMP388 for position control were added. The "real-time JTAG" was particularly important for development tasks. Thus, a complete debugger (XDS100v2) is integrated on the flight controller and allows communication with the controller via JTAG and UART, just as you know it from the development board...
The board features:
Some of the newest TI Controller: TMS320F280049PMS
Dual channel debugger (JTAG//UART) based on a FTDI 2232 (XDS100v2)
In mid-2018 I completed my first quadcopter project with the goal of designing a own flight controller and expand the software, mainly to further and deeply deal with position algorithms. Additionally looking for new ideas for building drones, a very rare case came across: a single-rotor drone with air vanes for control, which is based on the principle of "torque" of an RC model aircraft. This principle aroused my curiosity and it was clear to me: I would like build up something like this and get this thing flying!
 Benjamin Prescher
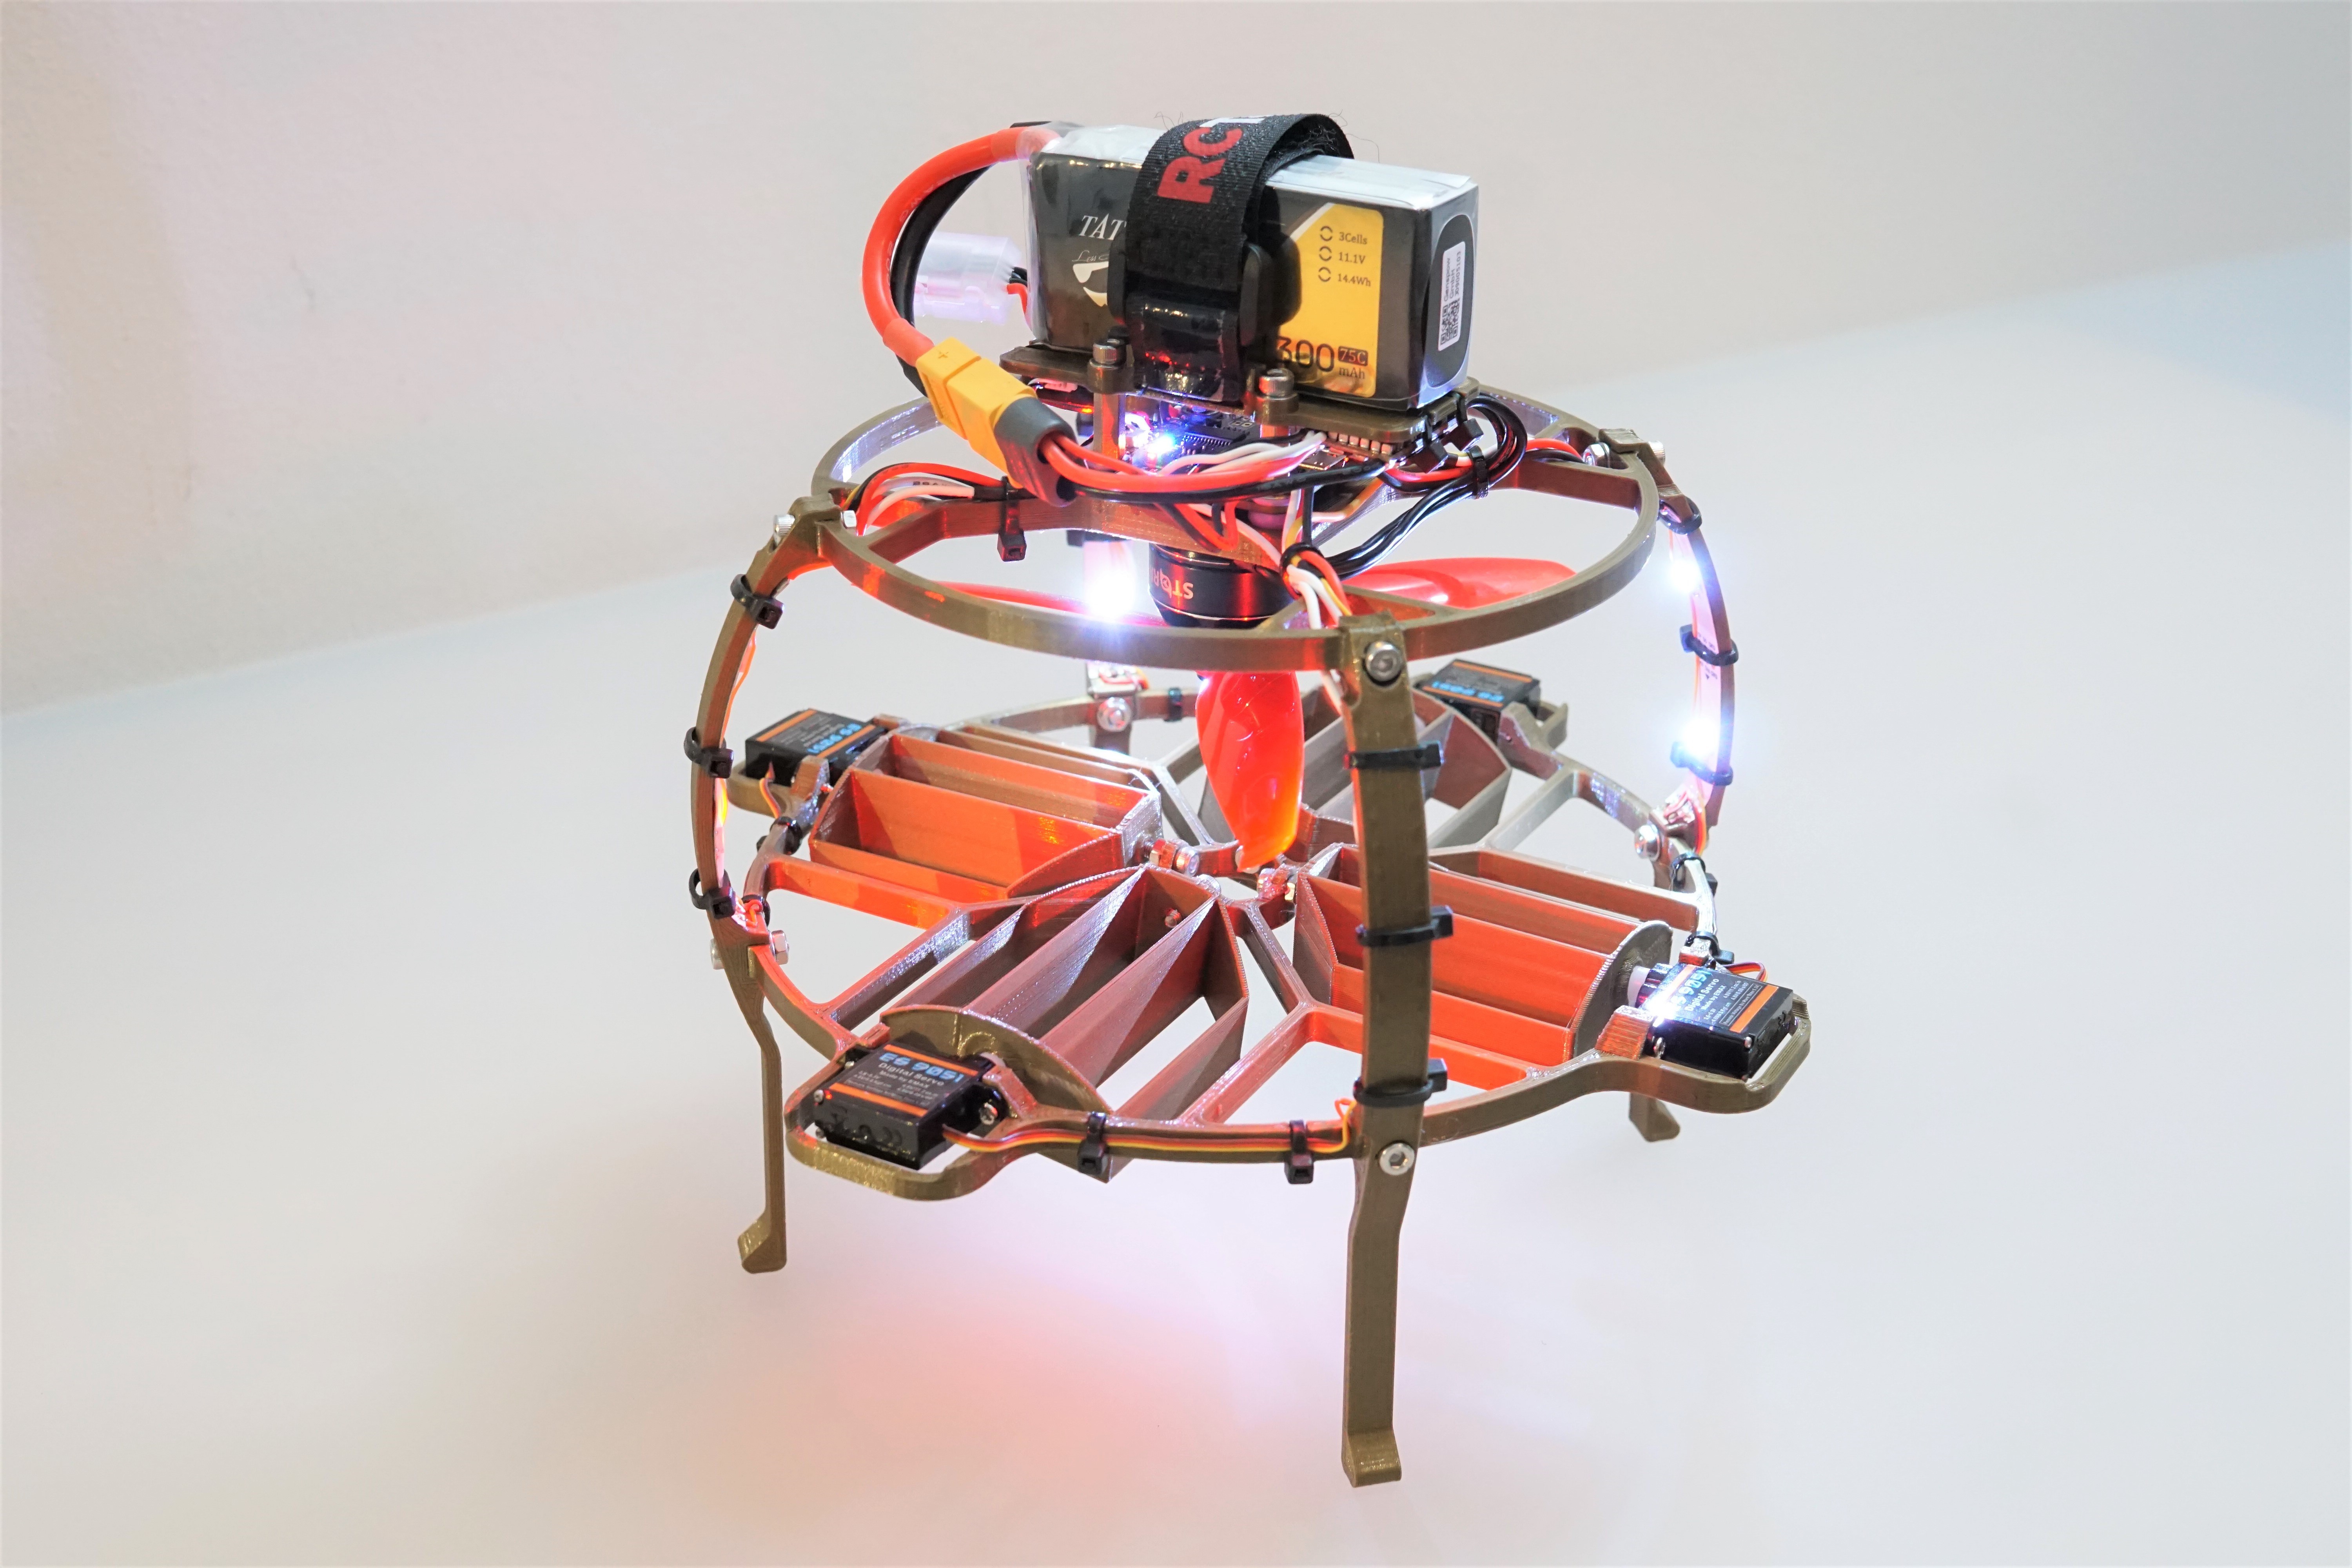
 This gives a more closer look at the build, showing the flight controller in place, the settings with air vanes as well as the ESC and motor mounted on top: