 George Gardner
I've decided against painting the arcade, opting for an oak finish. To achieve this, I'll be using 3/4" oak veneer plywood. One 4' x 8' sheet should be enough for the entire build.
I mentioned in the previous post, that the marquee will dictate the size of the machine, so the inside was designed to be 2' 2" wide, to accomodate the 26" wide marquee.
Given this, I've determined that the maximum size monitor that would comfortably fit inside the machine is a 27" (diagonal) monitor, of which I quickly ordered.
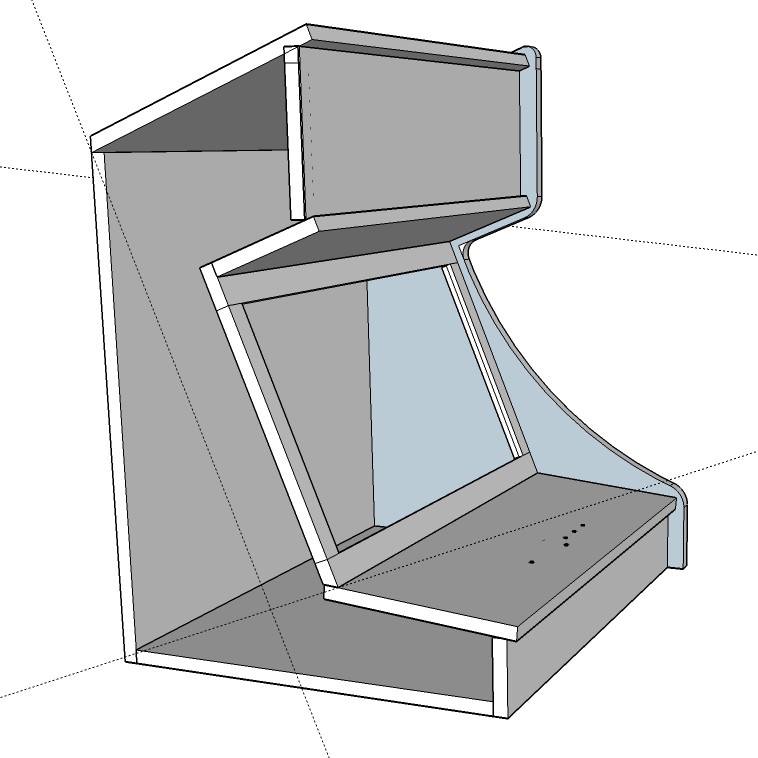
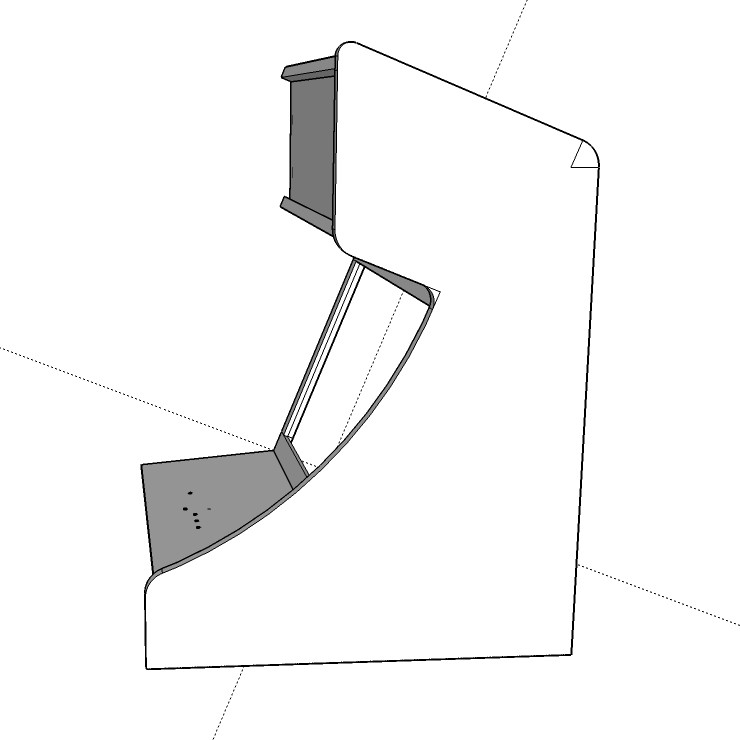
I then designed the side panels, to protrude from all extended edges by 1/2", with a radius on all corners except the bottom, and a large radius between the front and the upper part of the monitor as shown.
Selecting the side panel geometry, then exporting to DXF. I opened the file in Illustrator and defined all the points for the edges and the radius center point.
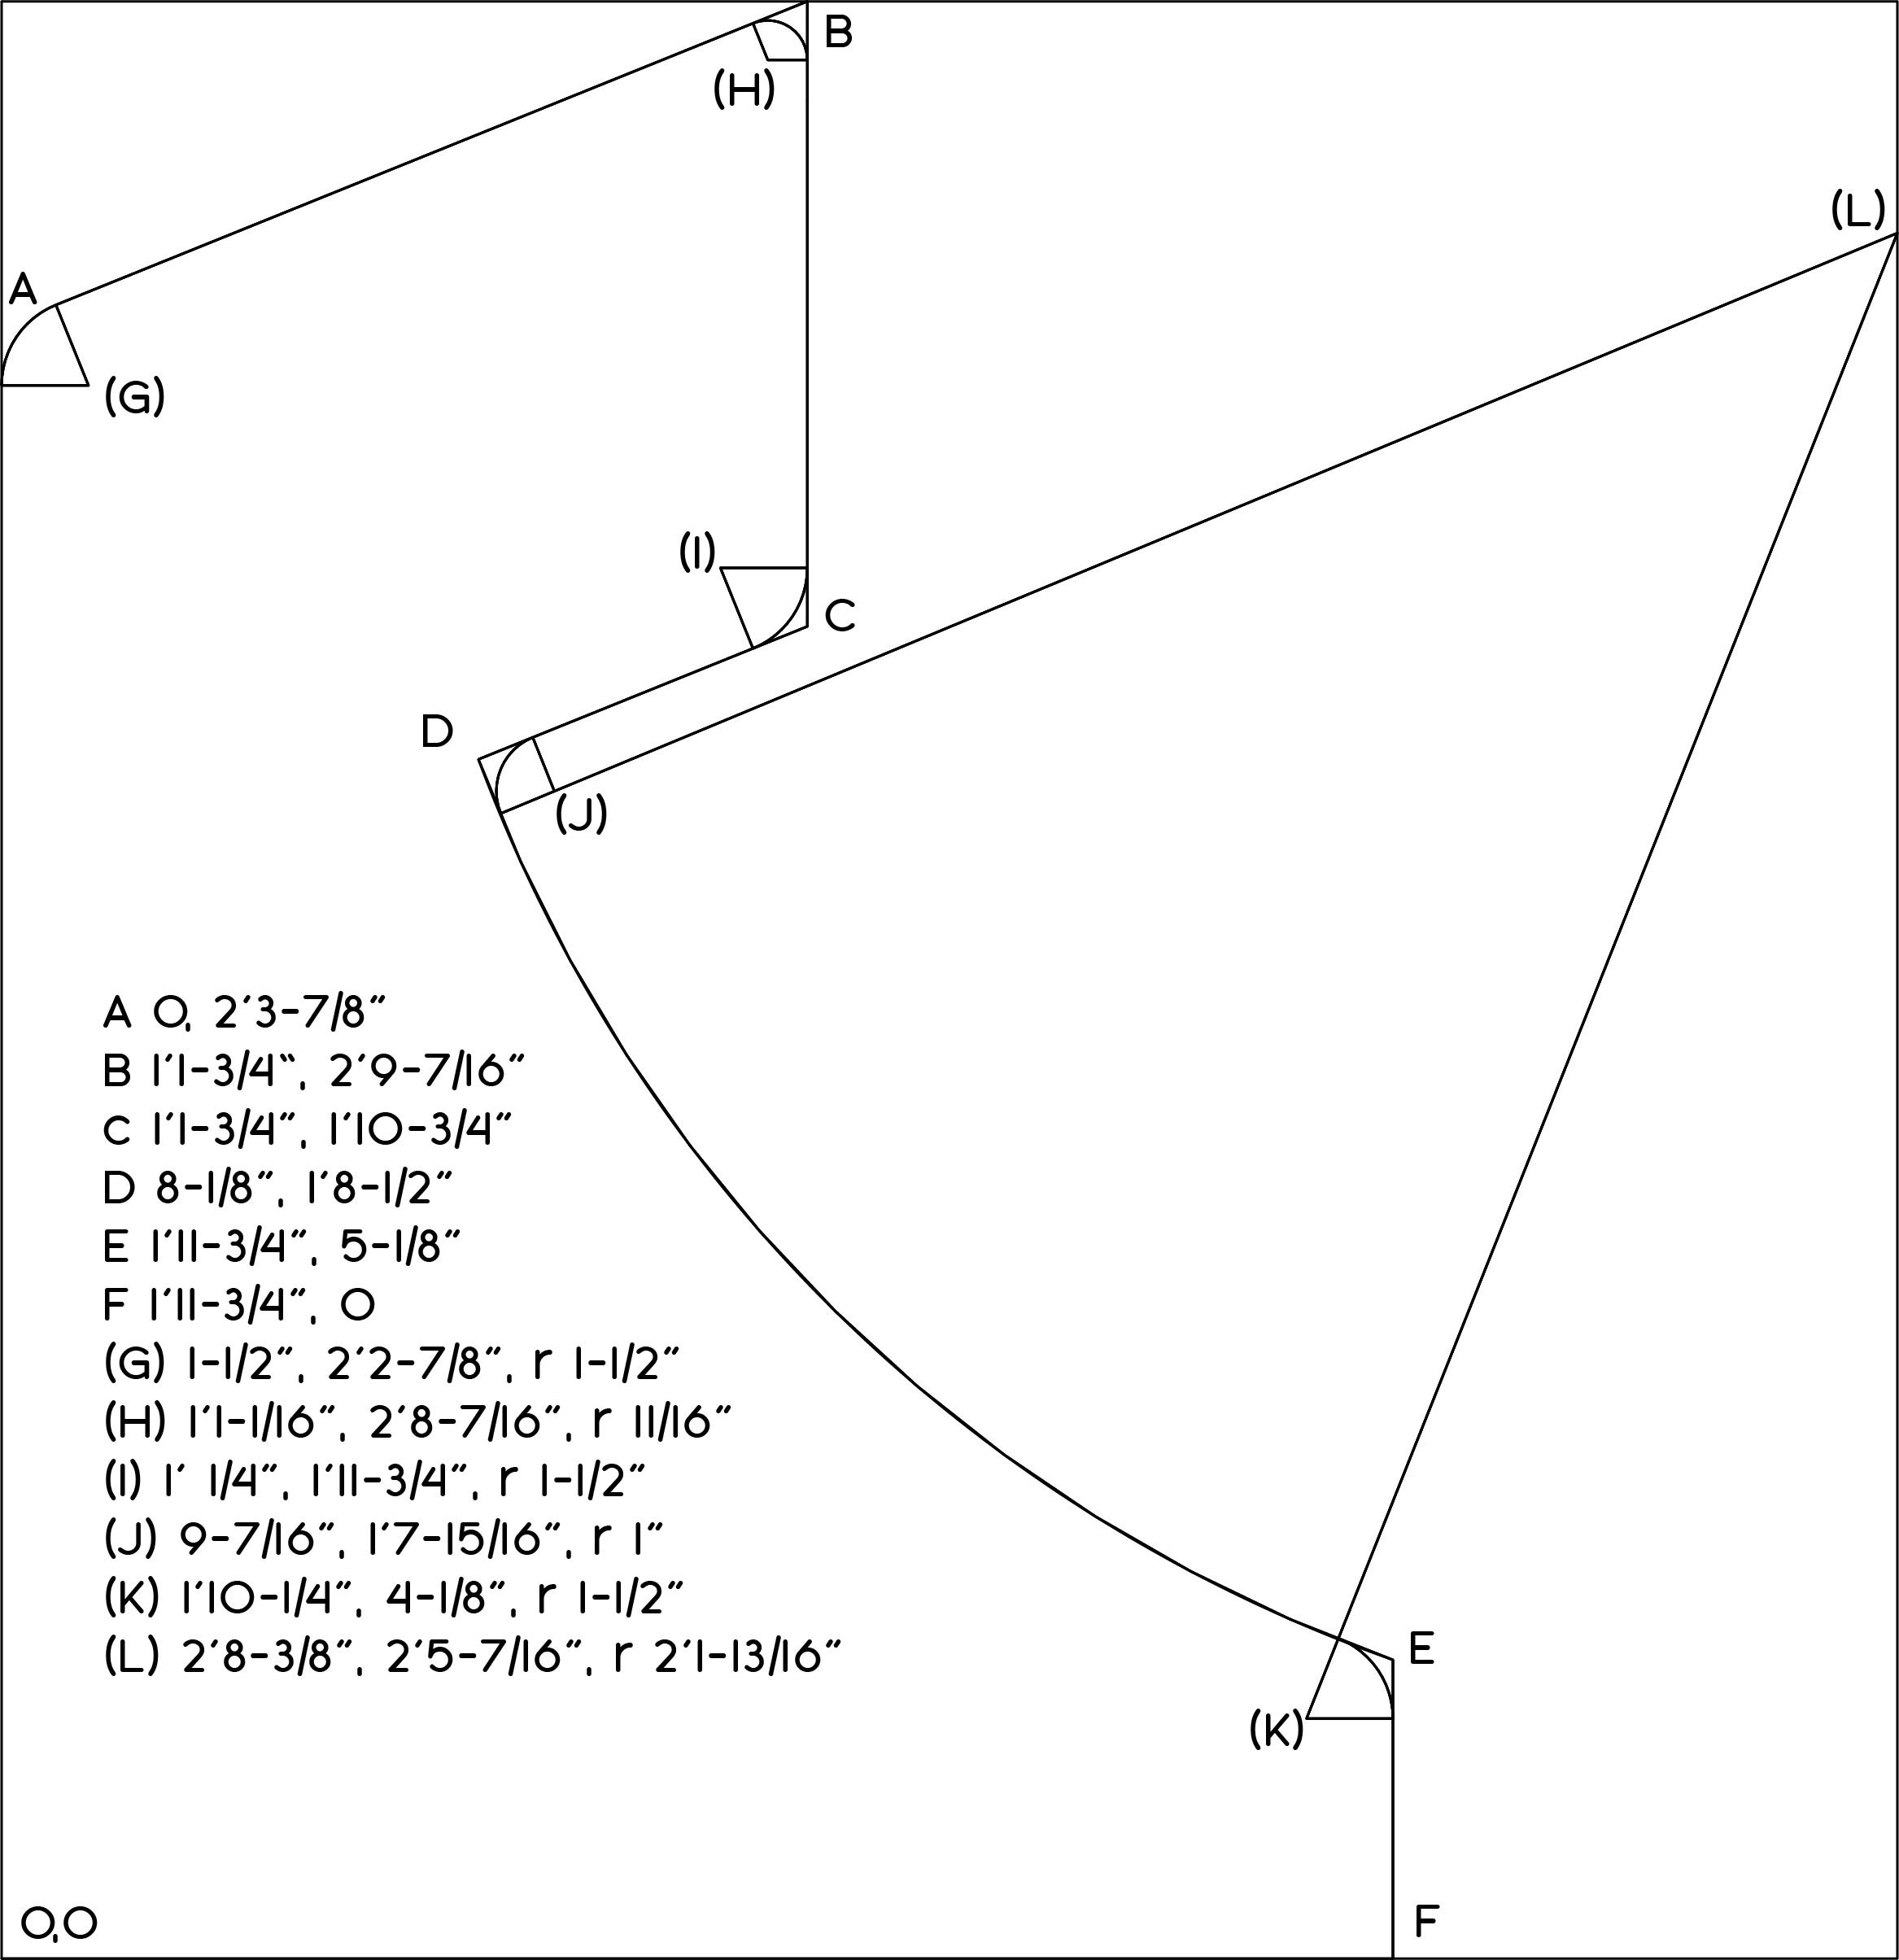
The origin, 0,0, is the lower left corner, with the first number representing the X (left and right) dimension, followed by the second number representing the Y (top to bottom) dimension.
I then layed out all these points on a piece of scrap plywood, eventually to be used as a template for the actual side panels.
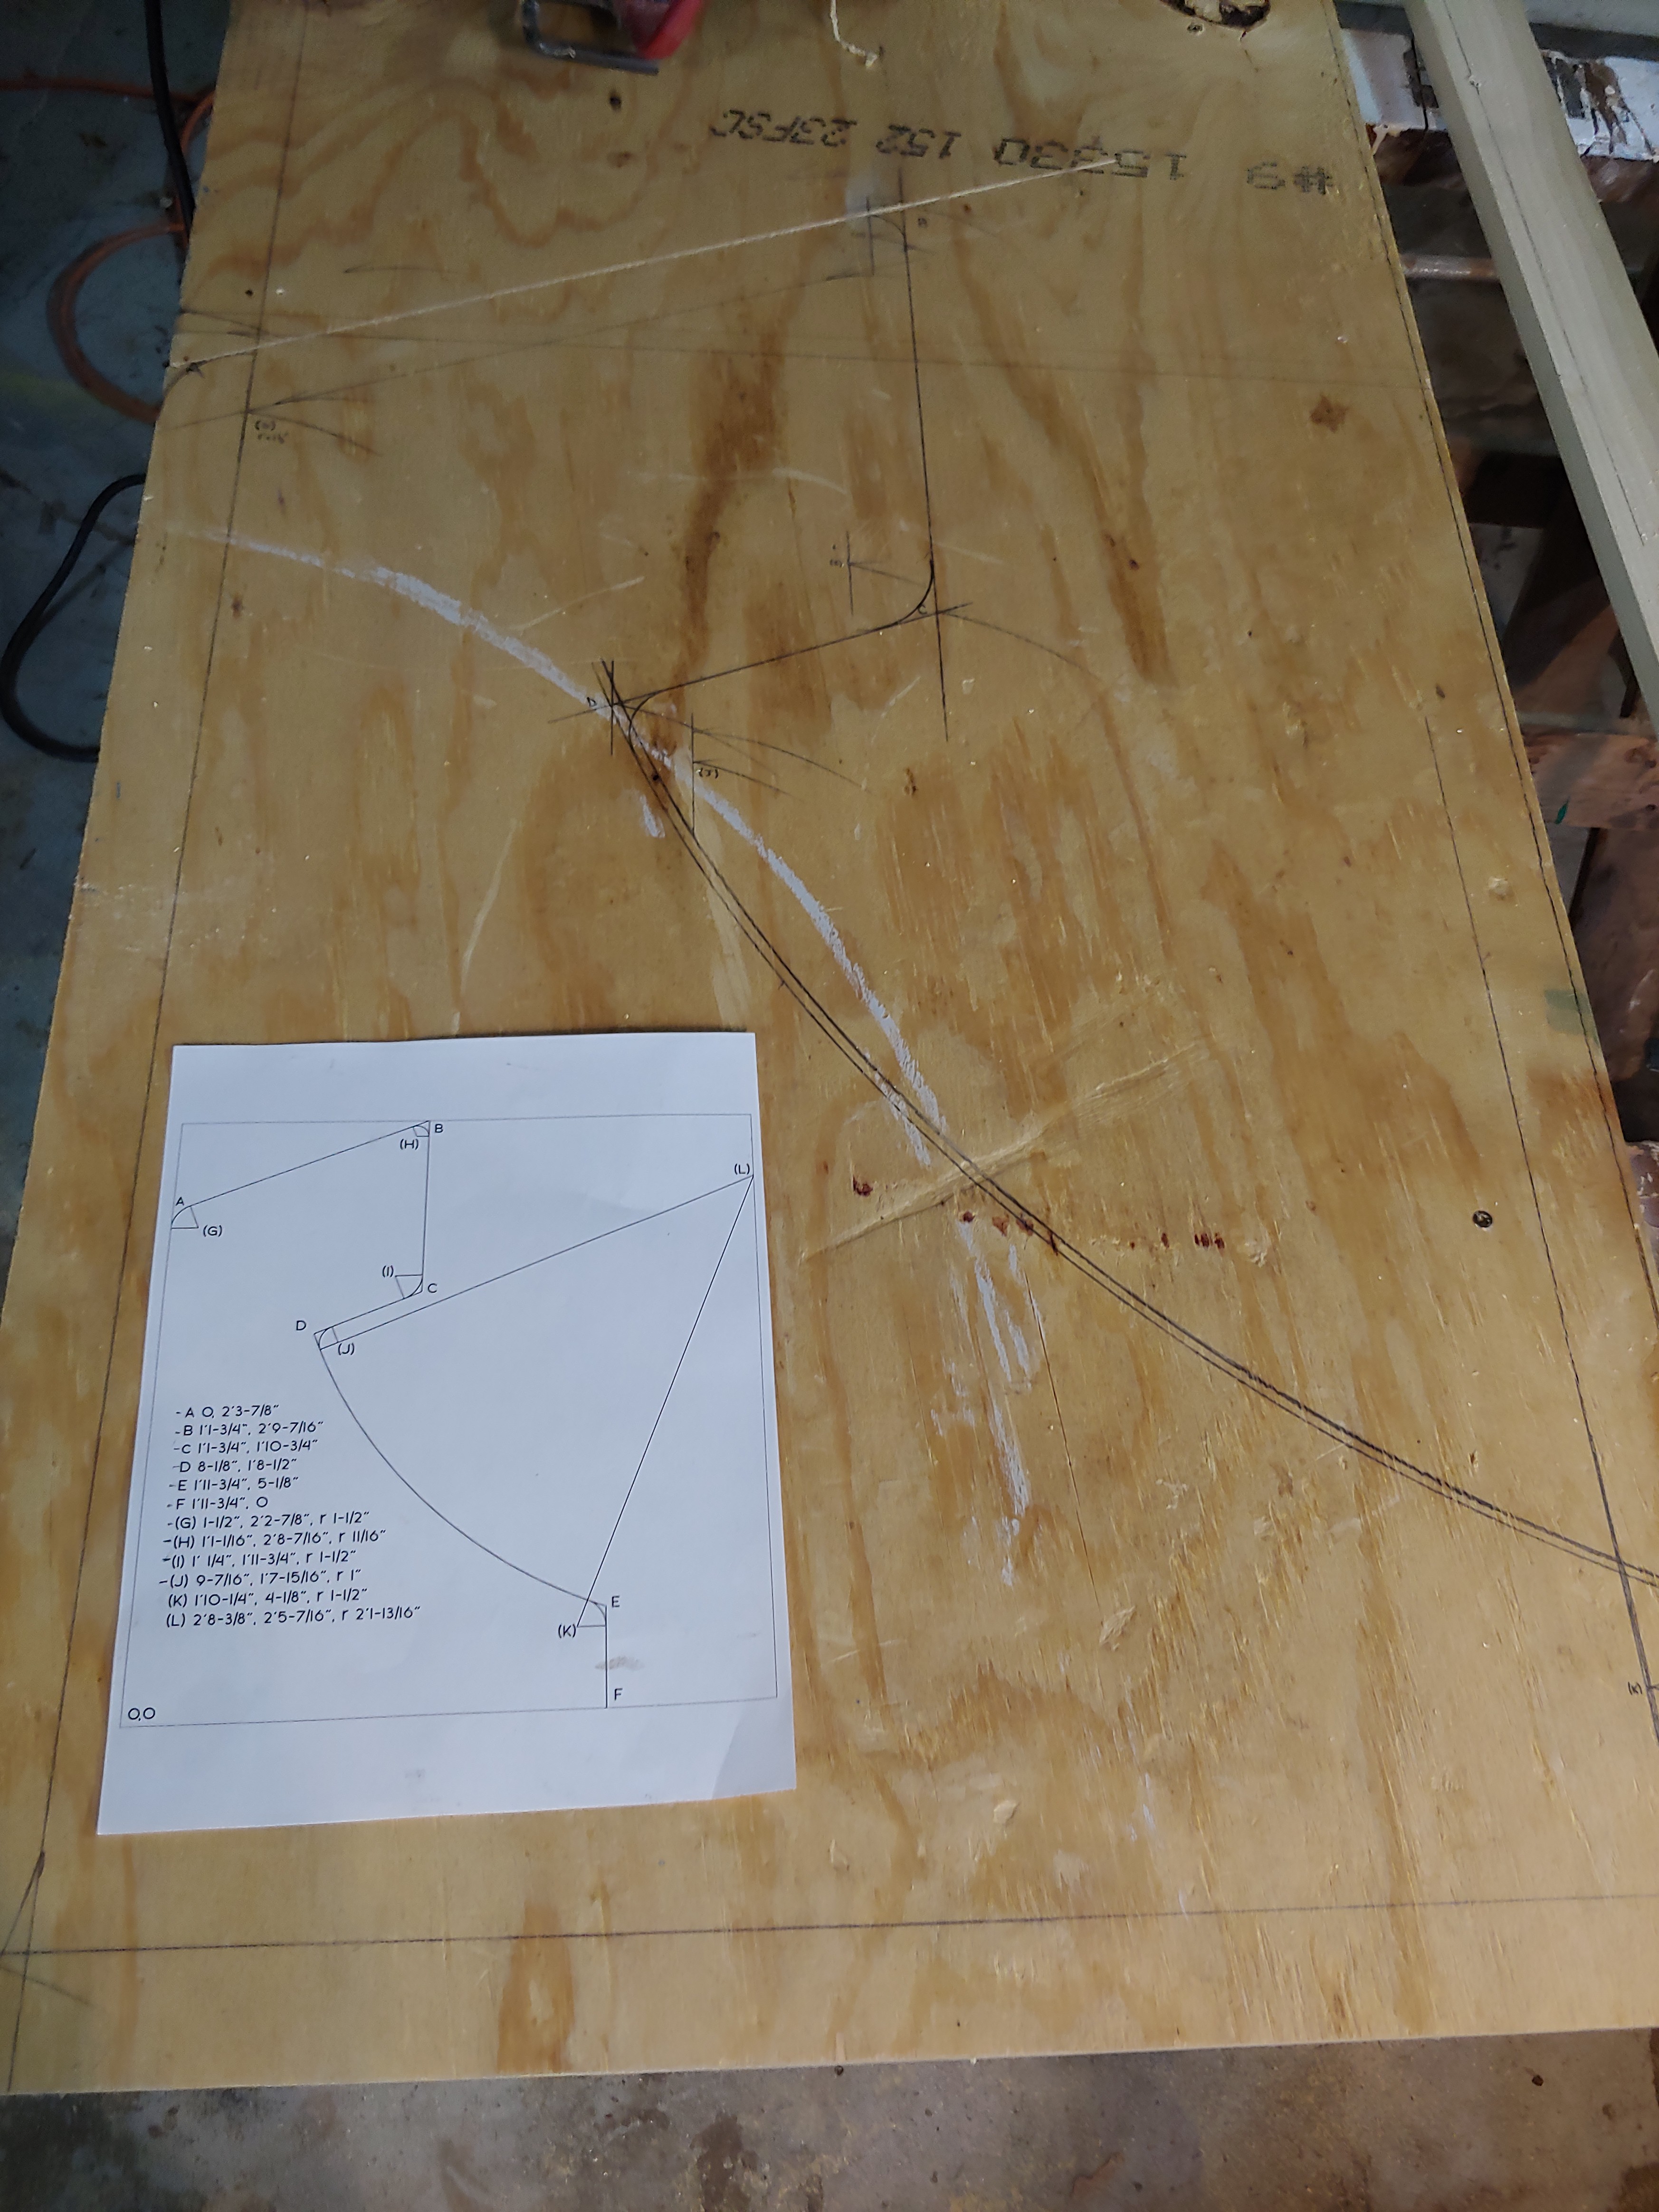
Using a skillsaw and jigsaw to cut the template out of scrap plywood, I then screwed the template to my sheet of 3/4" oak veneer plywood (on the inside so the screw holes would not be shown), and rough cut the shape of the side panels out of the veneer plywood. I cut the side panels rough, leaving about 1/8" from the edge of the template using a jigsaw.
I then followed up with a flush cut router bit, using the template as the guide for the bearing on the bit.
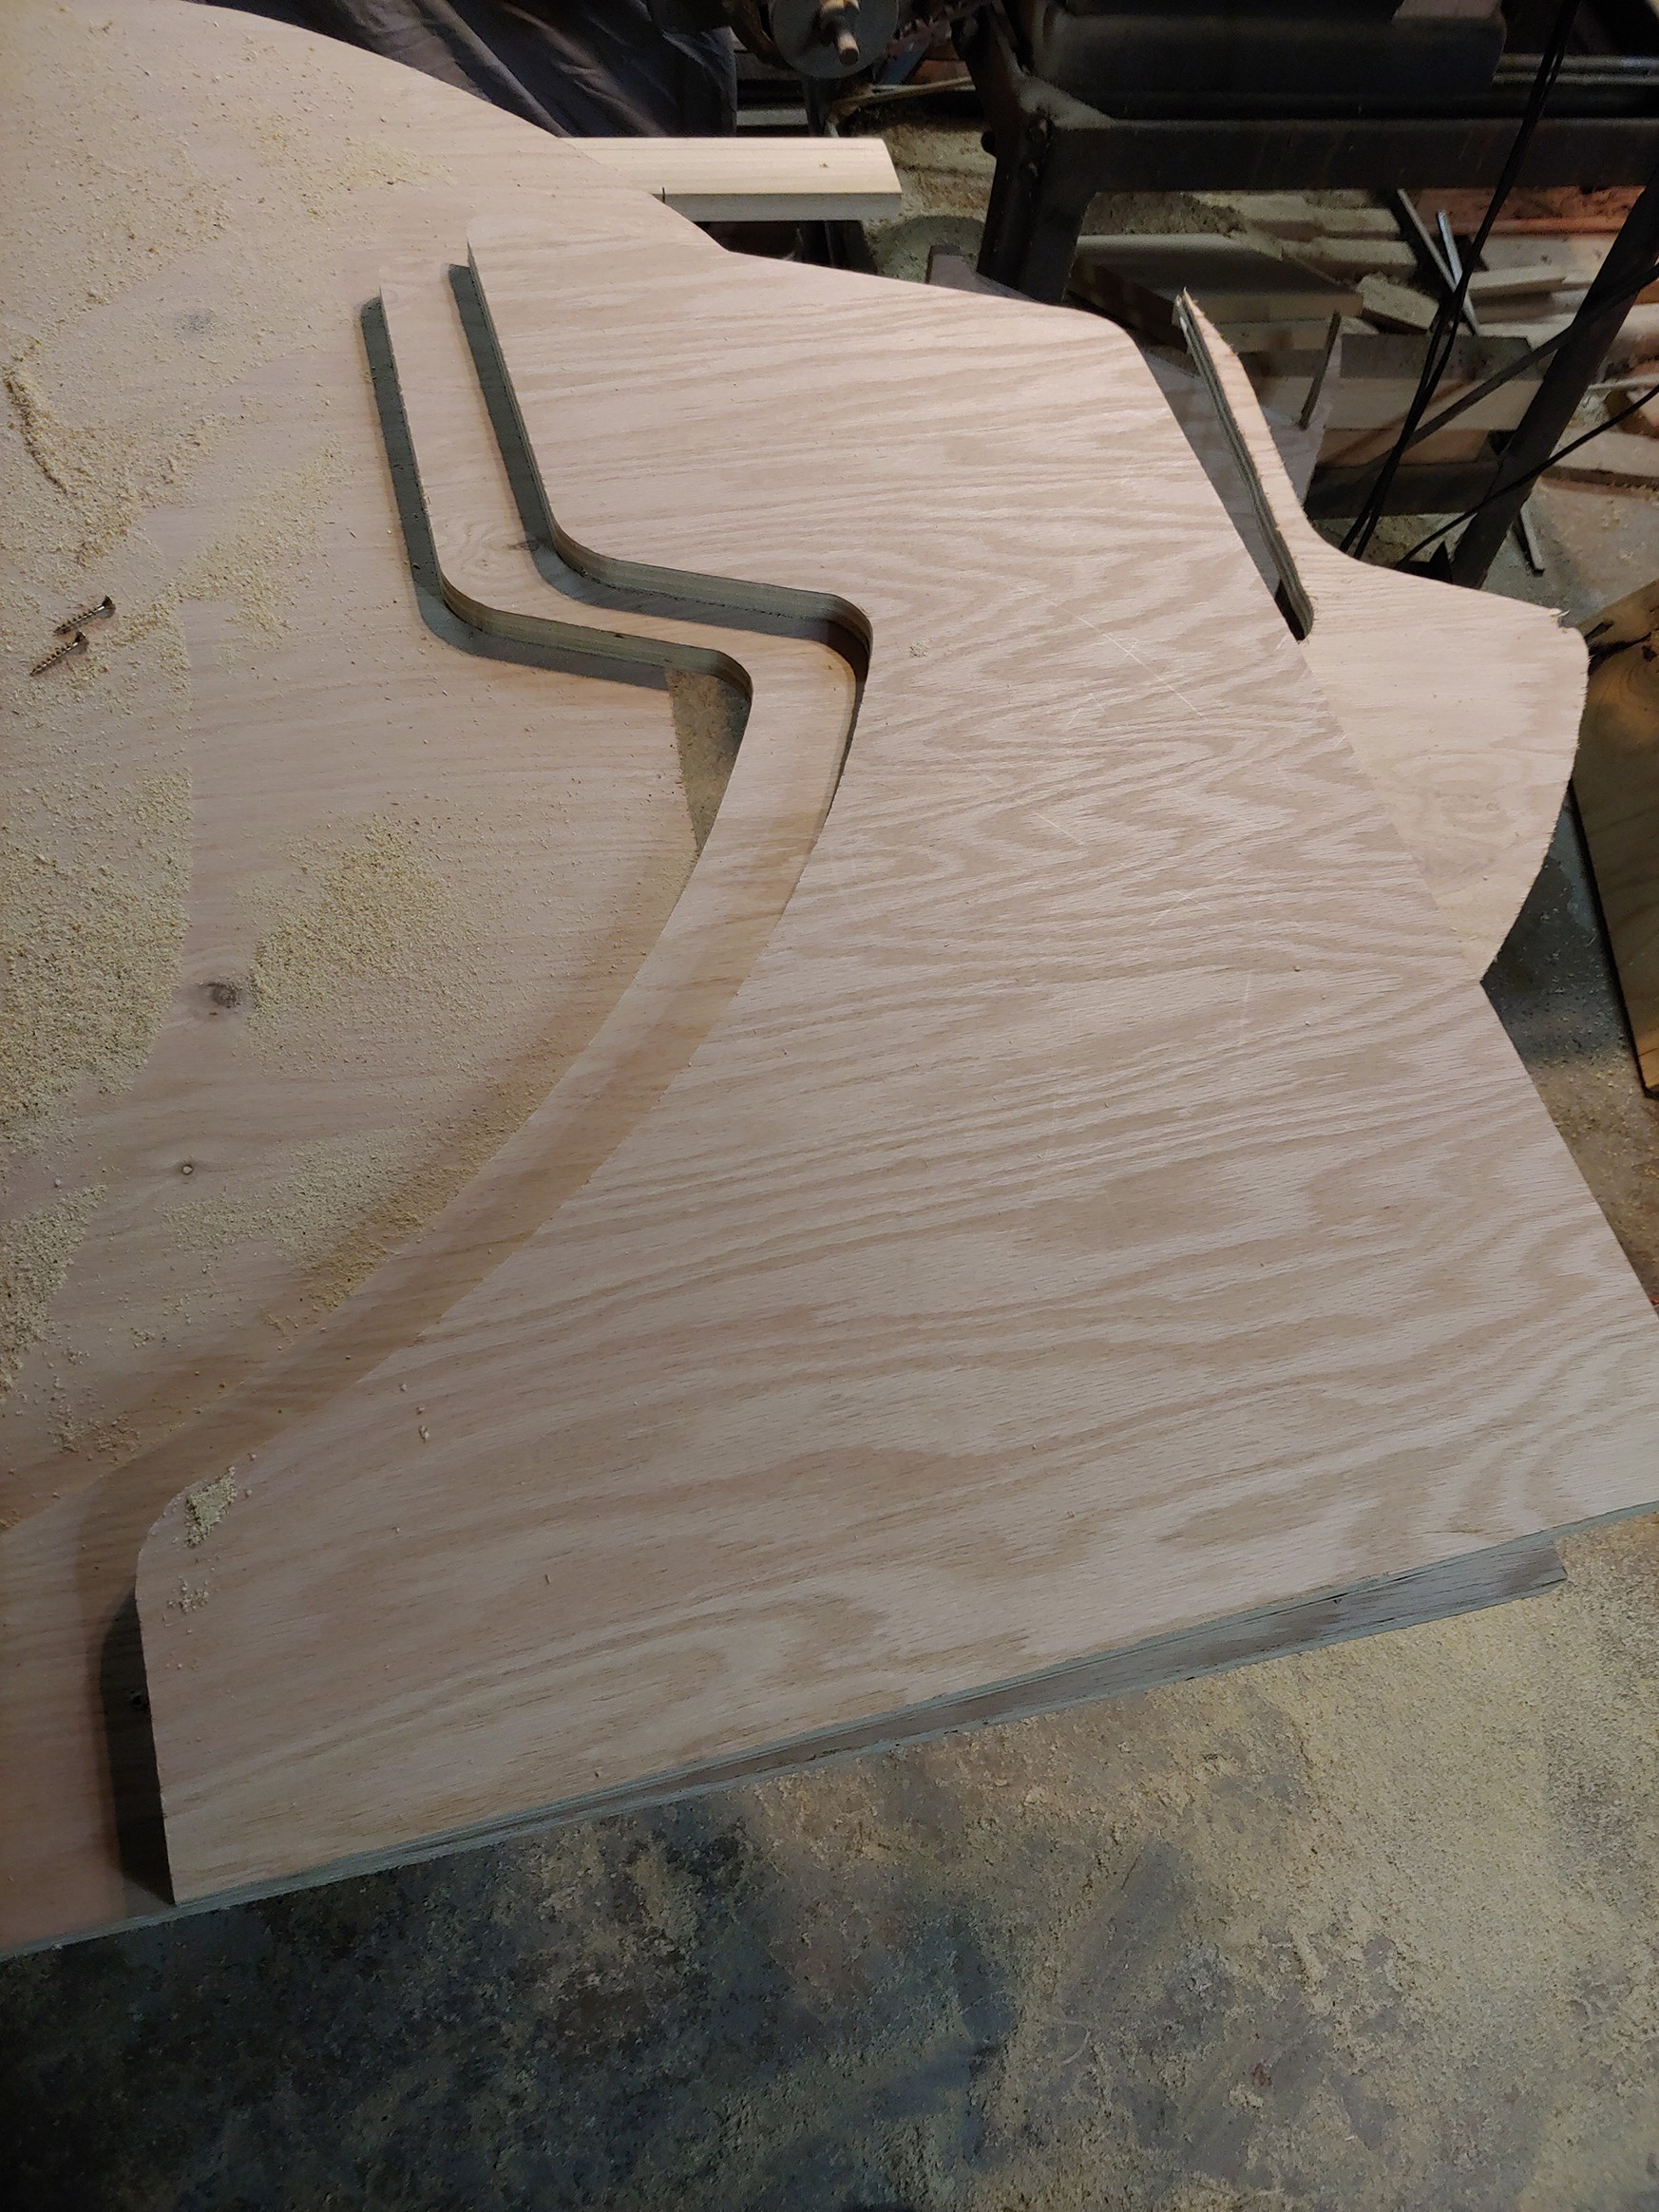
The final side pieces shown above, will eventually have t-moulding to conceal the rough plywood edges.
Discussions
Become a Hackaday.io Member
Create an account to leave a comment. Already have an account? Log In.