 George Gardner
After cutting all the inside pieces on the tablesaw, I laid out all the pieces and applied a couple coats of matte clear lacquer.
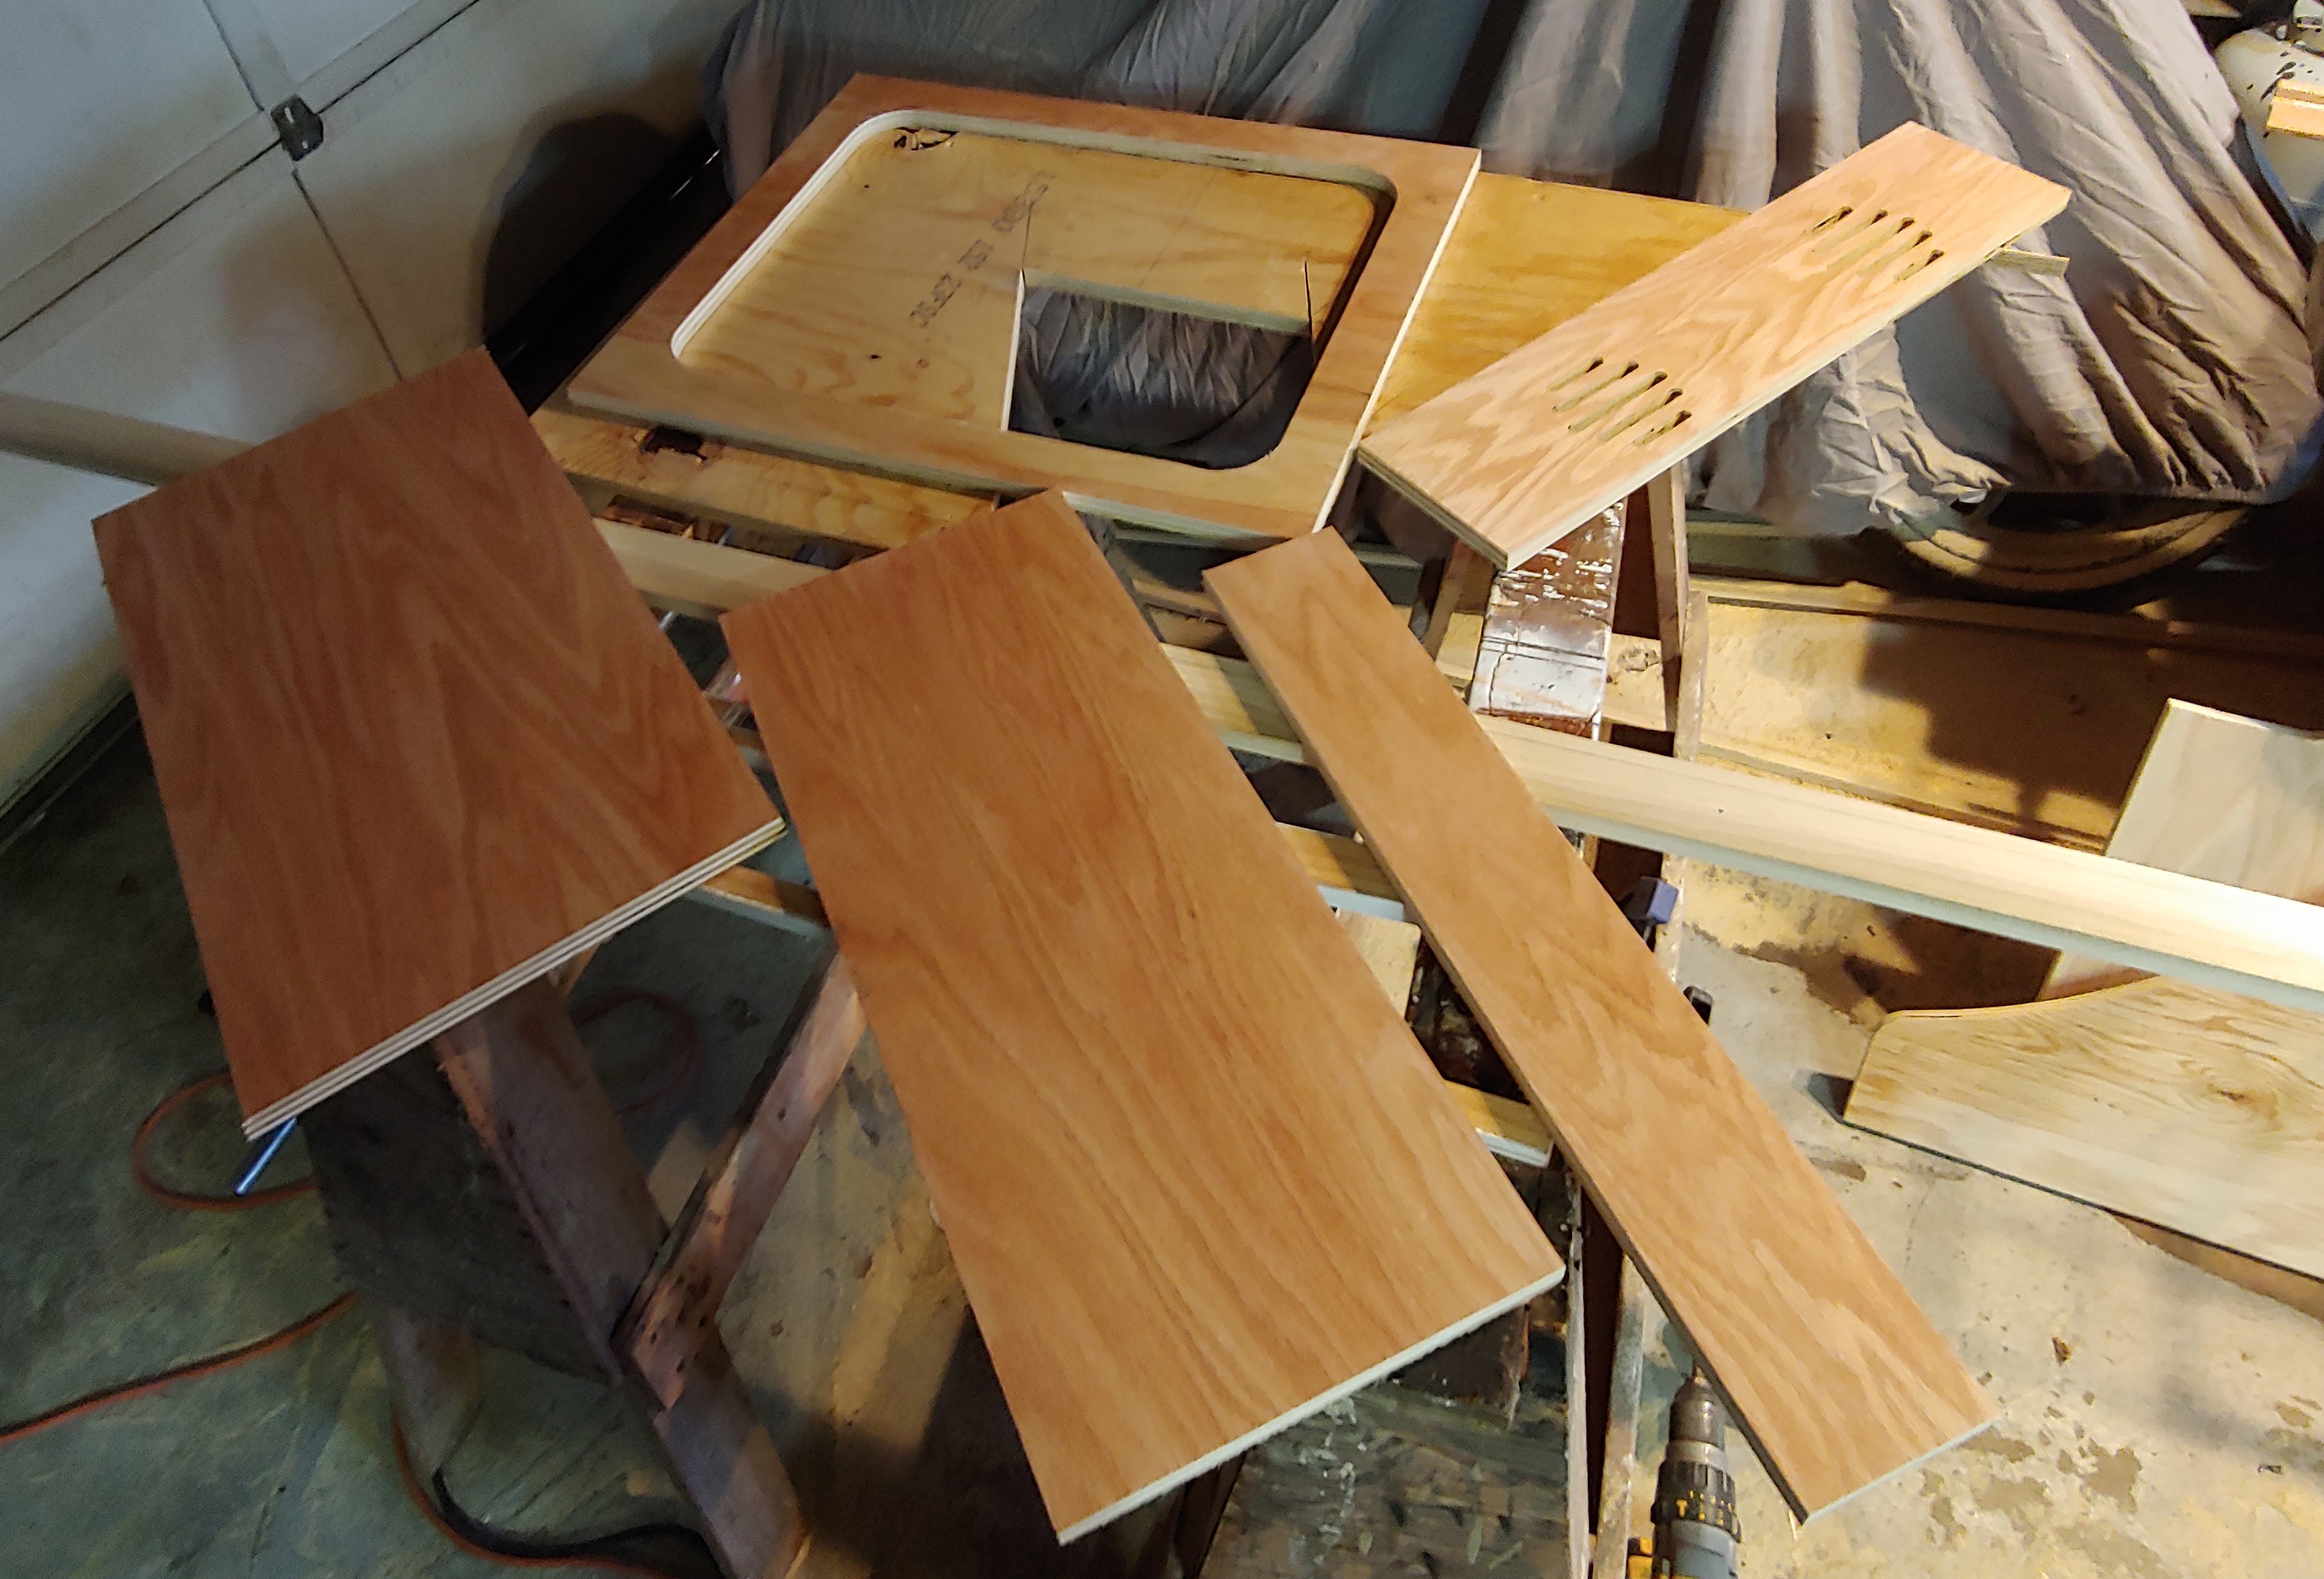
You'll notice the panel cut out for the speaker. For this I used a home built router guide that my router sits in, and did a couple back and forth passes with a 3/8" plunge router bit.
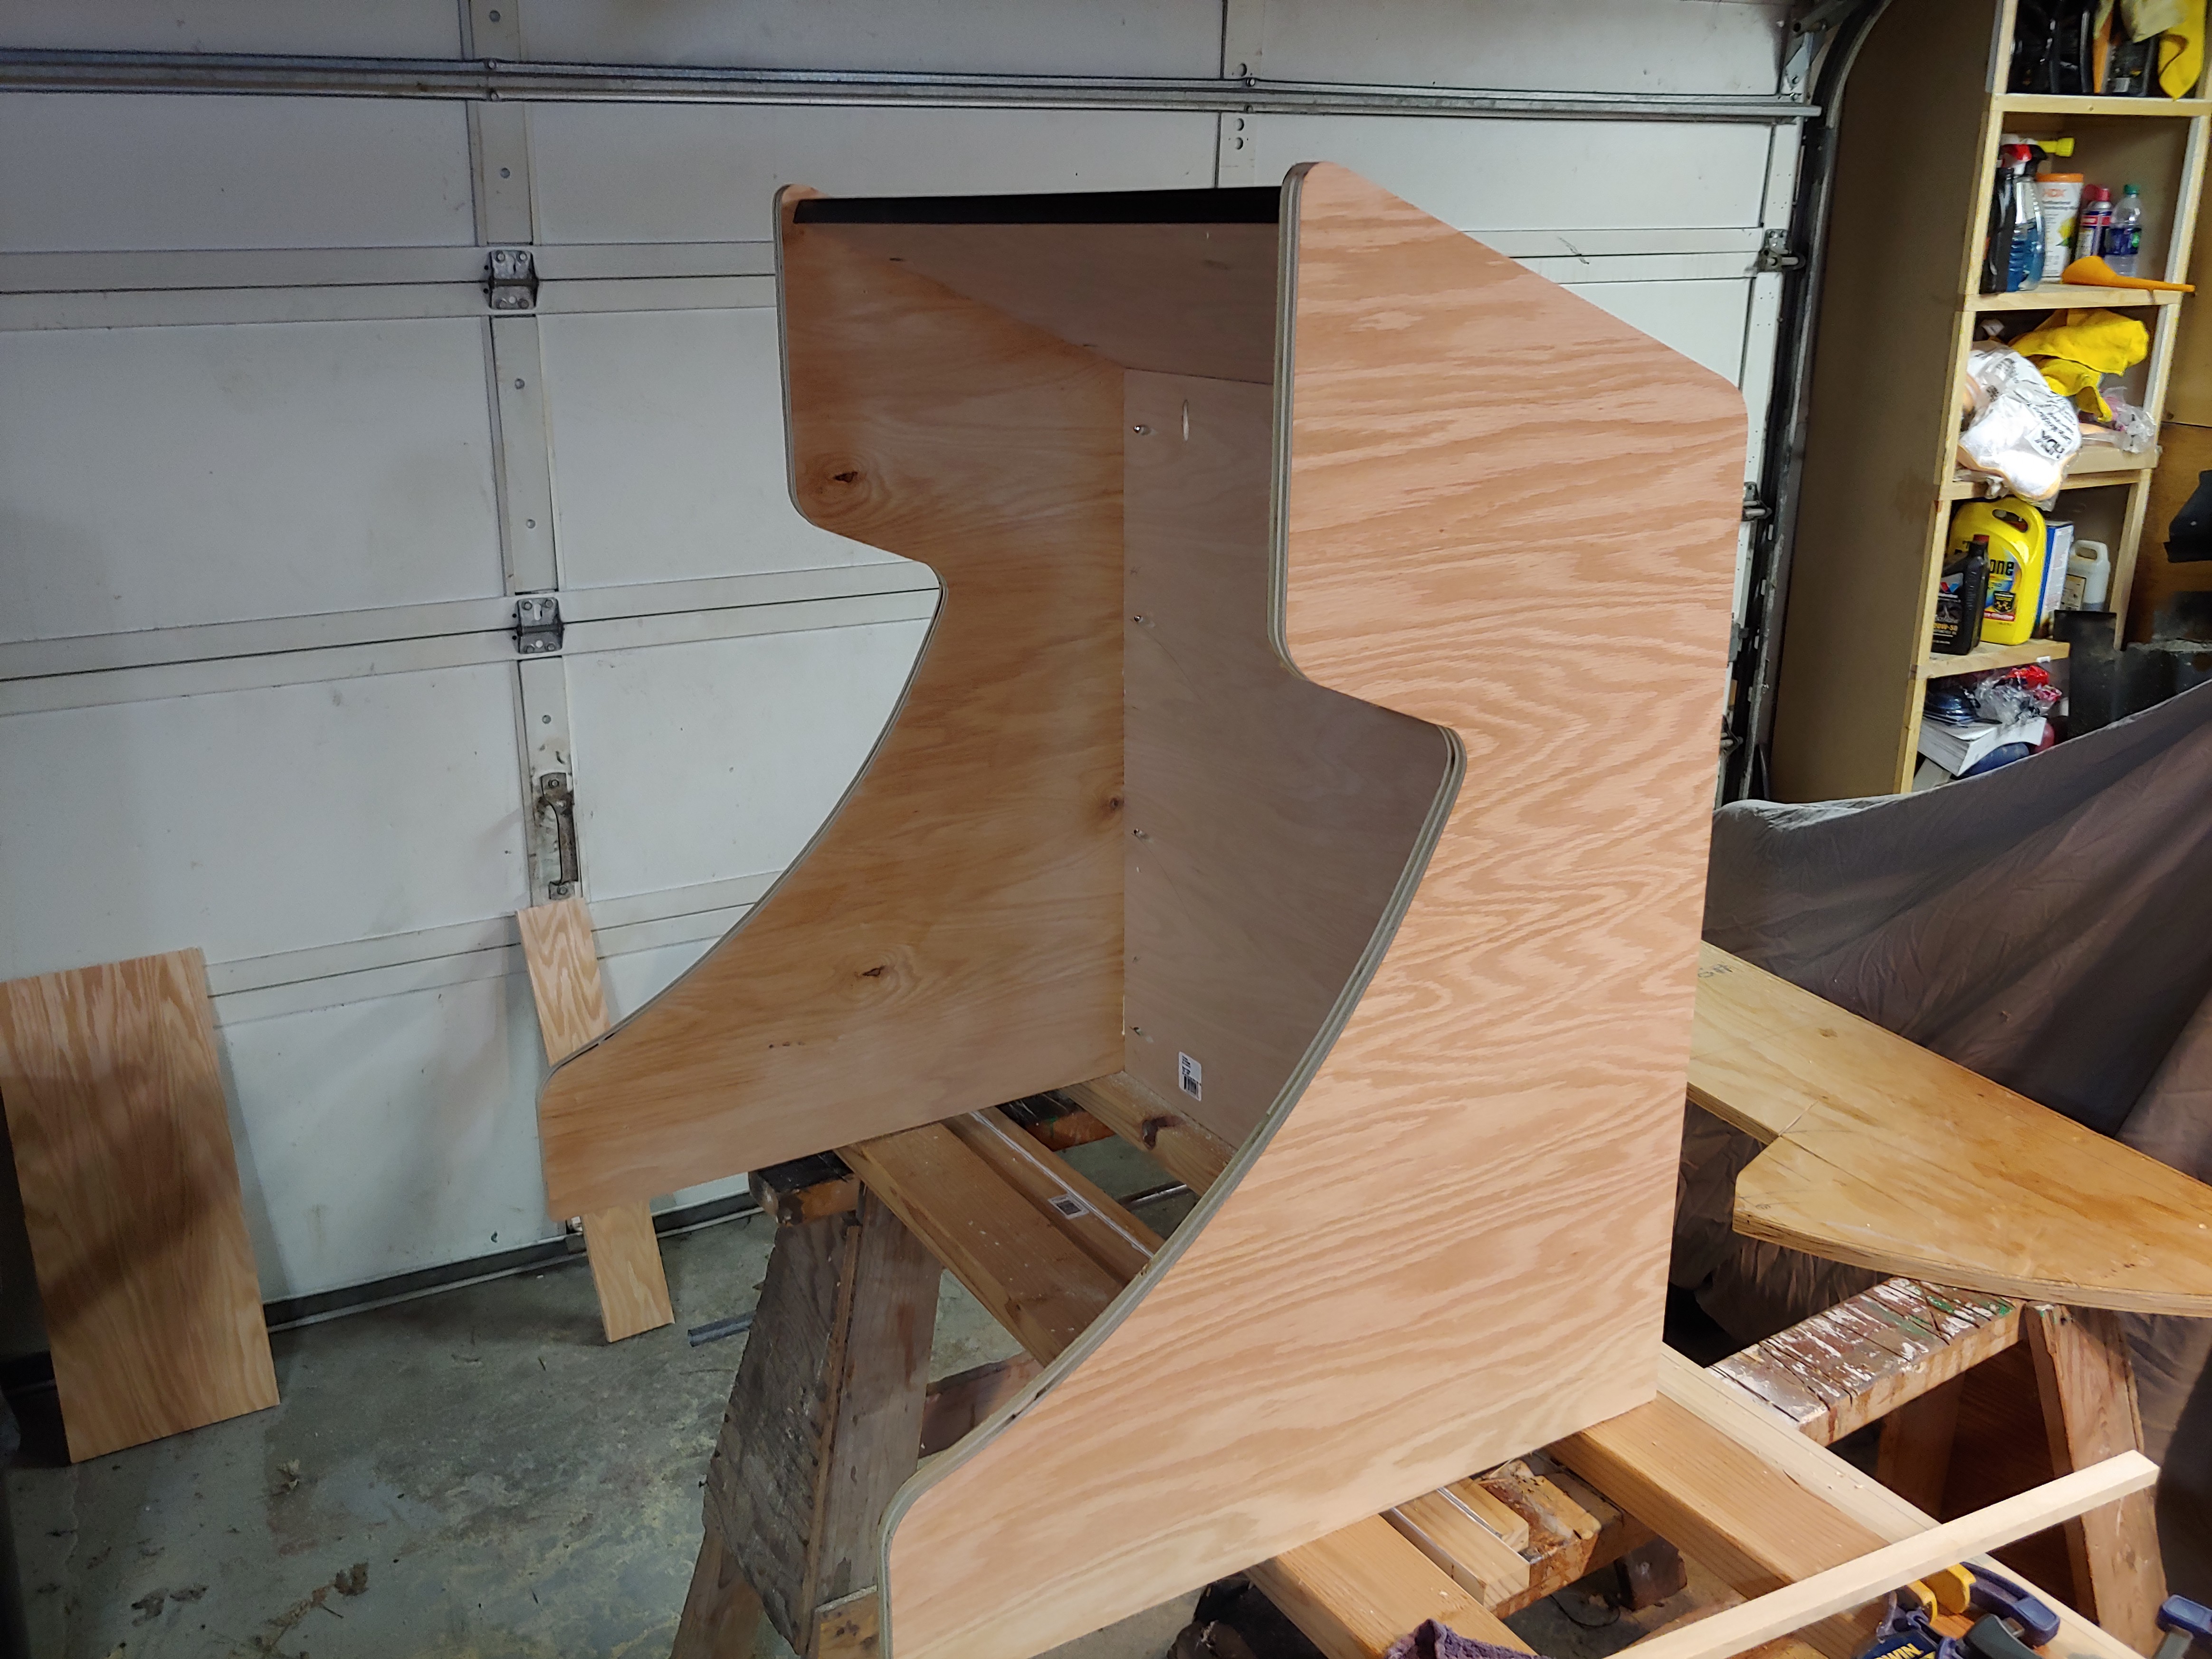
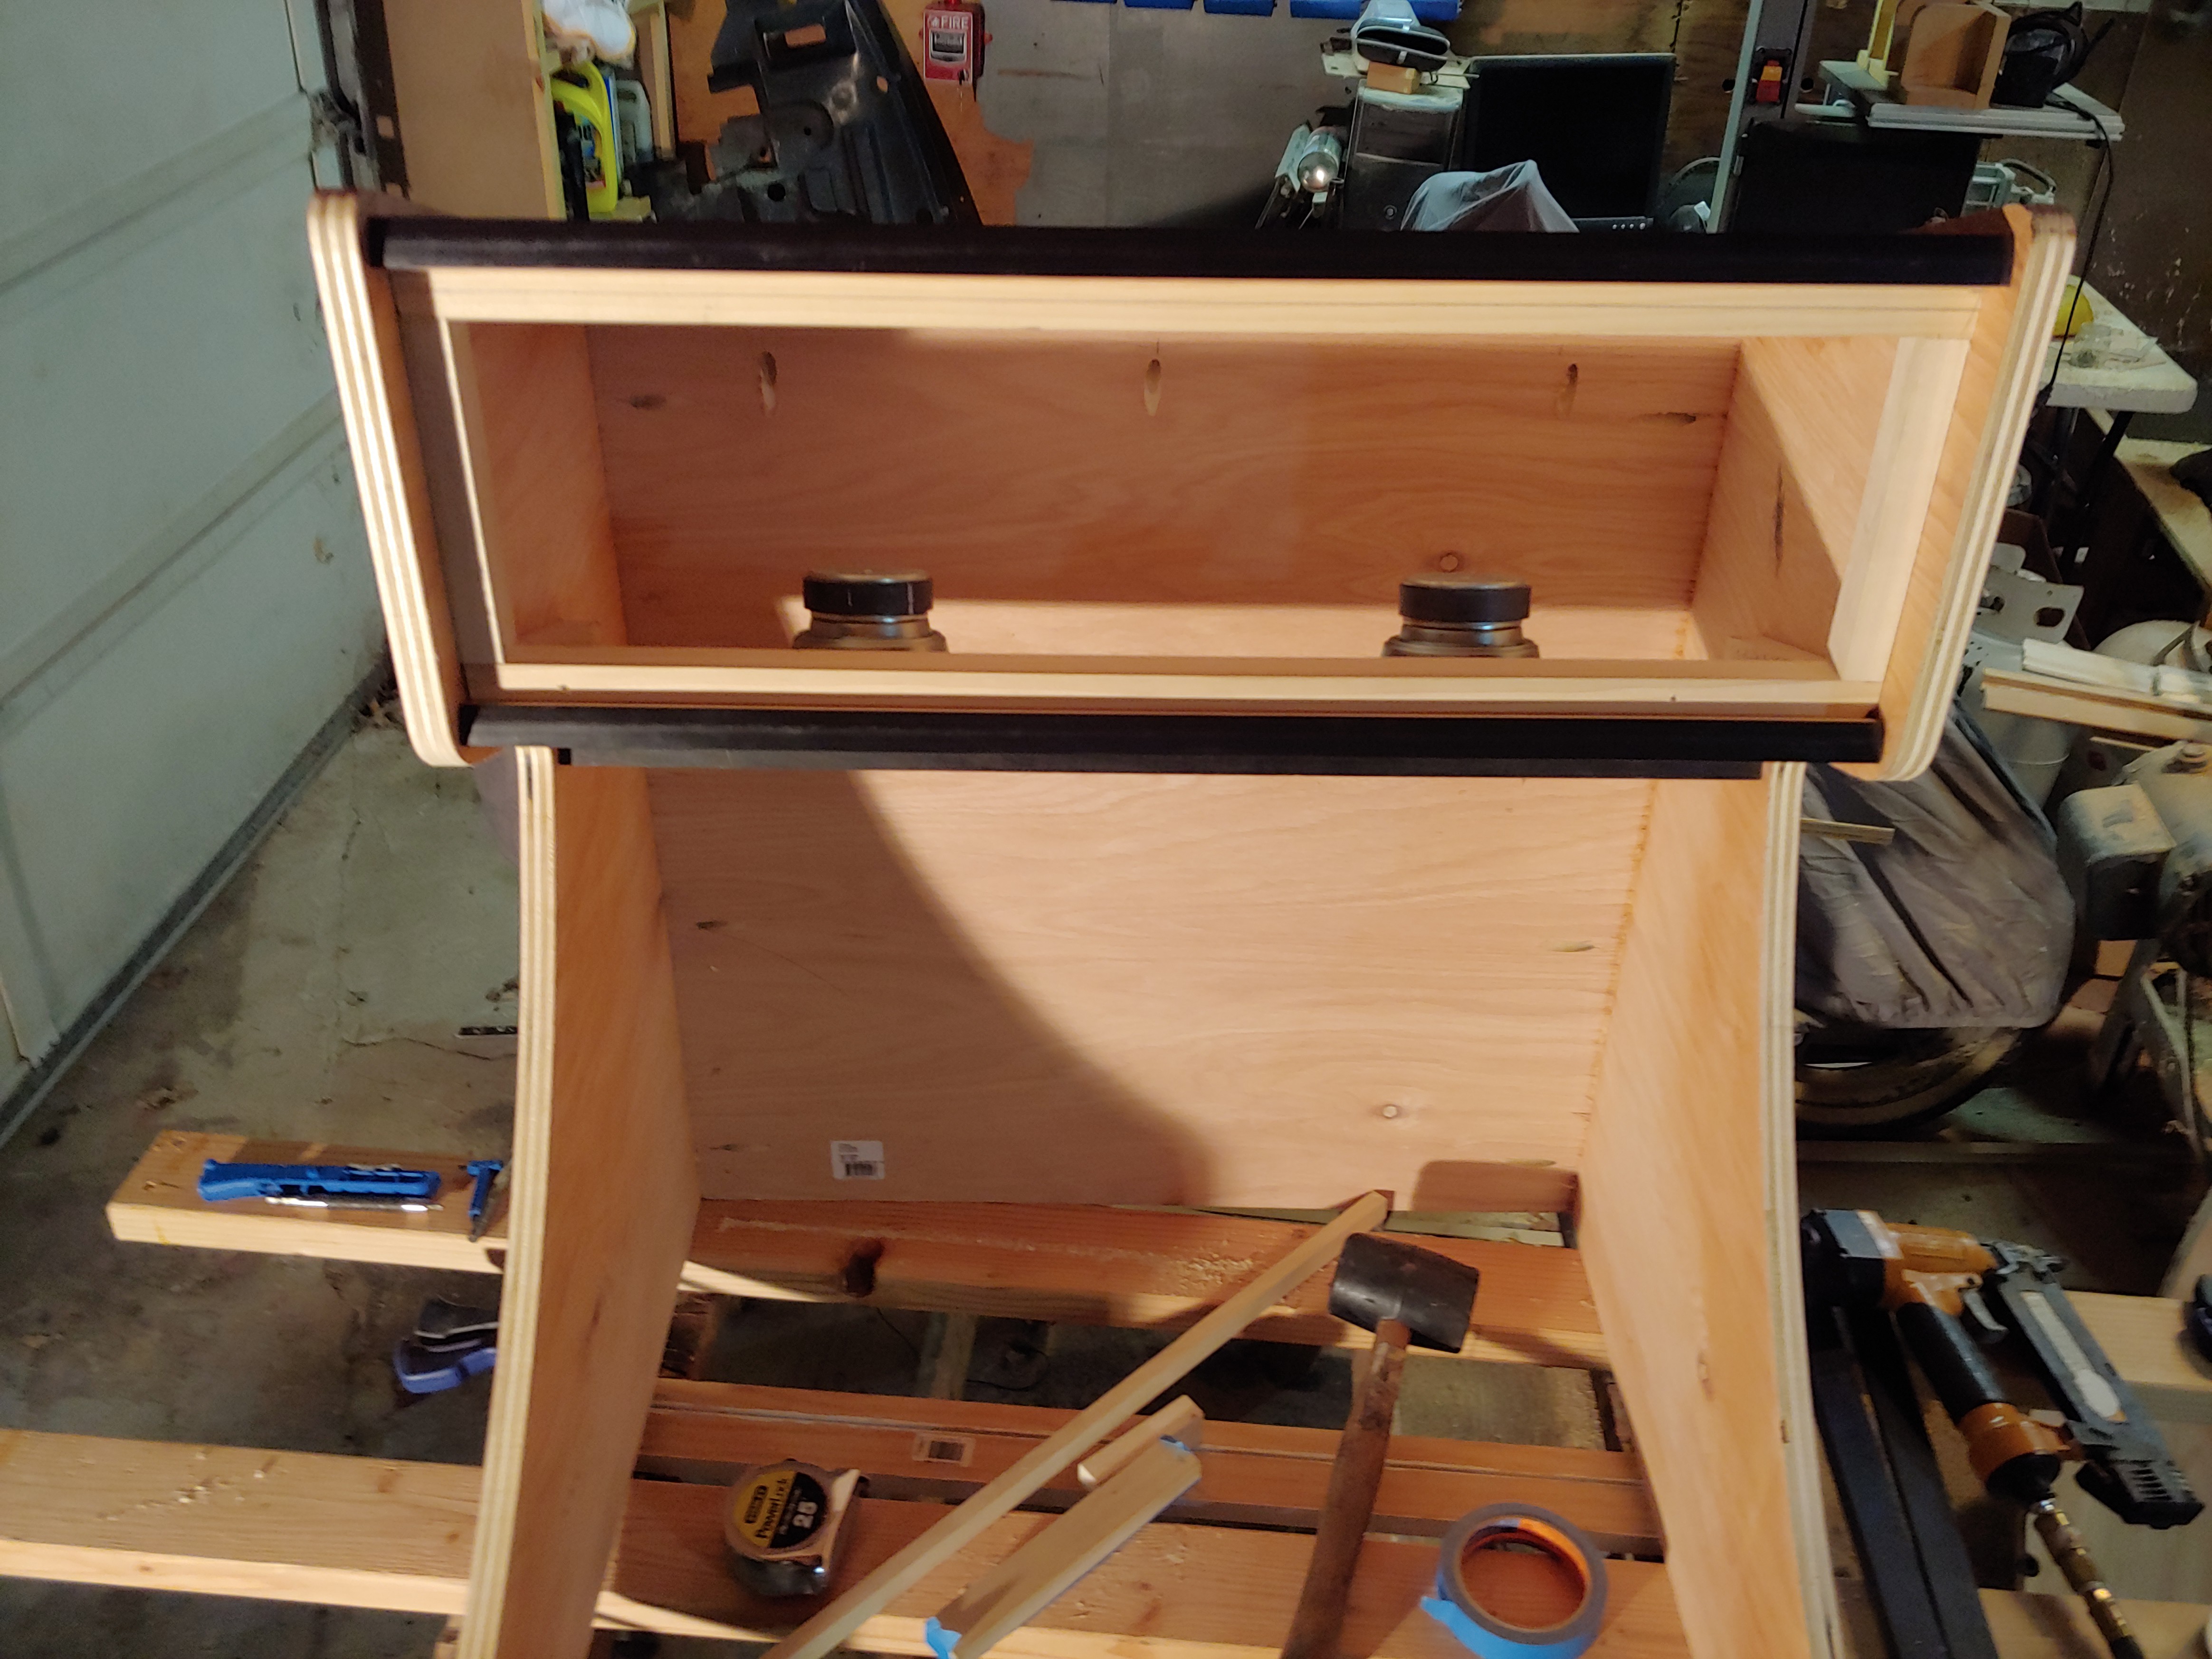
I used a Kreg Jig & screws to join the pieces together, starting with the back & top, then working my way around the front. The pieces had to be installed in a particular order, since I wouldn't have easy access to the inside after some of the pieces were installed.
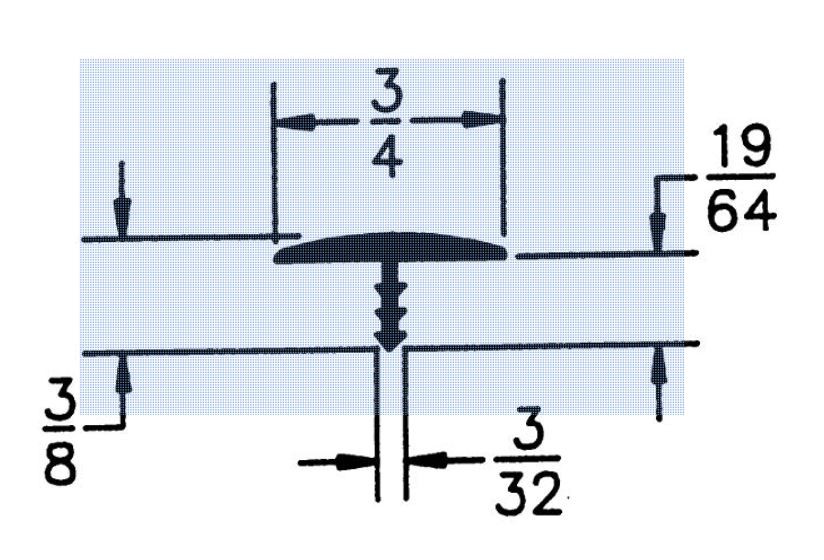
The t-moulding (shown above from outerwater industries, and purchased on Amazon) had to be installed on some of the pieces (you can see it is on the top piece in the image below) becuase the router would not have access to the far edges of the panel after it was installed. Even though the width of the part that gets inserted into the edge is 3/32, the directions instructed to use a t-moulding router bit with a width of 1/16" to allow the barbs on the t-moulding to have something to grab on to. Since the playwood is ACTUALLY 23/32" the t-moulding extends past the edges by a negligible amount.
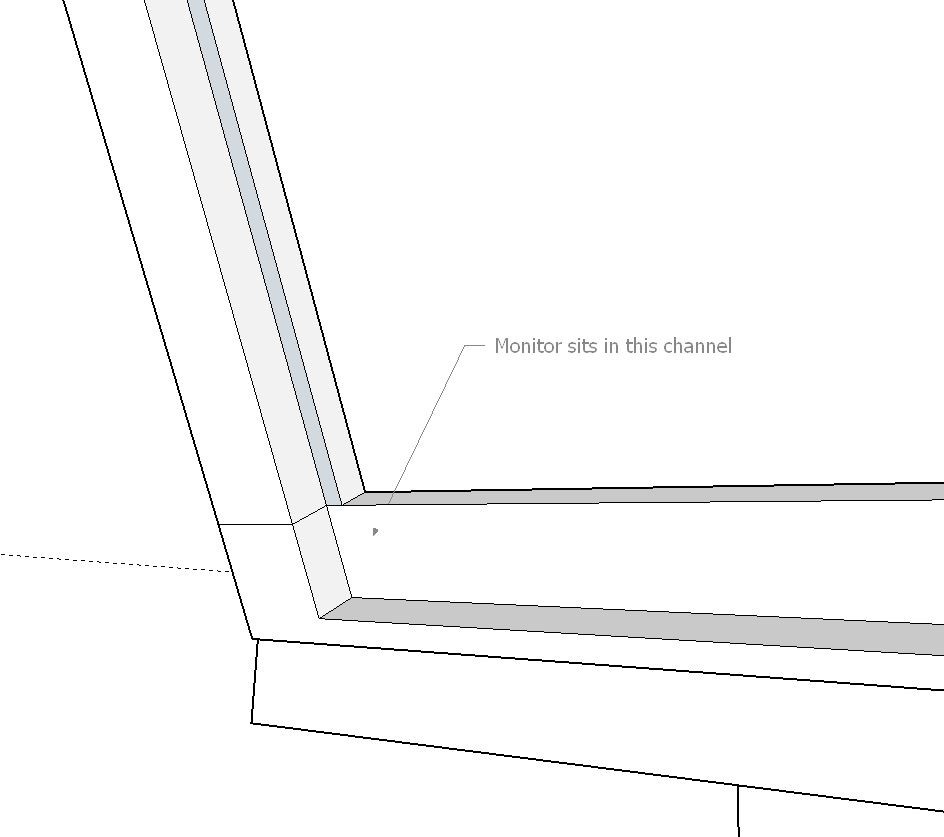
The face pieces that are to accept the monitor, and shown below, started as 3/4" poplar, to which I used a router table to channel out the pocket that will accept the monitor. Since these are a different species of wood, I painted them black.
I chose to install the speakers on the upper inside panel prior to the installation of the panel, as I knew my drill would have a tough time fitting in there afterwards. The speakers chosen are generic 4" sony speakers purchased on eBay a while back. I framed out the receiver edges for the marquee using 3/4" x 3/4" wood pieces. A bevel was cut into the top and bottom pieces to match the 22 degree angle of the top and inside top pieces. You can see the lacquer vs. no lacquer on the inside of the side pieces. This area will be visible after the build is complete because of the inset of the monitor pieces and joystick/button panel.
Discussions
Become a Hackaday.io Member
Create an account to leave a comment. Already have an account? Log In.