You can read more about this and other Esmacat tutorials on the official Esmacat website. You can also learn more about us on our main website.
Detailed documentation of the codes and steps can be found here.
EtherCAT Arduino Shield by Esmacat (EASE):
EASE is an EtherCAT slave that connects to an EtherCAT master (PC/ Laptop/ Dedicated Master devices like the Esmacat Master S and Esmacat Master C). It can be stacked on top of Arduino, Arduino-like boards and Arduino Shields. This shield allows high-speed communication with an industry-standard EtherCAT protocol for high-performance robotic applications.

Crowd Supply Campaign Page: https://www.crowdsupply.com/harmonic-bionics/ease
More info: https://www.esmacat.com/ease
This shield has 8 registers that can be used to send/receive data between devices via ethernet cables attached to the shield.
Suggested Reading: EASE Datasheet.
LCD Shield:
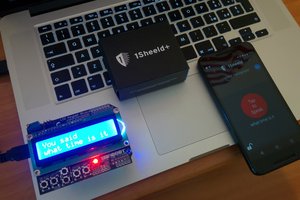
The LCD shield used in the tutorial is a 16x02 LCD display with six buttons which is simple and convenient to stack it onto the Arduino Uno board. There are 5 control buttons (Select, Up, Down, Left, Right) and a reset button. The 5 buttons are connected with the A0 analog input of the Arduino board.

Suggested Reference: keyestudio LCD 1602 Expansion Shield.
Hardware Connections:
The primary hardware components include,
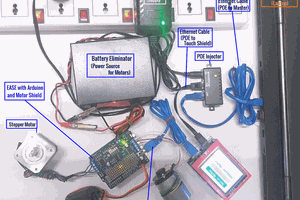
- EtherCAT slave (EASE with Arduino)
- EtherCAT Master (PC/ Laptop)
- Power Over Ethernet (POE Injector)
- LCD Shield
- Ethernet cables and
- DC Adapter.
Since EASE uses a POE injector, there is no need to power the Arduino boards separately. EASE can power the board through EtherCAT!
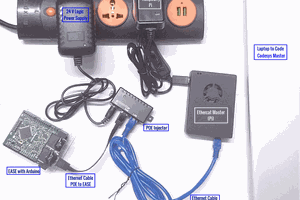
The connections are as shown in the two schematics attached in the images section of this tutorial. "The Hardware setup schematic" gives an overview of the connections to be made while the "Physical connection schematic" shows the setup once all the connections are made.
Note:
- Make sure the Ethernet connections are fit tightly into the sockets. (Loose connections may lead to the slave device not being recognized.)
- Test whether the range of analog values as specified in the Datasheet of the LCD is within the specified limit by printing it on to the Serial Monitor of Arduino.
Further Adjustments: The brightness of the LCD display can also be changed by adjusting the potentiometer (blue block-like part in the above image by adjusting the screw on top of it).
Required Libraries:
There are two libraries that will be used for this tutorial.
- An EASE Library for Arduino to communicate with the Arduino subsystem.
- An Esmacat Master Library for the master (PC) to communicate with the EASE slave device.
The link to both the libraries have been included under the schematics section. Install these libraries to get started with the coding part.
Refer to the links below to get more detailed step by step help with installing these libraries.
Suggested Reading: EASE Master Software structure.
Suggested Reading: Getting started with EASE.
Software :
The software required for this tutorial involves coding for
- the Esmacat Master and
- the Arduino.
Programming the Esmacat Master:
Open Visual Studio or any other (IDE) and copy all the 4 C++ codes available from the Code section (source files starting with ease_with_lcd/) into a new project folder and build the source code.
Refer to the links below to get more detailed step by step help with building source codes in Ethercat Master,
The following sections describe them in detail.
Suggesting Reading: Getting started with the Esmacat Master (Windows).
Suggesting Reading: Getting started with the Esmacat Master (Linux).
Coding the Arduino:
Open the Arduino IDE and create a new sketch. The complete code for this tutorial is available under the Code section within the "Arduino with Ease and LCD". Copy and paste the code into the sketch.
Compile and Upload this code into the Arduino board.
Note: Make sure you check whether...
Read more » Esmacat


 Alessandro Didonna
 Open Technology