 eloquentarduino
If this is the first time you're reading my blog, you may have missed that I'm on a journey to push the limits of Machine learning on embedded devices like the Arduino boards and ESP32.
I started with accelerometer data classification, then did Wifi indoor positioning as a proof of concept.
In the last weeks, though, I undertook a more difficult path that is image classification.
Image classification is where Convolutional Neural Networks really shine, but I'm here to question this settlement and demostrate that it is possible to come up with much lighter alternatives.
In this post we continue with the examples, replicating a "benchmark" dataset in Machine learning: the handwritten digits classification.
If you are curious about a specific image classification task you would like to see implemented, let me know in the comments: I'm always open to new ideas
The task
The objective of this example is to be able to tell what an handwritten digit is, taking as input a photo from the ESP32 camera.
In particular, we have 3 handwritten numbers and the task of our model will be to distinguish which image is what number.
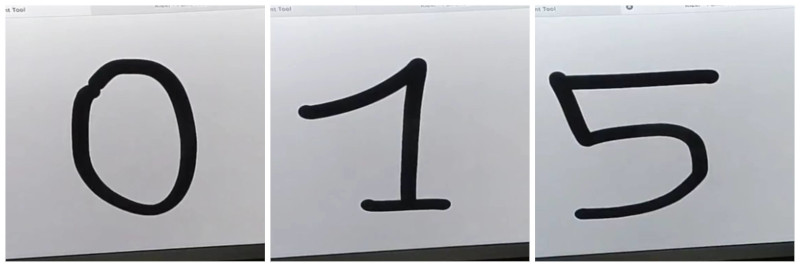
Handwritten digits example
I only have a single image per digit, but you're free to draw as many samples as you like: it should help improve the performance of you're classifier.
1. Feature extraction
When dealing with images, if you use a CNN this step is often overlooked: CNNs are made on purpose to handle raw pixel values, so you just throw the image in and it is handled properly.
When using other types of classifiers, it could help add a bit of feature engineering to help the classifier doing its job and achieve high accuracy.
But not this time.
I wanted to be as "light" as possible in this demo, so I only took a couple steps during the feature acquisition:
- use a grayscale image
- downsample to a manageable size
- convert it to black/white with a threshold
I would hardly call this feature engineering.
This is an example of the result of this pipeline.

Handwritten digit feature extraction
The code for this pipeline is really simple and is almost the same from the example on motion detection.
#include <esp_camera.h>

#define PWDN_GPIO_NUM     -1
#define RESET_GPIO_NUM    15
#define XCLK_GPIO_NUM     27
#define SIOD_GPIO_NUM     22
#define SIOC_GPIO_NUM     23
#define Y9_GPIO_NUM       19
#define Y8_GPIO_NUM       36
#define Y7_GPIO_NUM       18
#define Y6_GPIO_NUM       39
#define Y5_GPIO_NUM        5
#define Y4_GPIO_NUM       34
#define Y3_GPIO_NUM       35
#define Y2_GPIO_NUM       32
#define VSYNC_GPIO_NUM    25
#define HREF_GPIO_NUM     26
#define PCLK_GPIO_NUM     21

#define FRAME_SIZE FRAMESIZE_QQVGA
#define WIDTH 160
#define HEIGHT 120
#define BLOCK_SIZE 5
#define W (WIDTH / BLOCK_SIZE)
#define H (HEIGHT / BLOCK_SIZE)
#define THRESHOLD 127


double features[H*W] = { 0 };


bool setup_camera(framesize_t);
bool capture_still();
void print_features();


/**
 *
 */
void setup() {
    Serial.begin(115200);
    Serial.println(setup_camera(FRAME_SIZE) ? "OK" : "ERR INIT");
    delay(3000);
}

/**
 *
 */
void loop() {
    if (!capture_still()) {
        Serial.println("Failed capture");
        delay(2000);

        return;
    }

    print_features();
    delay(3000);
}


/**
 *
 */
bool setup_camera(framesize_t frameSize) {
    camera_config_t config;

    config.ledc_channel = LEDC_CHANNEL_0;
    config.ledc_timer = LEDC_TIMER_0;
    config.pin_d0 = Y2_GPIO_NUM;
    config.pin_d1 = Y3_GPIO_NUM;
    config.pin_d2 = Y4_GPIO_NUM;
    config.pin_d3 = Y5_GPIO_NUM;
    config.pin_d4 = Y6_GPIO_NUM;
    config.pin_d5 = Y7_GPIO_NUM;
    config.pin_d6 = Y8_GPIO_NUM;
    config.pin_d7 = Y9_GPIO_NUM;
    config.pin_xclk = XCLK_GPIO_NUM;
    config.pin_pclk = PCLK_GPIO_NUM;
    config.pin_vsync = VSYNC_GPIO_NUM;
    config.pin_href = HREF_GPIO_NUM;
    config.pin_sscb_sda = SIOD_GPIO_NUM;
    config.pin_sscb_scl = SIOC_GPIO_NUM;
    config.pin_pwdn = PWDN_GPIO_NUM;
    config.pin_reset = RESET_GPIO_NUM;
    config.xclk_freq_hz = 20000000;
    config.pixel_format = PIXFORMAT_GRAYSCALE;
    config.frame_size = frameSize;
    config.jpeg_quality = 12;
    config.fb_count = 1;

    bool ok = esp_camera_init(&config) == ESP_OK;

    sensor_t *sensor = esp_camera_sensor_get();
    sensor->set_framesize(sensor, frameSize);

    return ok;
}


/**
 * Capture image and do down-sampling
 */
bool capture_still() {
    camera_fb_t *frame = esp_camera_fb_get();

    if (!frame)
        return false;

    // reset all features
    for (size_t i = 0; i < H * W; i++)
        features[i] = 0;

    // for each pixel, compute the position in the downsampled image
    for (size_t i = 0; i < frame->len; i++) {
        const uint16_t x = i % WIDTH;
        const uint16_t y = floor(i / WIDTH);
        const uint8_t block_x = floor(x / BLOCK_SIZE);
        const uint8_t block_y = floor(y / BLOCK_SIZE);
        const uint16_t j = block_y * W + block_x;

        features[j] += frame->buf[i];
    }

    // apply threshold
    for (size_t i = 0; i < H * W; i++) {
        features[i] = (features[i] / (BLOCK_SIZE * BLOCK_SIZE) > THRESHOLD) ? 1 : 0;
    }

    return true;
}


/**
 *
 */
void print_features() {
    for (size_t i = 0; i < H * W; i++) {
        Serial.print(features[i]);

        // don't print "," after the last element
        if (i != H * W - 1)
            Serial.print(',');
    }

    Serial.println();
}
2. Samples recording
To create your own dataset, you need a collection of handwritten digits.
You can do this part as you like, by using pieces of paper or a monitor. I used a tablet because it was well illuminated and I could open a bunch of tabs to keep a record of my samples.
As in the apple vs orange, keep in mind that you should be consistent during both the training phase and the inference phase.
This is why I used tape to fix my ESP32 camera to the desk and kept the tablet in the exact same position.
If you desire, you could experiment varying slightly the capturing setup during the training and see if your classifier still achieves good accuracy: this is a test I didn't make.
3. Train and export the SVM classifier
For a detailed guide refer to the tutorial
from sklearn.svm import SVC
from micromlgen import port

# put your samples in the dataset folder
# one class per file
# one feature vector per line, in CSV format
features, classmap = load_features('dataset/')
X, y = features[:, :-1], features[:, -1]
classifier = SVC(kernel='linear').fit(X, y)
c_code = port(classifier, classmap=classmap)
print(c_code)
At this point you have to copy the printed code and import it in your Arduino project, in a file called model.h.
4. The result
Okay, at this point you should have all the working pieces to do handwritten digit image classification on your ESP32 camera. Include your model in the sketch and run the classification.
#include "model.h"

void loop() {
    if (!capture_still()) {
        Serial.println("Failed capture");
        delay(2000);
        return;
    }

    Serial.print("Number: ");
    Serial.println(classIdxToName(predict(features)));
    delay(3000);
}
Done.
You can see a demo of my results in the video below.
Project figures
My dataset is composed of 25 training samples in total and the SVM with linear kernel produced 17 support vectors.
On my M5Stick camera board, the overhead for the model is 6.8 Kb of flash and the inference takes 7ms: not that bad!
Check the full project code on Github.