Close
0%
0%

Wombatics Otto

It is a remix of Otto DIY Robot with built-in BLE, Motion Sensing and Lithium Battery Charger.

Similar projects worth following
The purpose of this remix, "Wombatics Otto" is to make an Otto DIY Robot with built-in BLE, Motion Sensing and Lithium Battery Charger. The body and head have been changed for easier access to the mainboard and no more hanging wiring.

Wombatics SAM01 mainboard is built for projects which need to work with mobile app, servos and motion tracking in mind. With onboard Bluetooth Low Energy (BLE) module, it is compatible with both Android and iOS.

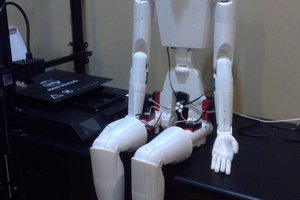
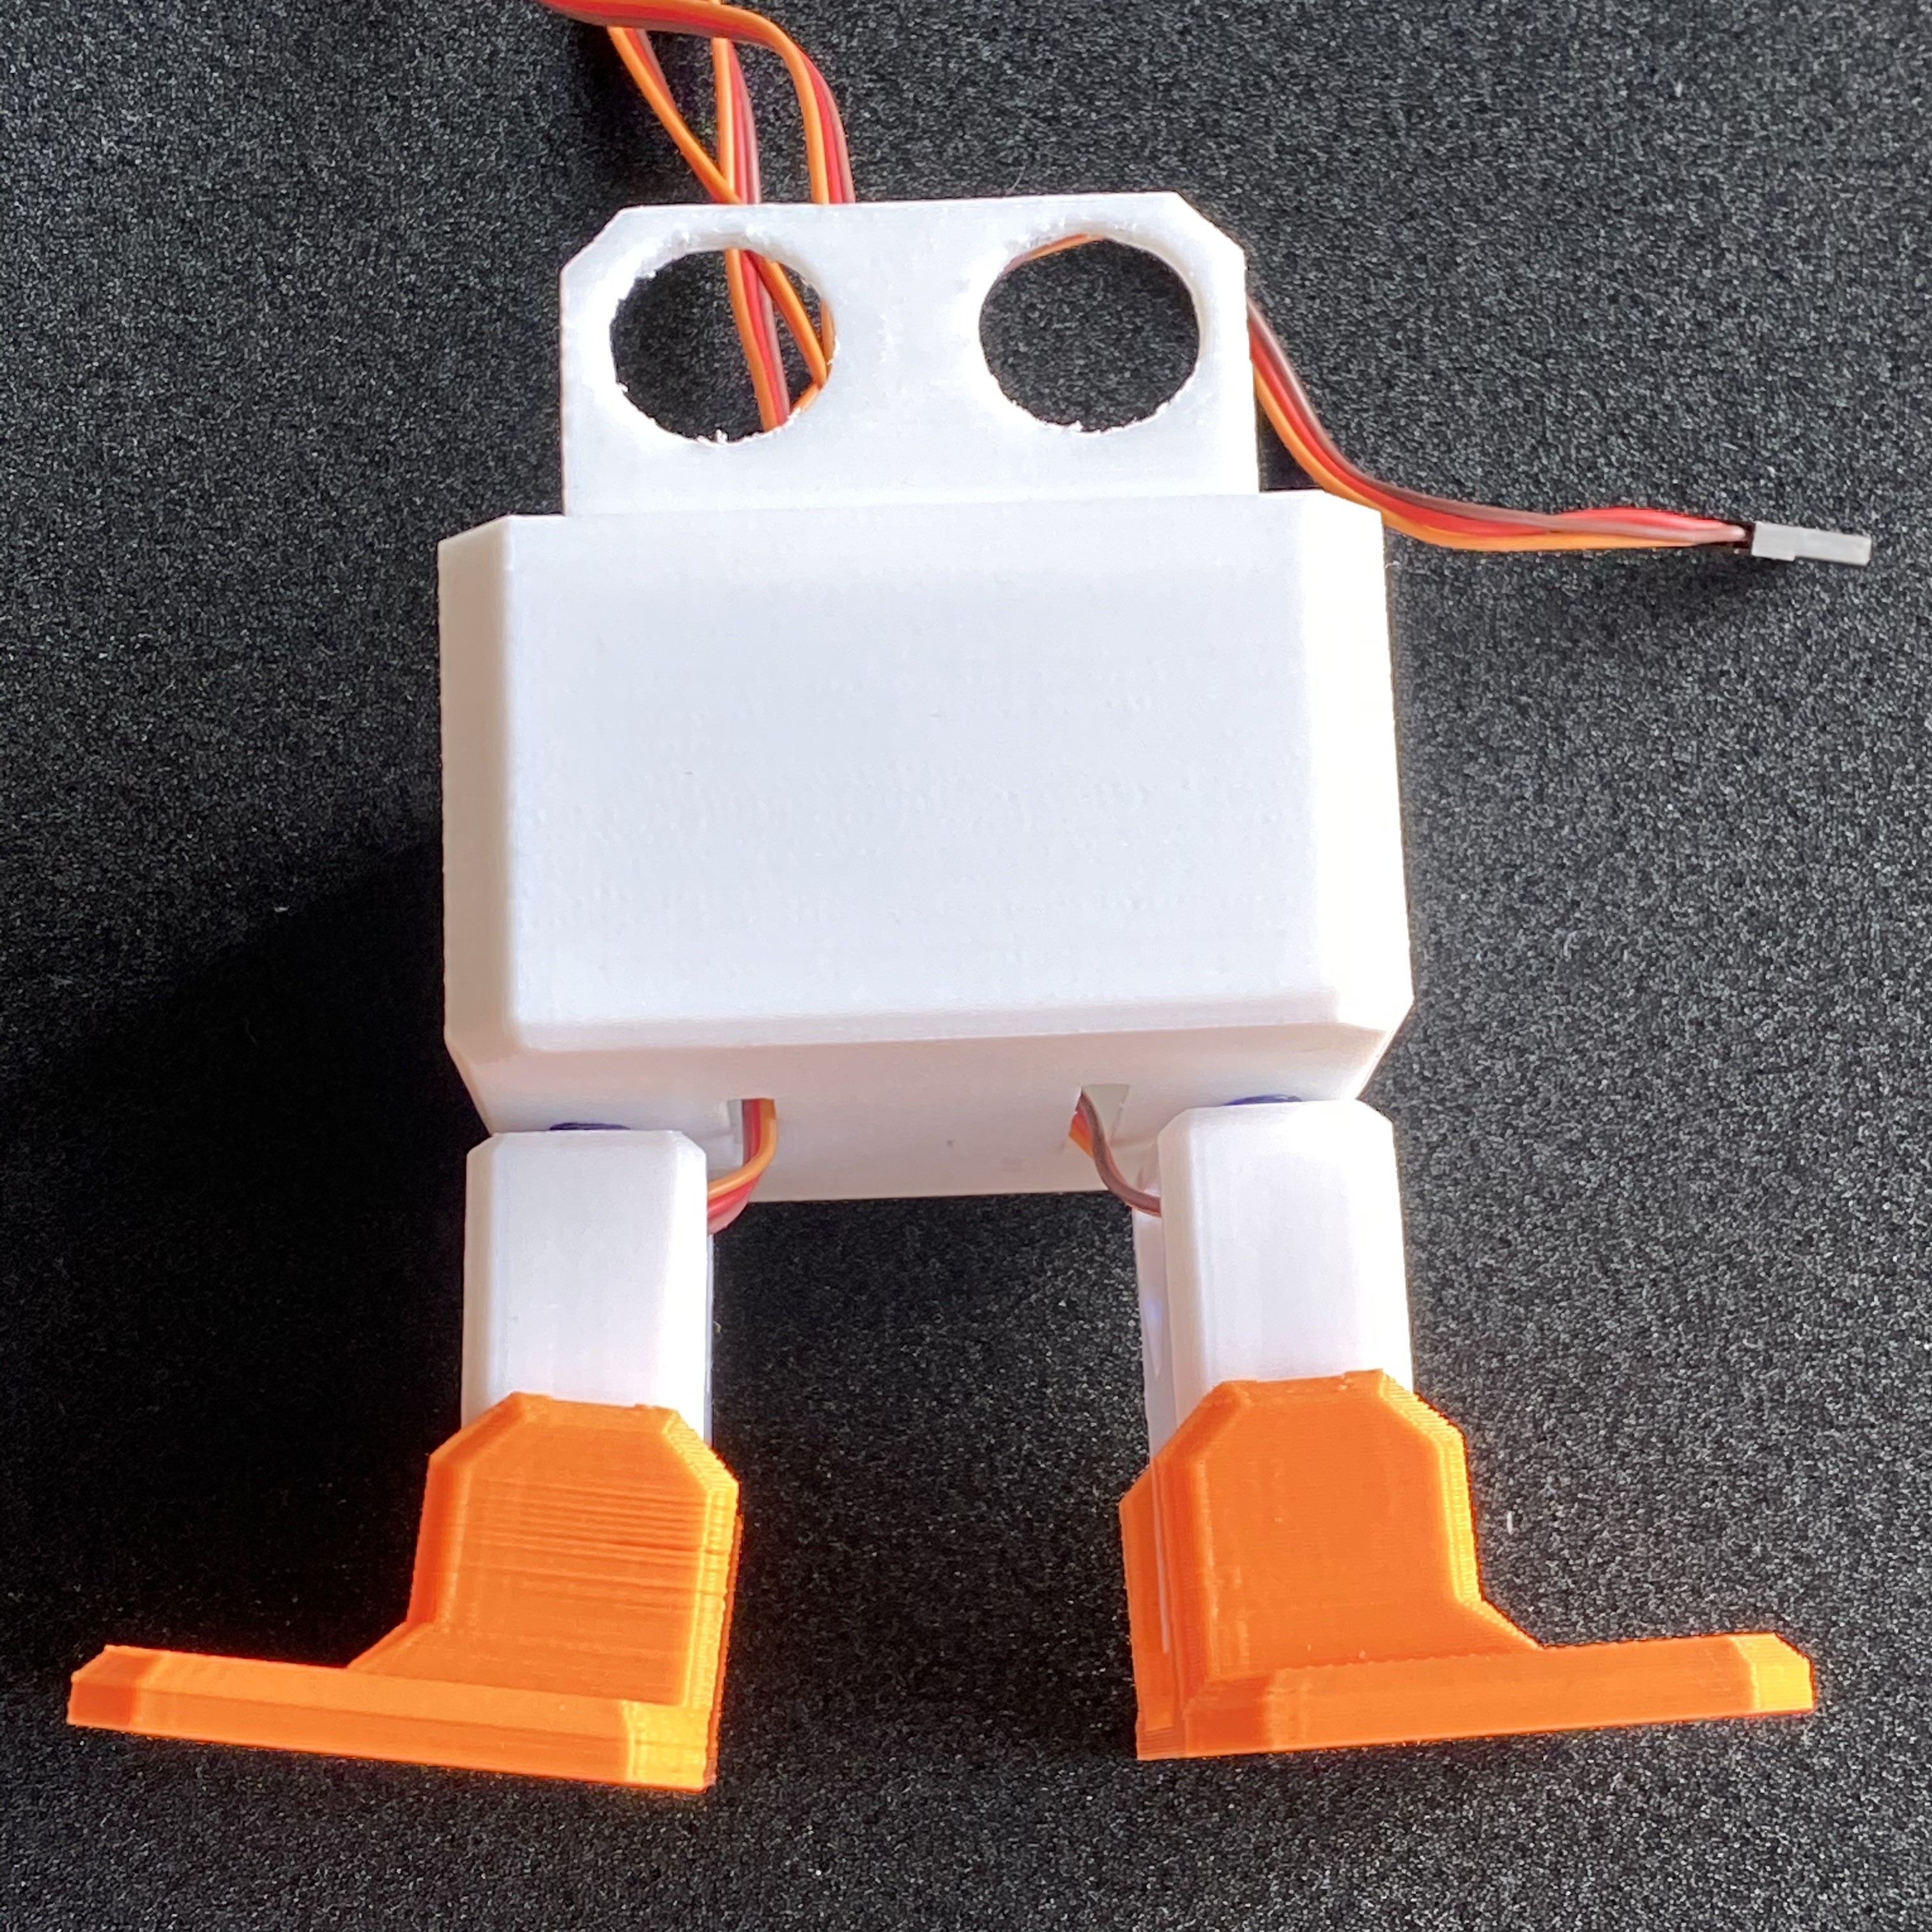
It is ideal for building your own robot such as Otto.

This project is a remix of Otto with Wombatics mainboard.

More details of Wombatics board.

https://www.wombatics.com

https://github.com/wombatics/sam01

https://www.facebook.com/wombaticsco/

OttoDIY_Leg_v08.stl

Otto DIY Leg - 3D print STL

Standard Tesselated Geometry - 70.79 kB - 03/08/2020 at 10:58

Download

OttoDIY_foot_v08.stl

Otto DIY Foot - 3D print STL

Standard Tesselated Geometry - 25.28 kB - 03/08/2020 at 10:58

Download

Wombatics Otto Body.stl

Wombatics Otto Body - 3D print STL

Standard Tesselated Geometry - 127.04 kB - 03/08/2020 at 10:57

Download

Wombatics Otto Head.stl

Wombatics Otto Head - 3D print STL

Standard Tesselated Geometry - 14.14 kB - 03/08/2020 at 10:57

Download

OTTO_Servo_Setup.ino

Arduino - Servo Testing

ino - 1.46 kB - 03/24/2020 at 05:01

Download

View all 9 files

  • 1 × Wombatics Robotics Mainboard SAM01 - Arduino Nano Compatible Robotics Board
  • 1 × USB-A to Mini-USB Cable
  • 4 × Servo SG90
  • 1 × 3.7-4.1V Lithium Battery / Lithium Super Capacitor (400-700mAh) ** We use Lithium Super Capacitor **
  • 4 × AA Battery

  • 1
    3D Printing

    3D Printing Setting
    Layer Height : 0.2mm
    Outline Shells : 3
    Fill : 10%
    Supports: No

    STL Files
    2 x OttoDIY_foot_v08.stl
    2 x OttoDIY_Leg_v08.stl
    1 x Wombatics Otto Body.stl
    1 x Wombatics Otto Head.stl

  • 2
    Setup the 4 Servos

    Connect the servos to D3, D4, D5 and D6 to the mainboard as the diagram below. Connect the mainboard and computer with a micro usb cable.

    Open Arduino IDE under Tools, pick Board: Arduino Nano, Processor: ATmega328P (Old Bootloader) and the correct Port.
    (USB driver for the wombatics mainboard: http://bit.ly/cp2112-usb-serial )

    Test whether the servos are working with the (OTTO_Servo_Setup.ino).  Leave it at 90 degree at the end for assembling the robot.

    #include <Servo.h> 
    #include <Oscillator.h>
    
    
    /*
                     --------------- 
                    |     O   O     |
                    |---------------|
    RIGHT LEG 4==>  |               | <== LEFT LEG 3
                     --------------- 
                        ||     ||
    RIGHT FOOT 6==>   -----   ------  <== LEFT FOOT 5
                     |-----   ------|
    */
    
    #define PIN_LEFT_LEG   3   
    #define PIN_RIGHT_LEG  4  
    #define PIN_LEFT_FOOT  5  
    #define PIN_RIGHT_FOOT 6 
    
    #define N_SERVOS 4 // There are four servos 
    Oscillator servo[N_SERVOS];
    
    void setup()
    {
      servo[0].attach(PIN_LEFT_LEG); 
      servo[1].attach(PIN_RIGHT_LEG); 
      servo[2].attach(PIN_LEFT_FOOT); 
      servo[3].attach(PIN_RIGHT_FOOT); 
    
      //Test 45 degree
      servo[0].SetPosition(45);
      servo[1].SetPosition(45);
      servo[2].SetPosition(45);
      servo[3].SetPosition(45);
      delay(1000);
    
      //Test 90 degree
      servo[0].SetPosition(90);
      servo[1].SetPosition(90);
      servo[2].SetPosition(90);
      servo[3].SetPosition(90);
      delay(1000);  
    
      //Test 135 degree
      servo[0].SetPosition(135);
      servo[1].SetPosition(135);
      servo[2].SetPosition(135);
      servo[3].SetPosition(135);
      delay(1000);  
    
      // Set Final position to 90 degree for assembly
      servo[0].SetPosition(90);
      servo[1].SetPosition(90);
      servo[2].SetPosition(90);
      servo[3].SetPosition(90);
      
      delay(1000);
      
    }
    
    void loop() 
    {
    
     
    }
  • 3
    Assembling Part 1 - 3D printing parts and servos

    Put two servos into the body and secure them with the screws come with the servos

    Join the leg to the body with the servo horn

    Put the two servos into the leg, and put the hood onto the leg servos while keeping the servos at 90 degree.

    Put the servo wires up to the body through the holes at the bottom of the body

    Slide the foot on the leg servo

View all 9 instructions

Enjoy this project?

Share

Discussions

Similar Projects

Does this project spark your interest?

Become a member to follow this project and never miss any updates