 Pierre-Loup M.
The most obvious part for a synth with a keyboard is... a keyboard. Or a keybed, since it's the name the key assembly is called (thank to Tim Trzepacz for mentioning it on his inspiring NanoEgg project ! Funny how having the right word can save so much time when looking for something around Internet !).
The one that was used comes from an electric all-pastic organ made by Bontempi somewhere around the mid 80's. I found it at a secondhand market, not working, for almost nothing.
The construction is quite basic, with a plastic rack with mounting holes underneath (one less thing to think about !) each key being mounted on a pole and held by a circular spring. This rack has brackets holding a pcb the size of he keybed, on which were something looking like a resistor array. I wondered for a time if i was going to try and understand how it worked, but eventually just kept the PCB to route my own wiring.
Each key has a smooth spring attached on it, which is soldered to the pcb. These springs come to touch a metal rod when the key is pressed. (note : the keybed was one third grey with these C-shape contacts, and two thirds white with a unique rod going all the length. The synth uses the white keys with the rod.)
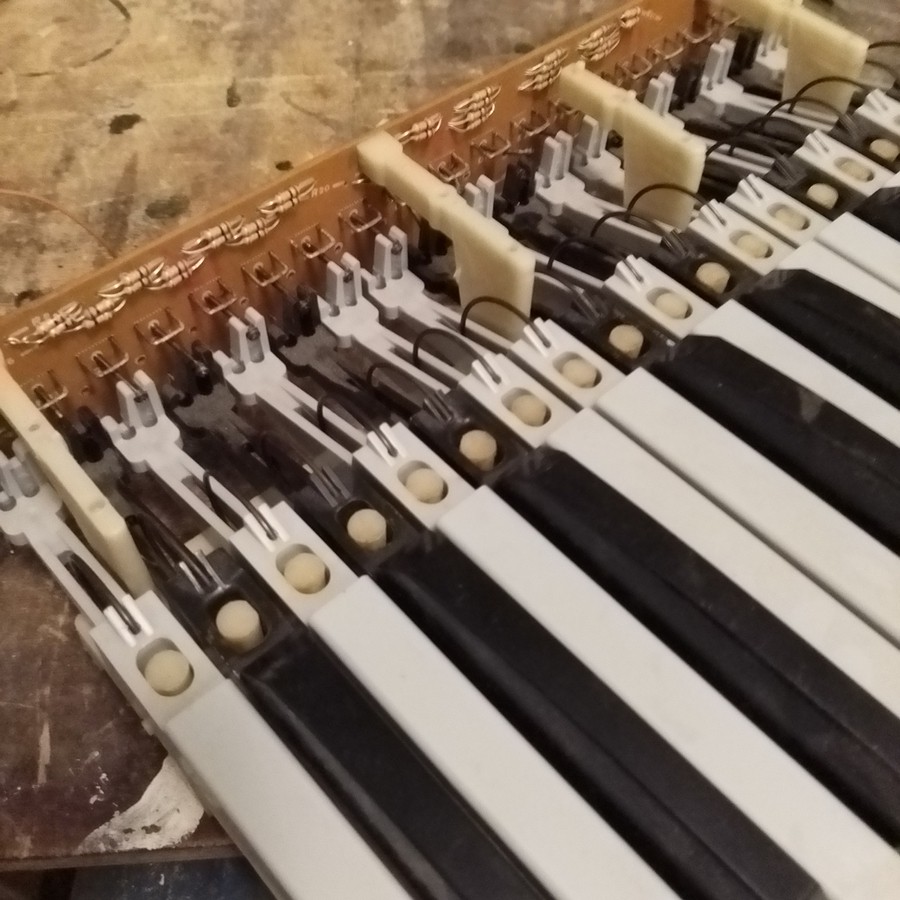
The pcb has been cut several times as the project progressed. The first time in two, to separate the grey side from the white side. It was then cut again to limit the height of the keybed, just at the level of the brackets holding it. But is was yet too high, so the brackets were cut, and the pcb finally mounted on a wooden support on the synth base plate.
The pcb has been kept only because the contact springs are soldered on it. Each contact has been wired to a digital input of the first Arduino mega (exact list in the sketch mega1), using internal pull-up resistors ; the long rod on which they come to contact is grounded.
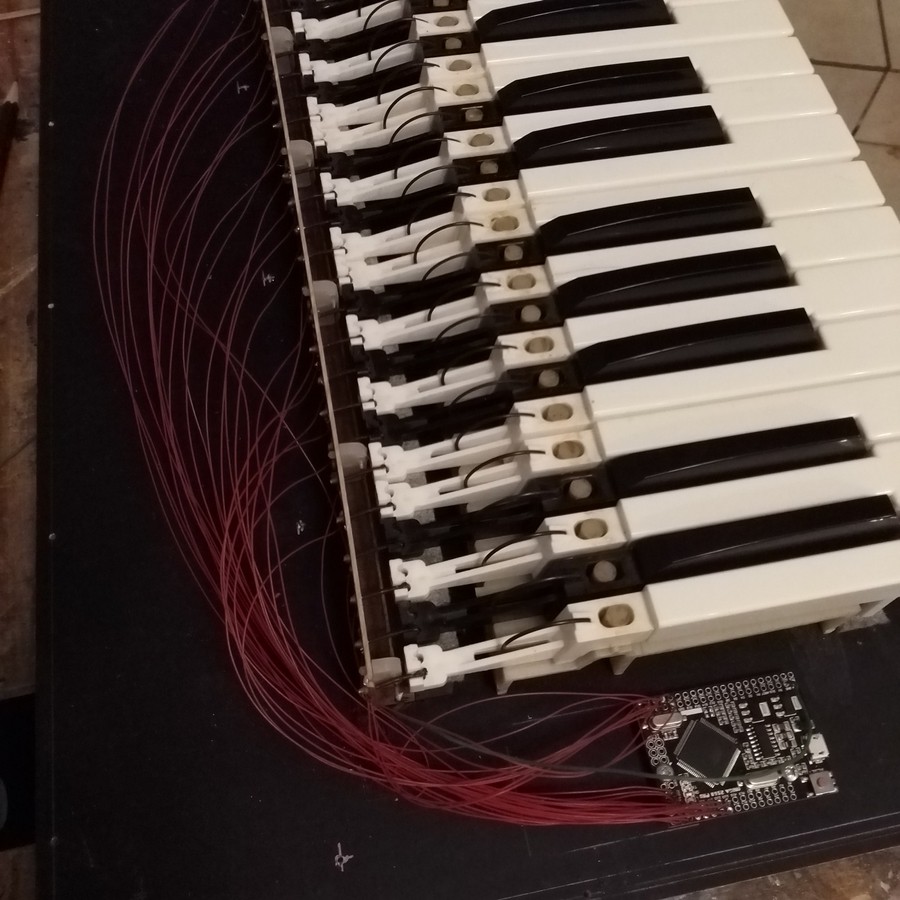
The keybed was quite noisy when pushing and releasing keys, so I added two thick pieces of felt running under the keys. One at the front, to dampen the key at the end of its travel, one at the rear, on which it lies when not pressed, which also dampens when it's released.
On a software side, with springs as switches the need for debouncing becomes even more important than it usually is ! There are plenty of libraries out there, I've used one I wrote years ago, which works well.
Keys are wired to consecutive inputs, so the main program only defines a table of PushButton objects, one for loop in setup() to init each key (input mode, associated pin and debounce time), then one for loop in the main loop which updates the key and sends a MIDI message on change. The keys are mapped to midi notes from 0 to 29 ; offsets are applied on Teensy side, which was easier when testing code : programming this Mega board means removing everything !
Discussions
Become a Hackaday.io Member
Create an account to leave a comment. Already have an account? Log In.
Awesome!
Are you sure? yes | no