 Pete Hoffswell
With wood, saws, chalklines and screws, it's time to get to work. Here's today's activity.
- Rip one 4x8 to make two 2x8. first is for kicker board, and second is for top.
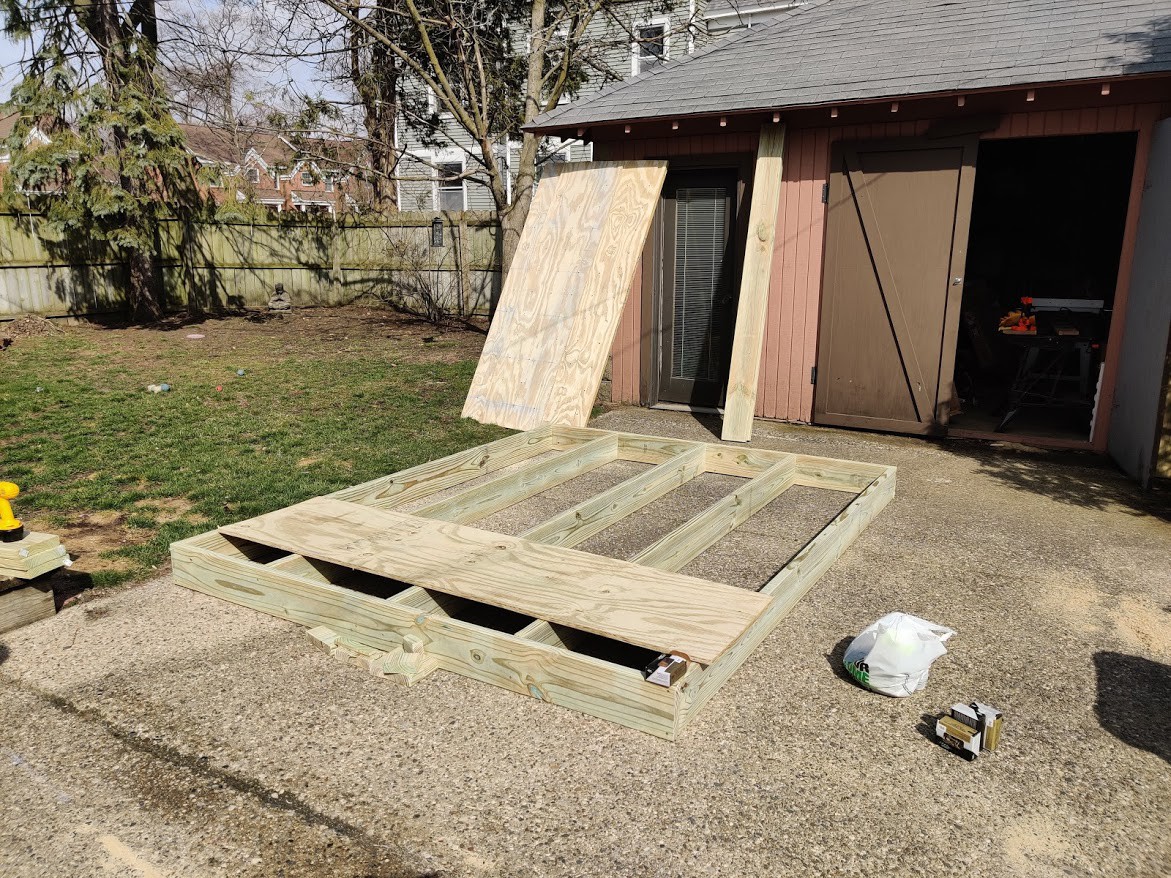
- frame up wall
- Stack layout and drill wall holes
To drill the holes, we first lined up the 2 and 1/2 sheets stacked perfectly, and screwed them together. We used a chalk line to lay out the hole grid as per the Moonboard plan with imperial panel template. Take your time here, as it can be a bit fiddly - remember to mark the lower-left corner of each panel so you can maintain the orientation as per the design. The Moonboard has a quirky feature that between sheet 1 and 2 the hole spacing is 22cm instead of 20. They call it a feature. Ha.
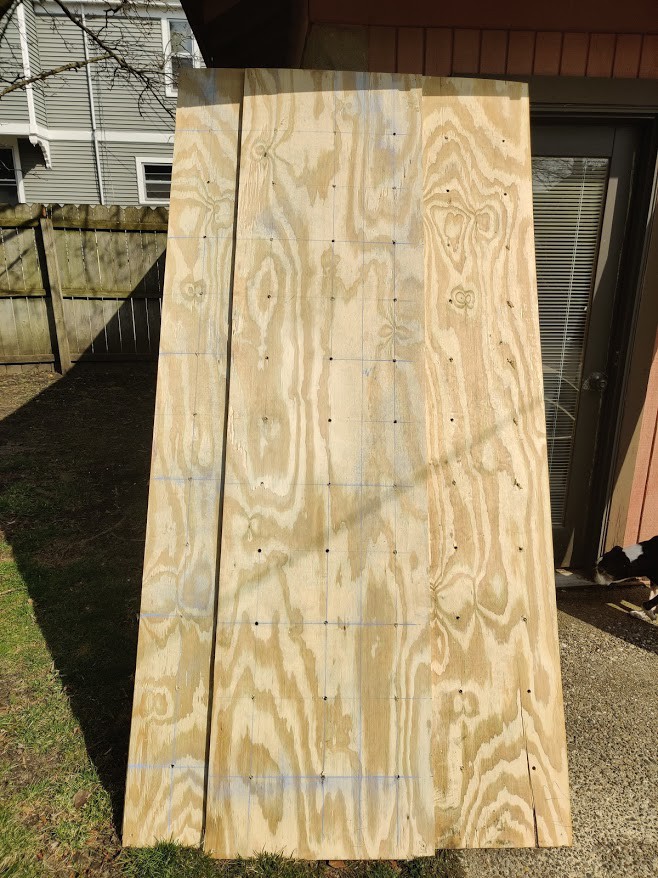
We used a cheap drill guide from Harbor Freight that seemed to make holes go better, but not sure it was worth the $19 we paid for it.. It's sort of a piece of junk, but may have been better than nothing. Be sure to use a 7/16" drill to drill the holes.

As it turns out, we decided to use the same hole pattern for our kickerboard, so we should have drilled first and then cut the sheet in half.
While framing, we could lay out our sheets to be sure that the joists were not going to interfere with holes. For our build, we needed to shift one or two joists slightly to clear the 20cm hole grid. This is an important step. You won't be happy if your holes are covered up!
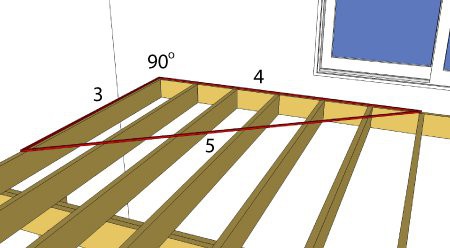
Be sure your frame is square by measuring opposite corners to match length, or use the 3-4-5 method. See Climber Dad's video as to how he used a board to lock the square into place.
This thing is going to be HEAVY. With 2x10 treated and 10 feet, it's going to be a beast. Hopefully the lean-to method will still work on such a large wall. We'll see.
Discussions
Become a Hackaday.io Member
Create an account to leave a comment. Already have an account? Log In.