 The Tech Lab
-
1How It Works
We made this project super simple so that anyone can build it on the weekend. Not only is it fun to make with children but it is also educational, and definitely useful in the current situation. The main brain of this countdown timer is an "Arduino". It's a tiny computer that can be programmed using personal computers. Arduinos are widely used for learning, prototyping and even actual products. If you don't have any experience with it then don't worry, we will walk you through the process easily and you will be able to get started with Arduino, maybe even make more future projects with it if you like the idea of it.
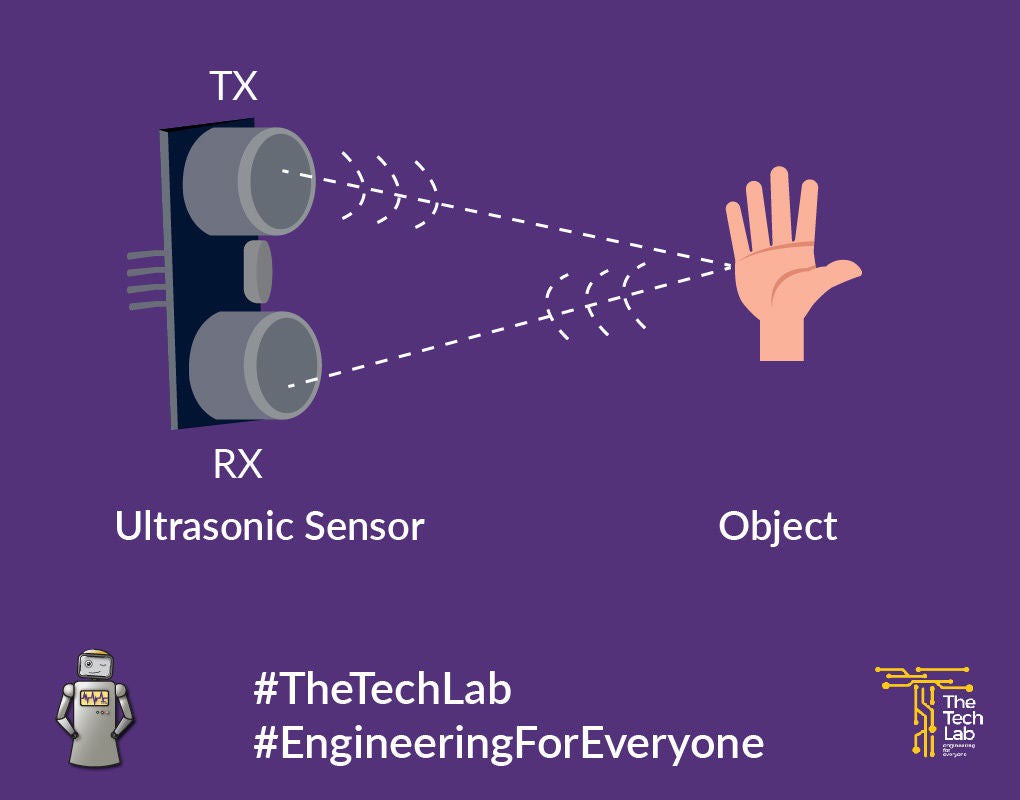
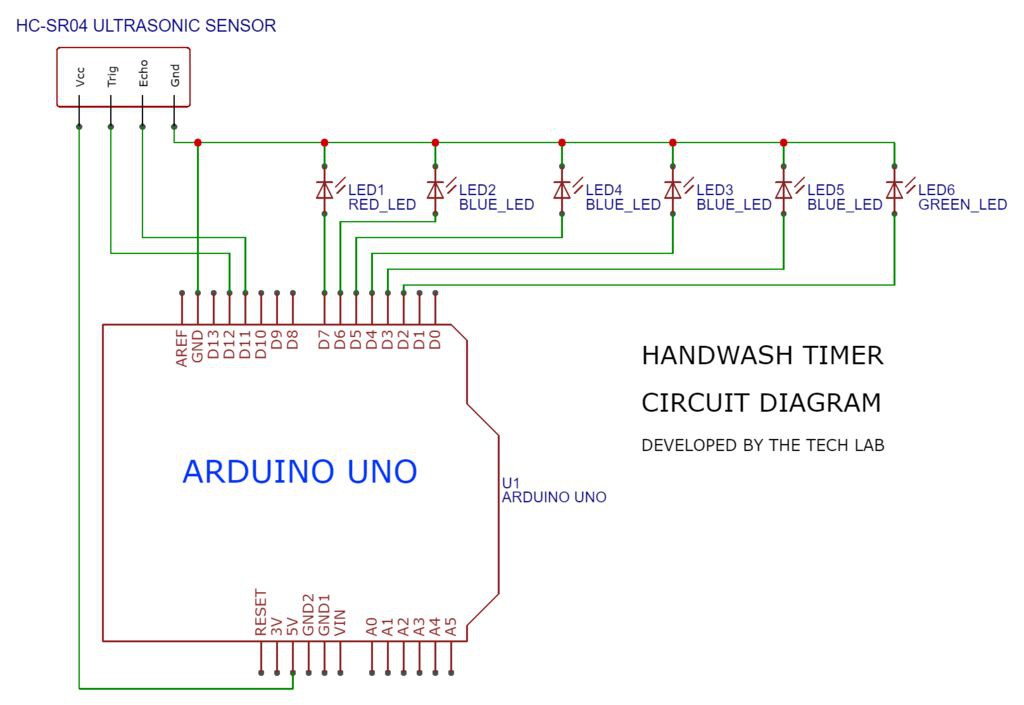
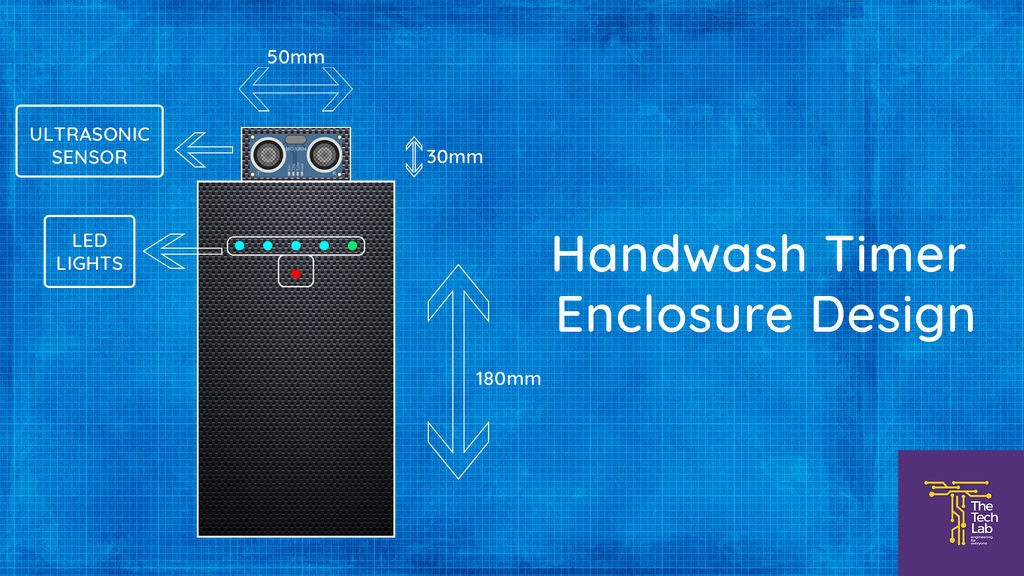
So the Arduino is connected to an ultrasonic distance sensor, and 6 LEDs. The Arduino is sending ultrasonic sound waves with the distance sensor and checking the time it takes for the sound waves to be reflected back to the sensor. Using the time, it measures the distance of anything right in front of it. So the Arduino is always reading the sensor, waiting for your hand to appear within 30 centimeter. As soon as it detects something within 30 centimeters, the Arduino turns on the red LED and waits for 4 second for you to take some water and soap on your hands. Then it starts the 20 seconds countdown. Eventually the 5 blue LEDs light up, one by one, over the period of 20 seconds.
Once the green LED turns up, you have washed your hands for long enough and you can rinse off the soap.
![]()
-
2Making the Breadboard Version
There are two version of this project that you can build. One is on a solder-less breadboard and another is on a veroboard or perfboard. If you know don't know how to solder or have very little experience with it, we encourage you to make the breadboard version as it requires no soldering. We recommend Arduino Uno if you want to make the breadboard version since Arduino Nano requires soldering.
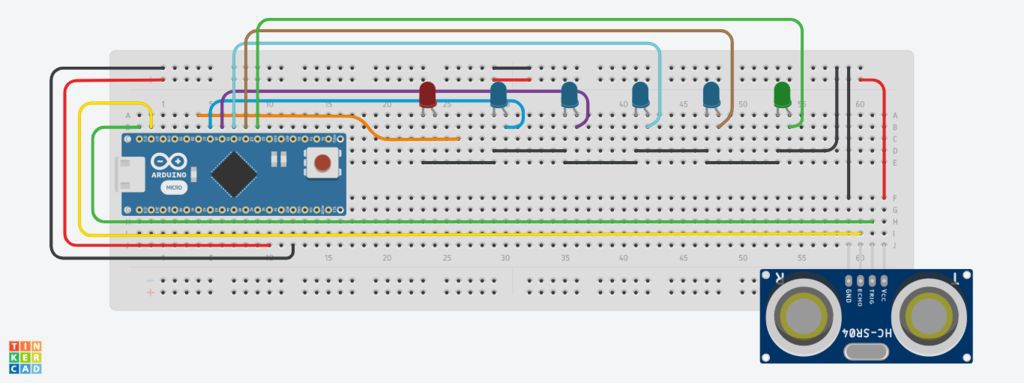
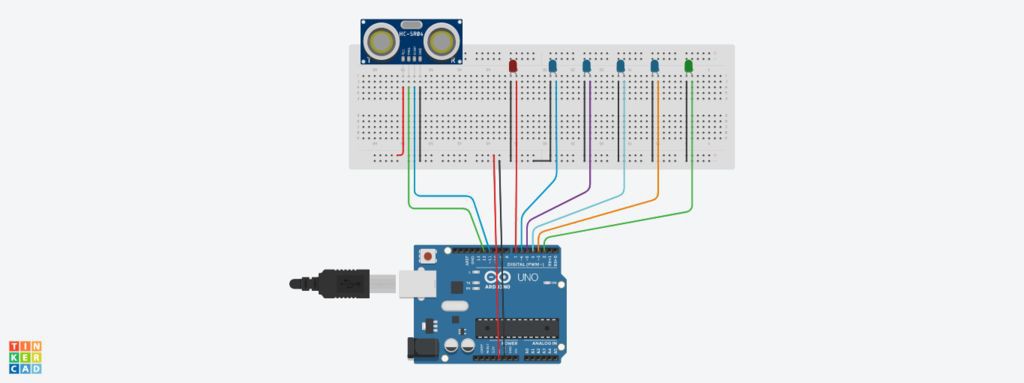
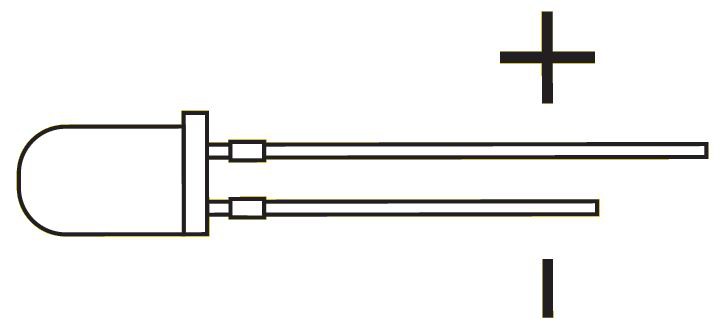
Making this project on the breadboard is really simply. We just have connect our Arduino to the sensor and 6 LEDs. You can follow the picture provided above that shows how to hook things up with both Arduino Uno and Nano, whichever taste you prefer. We use jumper wires to connect everything together. Don't forget to check the LED polarities. The longer pin is usually the positive pin, so the longer pins should be connected to the Arduino digital pins. The shorter pins on the other hand should be connected to ground (GND) pin of the Arduino.
![]()
![]()
![]()
![]()
-
3Step 3
If you have some experience with electronics and you know how to solder, you can solder this onto a solder-able board or even design a PCB of your own. The schematic is provided above, here's the EasyEDA design file so that you can export the PCB easily.
![]()
When soldering, make sure you get the LED polarities correct. You can also add some 150 Ohm resistors to all the LEDs so that they get a longer lifetime. We excluded the resistors to make this project more beginner friendly. Not using resistors is completely fine according to our test, the LEDs seem to be just fine. They should last fairly long as they are only lit up for 4 seconds at a time.
-
4Uploading the Code
Once we are done building the circuit, it's time to upload the code to the Arduino board. If you have never used Arduino before, we recommend you to go through the getting started documentation on the official Arduino website. You will have to install the Arduino IDE (Integrated Development Environment) onto your computer or notebook. Then download the code attached below in this step.We have wrote many comments in the code to make it easy to understand for newbies.
Now connect the Arduino to your computer with the cable that came with it. Open the code on your computer using the Arduino IDE. From Tools > Board, select the Arduino that you're using. For us it was an Arduino Nano. Also select the port for your Arduino from Tools > Port. Next, click the Upload Button on top left corner. The upload should begin. You should get a "Done Uploading" message once it's complete.
If you get an error while uploading, make sure you chose the right board and port. Try a different port until it works. You might also need to change processor if you are using an old Arduino Nano, you can find the option in Tools > Processor.
-
5Testing Functionality
Once you have successfully uploaded the code, it's time to check if the timer works correctly before putting it into an enclosure. Normally all the LED should be off. Take your hand in front of the sensor, the red LED should turn on. Eventually all the LED should turn on with 4 seconds interval, finally lighting up the green LED.
Congratulations! Your timer works! 👏👏
If everything doesn't work normally, first check your connections to the ultrasonic sensor. It's easy to mistakenly connect the sensor pins reversed. If an LED doesn't light up, check it's connection and polarity. If it still doesn't work, try replacing the LED.
![]()
-
6Making the Enclosure
Once you are done building the circuit, it might be a good idea to to put it all into an enclosure. The enclosure brings a professional look to your timer and protects it from small splashes of water.
The enclosure can be made pretty much out of anything as long as it looks nice. Using something that doesn't get wet is all you need. You can make it however you like using your creativity. It can be made from a small plastic food container, wood, cardboard, 3D printed or anything else, your imagination is the limit. Use your creativity to draw or paint your enclosure as you like.![]()
![]()
![]()
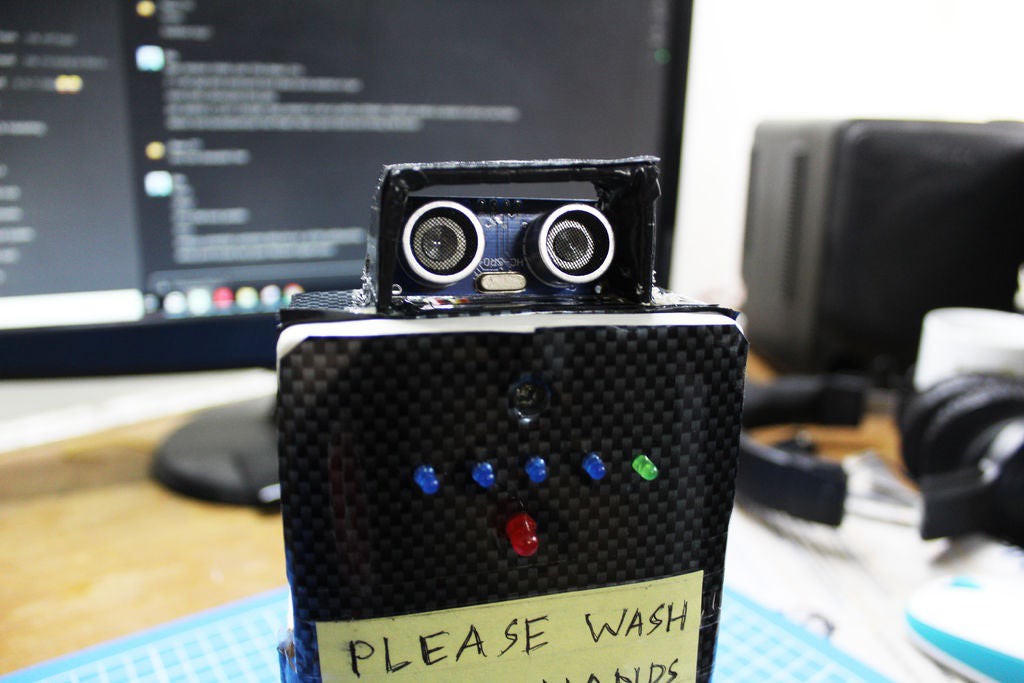
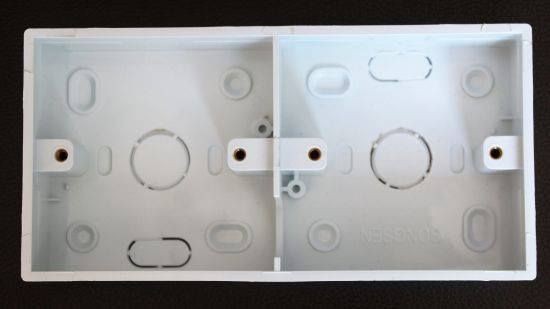
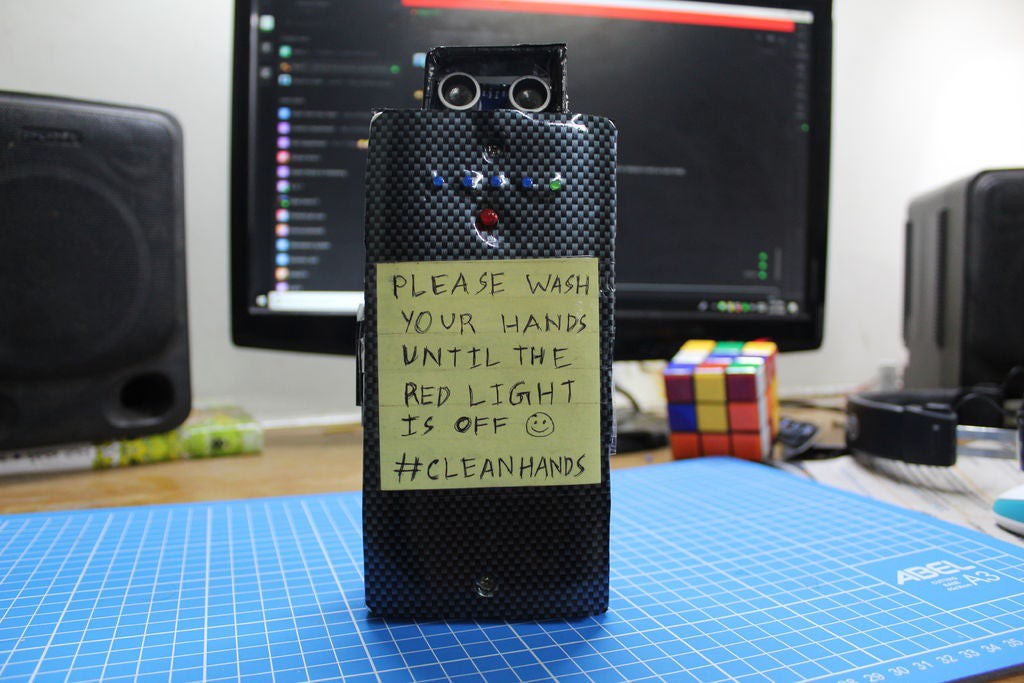
For our enclosure we wanted it to be completely out of scratch. So we used old electrical outlet box that we had lying around. We used some wires soldered directly onto the Arduino, connecting to the LED and some header wires connecting to the sensor. We covered ours with some old carbon vinyl lying around to give it an aesthetic look. In the end it turned out pretty nice for the simple materials we used. The dimensions of our enclosure is shown in the photo above. Feel free to use the same dimensions if you like.
-
7Success!
![]()
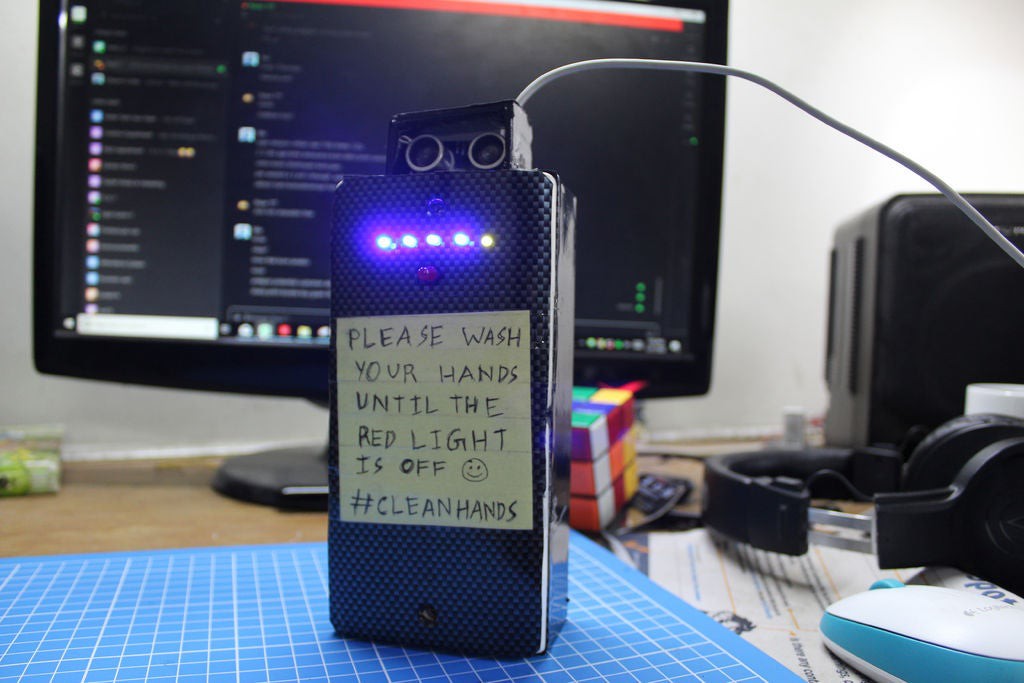
You just made yourself a small handwash countdown timer!
This simple project can help keep you safe from the scary virus and bacteria all around us. In test we found that we actually used to wash our hands for a much shorter time before we used this timer. This also encourages kids to wash their hands more often as it is fun to watch this timer countdown. You can make a few, draw your favorite characters on it and put it in front of all the soap dispensers in your house.
-
8Last Words
With the current Corona virus, it is really important to keep ourselves safe. We can easily take this situation and turn it into a lesson to stay more safe from germs. This project is just a small contribution makers can do in this situation. We would be really happy if this helps you at all. Please let us know if you make it with the "I made it" feature. We would also like to send a thank you letter for helping fight against the Corona virus. To get it, please send us your Handwash Timer photo using this form.
Make sure to use hashtag #HandwashTimerChallenge when you post your timer photo on a social media. Let's spread this idea among all the makers out there.
Thanks for reading and stay safe.
Written by Iqbal Samin Prithul, from The Tech Lab.
Fight Coronavirus: Simple Handwash Timer
A DIY timer to ensure you're washing your hands for at least 20 seconds.

Discussions
Become a Hackaday.io Member
Create an account to leave a comment. Already have an account? Log In.