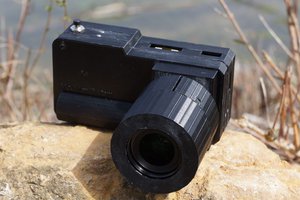
• Preserving Those Photos

    fruchti07/23/2020 at 13:53 0 comments

    The camera has been going strong for nearly two years now. Although it is listed as a ‘completed project’ here, there was still one missing feature, overdue to be added. Since the beginning, I wanted the camera to somehow store its pictures in digital form. This, however, didn't happen until now because I couldn't make room for another SPI peripheral to drive an SD card, whichever way I tried to shuffle the pins around.

    Now, however, I decided to go for bit-banging SPI. Of course, this would be way slower than hardware SPI, but then again, speed doesn't really matter: The camera can just store its photo after it's done printing and shut itself down once it has written everything to disk—how long that takes is not that relevant for user experience.

    So, 4 arbitrary microcontroller pins were all I needed hardware-wise. I removed some originally planned features like the paper cutter servo driver, repurposed the status LED output and thus could make that happen just with stuff from my parts bin.

    Inside view of the camera

    To mount the microSD card slot, I used a blank leshy PCB, on which I just populated the SPI pull-ups and a bypass capacitor next  to the microSD connector. With the mounting pads simply soldered to the case's copper plating, the add-on is mechanically more than stable enough and doesn't budge at all when plugging and unplugging the SD card. The SPI lines were then wired up to the blue pill board just like everything else within the messy little box.

    Also visible here are the two 18650s and their BMS PCB with which I had replaced the original battery pack a while ago (the old one was already worn out when I had installed it). The dangling extra connector with the black shroud near the centre is for balancing the pack while charging (there is no internal charging circuitry so far).

    For the software, I wrote a simple BMP file output procedure. Since the images are fairly low-resolution, two-colour and dithered, the format is not only easy to write, but also actually close to optimal; e.g. a PNG's compression wouldn't save much space. Each picture takes up 2.72 KiB. Not really the stereotypical huge BMP file you might think of at first.

    Example output image
    The image seen as a print in the camera photo, upscaled 4x

    Even though the medium is quite different, I think the pictures retain quite a bit of their original appeal. Since the camera can be used without an SD card as well, just producing ephemeral printouts of all photos it takes, this addition is a strict improvement.

    I published the extended source code as version 2.0 in the project's repository. Naturally, my blog post has been updated as well.

  • The Instant Camera and How It Came To Be

    fruchti05/01/2020 at 13:35 0 comments

    In November 2011, I bought 5 thermal printer modules from a surplus store because they were 1 € each and what could be more interesting than having a small printer to stick to a project? When they arrived at my doorstep, they immediately went into a ‘potentially interesting things’ drawer.

    Hidden from sight, but not purged from my memory, I still occasionally couldn't but think of these neatly documented and not too hard to drive modules.

    A few years later it was finally time to do something about these printer modules taunting me from their drawer. The goal was a hand-held selfie camera with thermocromic paper output.

    However, I didn't want to build this camera around a Raspberry Pi which would have to boot for each shot or stay on when you might want to take a picture soon. I had something more minimal in mind. As basic as it could get, compact and able to fully turn itself off once it finished printing.

    This also had the benefit that I already had nearly all of the parts:

    • The aforementioned thermal printer module. Still in its plastic back it couldn't even collect dust over all those years! I had to get the thermocromic paper from a stationery store, though.
    • A camera module. I chose a simple, FIFO-less, OV7670-based one to get the project started quickly.
    • As the ‘brains’, as STM32F103 on a ‘blue pill’ board. Most of you reading these lines probably already have a stash of these, as did I.
    • A 74LS245 (yes, LS) I desoldered from a random junk PCB as a level shifter from 3.3V to 5V.
    • A 2S LiIon battery pack from an old DECT phone. I was surprised its protection circuit allowed me to draw the amount of current the thermal printer needed. It was an old battery pack and the little capacity it still had quickly went to next to none over a few charge cycles. Still, it was the only compact mobile power source I had which could deliver that sort of power (the battery pack was since replaced by two 18650s with sufficient discharge current capability).
    • 4 pairs of BC807/817 from the parts bin to drive the thermal printer's stepper motor (which advances the paper line by line). The motor isn't anything special so I don't need a controller nor a driver IC.
    • A random front-panel pushbutton (used old stock) to go on the back of the unit, acting as a trigger.
    • Some p-Channel MOSFET shorting the pushbutton as long as the camera operates, keeping it powered. I can't remember the exact part I used but it doesn't really matter as long as it survives the current draw.
    • A few random passives, like the 10kΩ pull-up for the print head's thermistor (because the timing should depend on temperature).

    The software side of things

    I began by writing a driver for the thermal printer, together with a small font renderer. The documentation thankfully was extensive enough, with proposed timings and formulae for their adaption to varying operating voltage and temperature, that this wasn't to big of a hassle. The text output wasn't used in the final design, but it was very useful to have for debugging.

    With the printing part working, it was time for the image capture.

    You might be already questioning my microcontroller choice. Using a camera module without a FIFO meant that the image data has to be captured live (unless I would do some sort of equivalent time sampling and end up with the most brutal rolling shutter possible) and a microcontroller without a camera interface isn't exactly built for that.

    However, the printer's resolution isn't all that high and the camera module's output resolution can be reduced as well. This took a bit of time since its documentation wasn't all that specific how to configure it near its lower resolution and frame rate limits, but in the end I made it spit out 160×144 pixel frames.

    Lacking a camera frame, I captured the parallel pixel data with the MCU's DMA, triggered by timers connected to the OV7670's synchronisation lines. Although I significantly reduced the image size, the...

    Read more »