 K.C. Lee
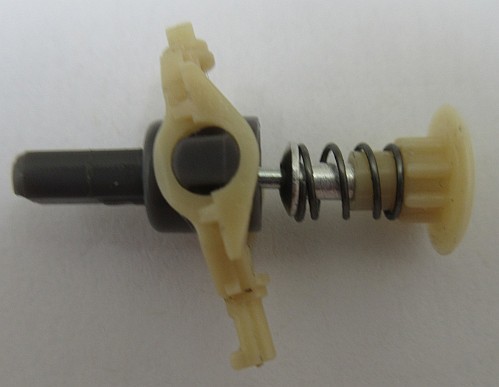
The problem with the Xbox 1/Xbox 360 thumb stick is that it relies on a tiny plastic dowel to center the stick. This part along with the dark grey thumb stick comes in one piece from precision injection molding. The off white plastics parts are used on the contact surfaces to reduce fiction.
I had replaced this same part many times with the "original Alps" replacements I got on Aliexpress, but these days it'll take forever as the global and local logistic are in a mess.

There is a spring that pushes the "gear" part down onto a convex surface at the base. There are (4) notches to prevent the "gear" from rotating, but there are a lot of slop as it is a loose fit.
The little dowel redirect the side ward force to center the stick. The shear force eventually breaks the joint between the dowel and the rest of the stick. No amount of super glue will help you fix this as the shear strength is much weaker than the adhesive force.
At one point I was thinking about metal casing or turning the part on a lathe as a long term replacement. It took a bit of matching sizes from my parts to come up with this simple hack. I have even tied using a carbon resistor as a proof of concept. I think this is a much easier cheap fix with much stronger readily available part.
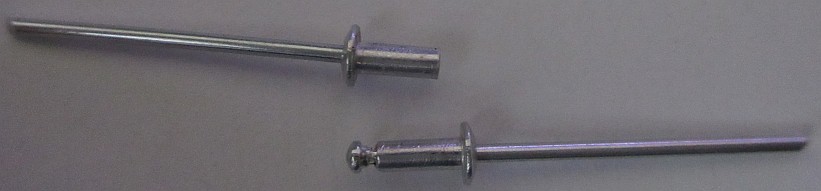
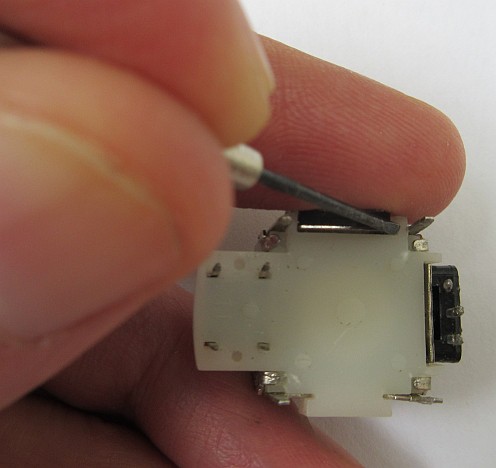
I replace the cheap plastic dowel with a metal part providing a lot of strength for this hack, so it should out last the rest of the stick. The rivet conveniently goes through the hole in the rest of the stick. They could have done this fix in the design, but they can't keep selling extra $45 controllers if they last forever.
I have done the hack with the samples I got with my rivet gun bought at a local hardware store chain a long while (like 10 years) ago. I have placed some rivets on order just an hour ago and won't be expected to see them for another 2 months even if I am lucky. I can't comment on the tolerances of them.
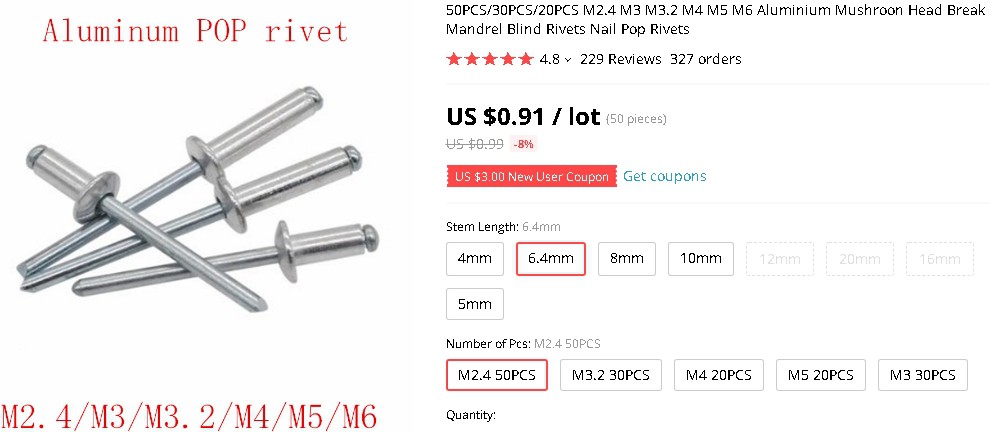
This is the mechanical specs of Aliexpress for the M2.4x6.4 pop rivet. I think they have decided to consolidate the metric part for the imperial market. M2.4 is pretty close to 6/64".

The actual dimension of the broken dowel is 0.098" dia, so a M2.5 rivet would be a better fit, but they don't come in cheap like parts from China. The 0.0035" difference between the two is buried in the mechanical tolerance of the rivets.
The 2 pennies rivets are not designed to be precision parts, so there bound to be some mechanical tolerance issues vs the original precision injection molded stick. You might have to sort the rivets from batches/suppliers if you want the best fit.
The centering mechanism has a bit of inherent slop at the neutral point even for a non-broken stick unlike a good quality RC stick that uses actual springs for centering. The firmware probably have set aside a deadband region about the neutral point. I cannot see actually the differences in feel and control behavior between my fixed version vs the other stick in actual use. So in the end, the tolerances of the rivet does not matter.
This hack might also work on other models if they are using the original Alps parts. e.g. Switch Pro, Xbox one and Playstation. Some of the similar looking off brand lower quality Chinese parts might have slightly different diameters for the dowel. The PCB footprints and dimensions for these parts are mostly interchangeable.


 Øystein
 Val
Val
 Alex Rich
 zapwizard