 Subhajit
Tutorial Video for Music Rhythm LED:
Required Components:
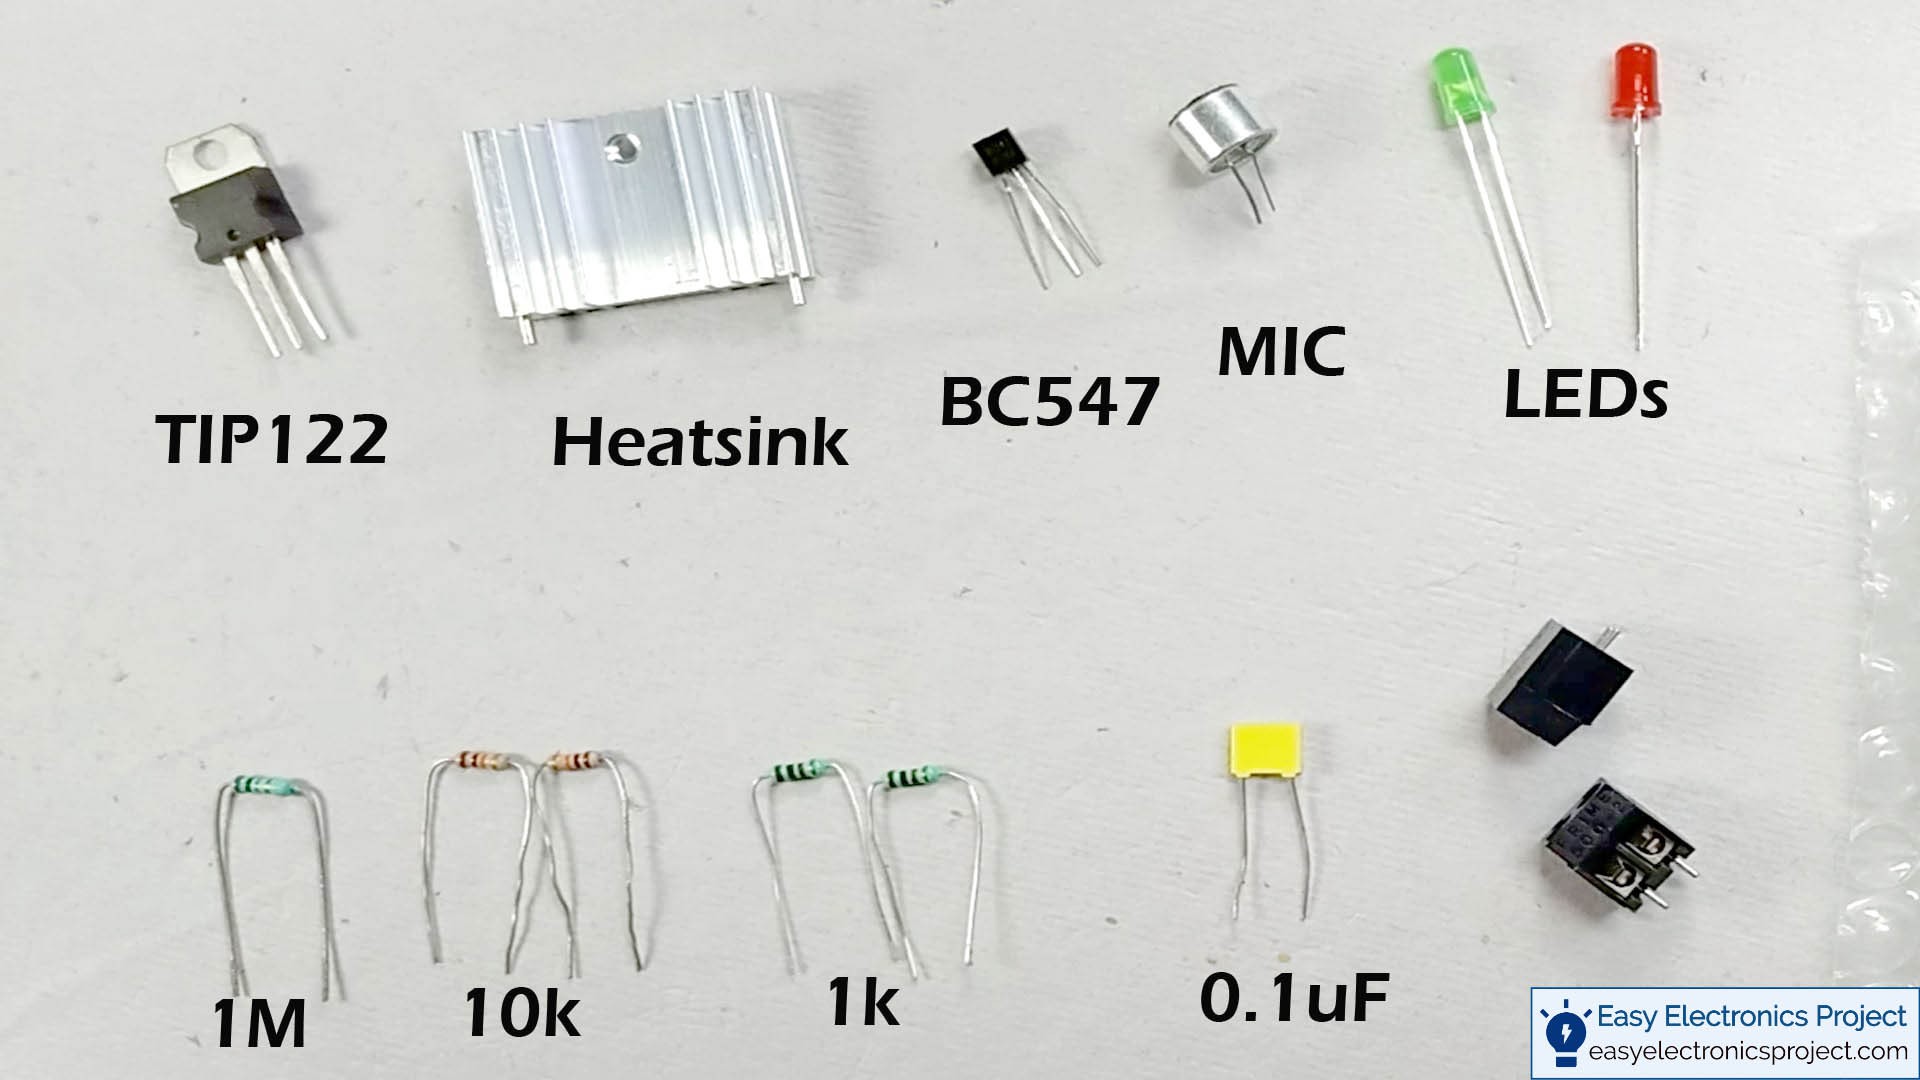
1. 1k resistors 2no
2. 10k resistors 2no
3. 1M resistor 1no
4. 0.1uF Capacitor 1 no
5. BC547 NPN Transistor 1 no
6. TIP122 Power Transistor 1no
7. LEDs 5mm 1.5Volt 2no
8. Condenser Microphone 1no
9. Connectors
10. 12volt LED strips or flashlight
11. 12V DC Adapter
Circuit Diagram:
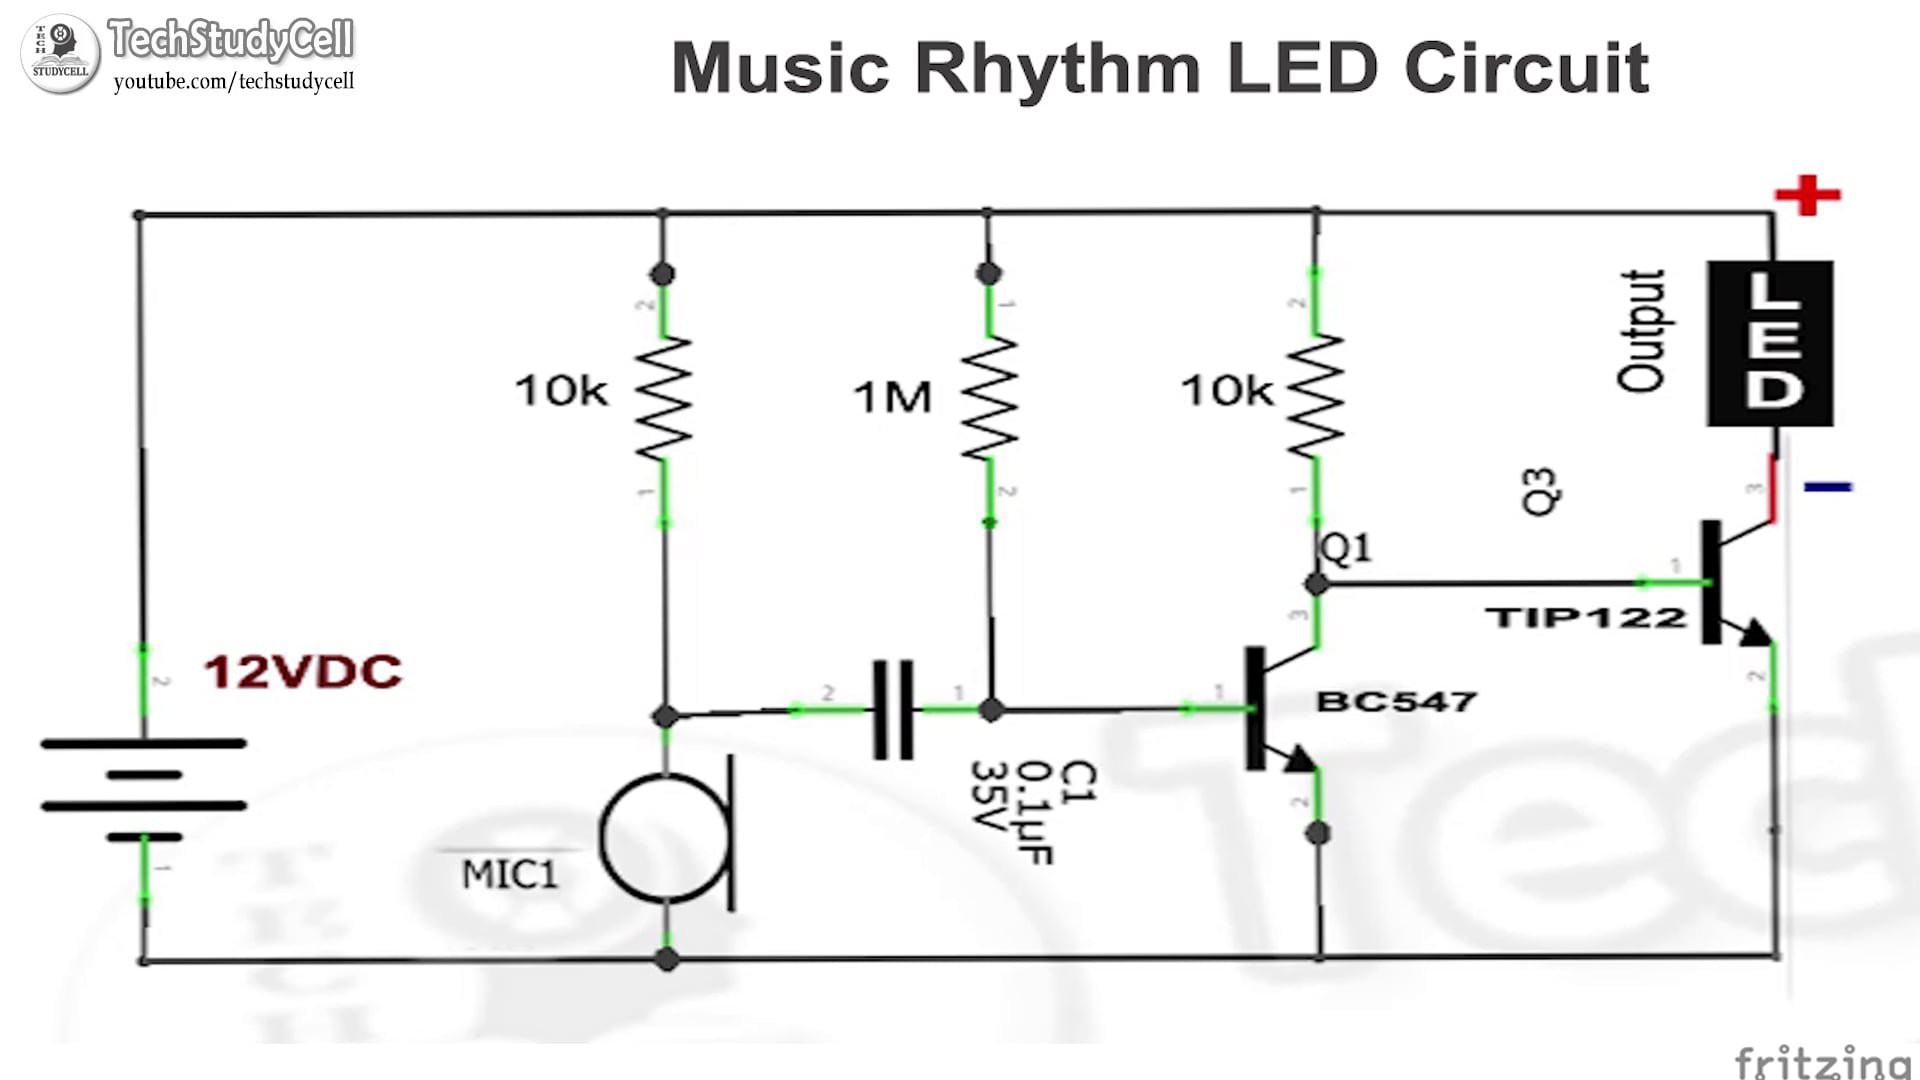
This the circuit diagram of the music rhythm LED strip.
How the music rhythm LED circuit works:
1. The music rhythm is sensed by the microphone and convert it into electric pluse.
2. Then the electric pulse fed to the base of the BC547 NPN transistor which amplifies the electric pulse signal
3. After that, the amplified signal fed to the base of the TIP122 NPN power transistor. for each positive pulse at the base, the TIP122 transistor turns on.
4. The 12V LED strip is connected with the collector of the TIP122 transistor. So when the TIP122 transistor turns on the current can flow through the 12V LED strip so the LED strip turns on. And when the TIP122 transistor turns off the current can not flow through the 12V LED strip so the LED strip turns off.
So first we convert the music rhythm to an electric pulse with a microphone. Then the signal is amplified by BC547 transistor and the amplified signal is fed to the TIP122 power transistor to turn on and turn off the LED strip as per the music rhythm.
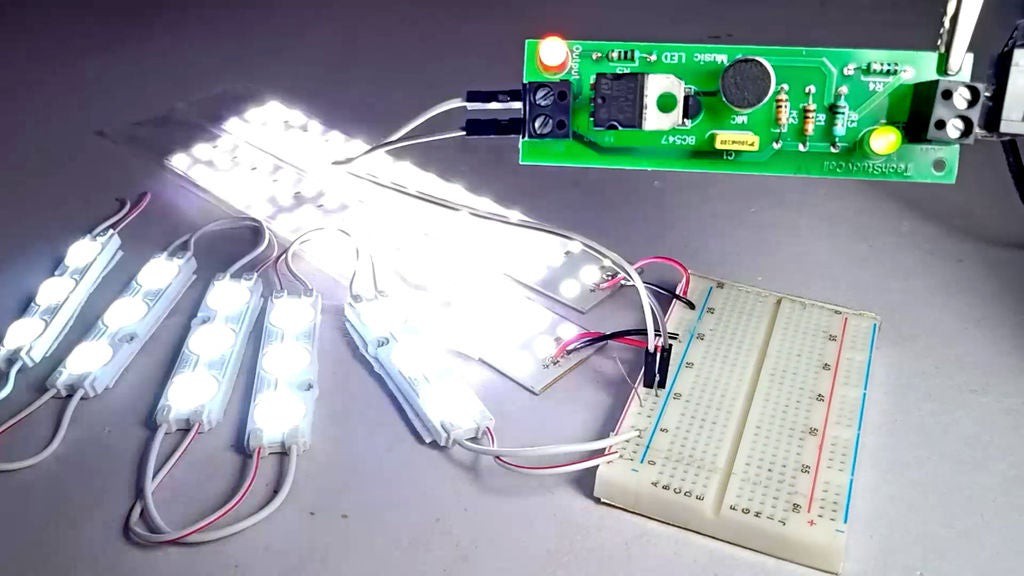
Breadboard Schematic:
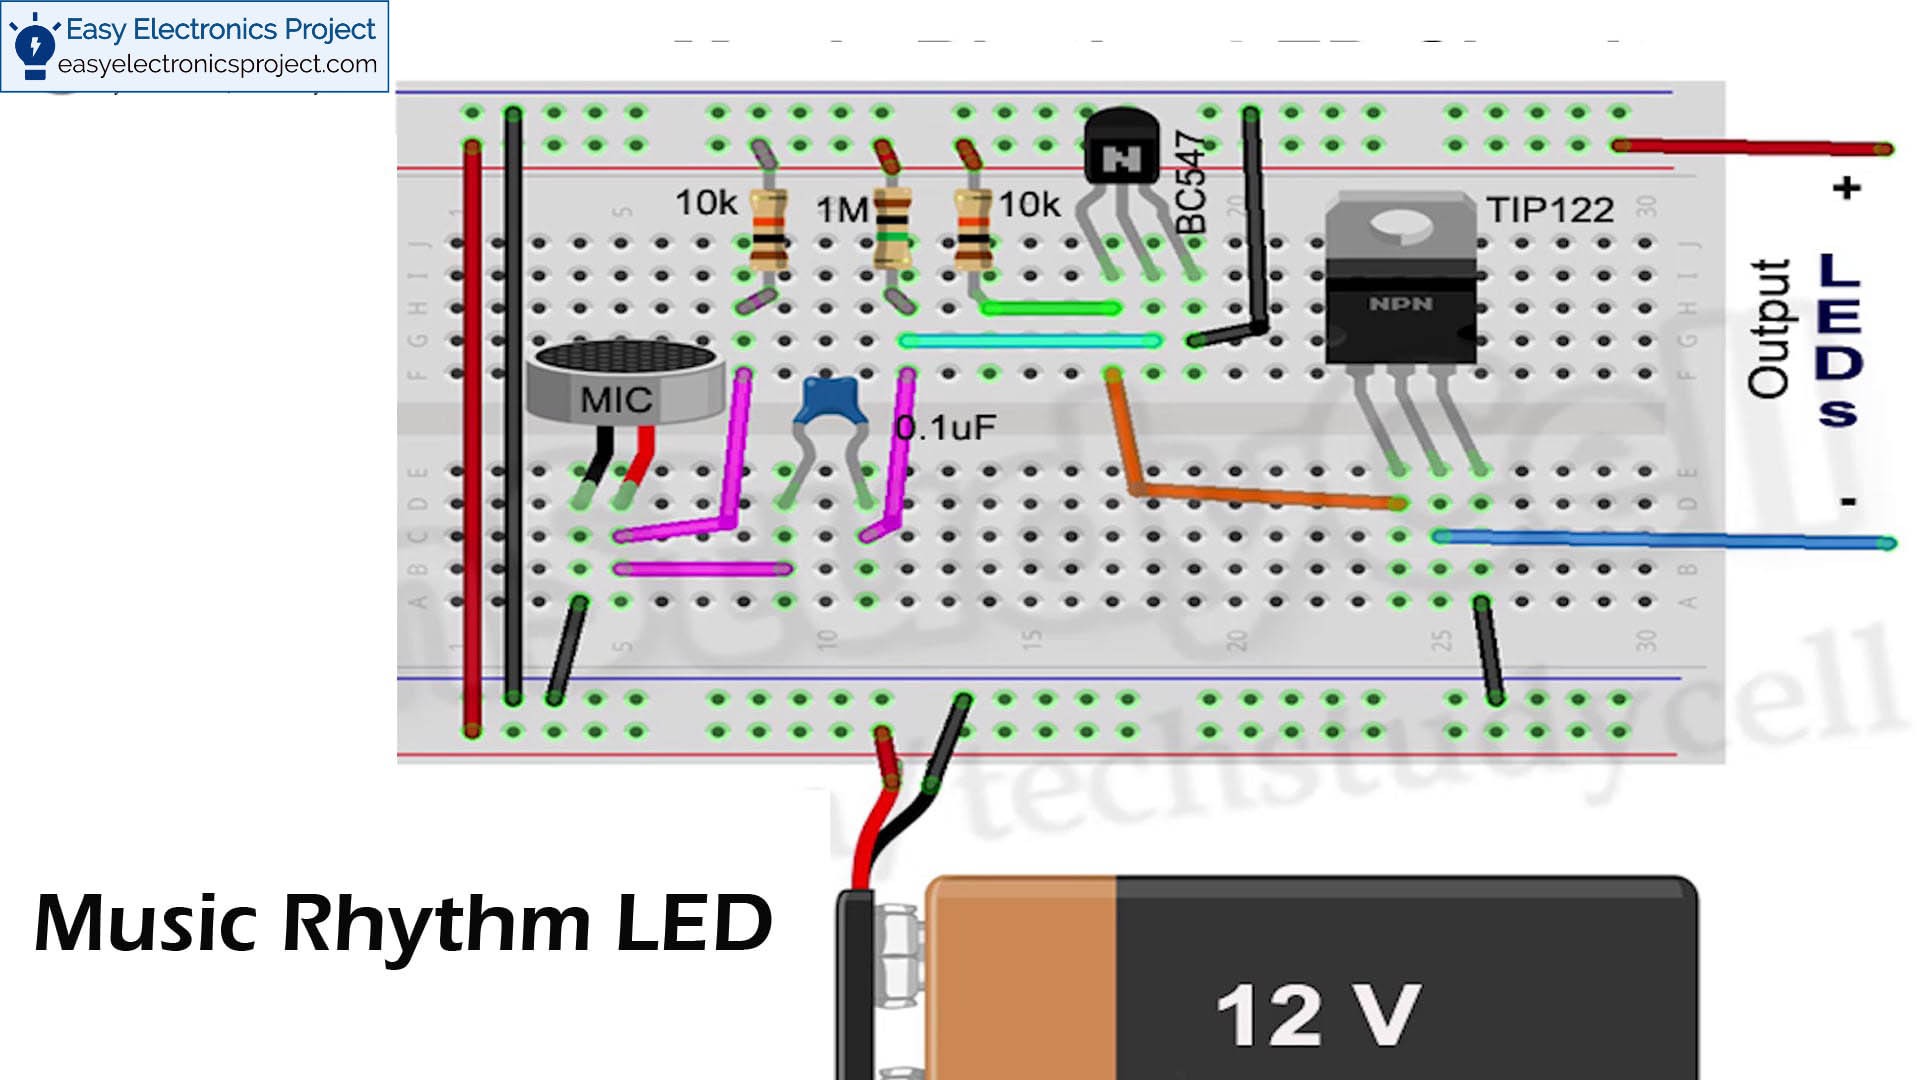
Before designing the PCB, I have designed the music rhythm LED circuit on the breadboard for testing.
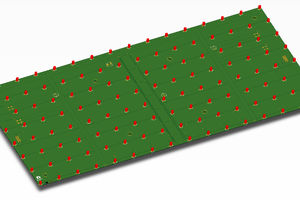
Designing the PCB:

After testing the circuit on the breadboard, I started designing the PCB.
You can also download the attached PCB Garber file for this music rhythm LED project.
Download link for the PCB Gerber file for the music rhythm led flashlight
https://drive.google.com/uc?export=download&id=16RtbOk-Q-wRUFd_cCO6HB7r0FtjlE5iB
Order the PCB:
After downloading the Garber file you can easily order the PCB
1. Visit https://jlcpcb.com and Sign in / Sign up
2. Click on the QUOTE NOW button.
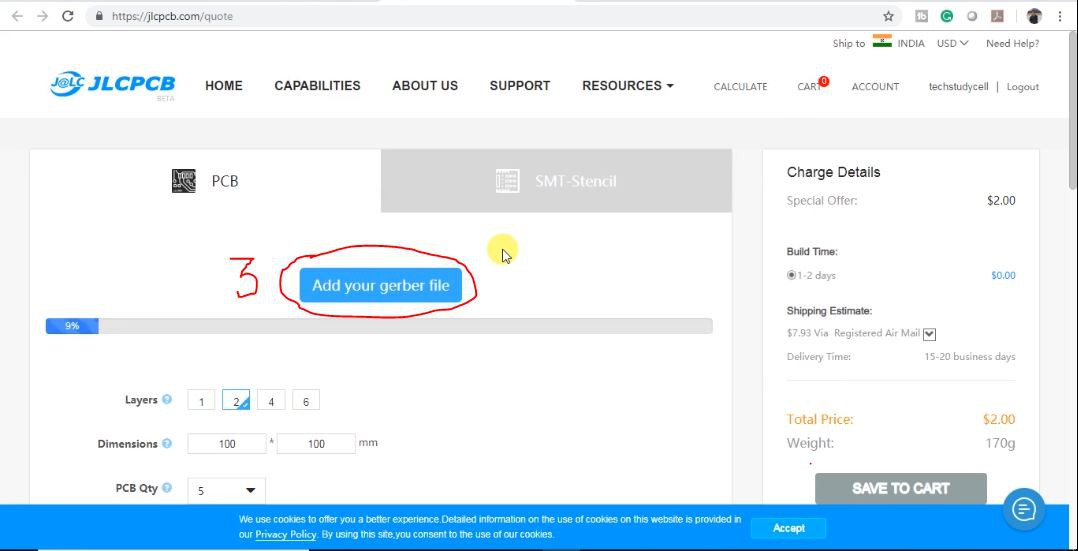
3 Click on the "Add your Gerber file" button. Then browse and select the Gerber file you have downloaded.
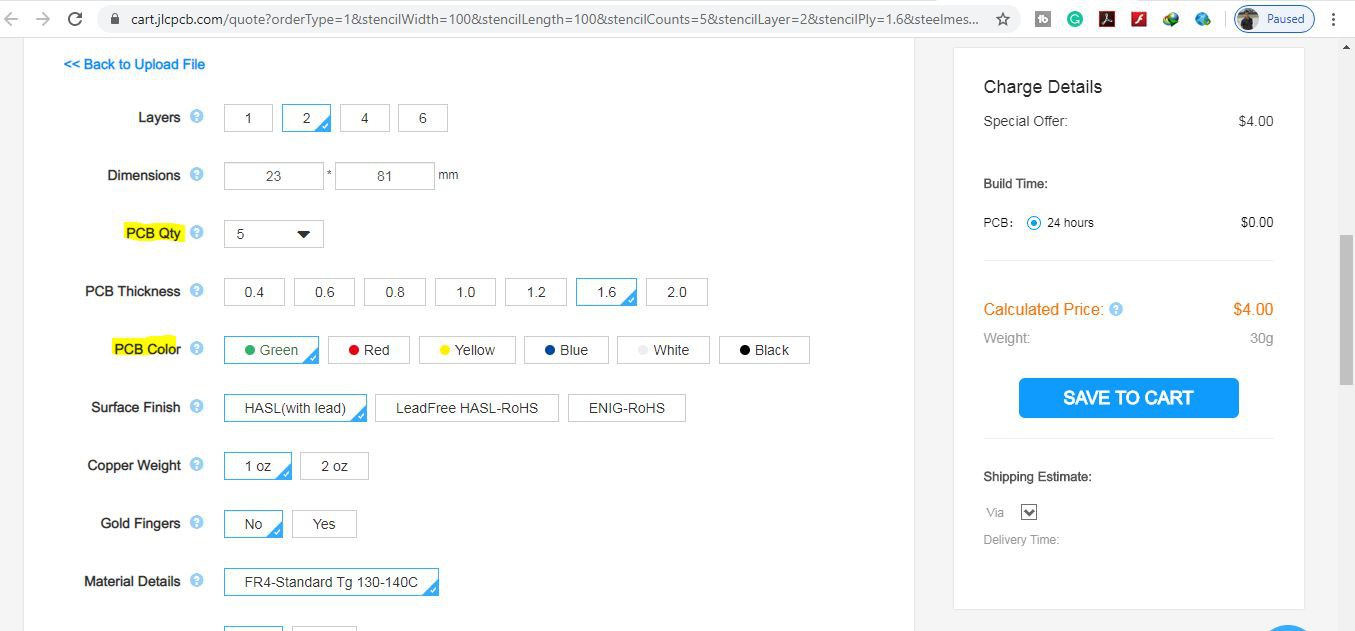
4. Set the required parameter like quantity, PCB color, etc
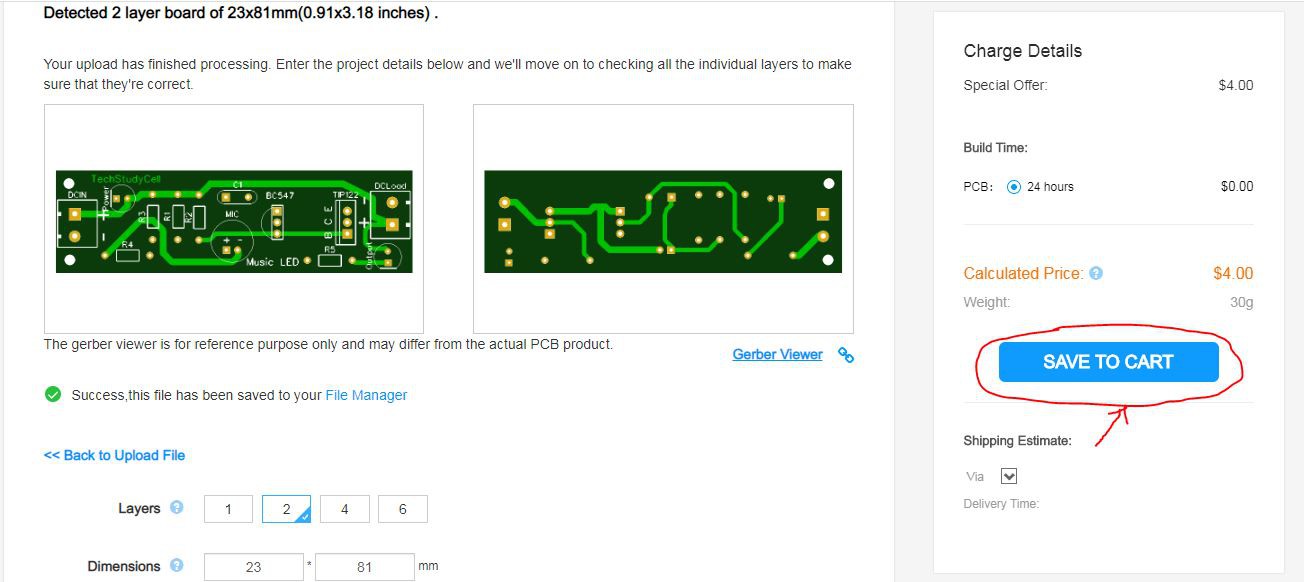
5. After selecting all the Parameters for PCB click on SAVE TO CART button.

6. Type the Shipping Address.
7. Select the Shipping Method suitable for you.
8. Submit the order and proceed for the payment.
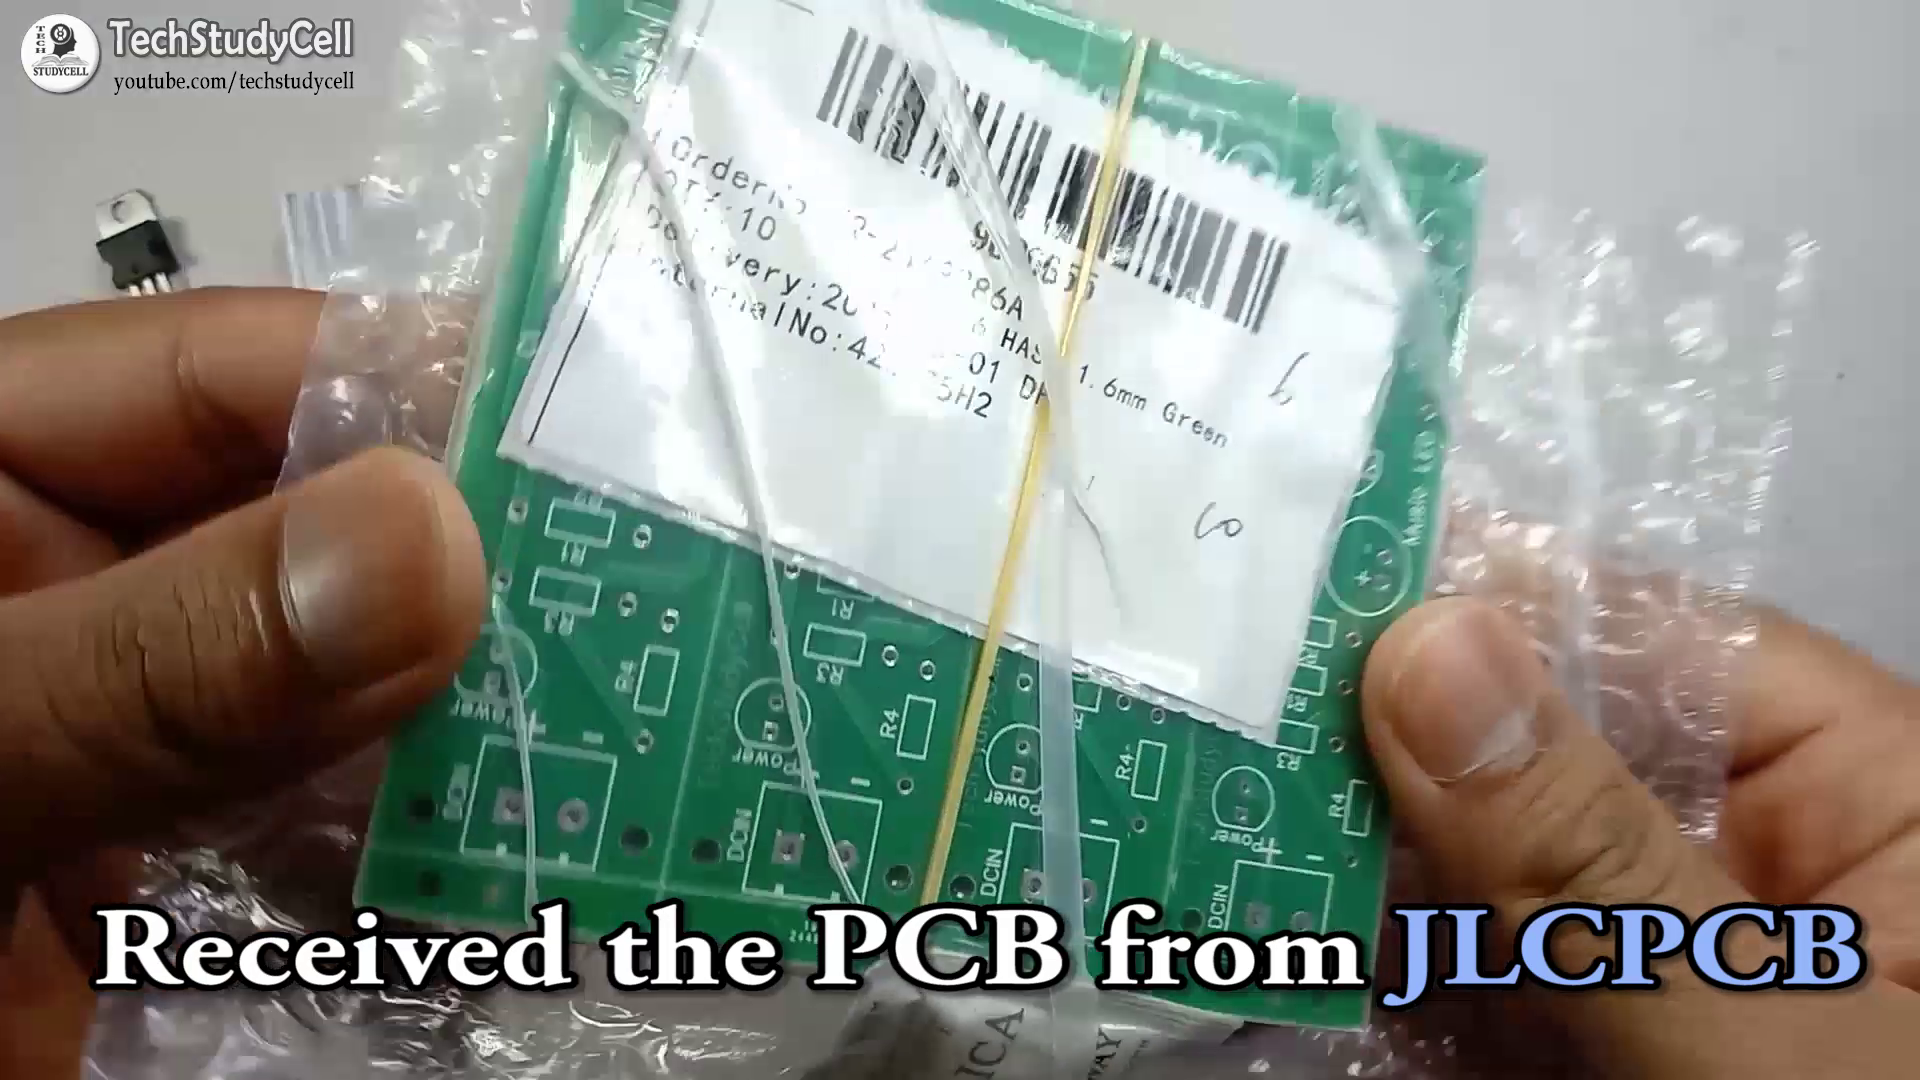
You can also track your order from the JLCPCB.com My PCBs took 2 days to get manufactured and arrived within a week using the DHL delivery option. PCBs were well packed and the quality was really good at this affordable price.
Solder All the Components:
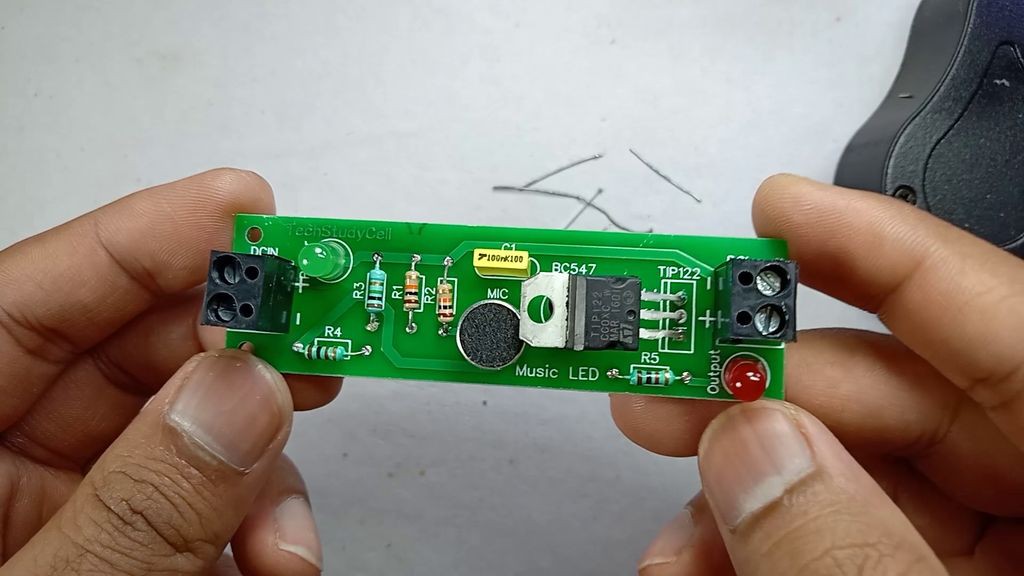
After that solder all the components as per the circuit diagram.
Testing the LED Flasher circuit:
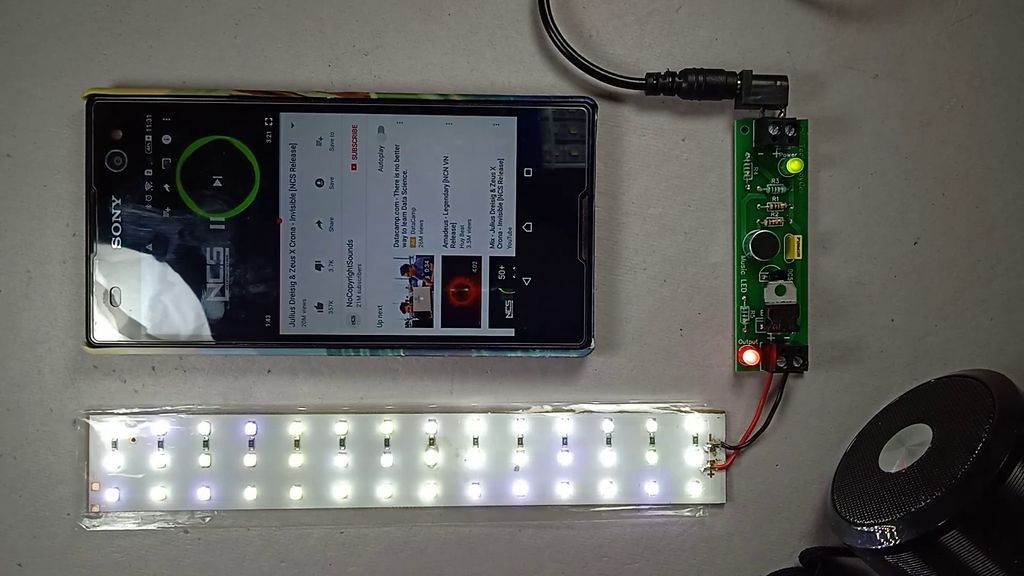
After the soldering, connect the led strip at the output pin and connect 12V DC supply at the input.
Now LED strip should blink with the sound.
Finally Music Rhythm LED Flash light is ready:
I hope you have liked this Music rhythm LED light project. I have shared all the required information for this project.
I will really appreciate it if you share your valuable feedback, Also if you have any query please write in the comment section.
For more such project Please follow TechStudyCell. Thank you & Happy Learning.
 Mirko
Mirko
 Kuro
Kuro
 youkito1991
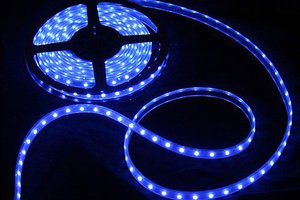
 mattko
hey your content is very unique and stylish but i think you should go there [https://salebunnies.com]