Close
0%
0%

QRNG

Quantum Random Number Generator

Public Chat
Similar projects worth following
This is a very easy project for those looking to take their first foray into quantum computing, here we are creating a random number generator which uses the quantum properties of light to generate random bits!

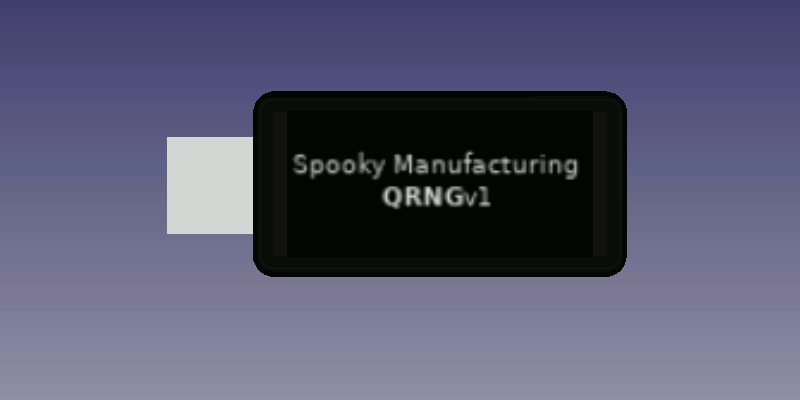
For those who don't have the time to read the article I wrote about DIY quantum computing where I go over more in-depth how this device works, I'll try to summarize the key points on the physics behind this:

So, a photon is a wave-particle, that means sometimes it acts as a wave does, and sometimes acts like a particle. If you throw a particle down a hallway with two doors at the end, it will go through one or the other, but when a wave goes through the same hallway it creates two new waves originating at the doors. There's a whole bunch of sciency principles used to describe parts of this wave-particle duality, but the basic gist is that when a wave-particle is being observed it acts as a particle, when a wave-particle is not being observed it acts as a wave.

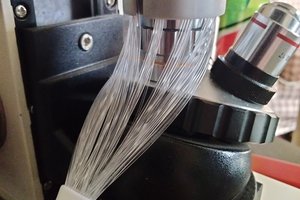
Now, a beamsplitter is just that, it splits a beam of light into multiple paths, essentially it's the 'doors' of this whole operation. So, when we pass a beam of light through the beam splitter it will split the light into 2 modes with some probability of a photon falling into one of the two modes.

And that's just what our circuit does! We use a light source (tuned to a 45* polarization) and a 50/50 polarizing beam splitter to split the light with 50% probability of a photon being horizontally or vertically polarized. Because these are distinct modes it is trivial to detect which mode the photons are in, we simply use a photoresistor on each mode, feeding the output to a comparison circuit, and arbitrarily pick a mode to be a 1 or a 0

pcb_preview.pdf

Preview of the PCB (full pcb files can be found in github)

Adobe Portable Document Format - 88.08 kB - 05/15/2020 at 10:59

Preview
Download

usb_schematic.pdf

Schematic of the USB version

Adobe Portable Document Format - 90.22 kB - 05/15/2020 at 10:57

Preview
Download

v1.1.ino

Firmware for the arduino based circuit

x-arduino - 1.41 kB - 05/15/2020 at 10:44

Download

QRNGv1-Schematic.pdf

The original v1 schematic (now QRNG_BASIC)

Adobe Portable Document Format - 28.94 kB - 05/15/2020 at 10:43

Preview
Download

  • 2 × Photoresistors
  • 1 × Arduino Uno
  • 1 × Breadboard Electronic Components / Misc. Electronic Components
  • 1 × 50/50 Polarizing Beam Splitter (650nm) These are a bit pricey, but can be purchased on Amazon
  • 1 × 650nm Laser Diode

  • Log... 1?

    Noah Wood05/15/2020 at 10:11 0 comments

    So I'm pretty new to hackaday (browsed a lot of the articles for years, just never made an account), and to the whole "hacker culture" so I apologize for any faux pas I've committed.

    I've been working on this project for about a year off and on, along with my other quantum projects, so everything is pretty disorganized at the moment.

    The published image of the device was from our first prototype, I was going to do a whole write-up on how to build it with step-by-step instructions but I kinda lost the time.

    I've since done a little more work on the hardware side, added an STM32 microcontroller with USB connection, 1 gigabyte of general storage, found a nice case to put it in, and then made this pretty cool (it sucks I know) 3d animation of it:


    I'm thinking this would make a good crypto wallet, and it's looking like we're going to have a halfway decent product :) I have to order the boards and test them, getting all those components to fit in such a small area was a challenge and I'm a little worried about the "hacks" I had to do to get everything to fit, next major step would be developing the software/firmware to go with it, Linux shouldn't be a problem but I'm dreading the thought of having to write code for windows, haven't used that OS for years.

    One of the things I'm debating is whether I should try to open up some of the microcontroller functionality, I've got a little room left to add a few extra vias you can solder to (and SWDIO with Trace is already available), but... I also get the feeling it'd be easier to just make a development board and/or a breakout board with the RNG circuit.

View project log

Enjoy this project?

Share

Discussions

Mandrew0822 wrote 02/06/2024 at 23:38 point

     Question, what values aare those photoresistors in your original model

  Are you sure? yes | no

allexoK wrote 09/18/2023 at 12:32 point

Hi, the projects looks very cool, I am thinking about replicating it and playing with it myself. Have you finished the USB stick version?

  Are you sure? yes | no

Aledaniel1 wrote 07/15/2021 at 18:06 point

How can I change the program to generate numbers between 1 and 60, and print them on LCD screen ? 

  Are you sure? yes | no

Noah Wood wrote 07/16/2021 at 09:25 point

The easiest way would be to just create a buffer variable and generate 6 bits, any results less than 1 or greater than 60 you'd throw away, as for hooking up an Arduino to an LCD, there's a great tutorial on their website https://www.arduino.cc/en/Tutorial/LibraryExamples/HelloWorld

  Are you sure? yes | no

Similar Projects

Does this project spark your interest?

Become a member to follow this project and never miss any updates