 Christian Bjelle
I've finally gotten to a point where the video logic accepts data from the UART and displays it on the screen.
Lessons learned
It is very hard to debug something if you are unsure anything works
At first power-on, the only thing that appeared working was some LEDs and a blinking white cursor on the screen. This at least told me that the base board was working, VGA-wires connected correctly and the module producing the sync signals correct, and that a video signal was produced.
Sending serial data produced no response at all. The scope verified that serial data was indeed received, but sent to the wrong pin (as half expected), but even sending it to the right pin made no difference.
Methodically working upwards in the hierarchy from the parts that worked, I was soon stuck again. There was no output from the generated EBR-ROM.
Do not assume that a tool does what it claims
It turned out that IPexpress was happy to create a EBR-based ROM, populated with a binary file, without warning about that the ROM was actually empty! As I trust the tools provided by Lattice, this took a few hours to sink in.
The binary font-rom-file is generated from a ascii-text source format and converted by a tool to an intel-hex. I had produced a sister-tool to generate Verilog-source for a ROM, and that got me past that hurdle.
module font_rom (input wire clock,
                 input wire [11:0] address,
                 output reg [7:0] data_out);

    always @(posedge clock) begin
        case (address)
            // @char(0x20) {
            // @char(0x21) {
            12'h211: data_out = 8'b00010000;  // '   0    '
            12'h212: data_out = 8'b00010000;  // '   0    '
            12'h213: data_out = 8'b00010000;  // '   0    '
            12'h214: data_out = 8'b00010000;  // '   0    '
            12'h215: data_out = 8'b00010000;  // '   0    '
            12'h216: data_out = 8'b00010000;  // '   0    '
            12'h217: data_out = 8'b00010000;  // '   0    '
            12'h219: data_out = 8'b00010000;  // '   0    '
            // @char(0x22) {
            12'h221: data_out = 8'b00100100;  // '  0  0  '
            12'h222: data_out = 8'b00100100;  // '  0  0  '
            12'h223: data_out = 8'b01001000;  // ' 0  0   '
            // @char(0x23) {
            12'h231: data_out = 8'b01000100;  // ' 0   0  '
            12'h232: data_out = 8'b01000100;  // ' 0   0  '
            12'h233: data_out = 8'b11111110;  // '0000000 '
            12'h234: data_out = 8'b01000100;  // ' 0   0  '
            12'h235: data_out = 8'b01000100;  // ' 0   0  '
            12'h236: data_out = 8'b01000100;  // ' 0   0  '
            12'h237: data_out = 8'b11111110;  // '0000000 '
            12'h238: data_out = 8'b01000100;  // ' 0   0  '
            12'h239: data_out = 8'b01000100;  // ' 0   0  '

      ....


            12'h5f9: data_out = 8'b11111110;  // '0000000 '
            default: data_out = 8'h0;
        endcase
    end
endmodule
Do not forget the relative timescale of signals when simulating
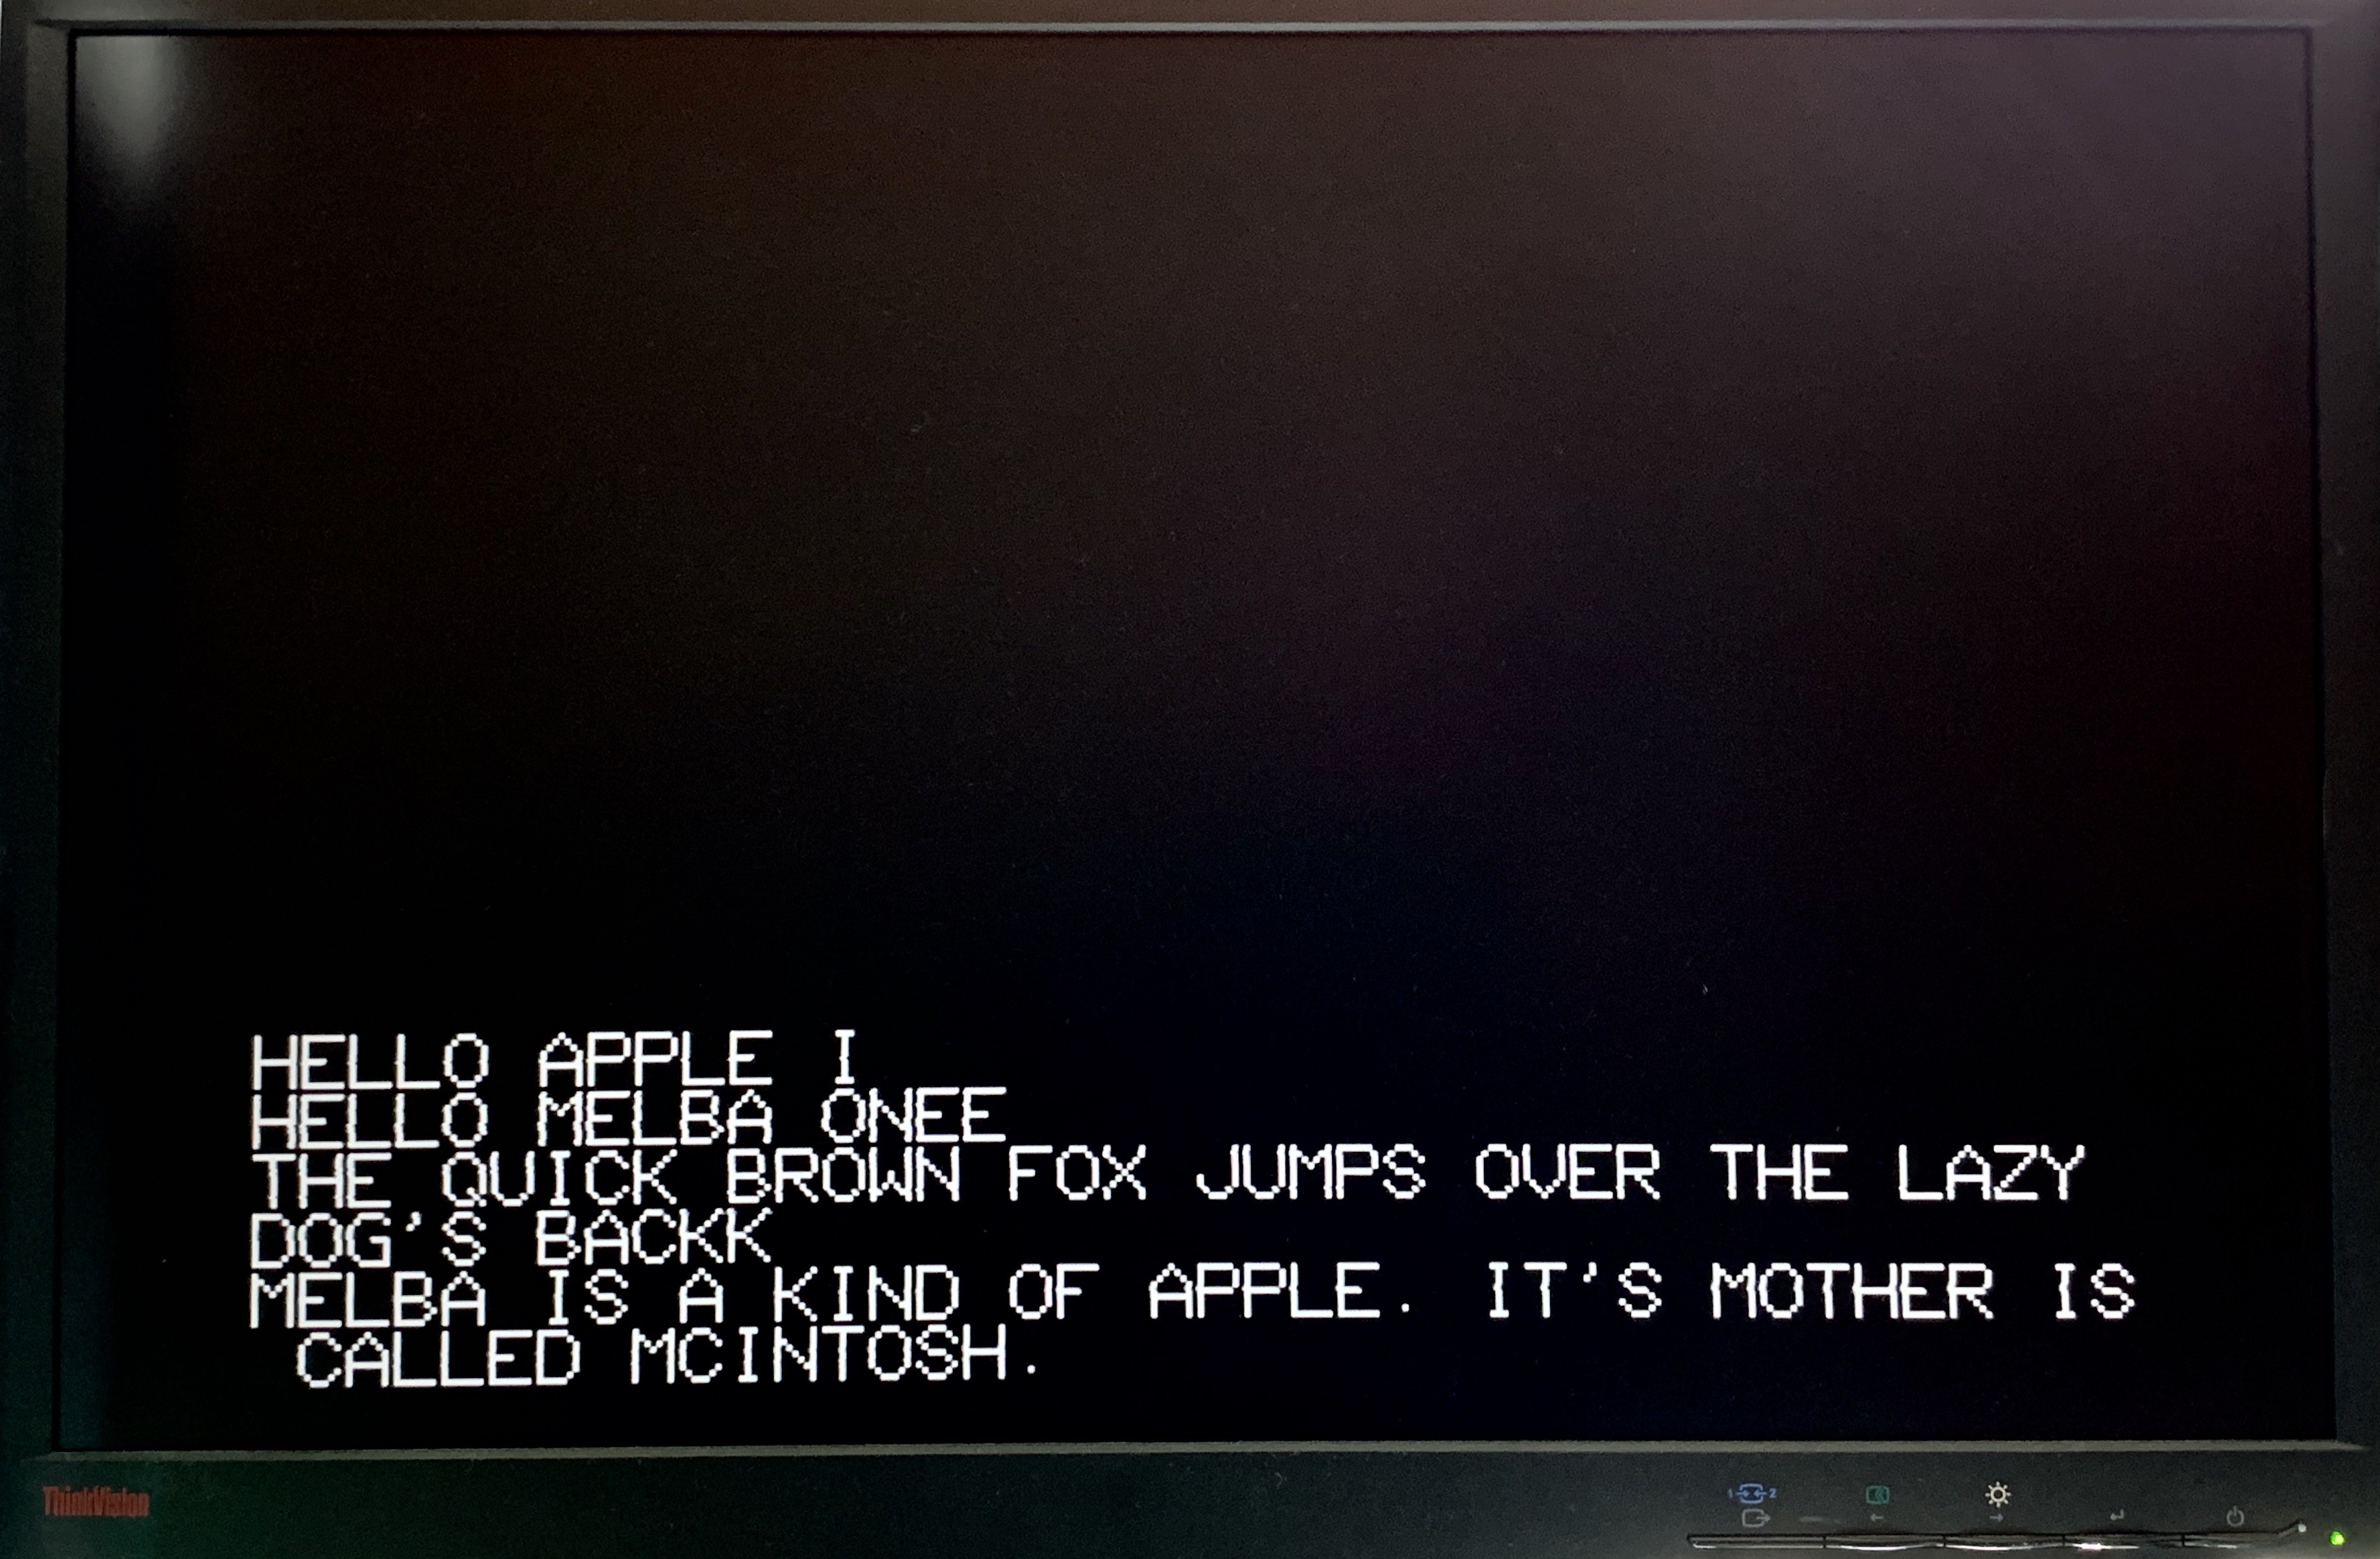
With the ability to produce hard coded text on the screen, I could now turn my attention to the UART. One of the issues was that the remote echo, created by sending back the received character, was running away, sending an unending stream of repeating garbage text.
The problem here was that when I simulated the UART, I used a strobe-signal (to start sending the character) that was a few clock-cycles wide. In reality, the strobe produced by the receiver was high after a character was received, and went low only when the stop-bit of the next character was received, and then went high again. The effect was that the transmitter always believed that the data on the in-port was new...
If I had used a reasonably scaled strobe-signal, I would have noticed the problem long ago.
The biggest problems are the dumb ones
After a lot of new stimulations and hard tests, I realised that the garbage-text I got looked a lot like the garbage you get when the baud-rate is set wrong.
Bingo! With the baud-rate set to 19200 bps, rather than the expected 9600 it works!
NeXT Step
There are a few minor bugs, like advancing the cursor while still writing a character to RAM, which produces a duplicate of the last character above the cursor, or that the B looks pretty ugly.
I'll fix those 😎
The biggest thing for the next iteration will be the actual computer part. Stay tuned for an update!
Inspiration for this can be found on Ben Eaters channel here.
Discussions
Become a Hackaday.io Member
Create an account to leave a comment. Already have an account? Log In.