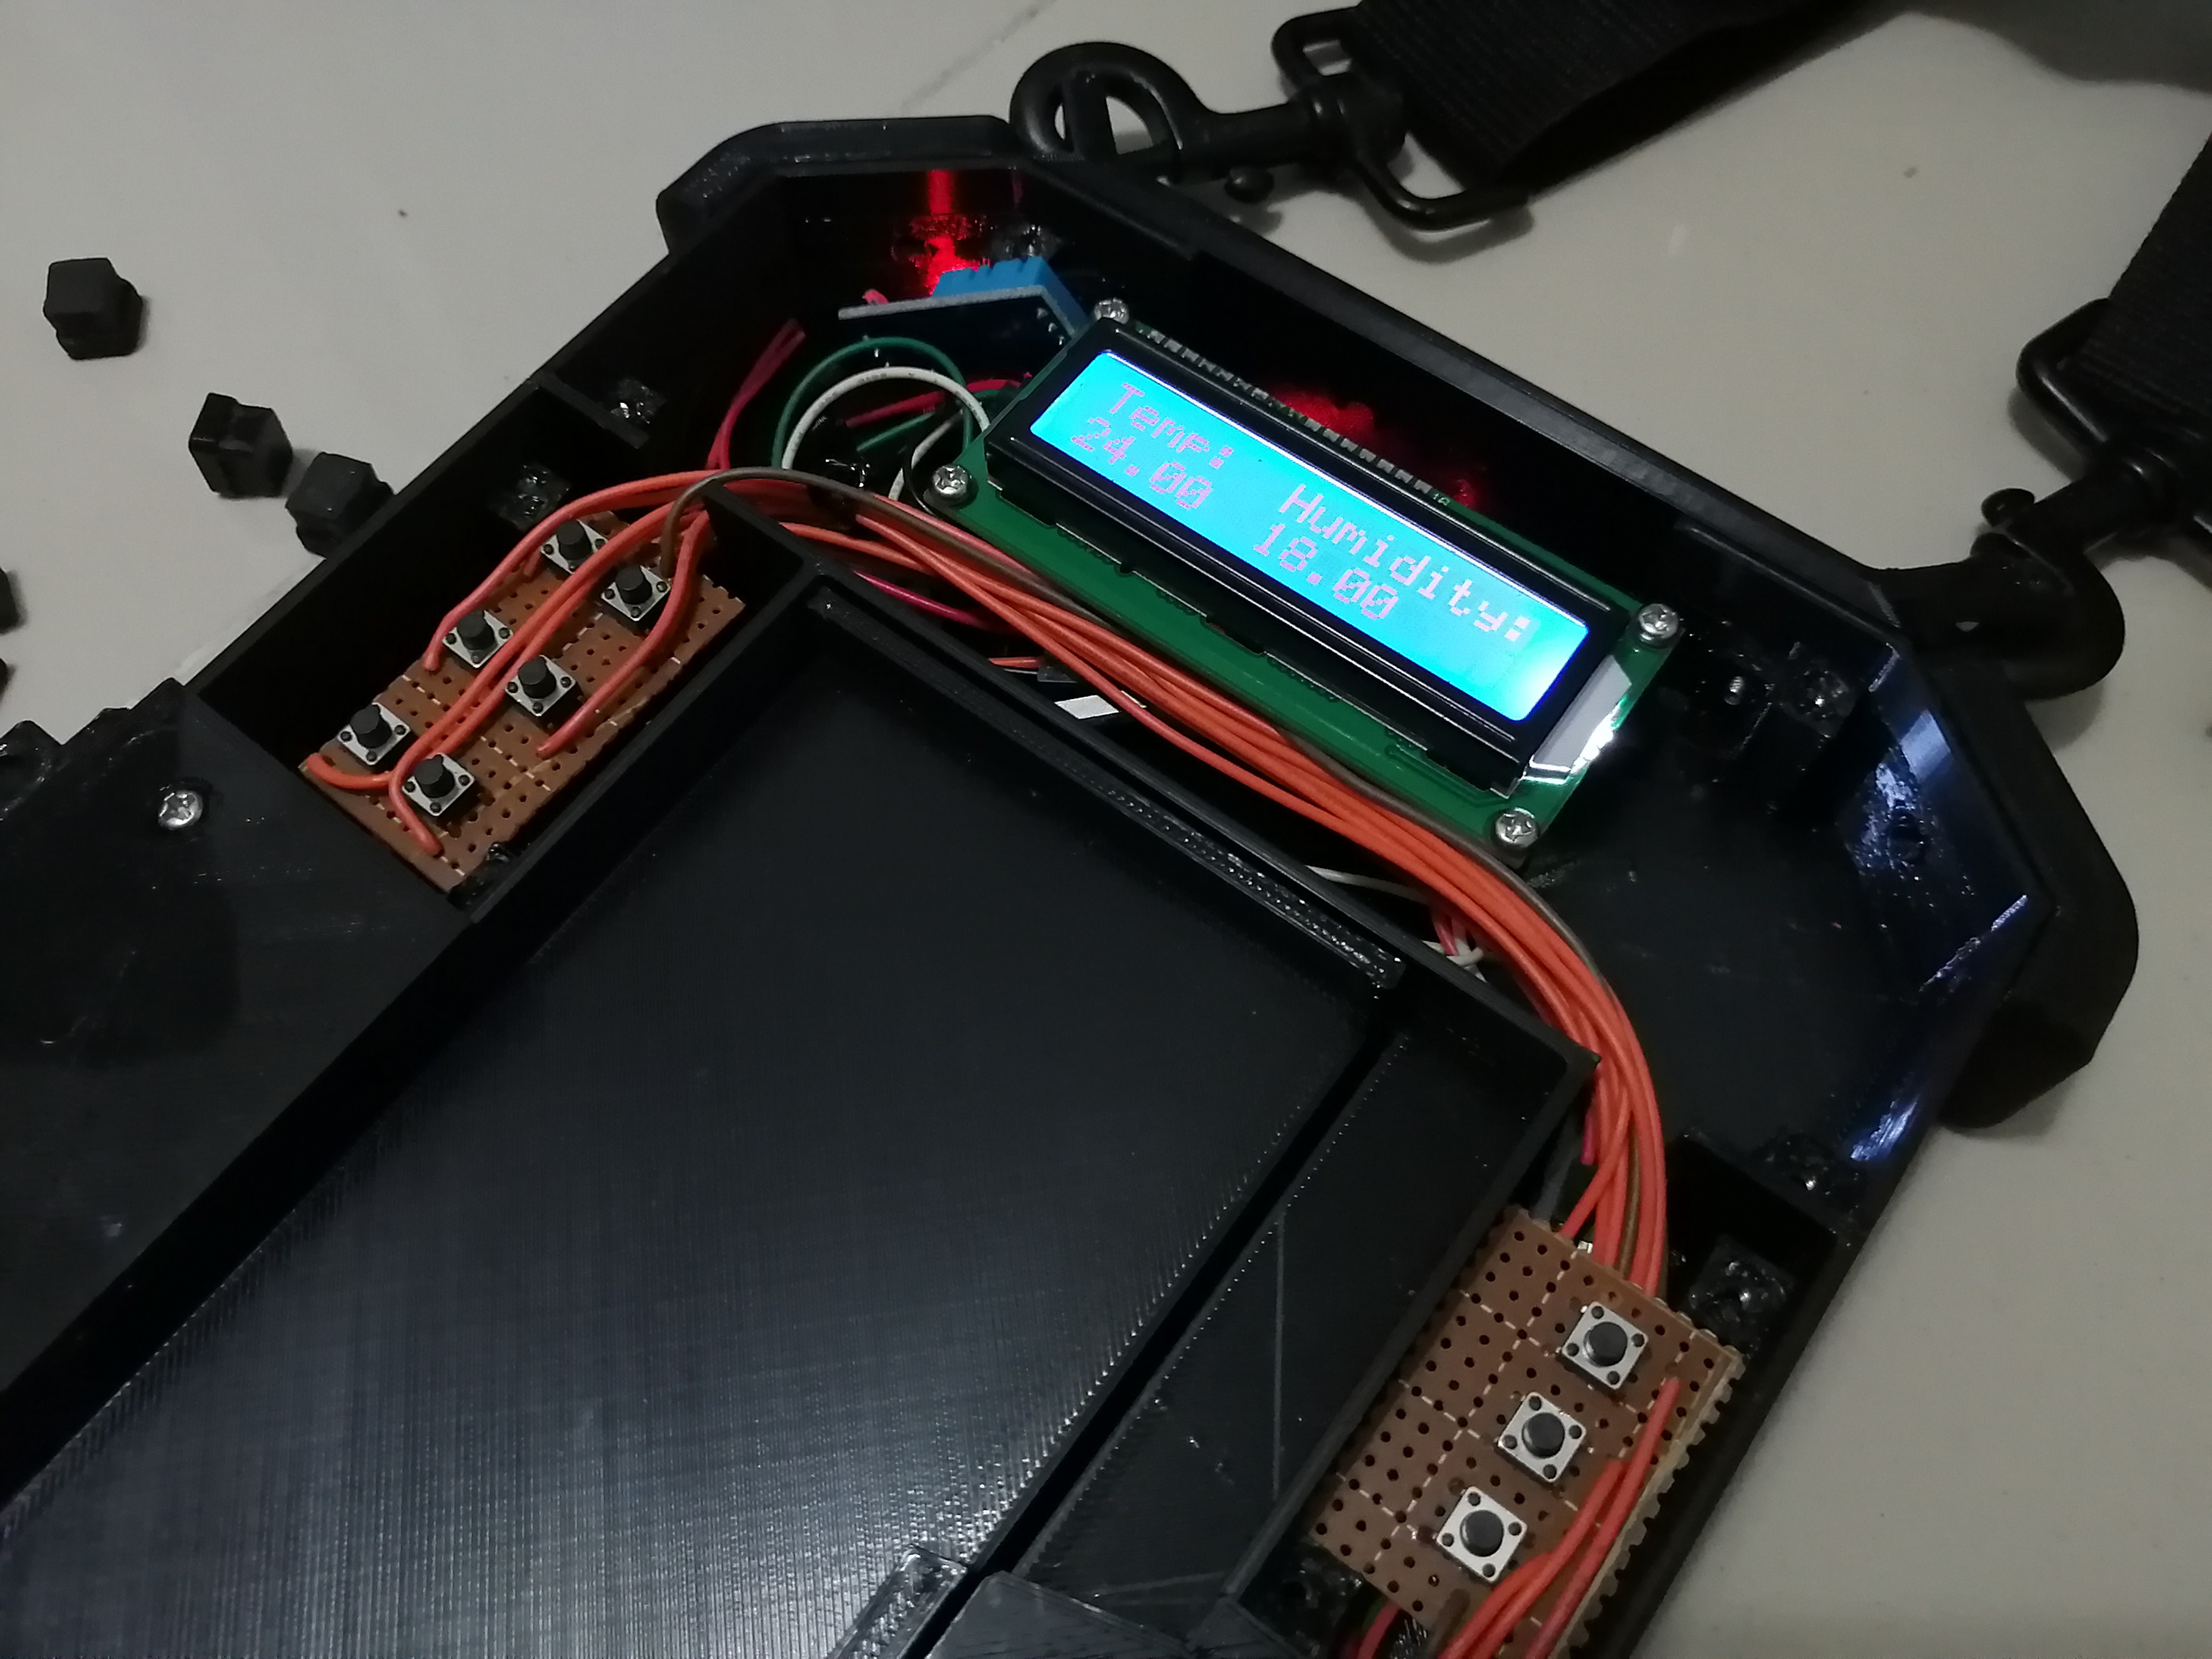
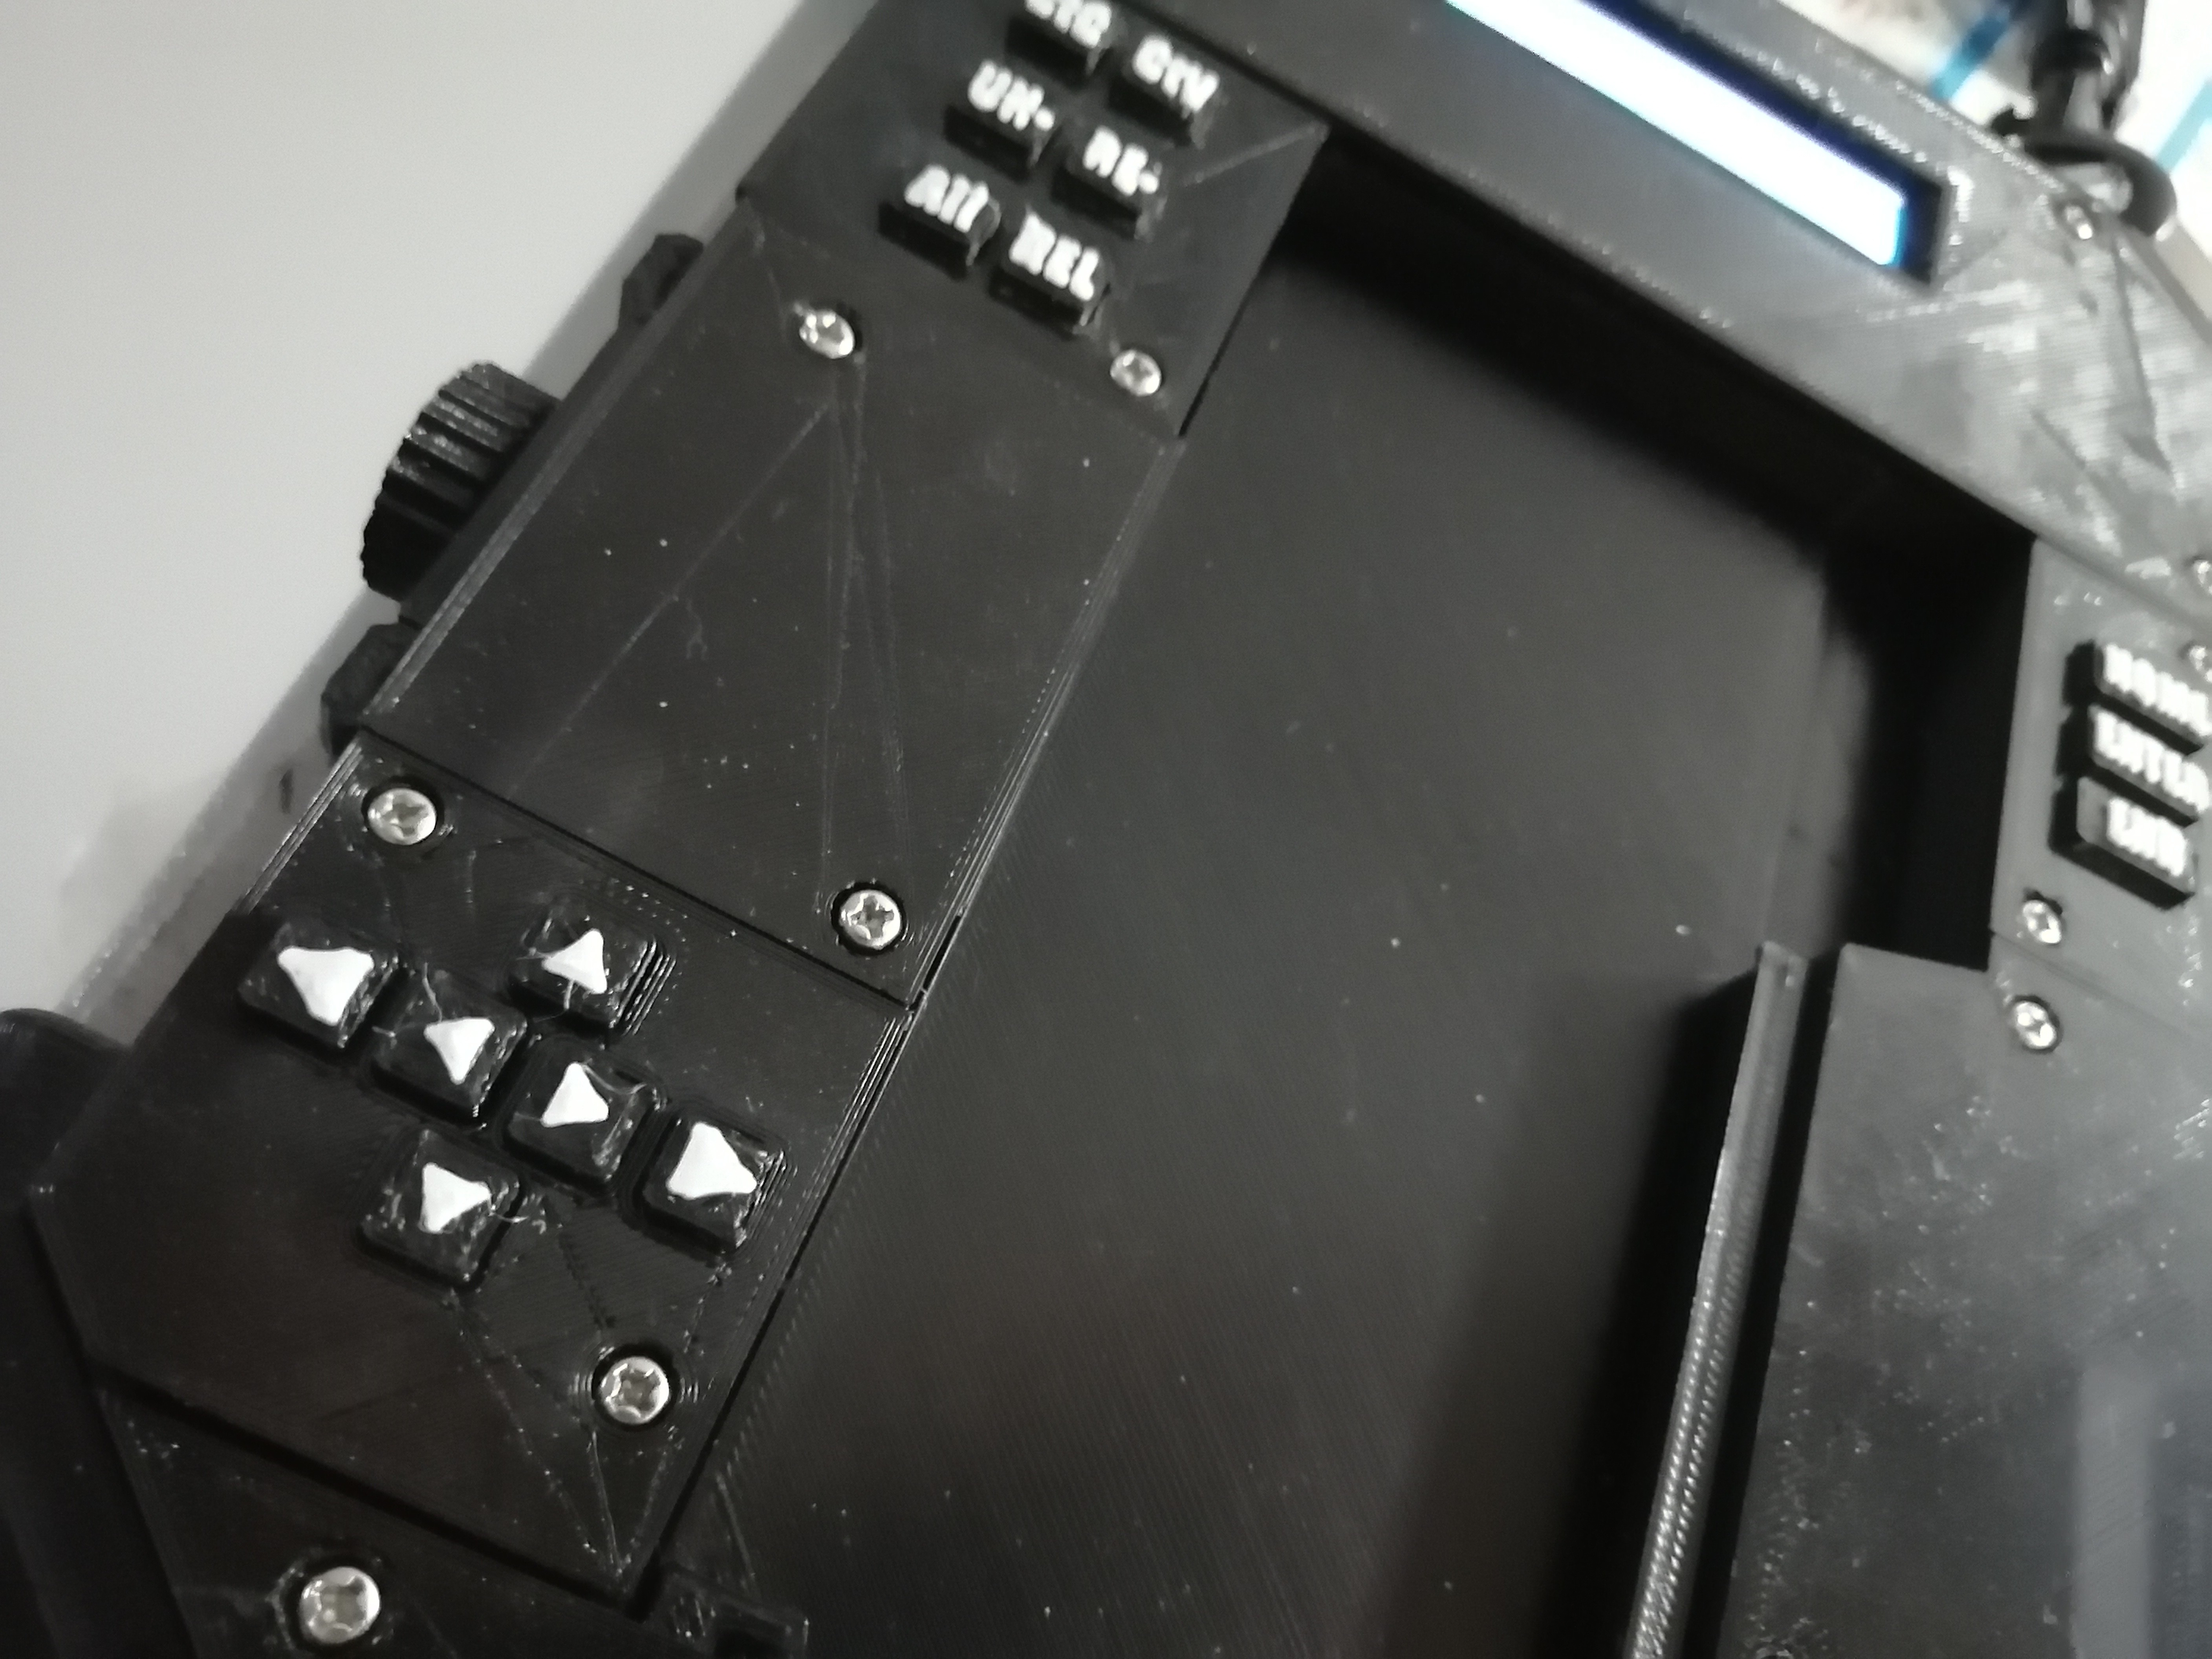
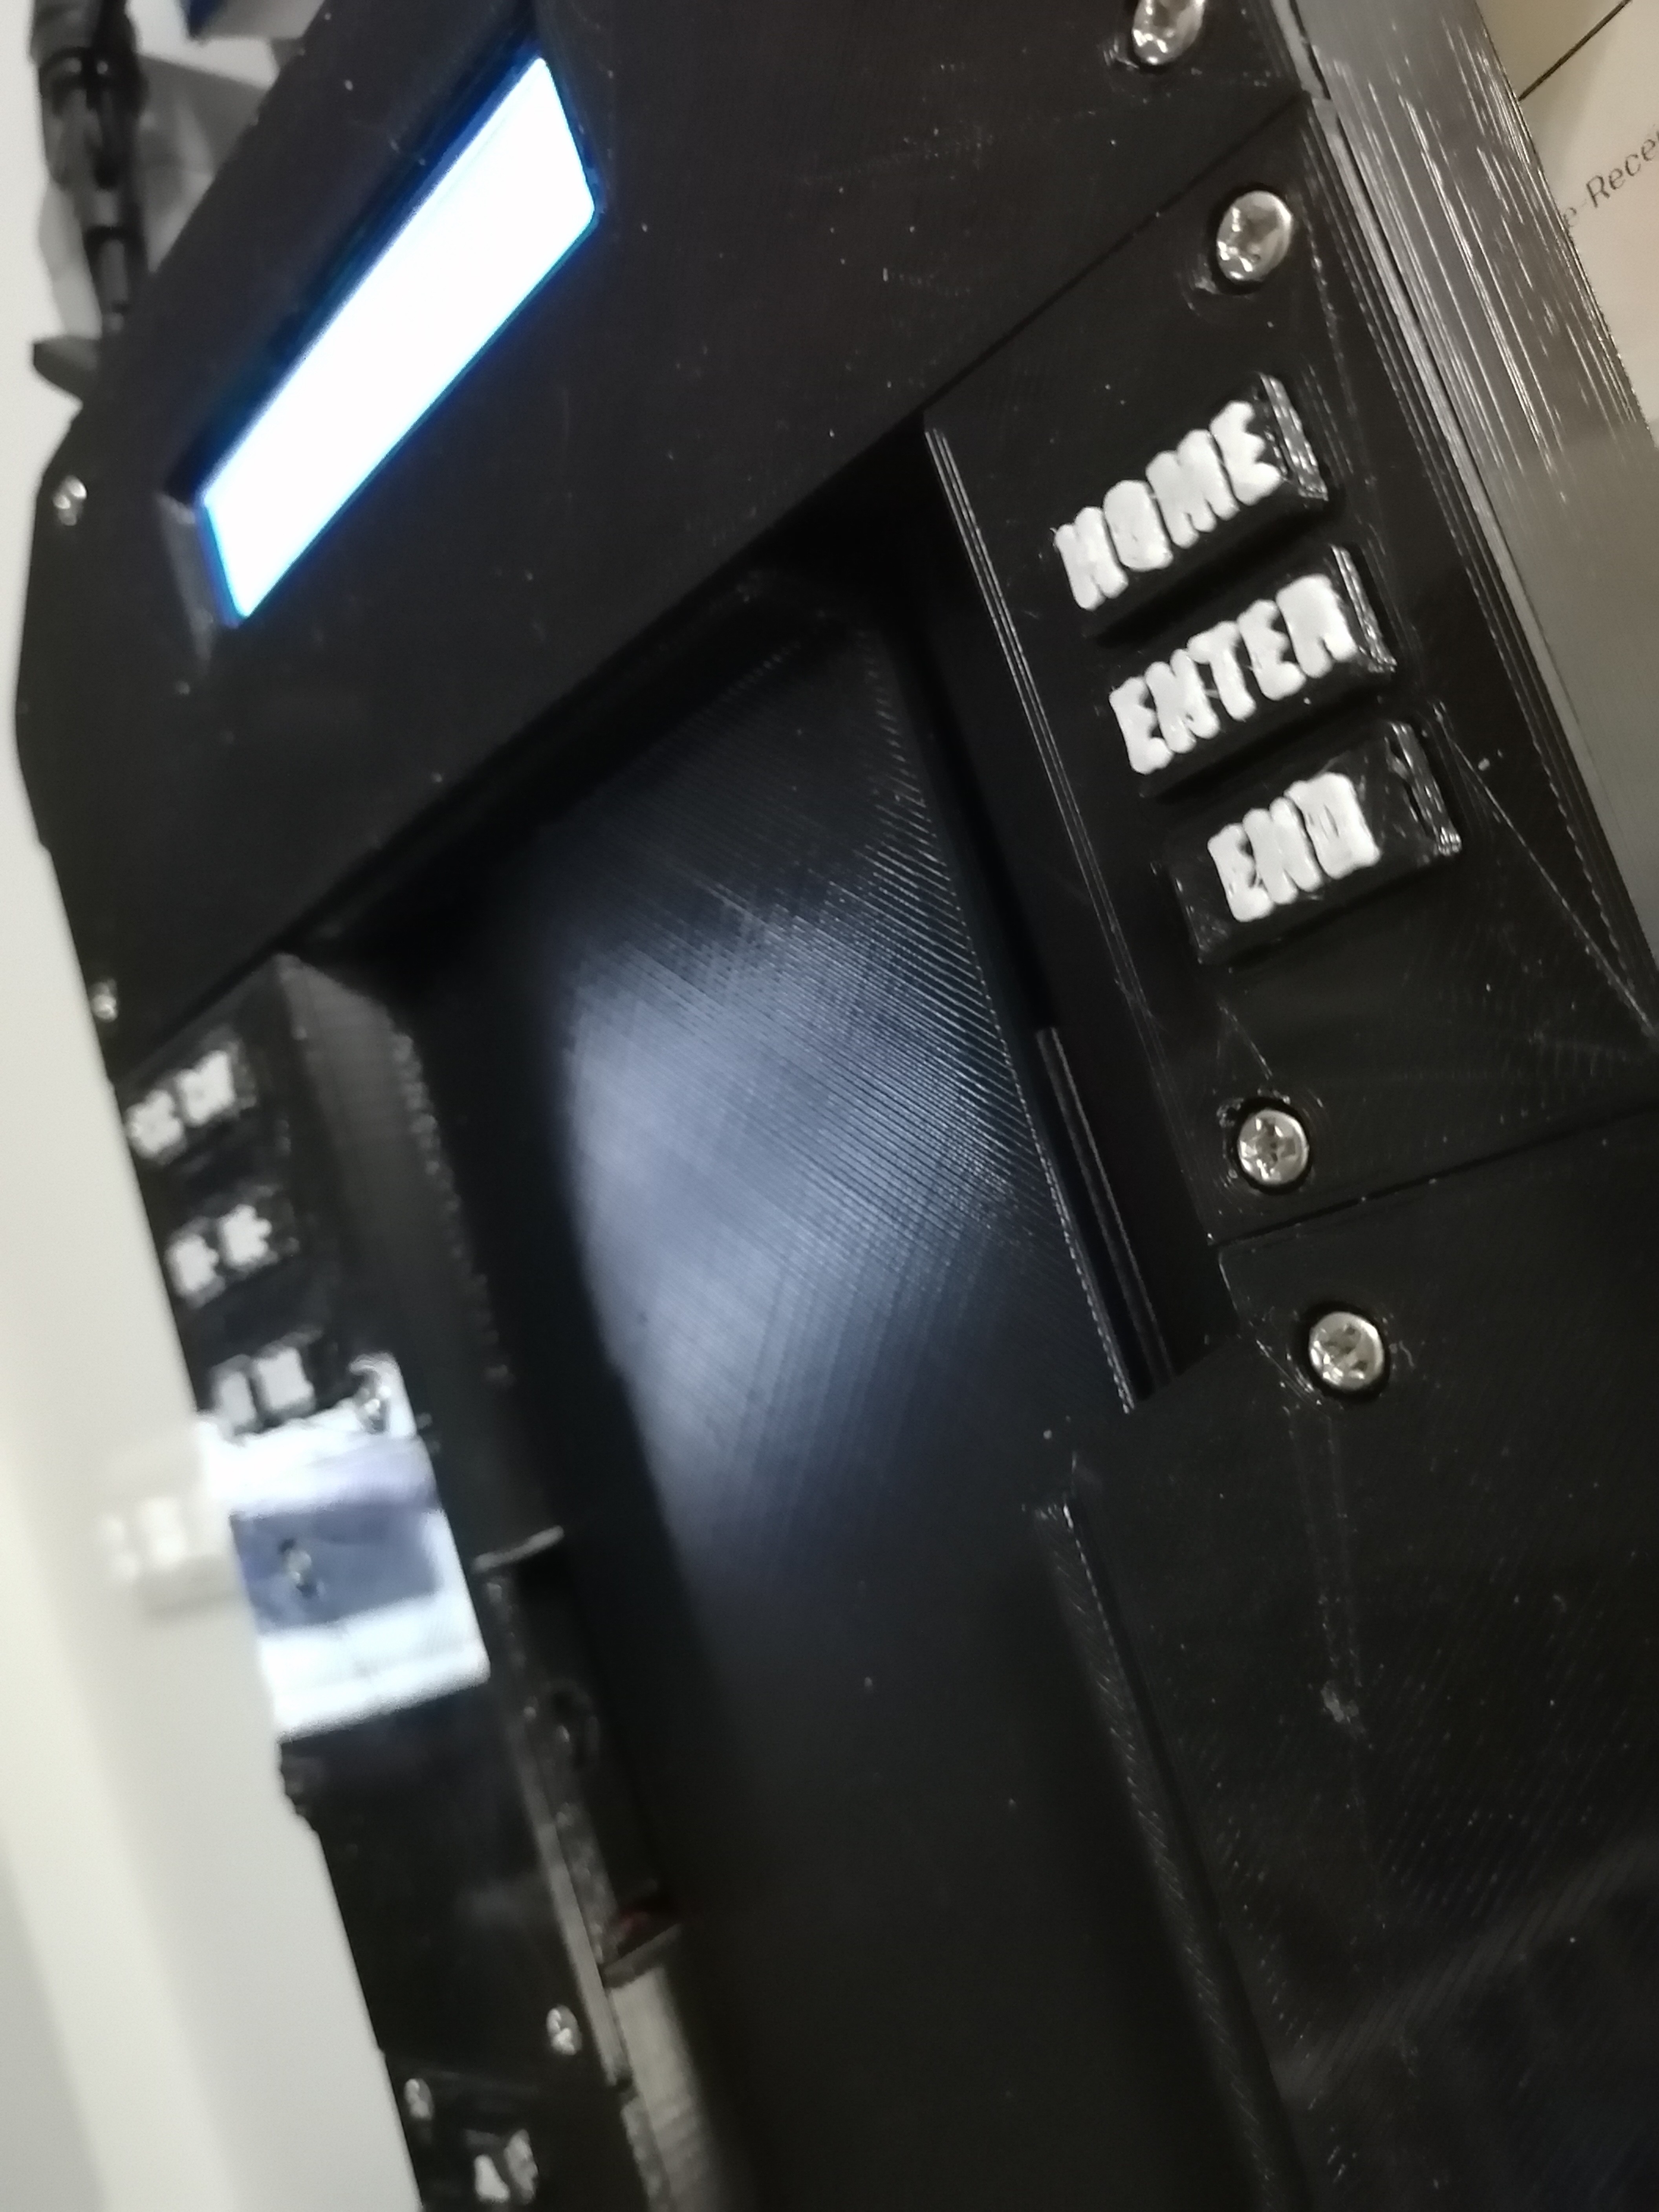
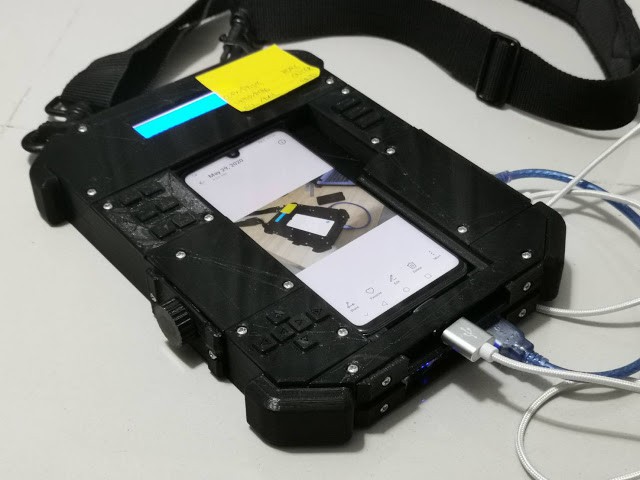
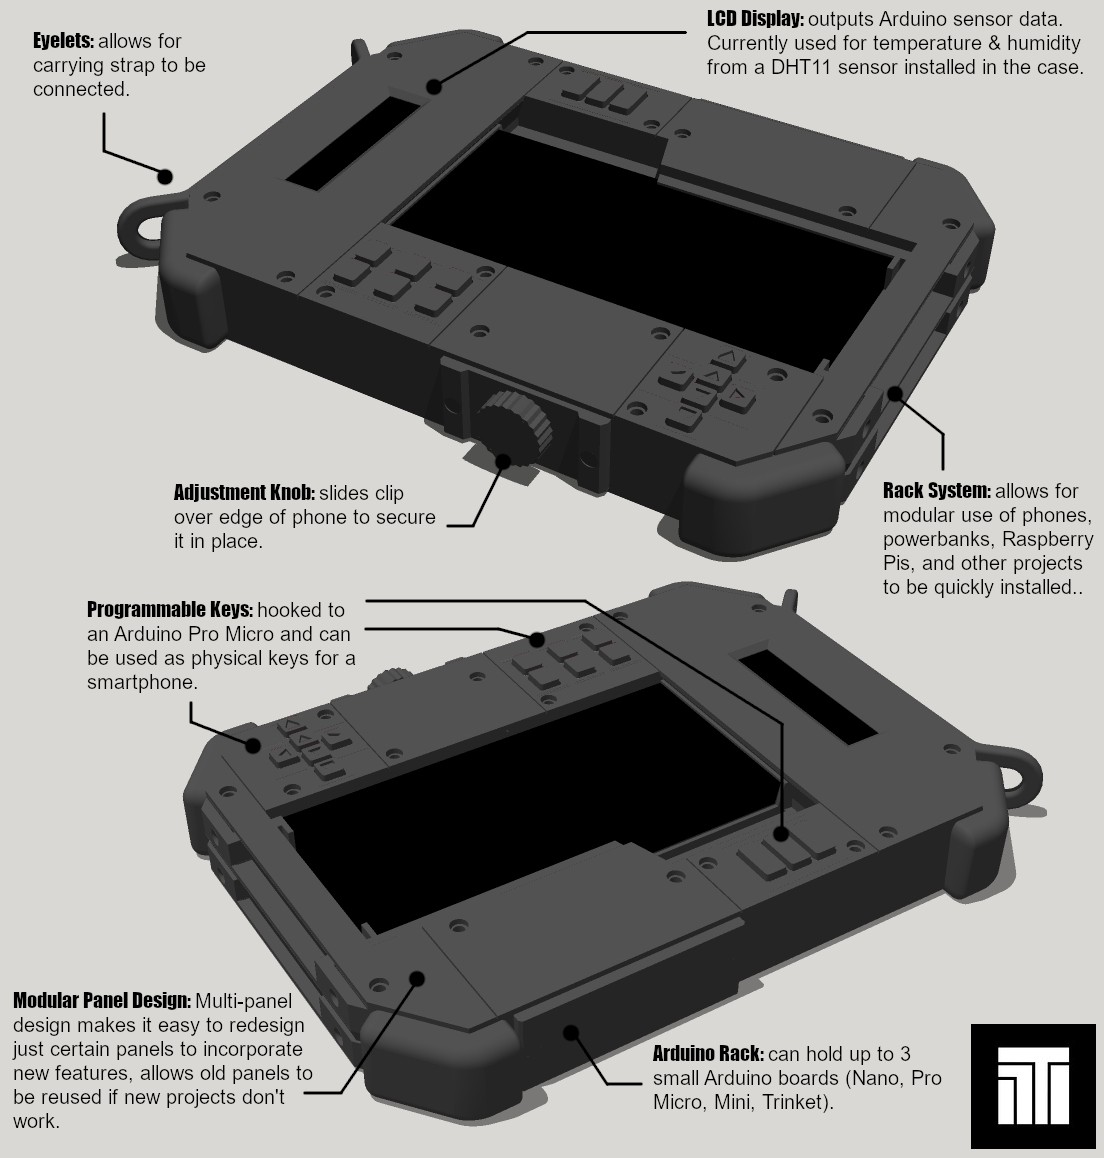
• DHT11 Sensor/LCD

    ProgressTH06/03/2020 at 02:05 0 comments

    June 3, 2020 | ProgressTH The DHT11 temperature/humidity sensor and an LCD display (and the powerbank powering them) was the original project that the cyberdeck was built around. 

    Driven by an Arduino Nano, the DHT11 sensor currently resides inside the LCD compartment through which the key wires run through on their way to the Arduino compartment where the DHT11 and LCD both hook up to the Nano as well. 

    What would be better and what will eventually be done is the DHT11 being given its own small probe housing and connect to the cyberdeck allowing the probe to be placed, say inside a 3D printing enclosure while the cyberdeck with the LCD display can be placed outside for easy reading. 

    Another idea being looked at is using a WiFi enabled NodeMCU to collect temperature and humidity data, uploading it up to ThingSpeak and being able to connect and display it on the cyberdeck via whatever smartphone or WiFi-enabled Pi is mounted on it at the time. 

    The code is pasted below for easy copying/pasting into your project if you wish.

    // include the library code:
    #include <Wire.h>
    #include <LiquidCrystal_I2C.h> // Using version 1.2.1
    
    // The LCD constructor - address shown is 0x27 - may or may not be correct for yours
    // Also based on YWRobot LCM1602 IIC V1
    LiquidCrystal_I2C lcd(0x27, 2, 1, 0, 4, 5, 6, 7, 3, POSITIVE);
    #include "DHT.h"
    
    // set the DHT Pin
    #define DHTPIN 8
    
    // initialize the library with the numbers of the interface pins
    #define DHTTYPE DHT11
    DHT dht(DHTPIN, DHTTYPE);
    
    void setup() {
      // set up the LCD's number of columns and rows:
      lcd.begin(16, 2);
      dht.begin();
    
      // Print a message to the LCD.
      lcd.print("Temp:  Humidity:");
    }
    
    void loop() {
      delay(500);
      // set the cursor to column 0, line 1
      // (note: line 1 is the second row, since counting begins with 0):
      lcd.setCursor(0, 1);
      // read humidity
      float h = dht.readHumidity();
      //read temperature in Fahrenheit
      float f = dht.readTemperature(false);
    
      if (isnan(h) || isnan(f)) {
        lcd.print("ERROR");
        return;
      }
    
      lcd.print(f);
      lcd.setCursor(7, 1);
      lcd.print(h);
    }

  • 2-Tone Keys

    ProgressTH06/01/2020 at 06:27 0 comments

    June 1, 2020 | ProgressTH Making the keys integrated into the main case standout a little more wasn't just an important aesthetic consideration, it also helps users figure out what the keys actually do! 

    To achieve this, the keys were re-designed in SketchUp 2017 (free version) and printed in black PLA (using a 0.3mm nozzle and 0.3mm layer resolution) up to 8.5mm where the lettering began. Then a quick filament change to white PLA was made to complete the keys. 

    The result is more-or-less legible key set with contrasting markings allowing me to remove the sticky note telling me what each key does.   

  • Initial Design

    ProgressTH05/30/2020 at 18:37 0 comments

    May 31, 2020 | ProgressTH What started out as a quick temperature sensor/display set up quickly escalated into a much larger project.

    I needed to display the temperature in different parts of the home office and ended up using a spare powerbank, Arduino, and DHT11 sensor to do it. I wanted to 3D print a permanent case for it but as I began designing it I decided to make it possible to include my phone and space for additional Arduino projects to be mounted to take advantage of the powerbank.

    Eventually what emerged was a very large phone case with a rack system that allows you to load phones, powerbanks, and in the future Raspberry Pi projects (and more) in a very modular design. The phone can be charged by the powerbank, the powerbank can run Arduino projects, and the phone itself can also power very simple Arduino projects like the temperature sensor/display.

    Right now the powerbank slides in at the bottom and another rack slides in above it that holds a smartphone. The racks can be redesigned easily and printed out to accommodate any project and just because two racks are used now doesn't mean that a future project couldn't use a larger single rack which is what I envision the Raspberry Pi would need if incorporated. 


    An older project, the Pro Micro-run mini-keyboard was incorporated into the case, meaning those keys you see actually work when you connect a mounted phone to the internal Arduino Pro Micro. It works the other way around too. You can connect the case buttons to any computer and use the shortcut keys (home/end/enter/etc.) or use that computer (if it has the Arduino IDE) to reprogram the keys.

    A WiFi-enabled Arduino board could also connect sensor data to the phone or Raspberry Pi directly or to the cloud and then displayed on the phone (and anywhere else with access) sort of like we did with our weather station a while ago.

    For now the case is a useful prototyping platform. It also is being used to display the temperature wherever it is hung up. It's future as a practical extension for smartphones or a suitable enclosure for a Raspberry Pi system remains to be seen.