 Sameera Chukkapalli
Face Mask Disinfection Device
UV-C / Heat, Arduino controlled, face-mask disinfecting device for Coronavirus (SARS-CoV-2)
This is an open source project shared under Creative Commons
“Attribution-NonCommercial-ShareAlike” CC BY-NC-SA
Disclaimer: This document falls under the "Good Samaritan Law".
Problem Statement
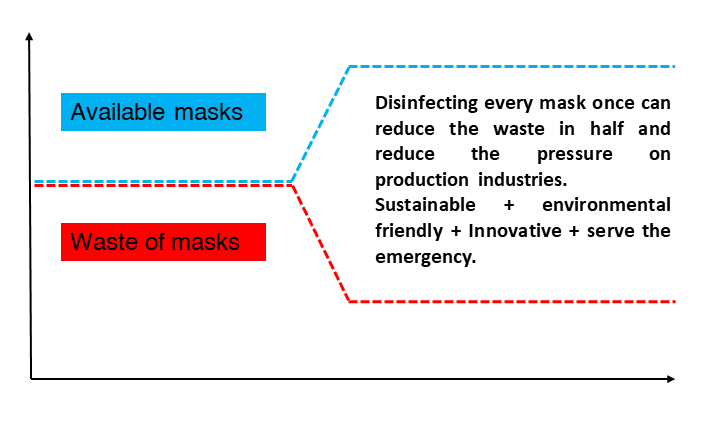
This device is a low budget and portable solution- that effectively uses UVGI and dry heat to disinfect face masks from SARS-CoV virions. The make of the device is simplified to enable easy production by people who have access to a maker space.
Version 1
•Dual protection: UV-C + dry heat
•Alarm: indicator for temperature differences.
•Affordable and easy to make.
Version 2
•Dry heat from infrared – cost effective and accessible to all.
•Can disinfected face shields as well.
•Can choose the combinations b/w UVC and Dry heat – or just one of them.
•Can accommodate more masks.
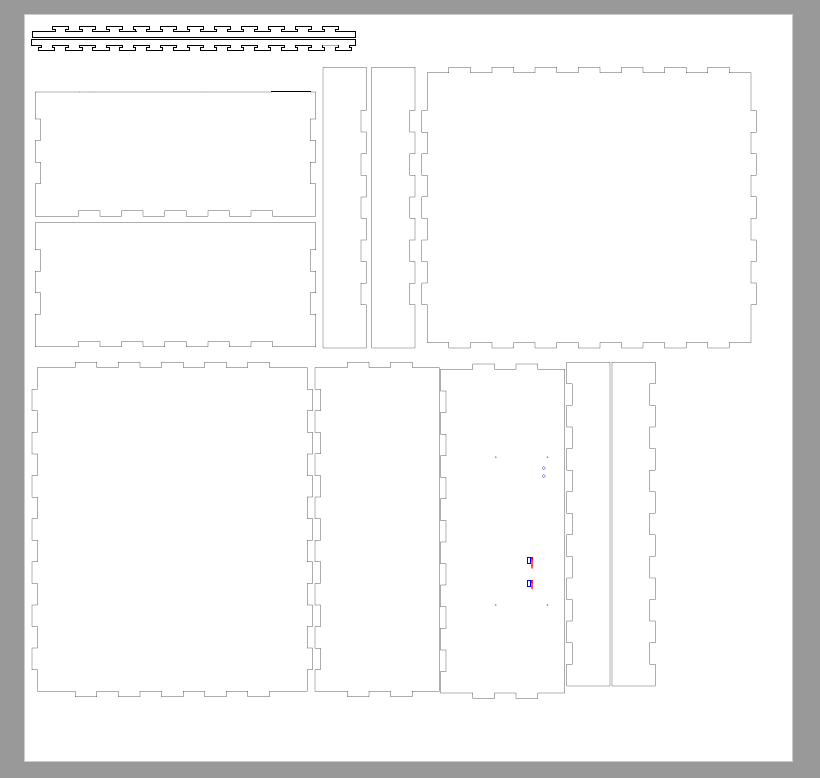
•Opensource – downloadable CNC, laser design files.
Published on:
- https://create.arduino.cc/projecthub/needlab/face-masks-disinfection-device-needlab-3ed2f5
- https://project.seeedstudio.com/needlab/face-masks-disinfection-device-needlab-3ed2f5
- https://www.seeedstudio.com/blog/2020/04/14/covid-19-series-face-mask-disinfection-device-using-uv-c-and-dry-heat-by-team-needlab
- https://www.hackster.io/needlab/face-masks-disinfection-device-needlab-3ed2f5
- https://makezine.com/2020/03/27/make-these-projects-to-fight-covid-19-right-now/
- https://makeprojects.com/project/face-masks-disinfection-device
- https://projetsdiy.fr/covid-19-makers-fablabs-repertoire-projets-lutter-coronavirus/#Sterilisation_UV
- https://www.makery.info/2020/04/10/covid-19-vers-une-solution-diy-de-desinfection-des-masques-ffp2/
- https://www.elektormagazine.com/labs/uv-c-heat-arduino-controlled-face-mask-disinfecting-device-for-coronavi
- https://www.open-electronics.org/guest_projects/face-masks-disinfection-device-needlab/
Github: Files to make the V2 of the Face mask disinfection device.
https://github.com/NeedLab/face-mask-disinfection-device
This publication explains in detail the method to build both V1 and V2 of the Face Mask disinfection device.


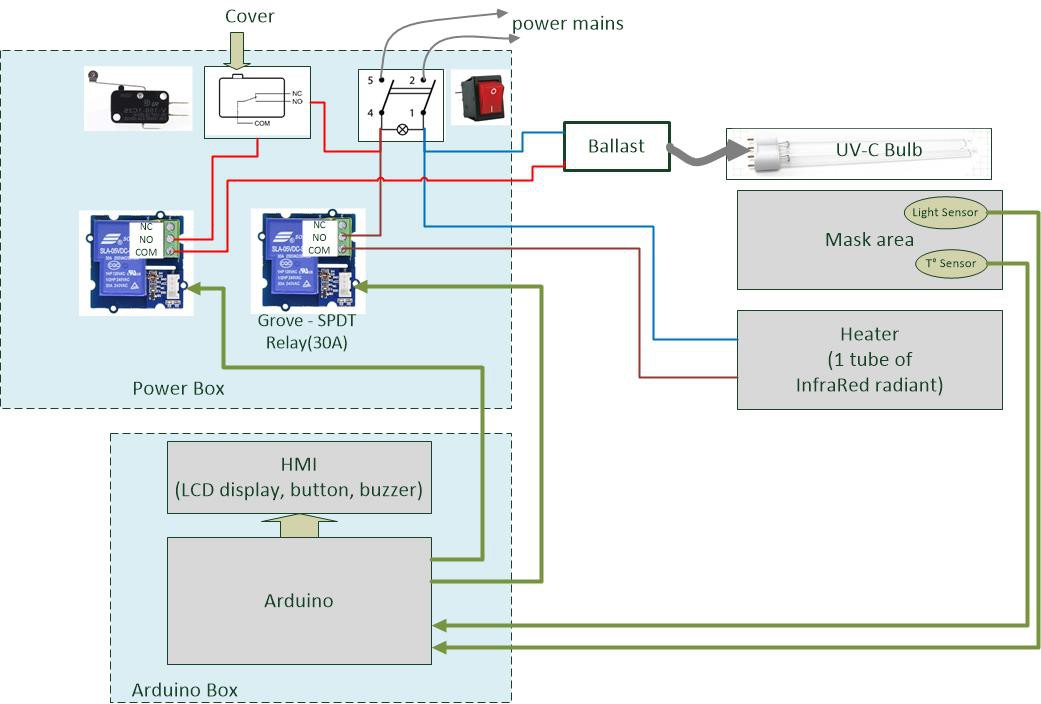
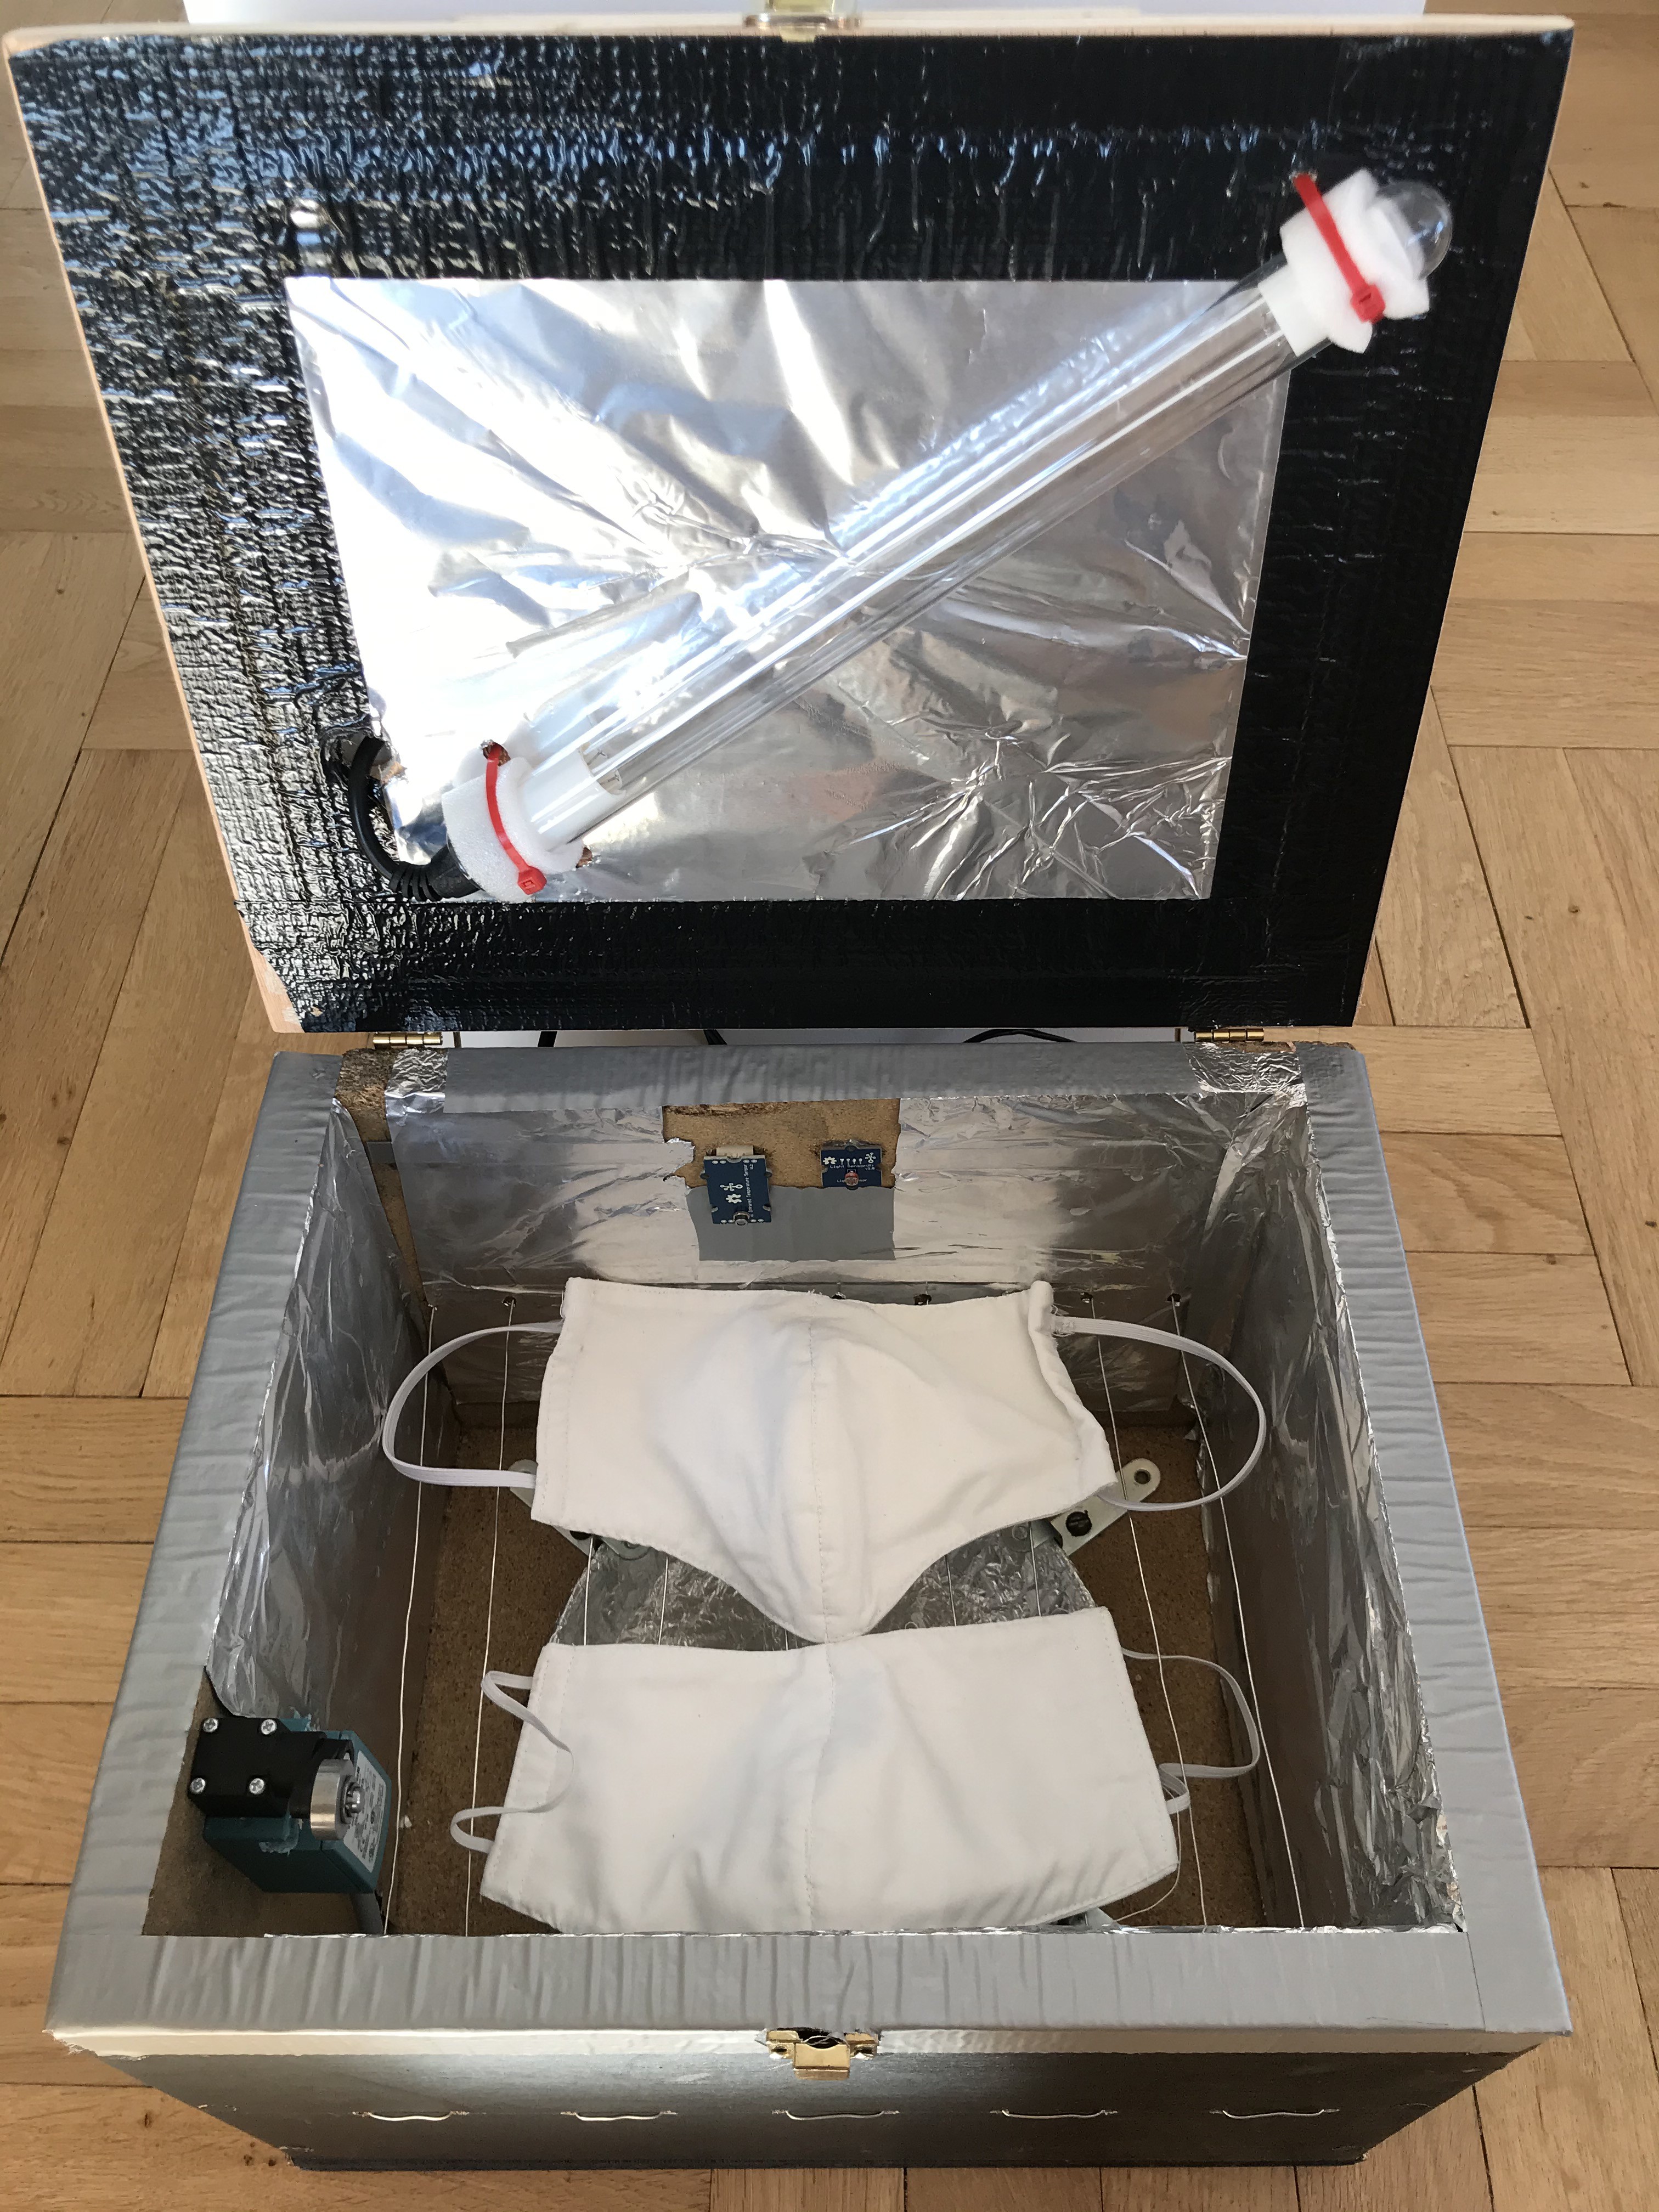
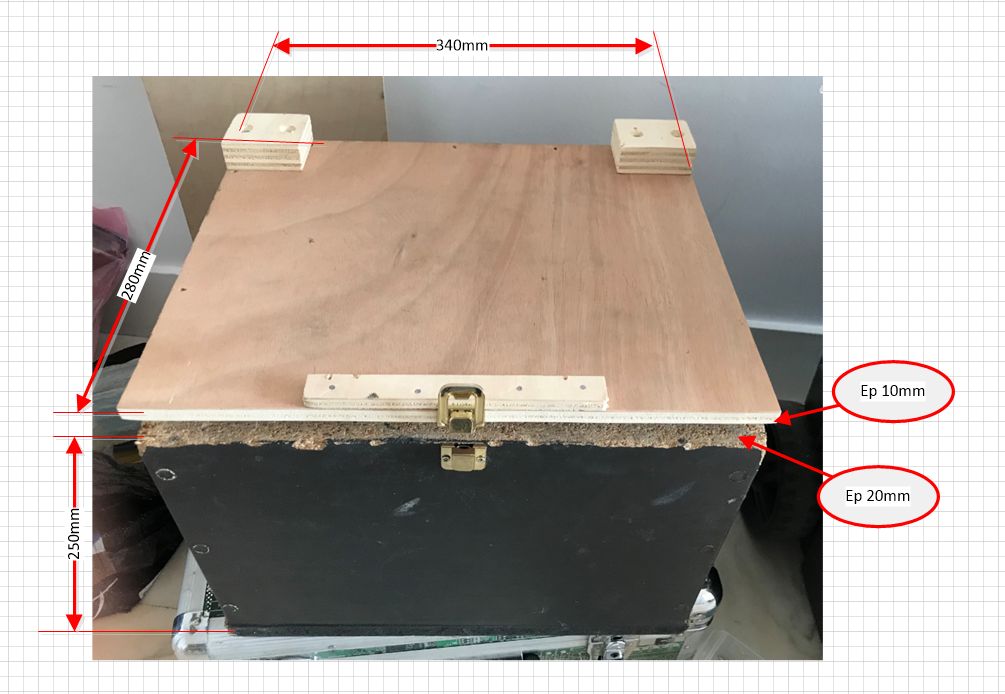
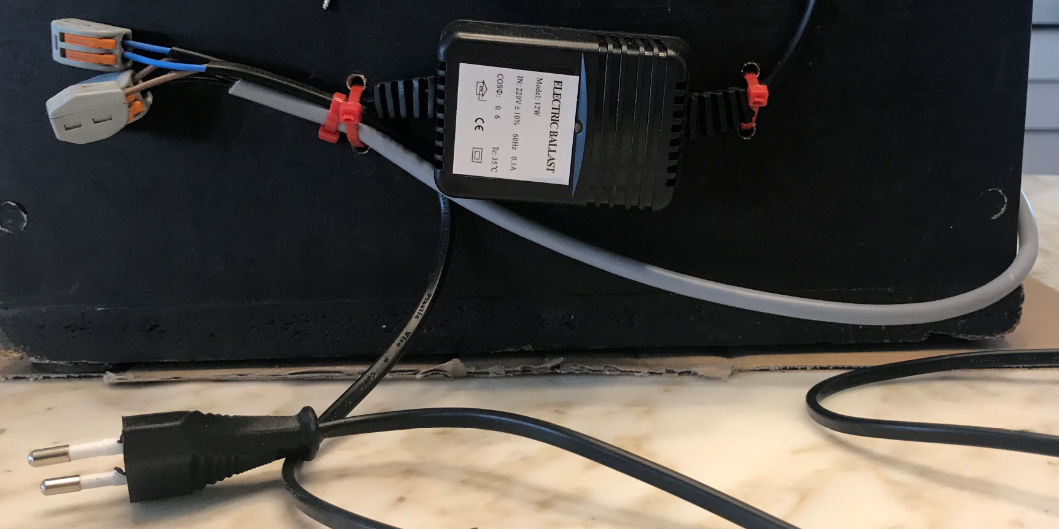
 Internal view of the electronics and electricals fit into the wooden box. On the right side compartment is the electronics and on the left side compartment is the electricals of the device.
  Back of the control board, Use Hot glue to keep the board in place.
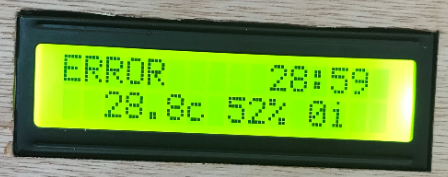
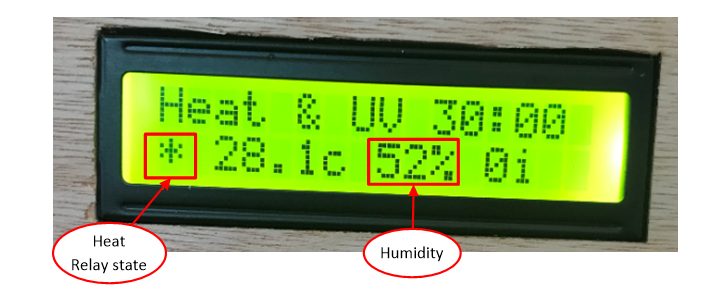
  Front view of the electronics box - which displays the temperature and humidity.
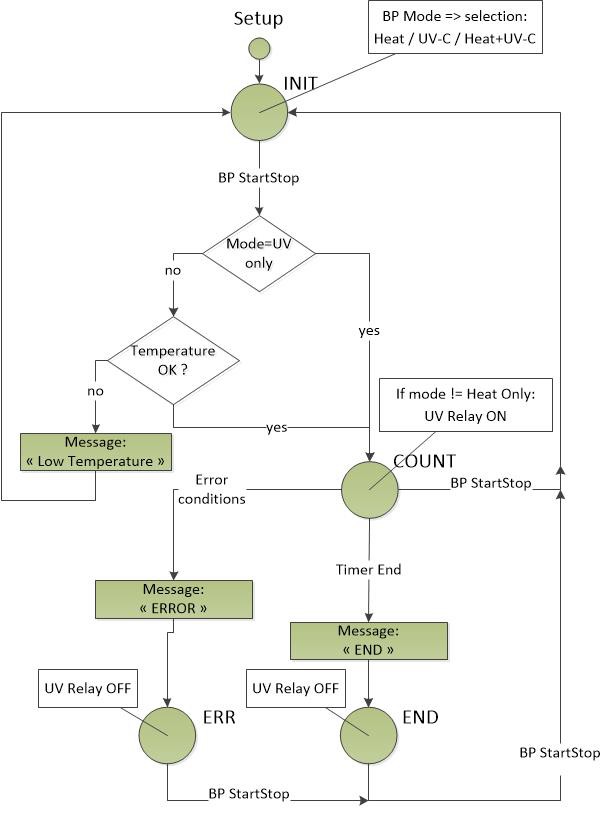
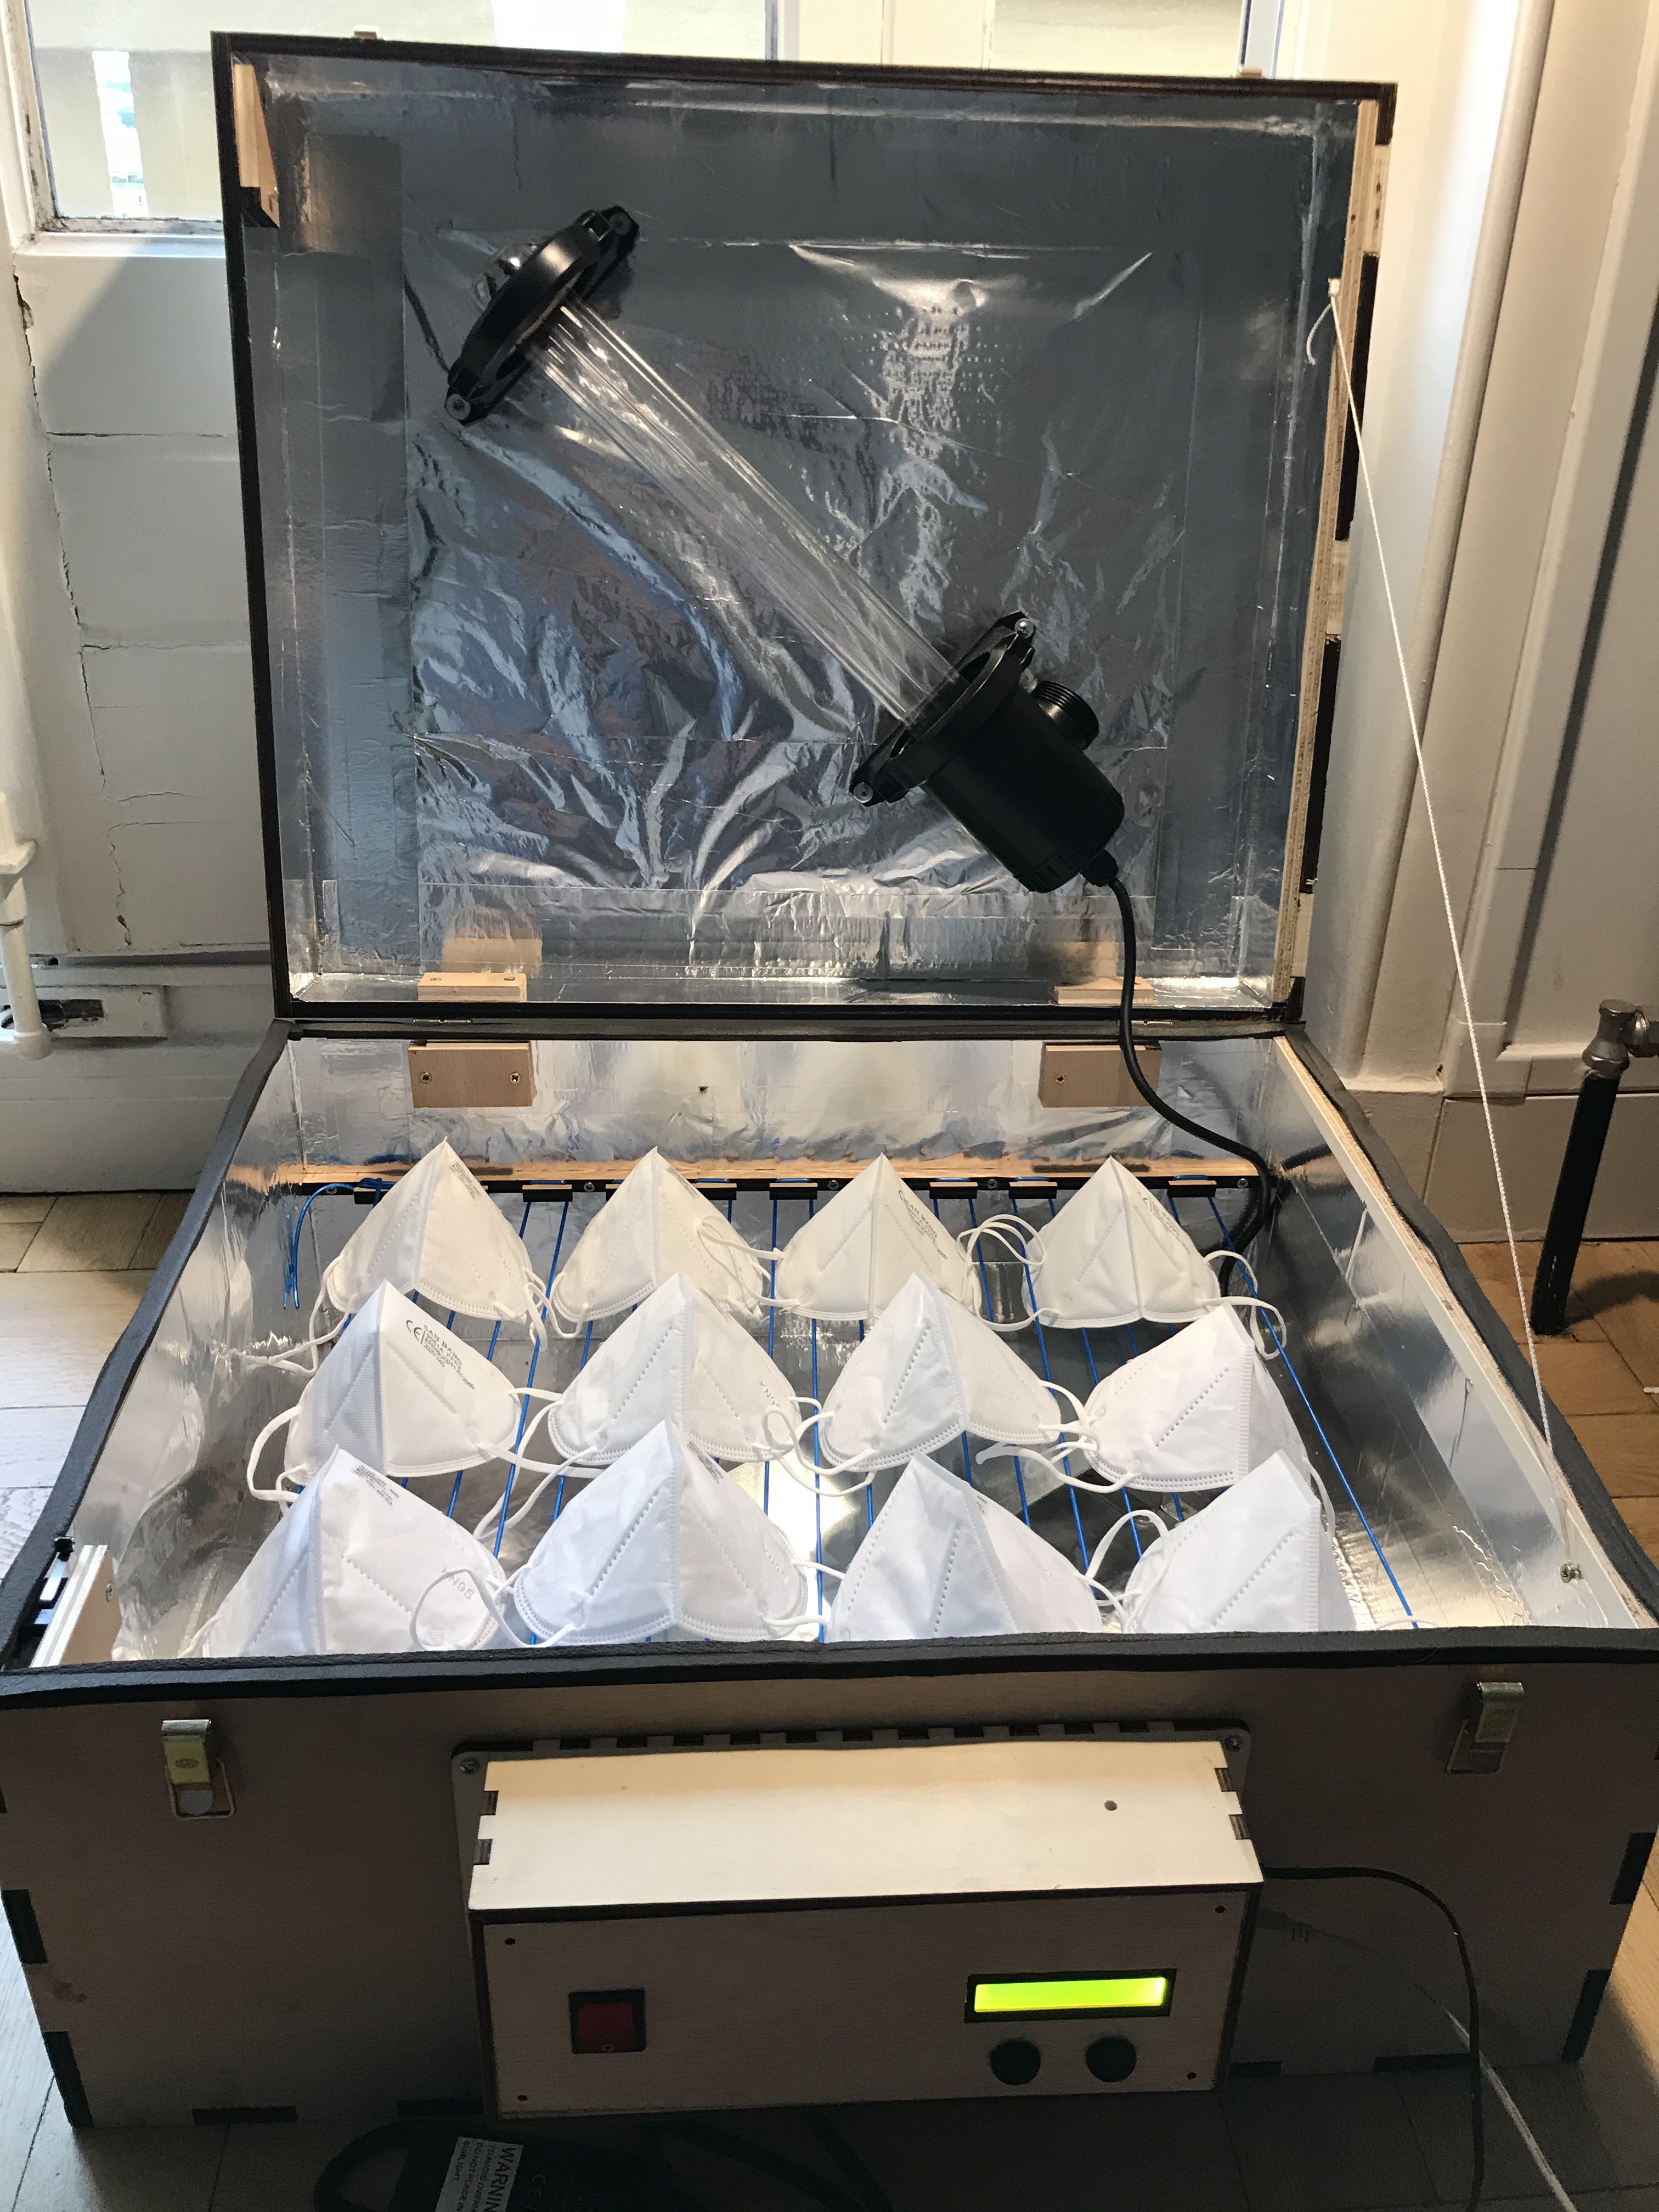
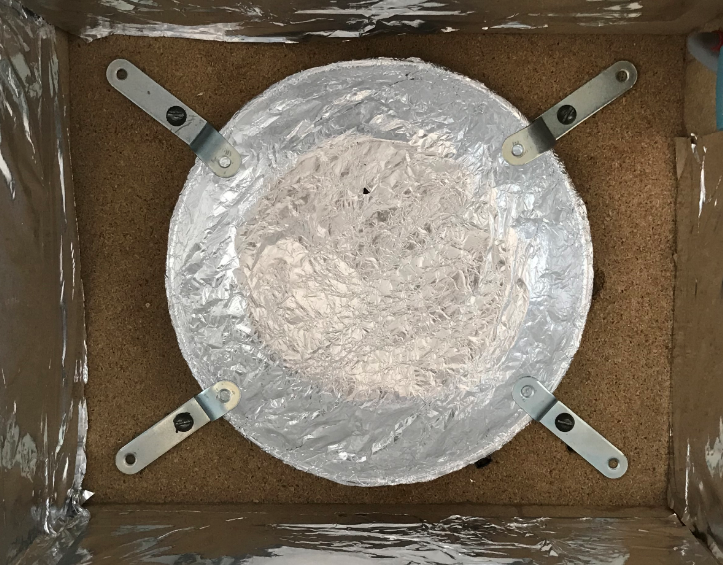
 Use of standard brackets to keep the infrared in place.
 Placement and positioning of the infrared heater.
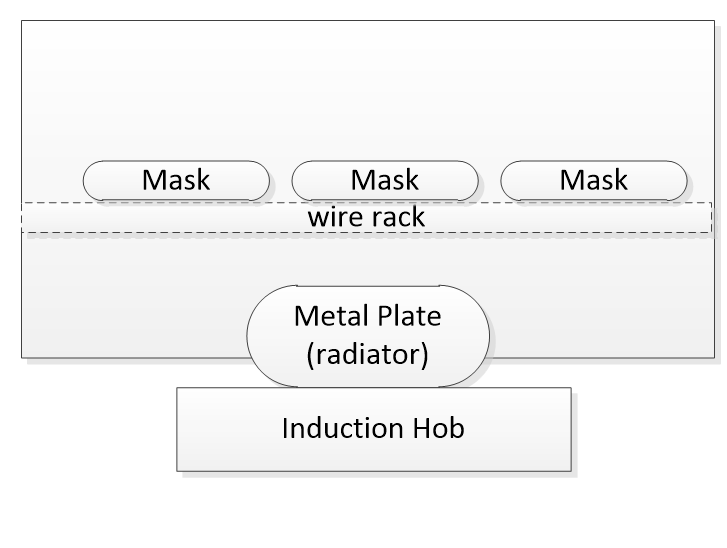
  Use of the metal plate on top of the infrared heater in order to radiate heat into the air
  Top view of the infrared heater with the metal plate and the insulated cables.
 Weaving of the cables. Equidistant and uniform with the help of the Laser cut holders on both sides of the box.
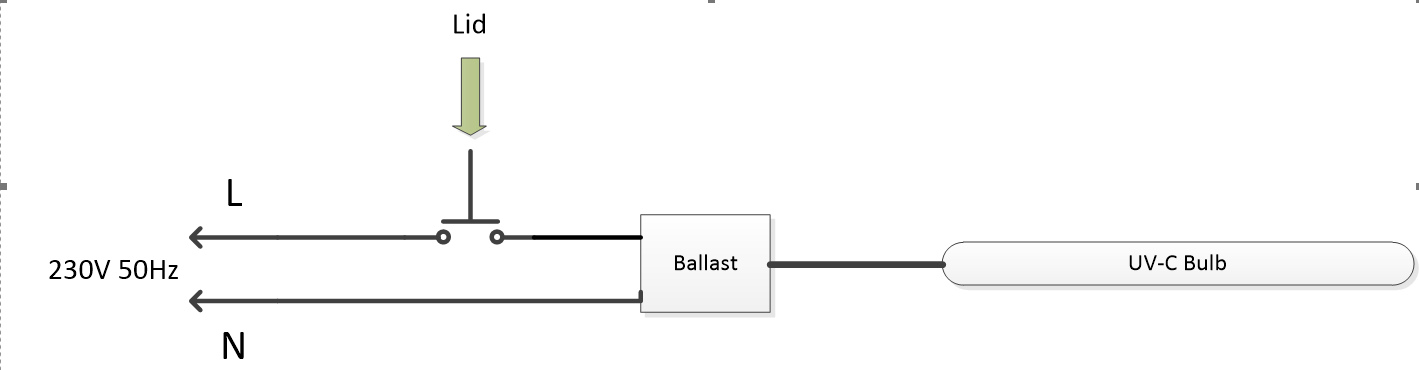
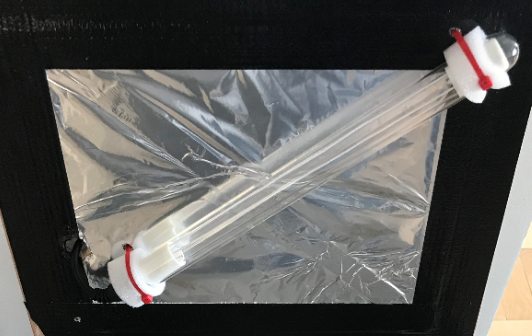
 Fix the UV-C light on the other side of the box.
 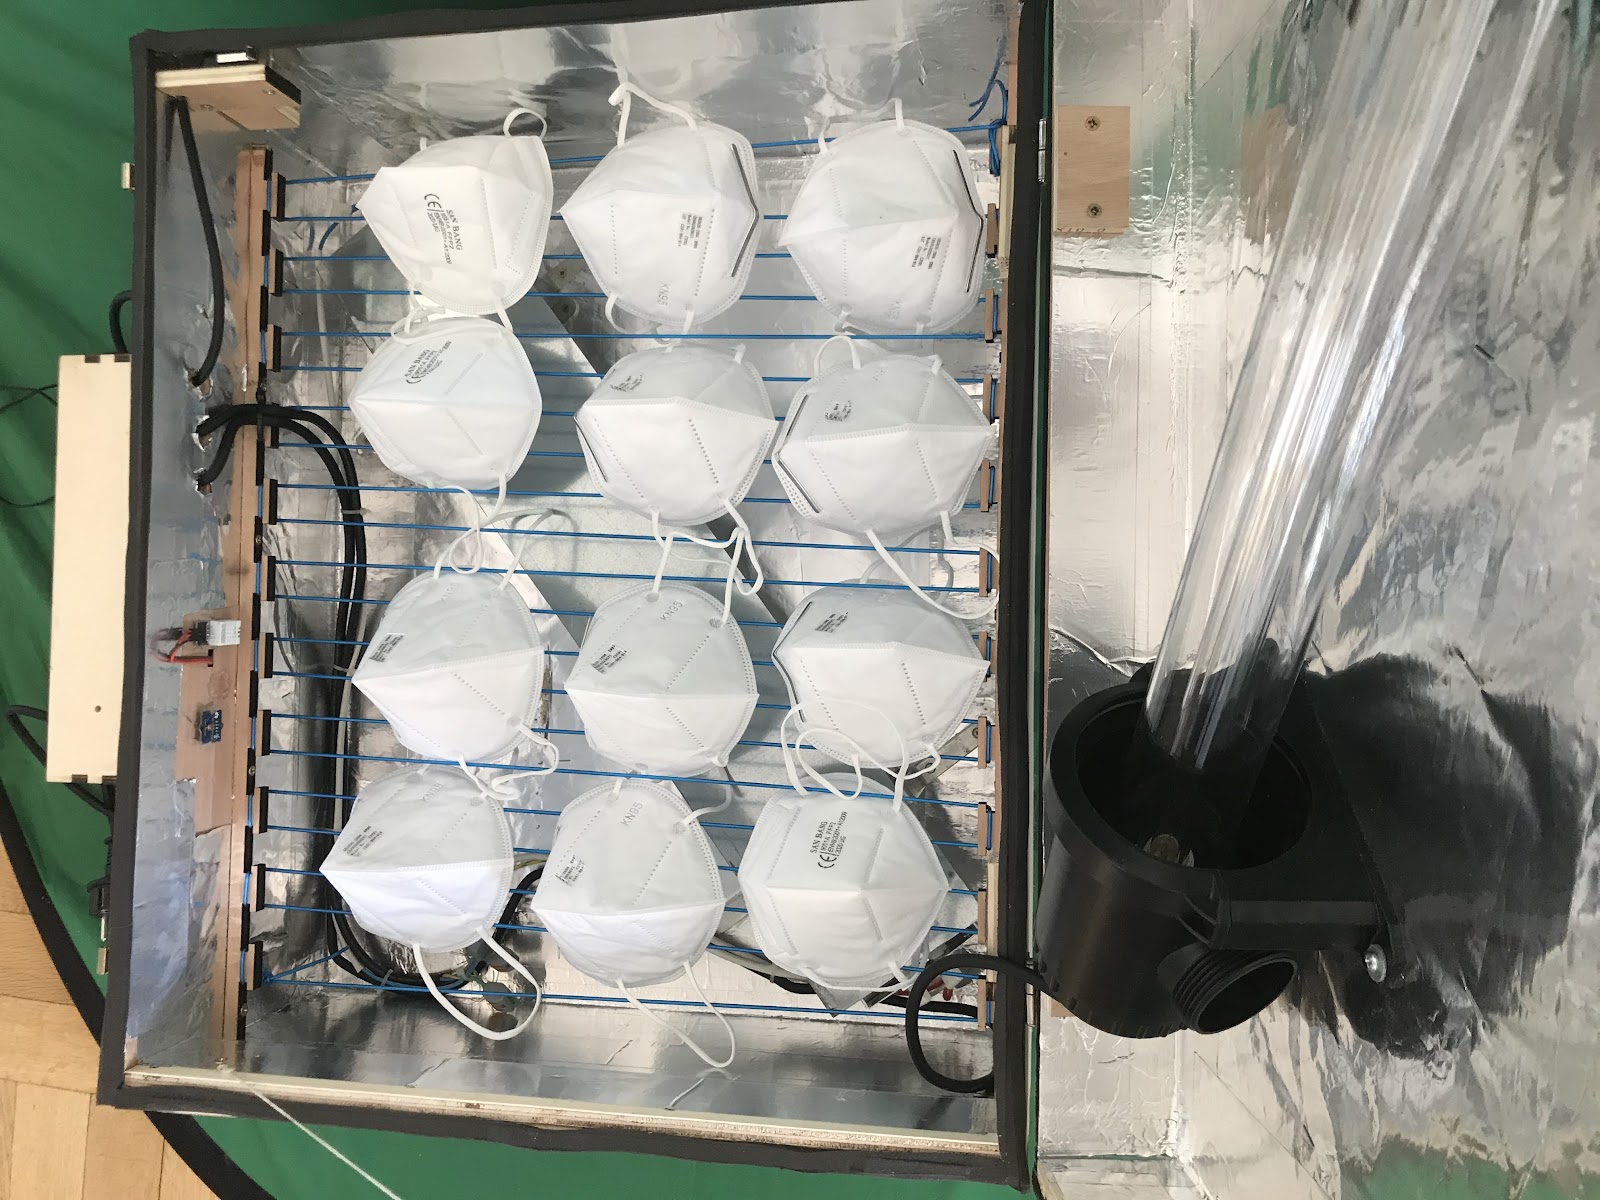 Place the masks in the rack.


 A small lock was used to ensure the closer of the cover.


 mcThings
 Jay Phantom
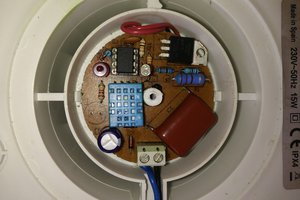
 João Assunção
 Anteneh Gashaw