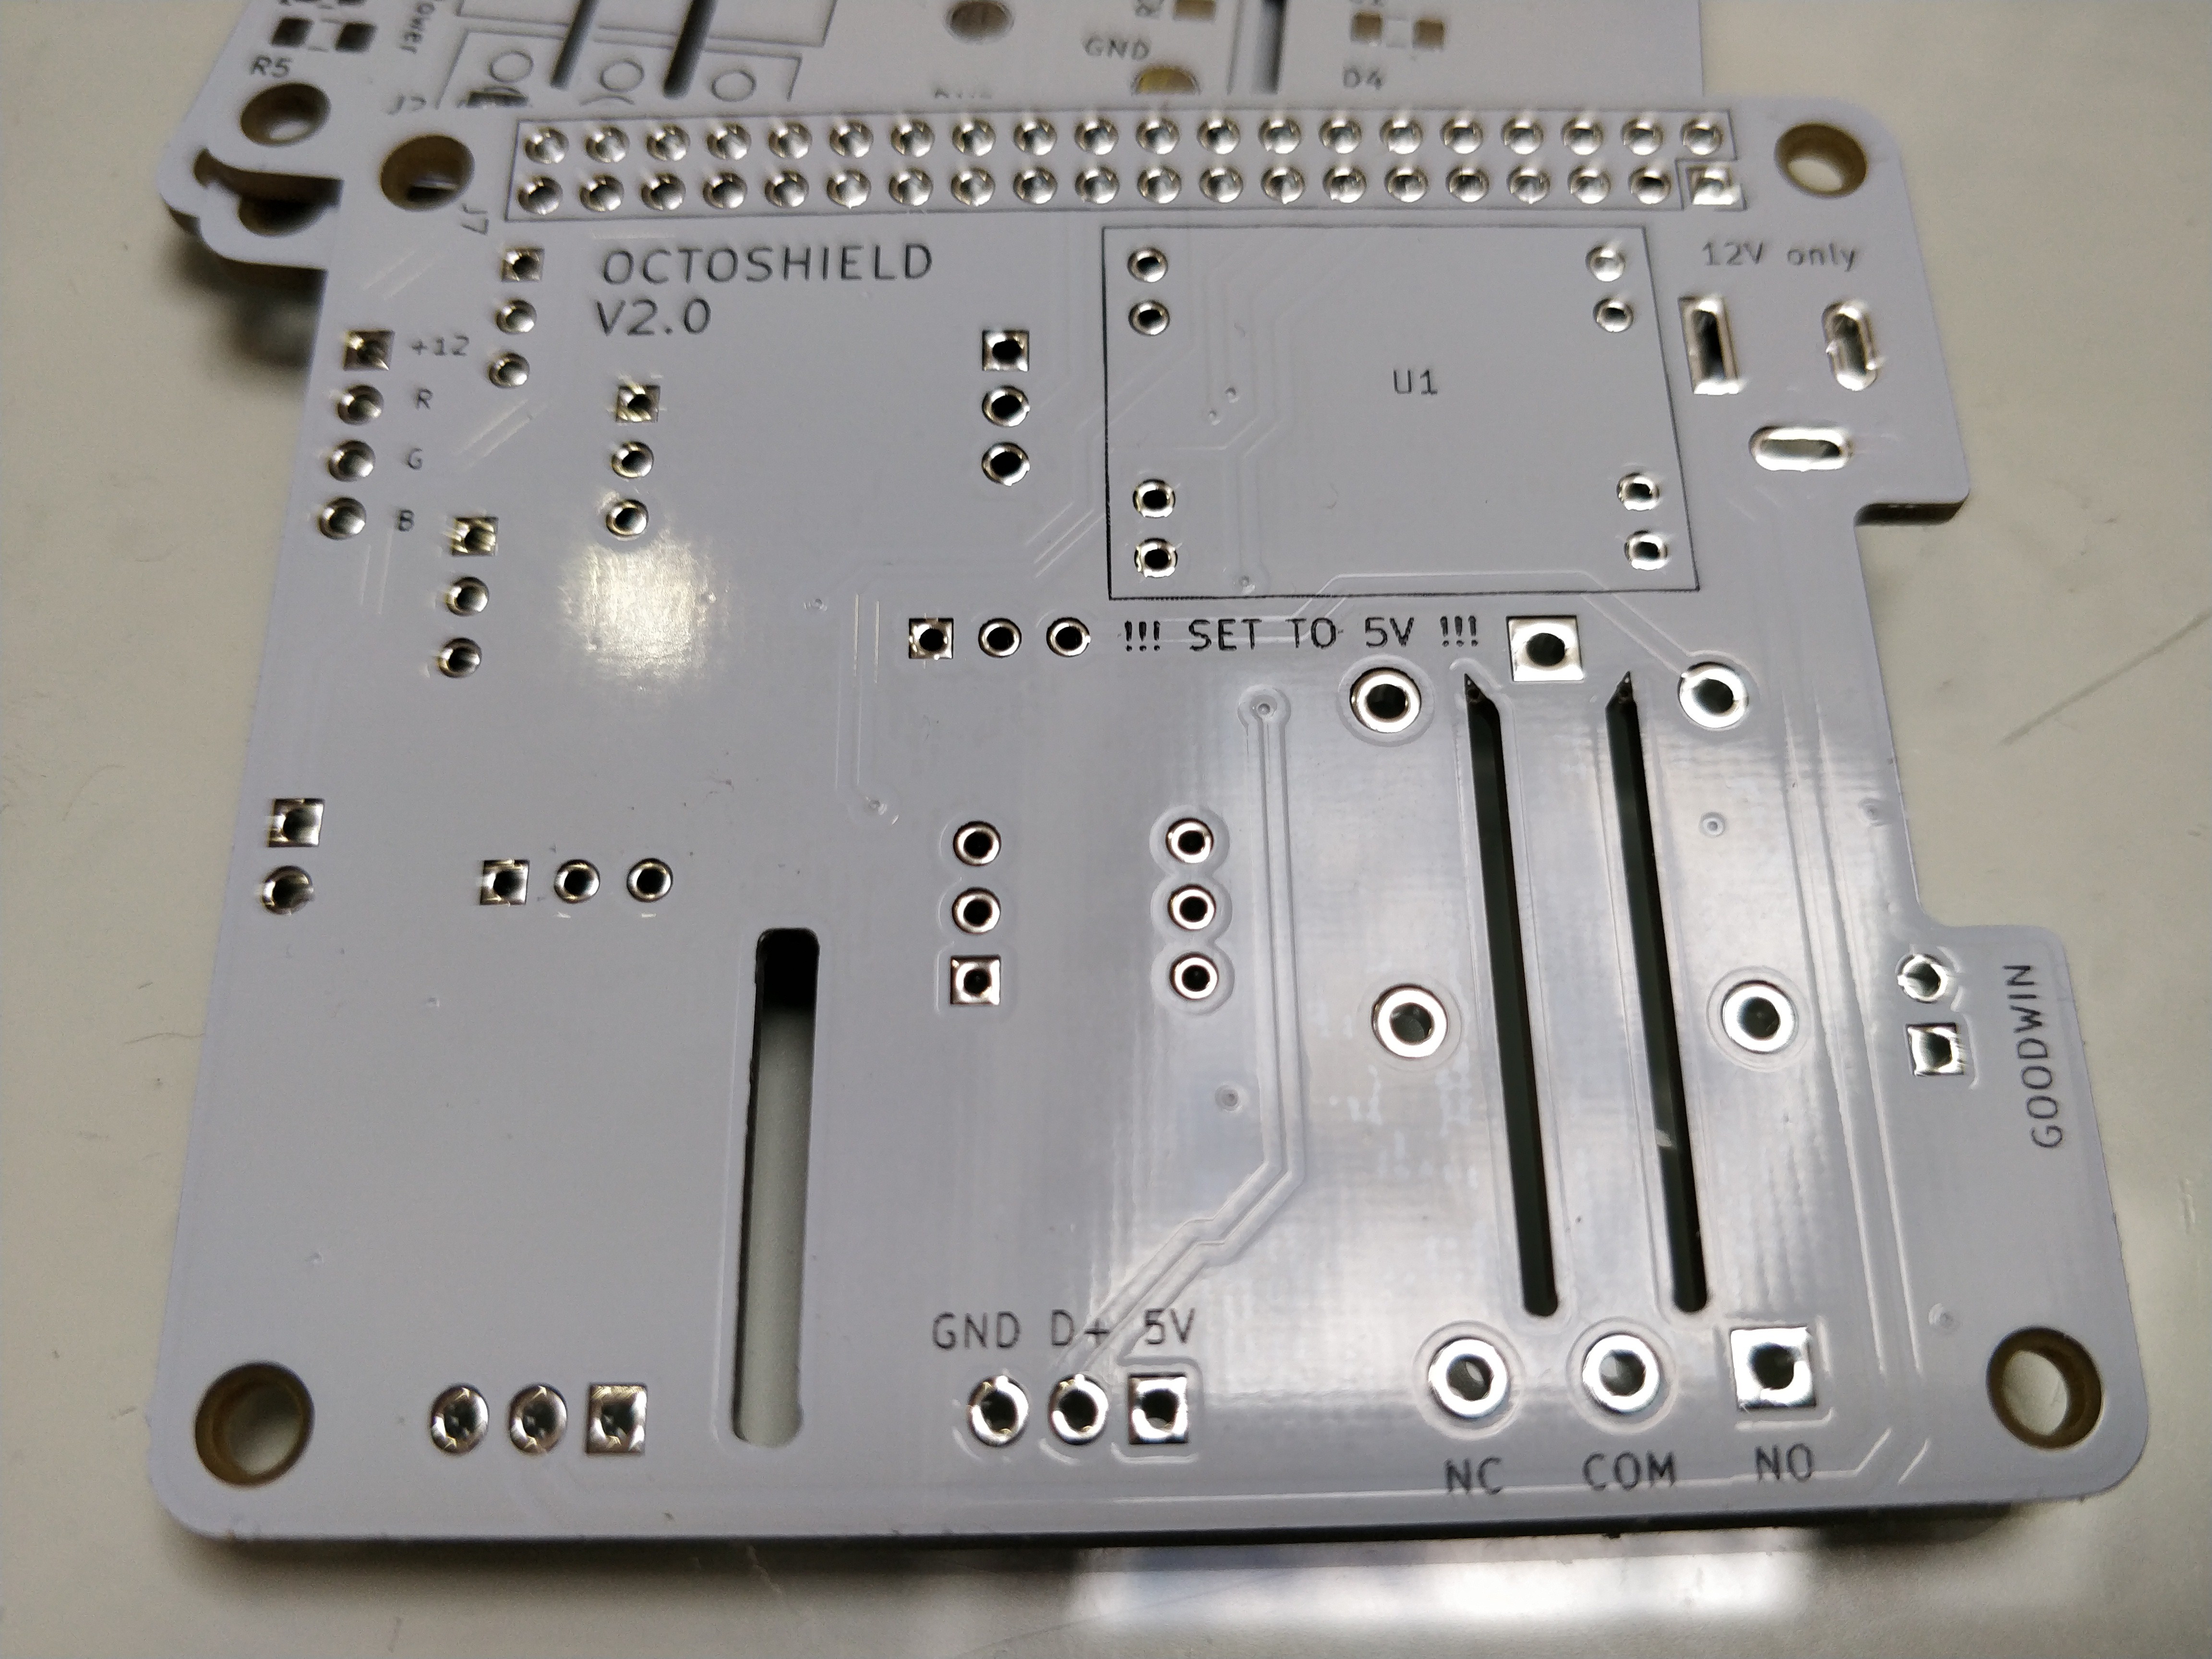
Close
0%
0%

Octoshield

Octoshield is a Raspberry Pi shield to help with 3D printing and Octoprint.

Similar projects worth following
Octoshield is a Raspberry Pi shield to help with 3D printing and adding features to Octoprint.

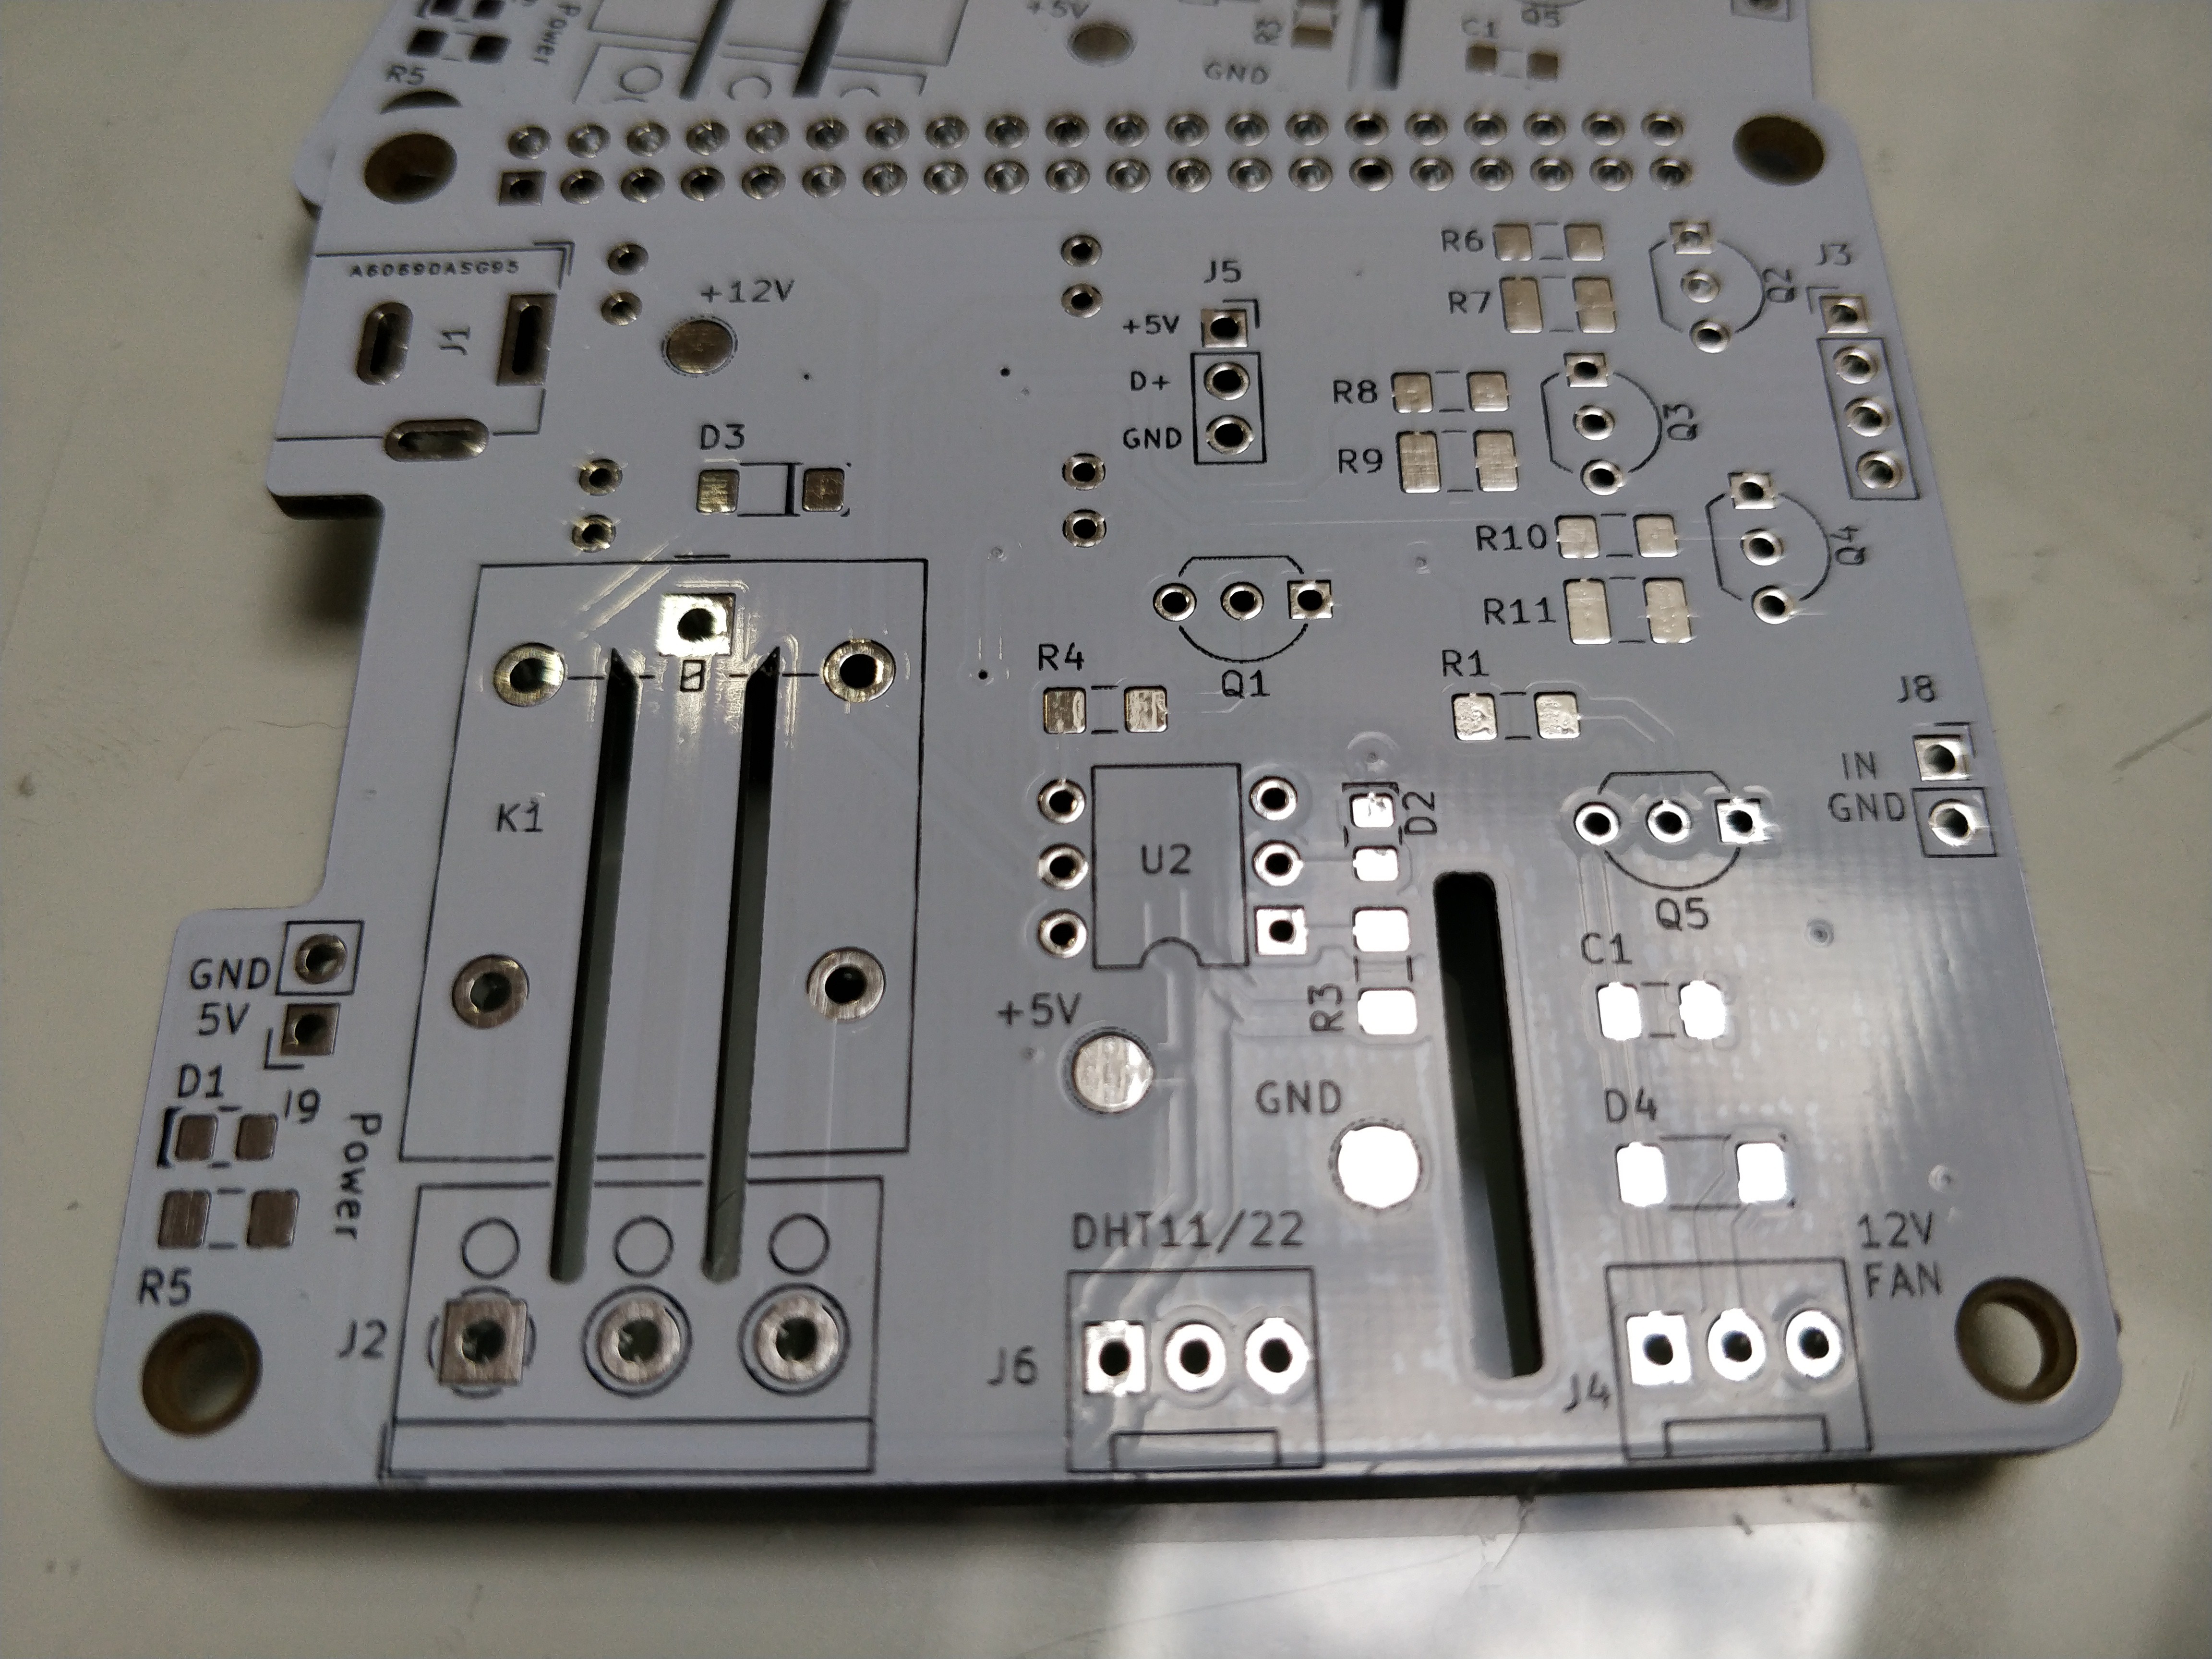
This project is made to help using the Enclosure plugin available for Octoprint by providing a simple interface to connect RGB LEDs, fan, input switch, temperature sensor and more.

The Octoshield also include a buck regulator to power a Raspberry Pi with a 12v supply.

Be careful to set it to 5v before connecting ANYTHING !

Here is the Enclosure plugin : https://plugins.octoprint.org/plugins/enclosure/

The plugin is realy easy to use and allow you to configure inputs and outputs using the GPIO pins. 


Here is the pinout used :

RaspberryDirectionFonction
GPIO_4
InputData line for DHT11/22 
GPIO_5InputButton input (ON/OFF)
GPIO_9OutputNeopixel data line
GPIO_17OutputRed channel (PWM)
GPIO_18OutputRelay command pin (ON/OFF)
GPIO_22OutputBlue channel (PWM)
GPIO_23Output12v fan command pin (PWM)
GPIO_27OutputGreen channel (PWM)

components list example.xls

Componants list from Mouser

ms-excel - 113.00 kB - 06/05/2020 at 20:31

Download

octoshield v2.0.zip

Kicad project

x-zip-compressed - 229.29 kB - 06/05/2020 at 19:01

Download

gerber.zip

Gerber files for manufacturing

x-zip-compressed - 145.48 kB - 06/05/2020 at 18:58

Download

  • 1 × Capacitor SMD 1206 4.7µF capacitor
  • 3 × 220Ω Resistor SMD 1206 220Ω resistor
  • 1 × 12V DC Jack BarrelJack_Wuerth_6941xx301002
  • 2 × 3 pins fan header FanPinHeader_1x03_P2.54mm
  • 1 × 4 pins header PinHeader_1x04_P2.54mm

View all 18 components

  • 1
    Build Instructions

    The board is using a mix of SMD and THT components but everything can be solder with a simple soldering iron, starting with all the SMDs before the through hole components on the top face and then the bottom face.

  • 2
    Plugin configuration

    The board was design to be used with the Enclosure plugin, of course you should start by installing it.

    Configuration is done by going into Settings/Enclosure Plugin, here you can configure inputs and outputs as you want.

    Output config
    Input configuration

View all instructions

Enjoy this project?

Share

Discussions

Similar Projects

Does this project spark your interest?

Become a member to follow this project and never miss any updates