 Fabian
As already teased, I was not 100% happy with "Mark2" of the WinDIY Wing. It was heavier than the first design, and there was no possibility to easily replace the wing and, if necessary, to repair it.
Generally, at WinDIY I try to keep all parts as modular as possible. In my opinion, this has the advantage that defective parts can be quickly replaced or repaired.
Additionally, parts can be improved step by step without having to completely redesign all other parts.
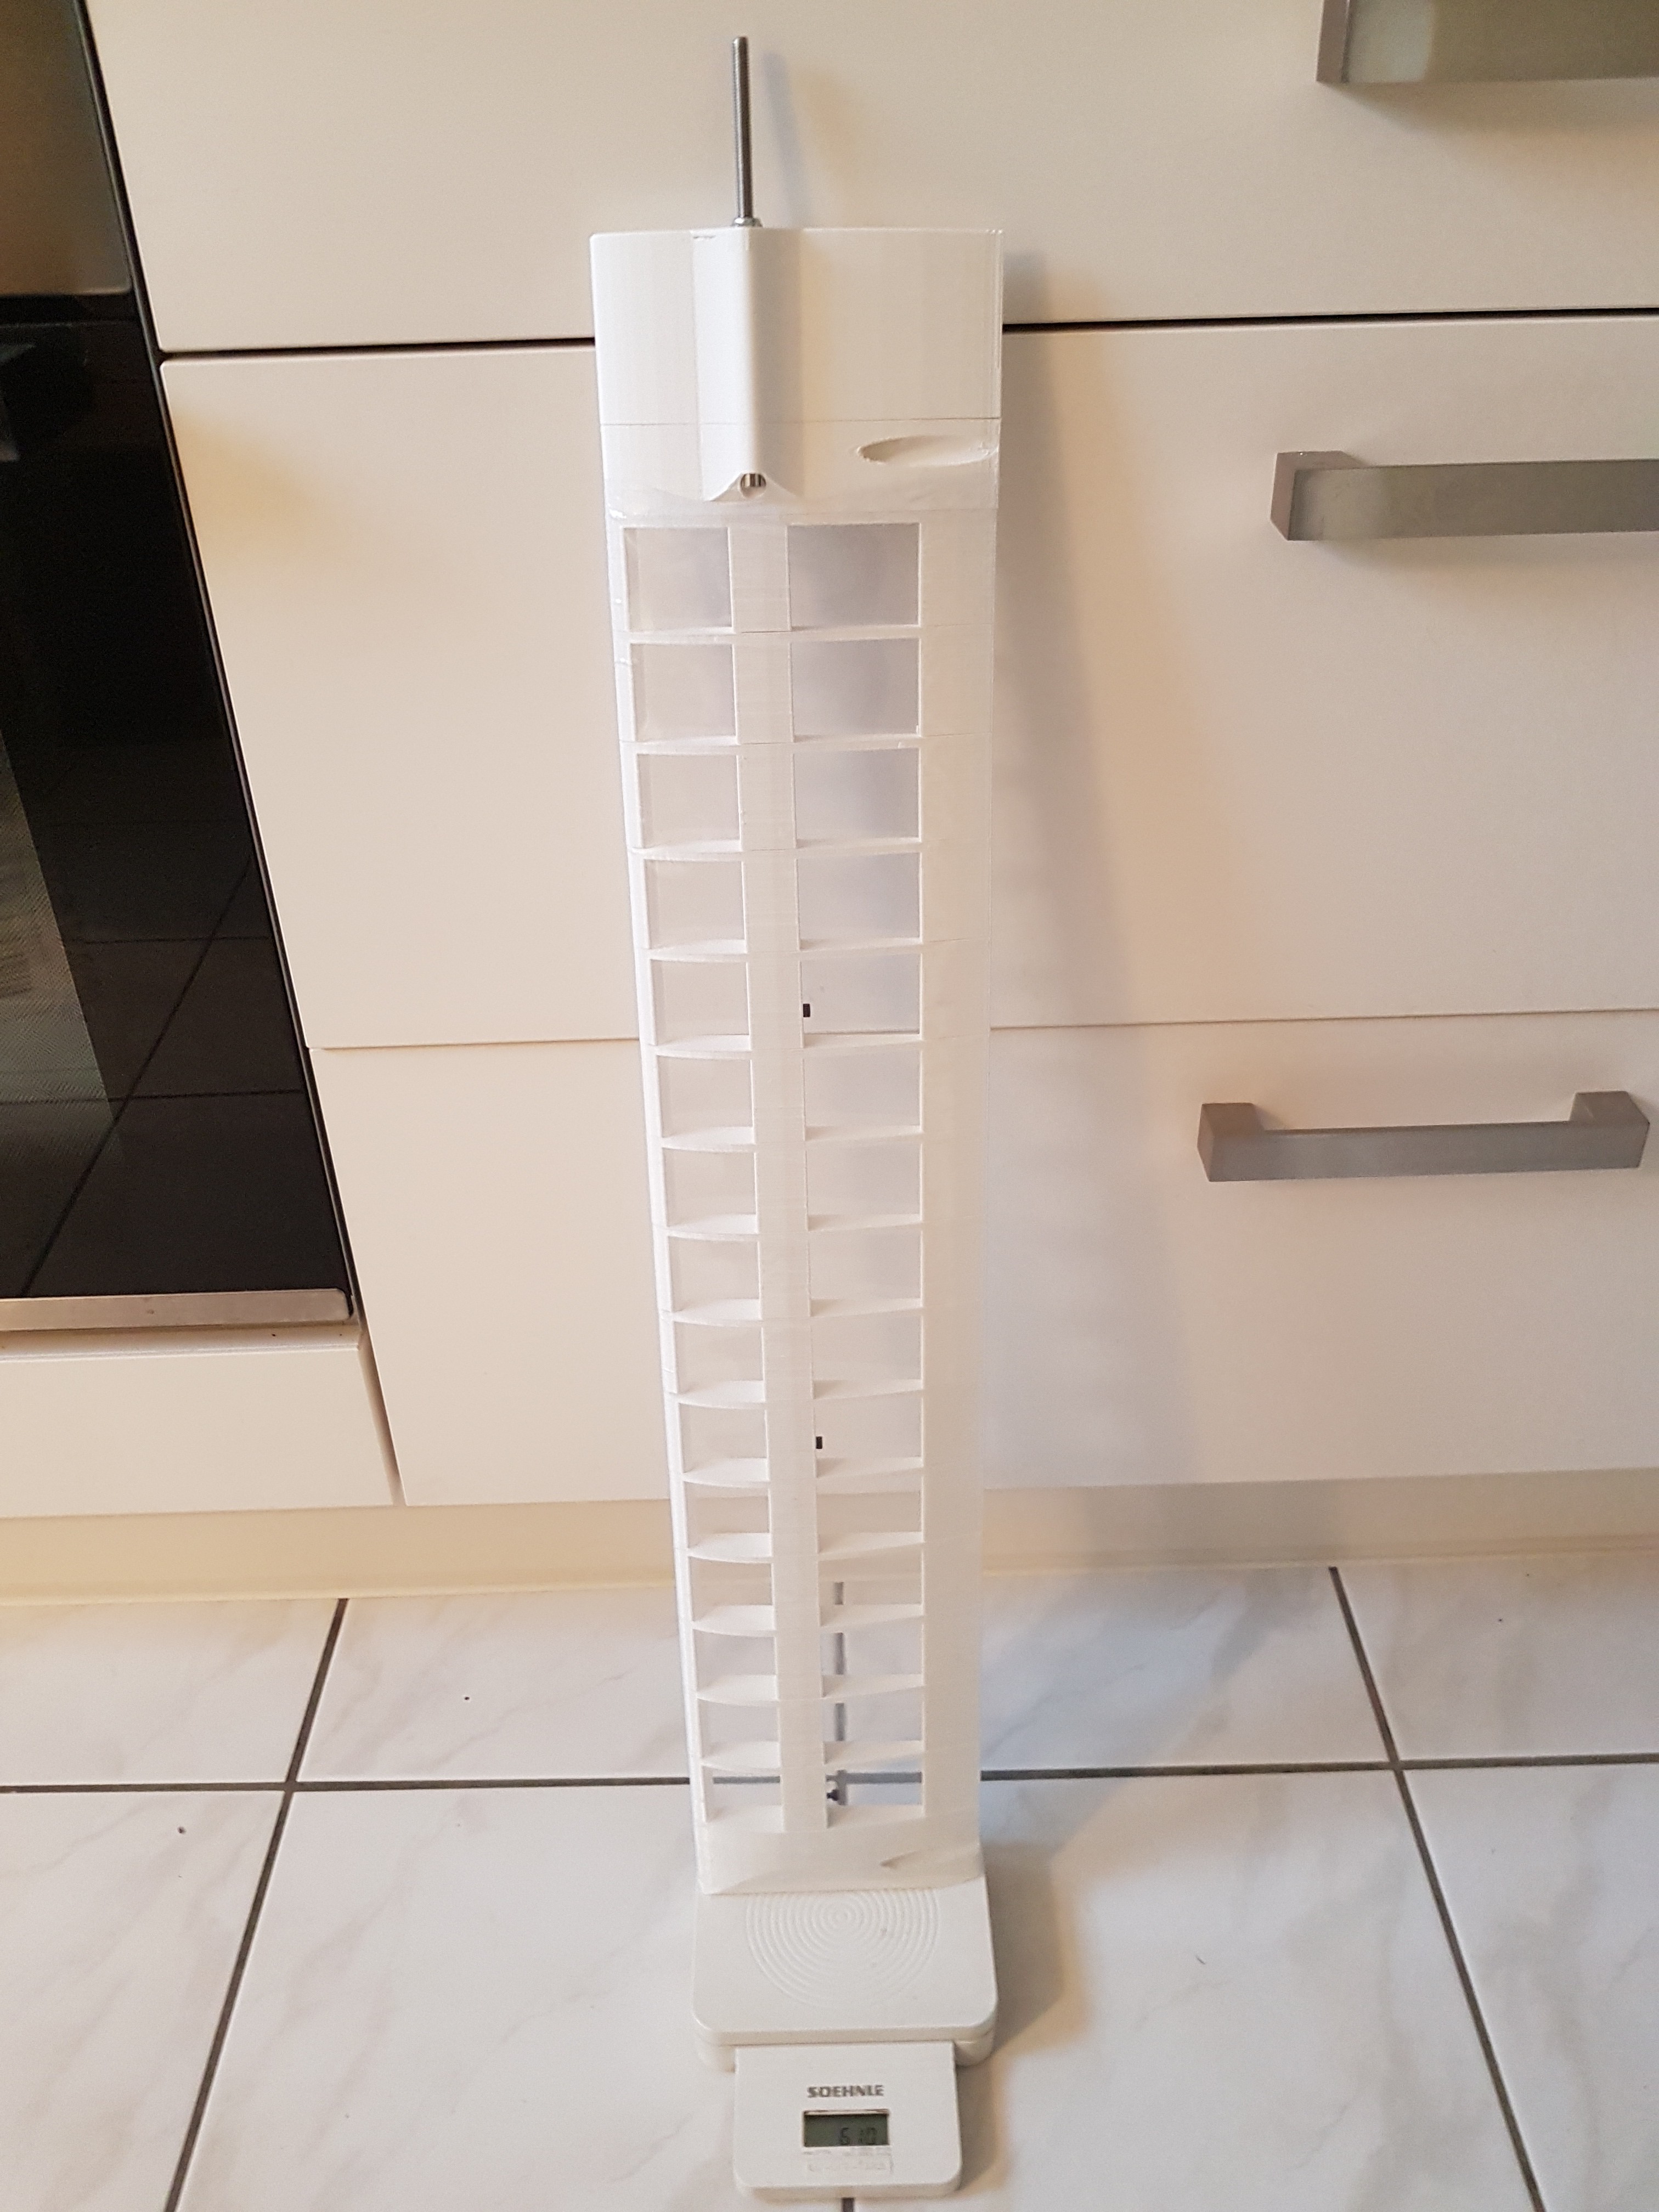
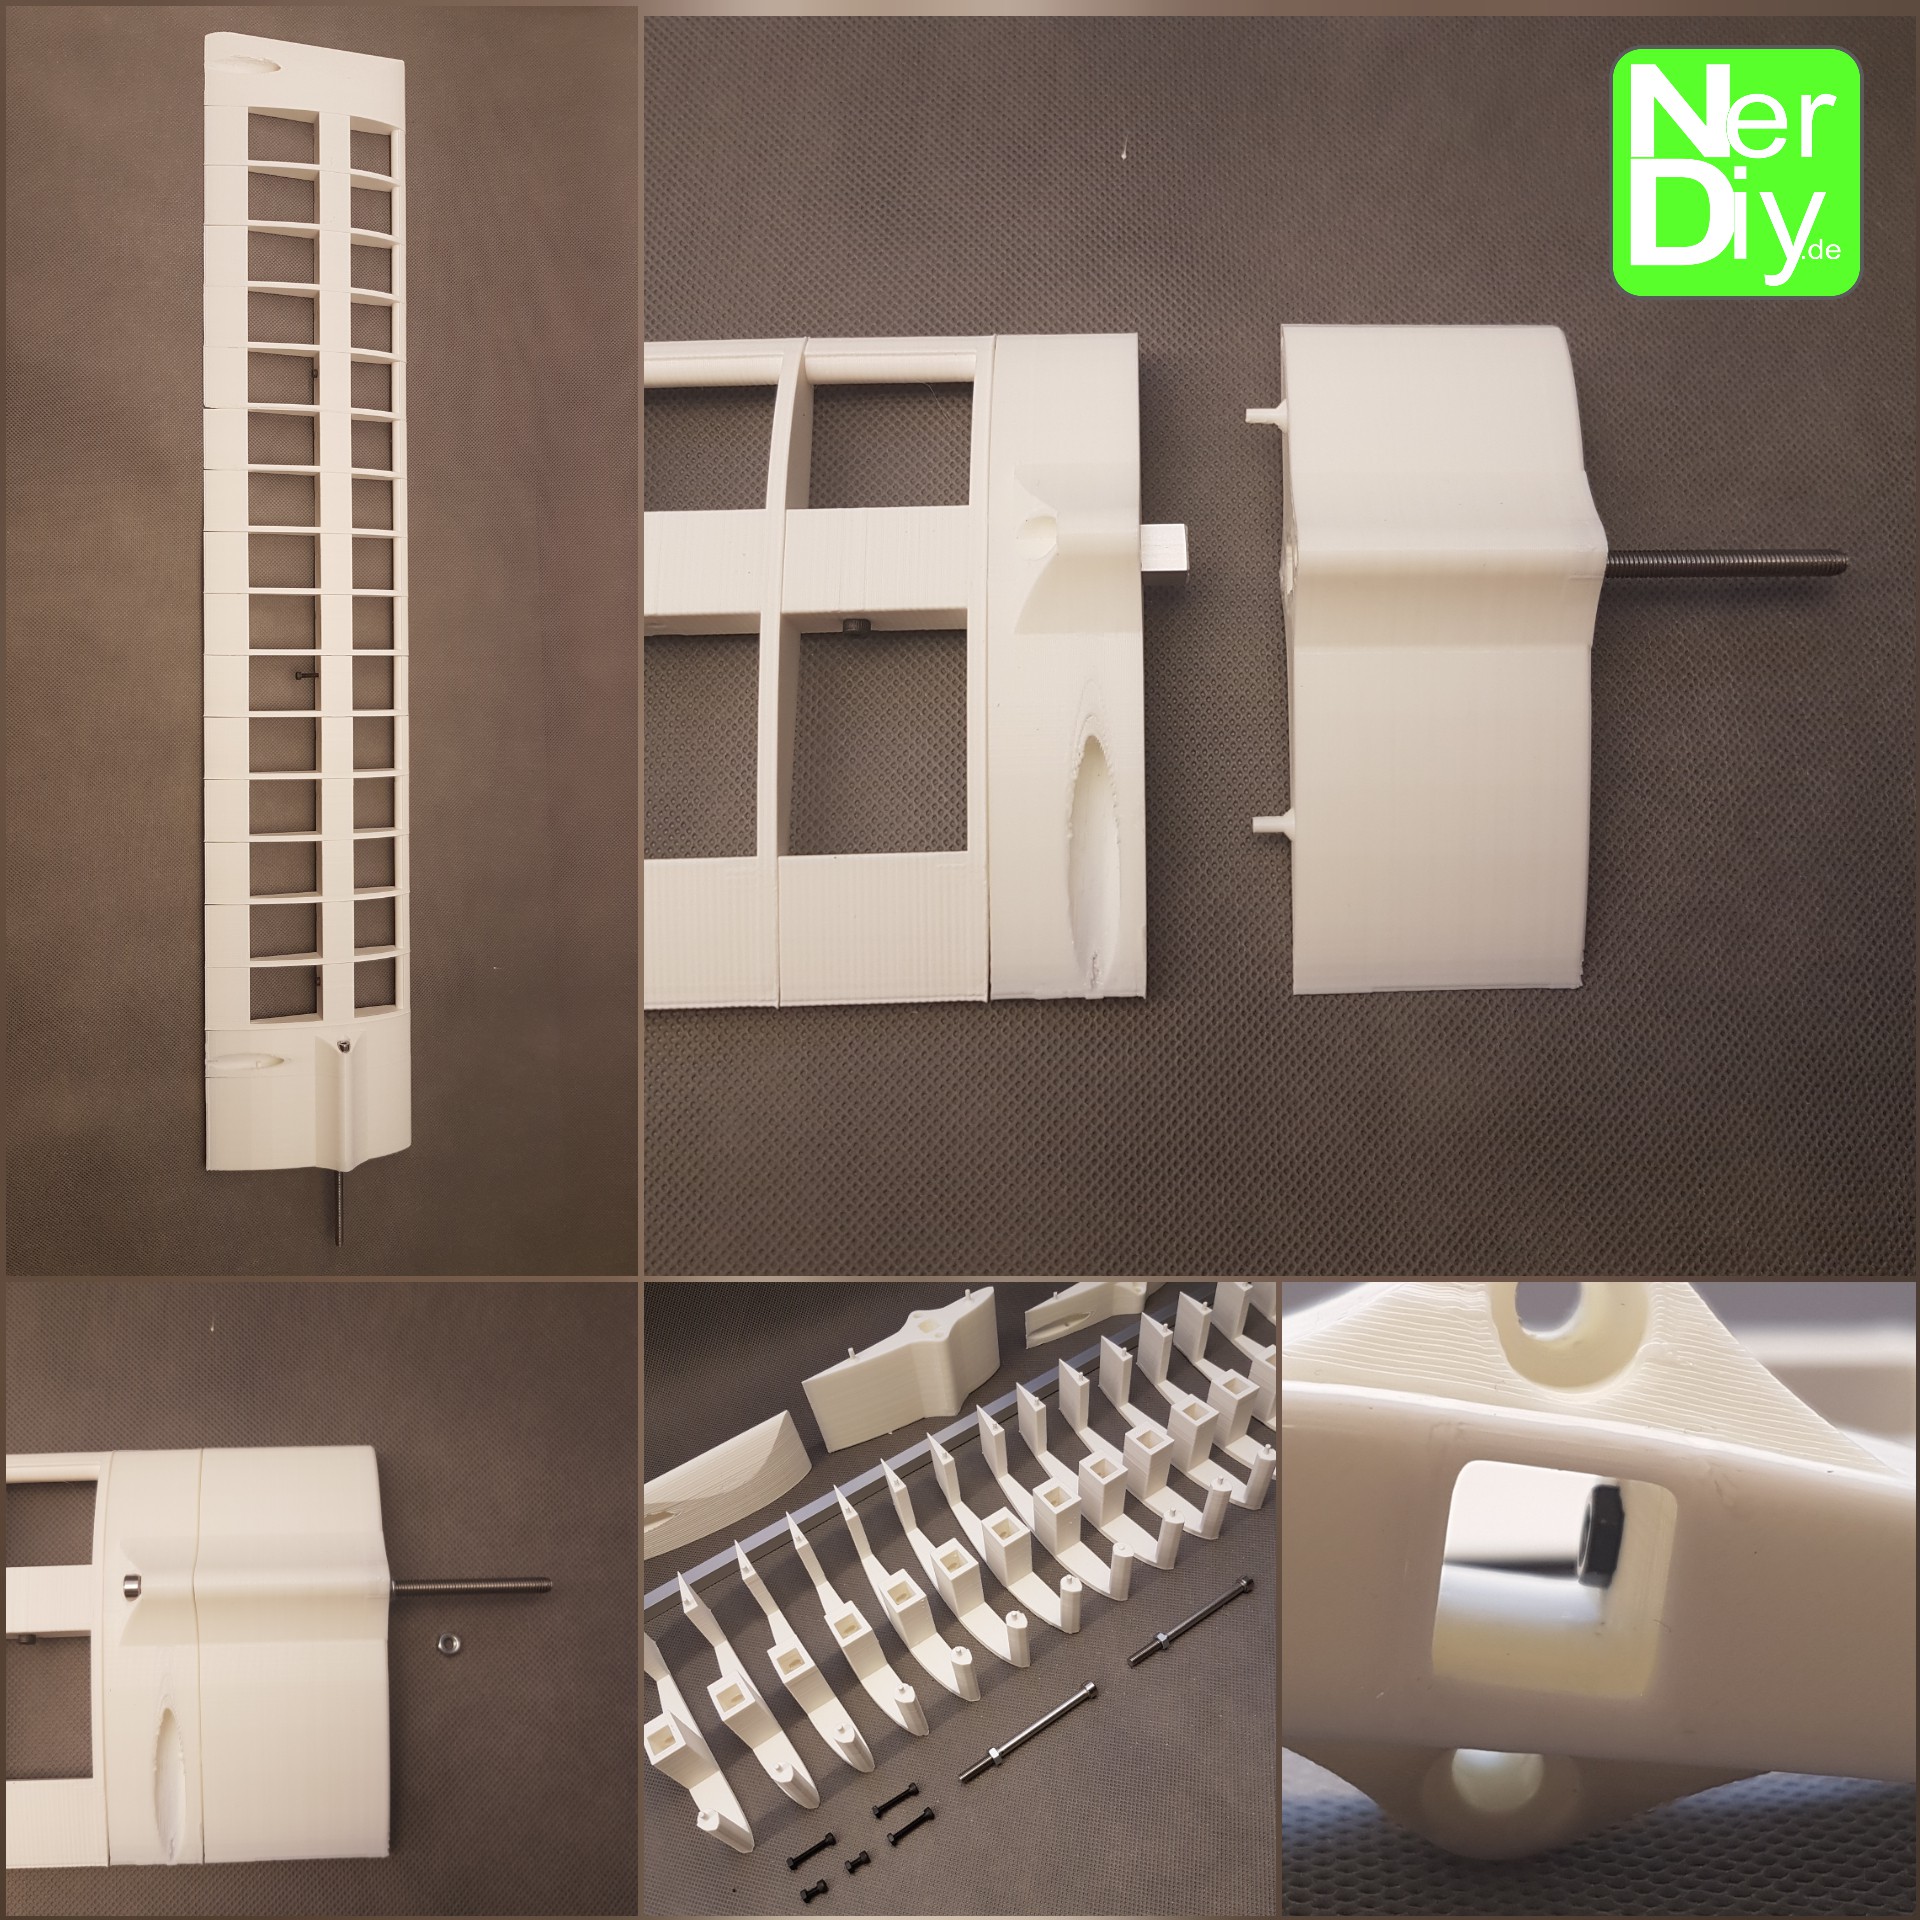
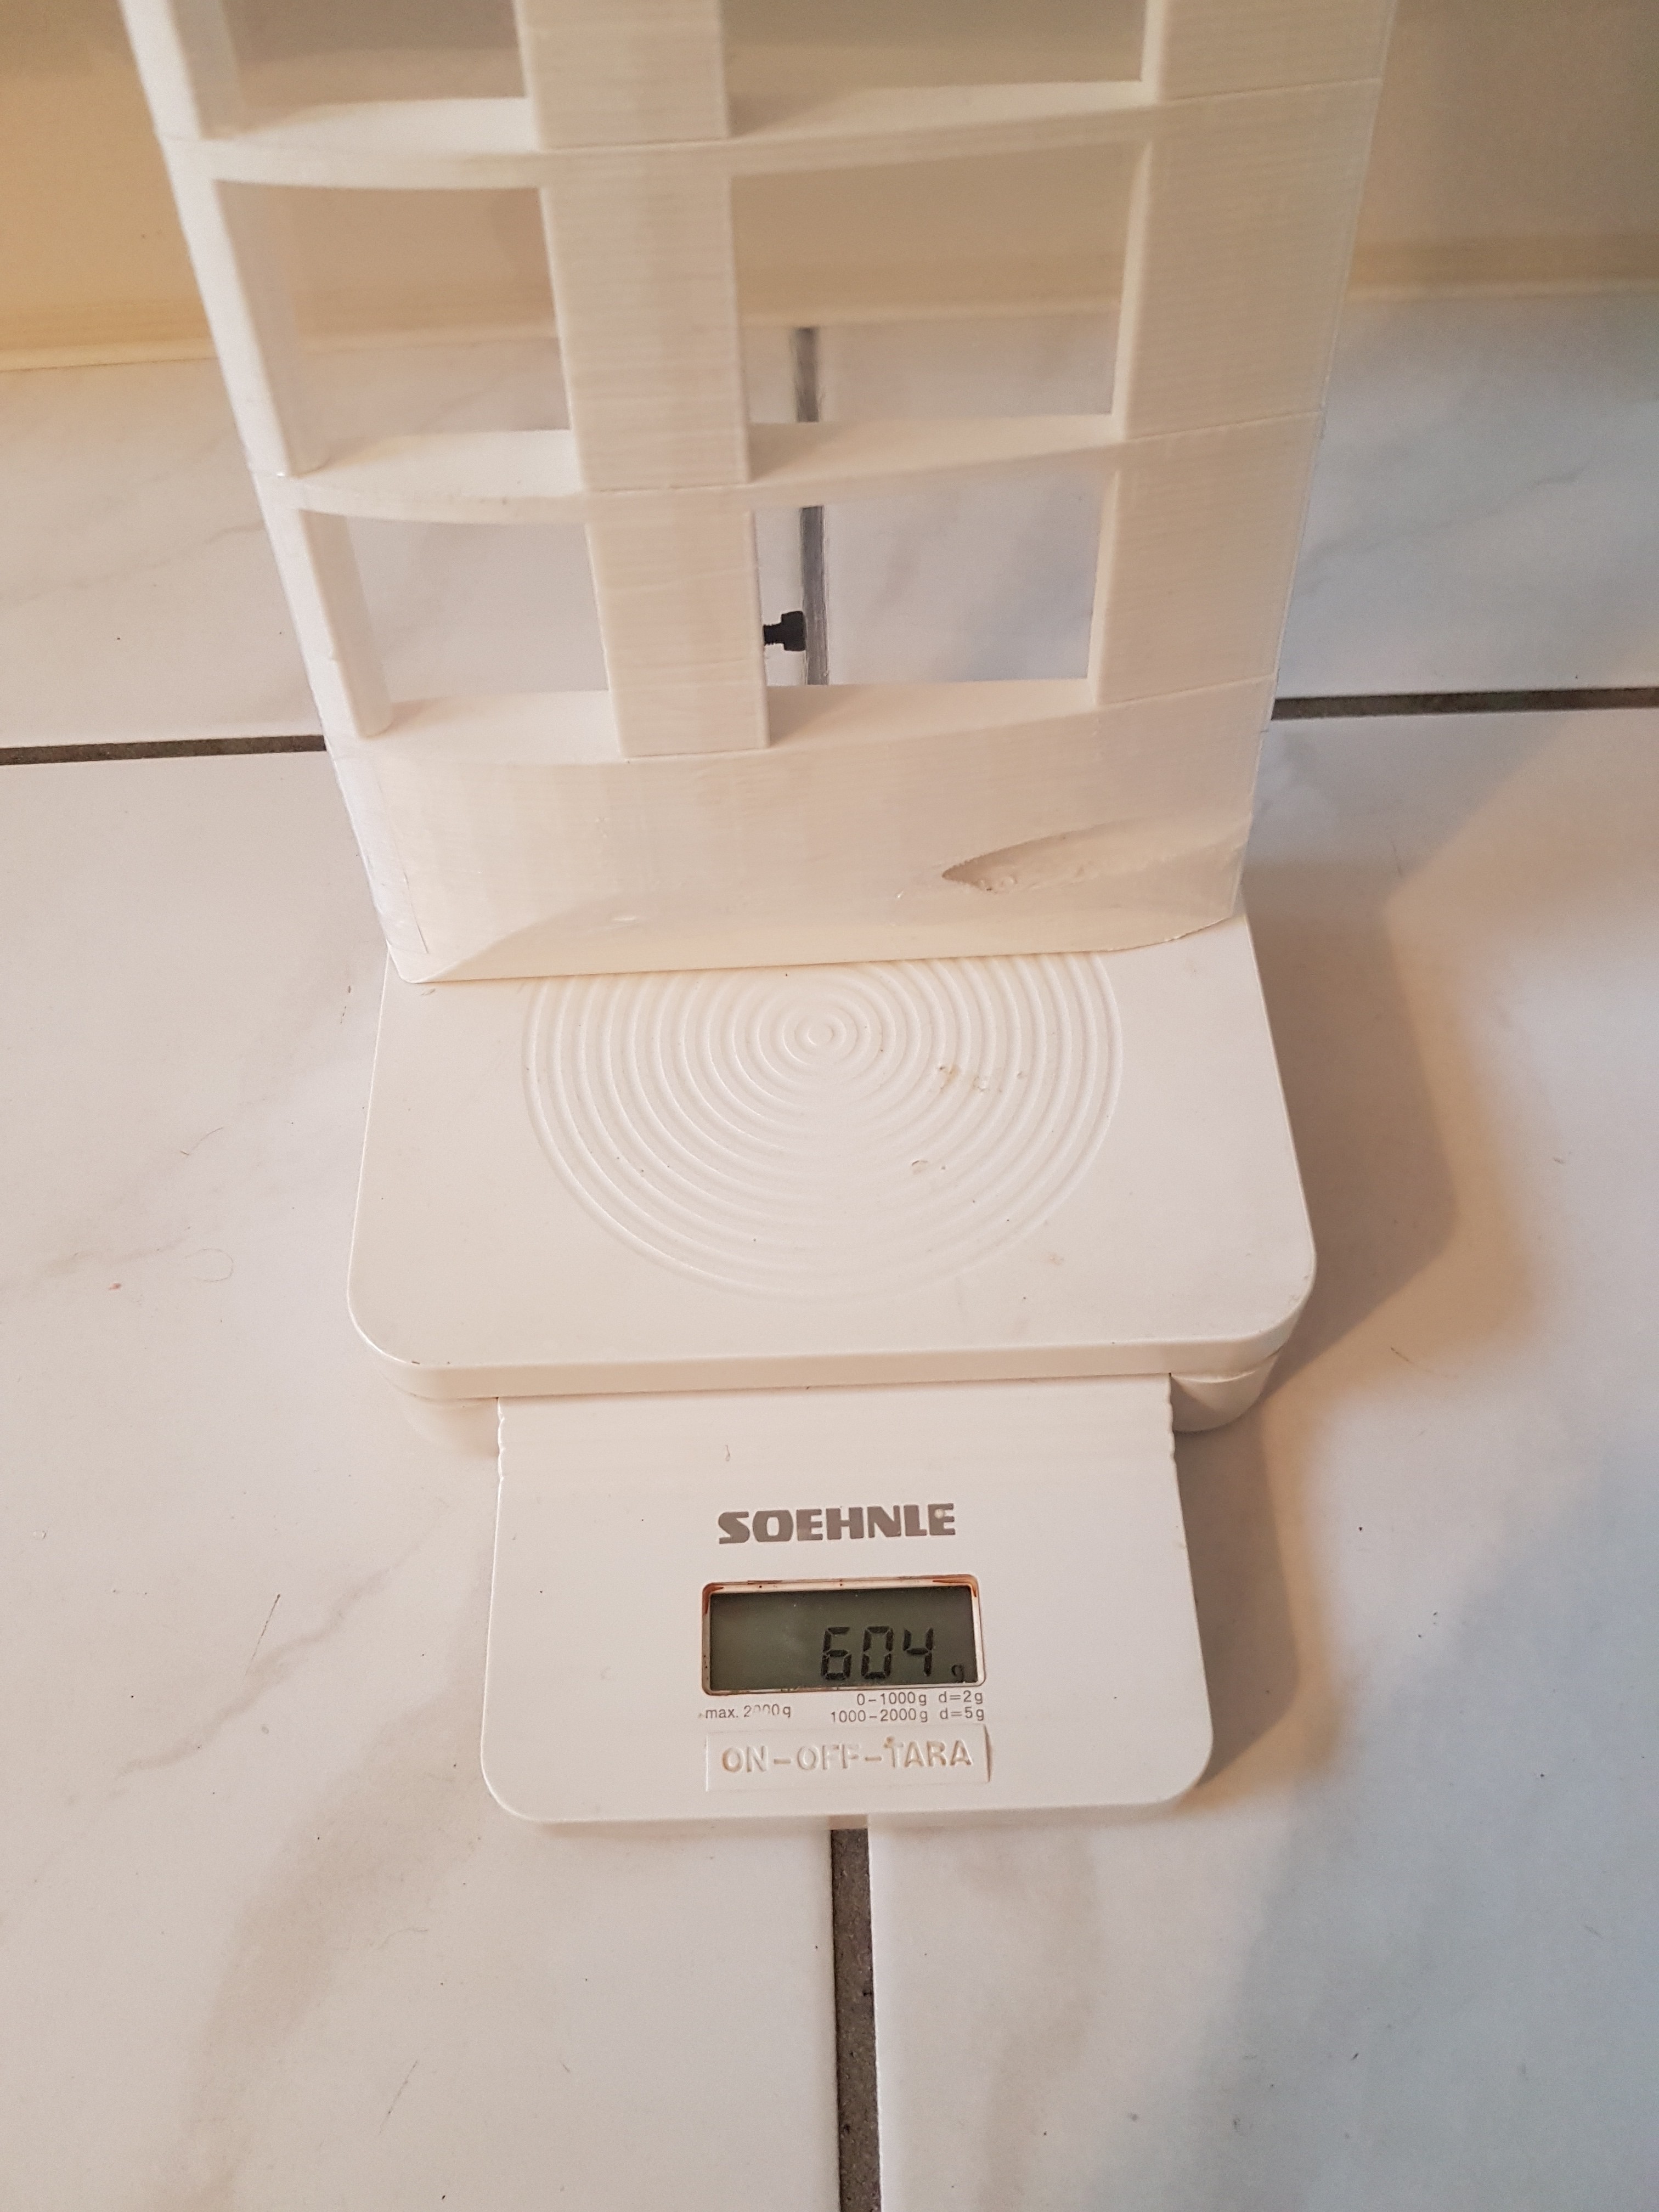
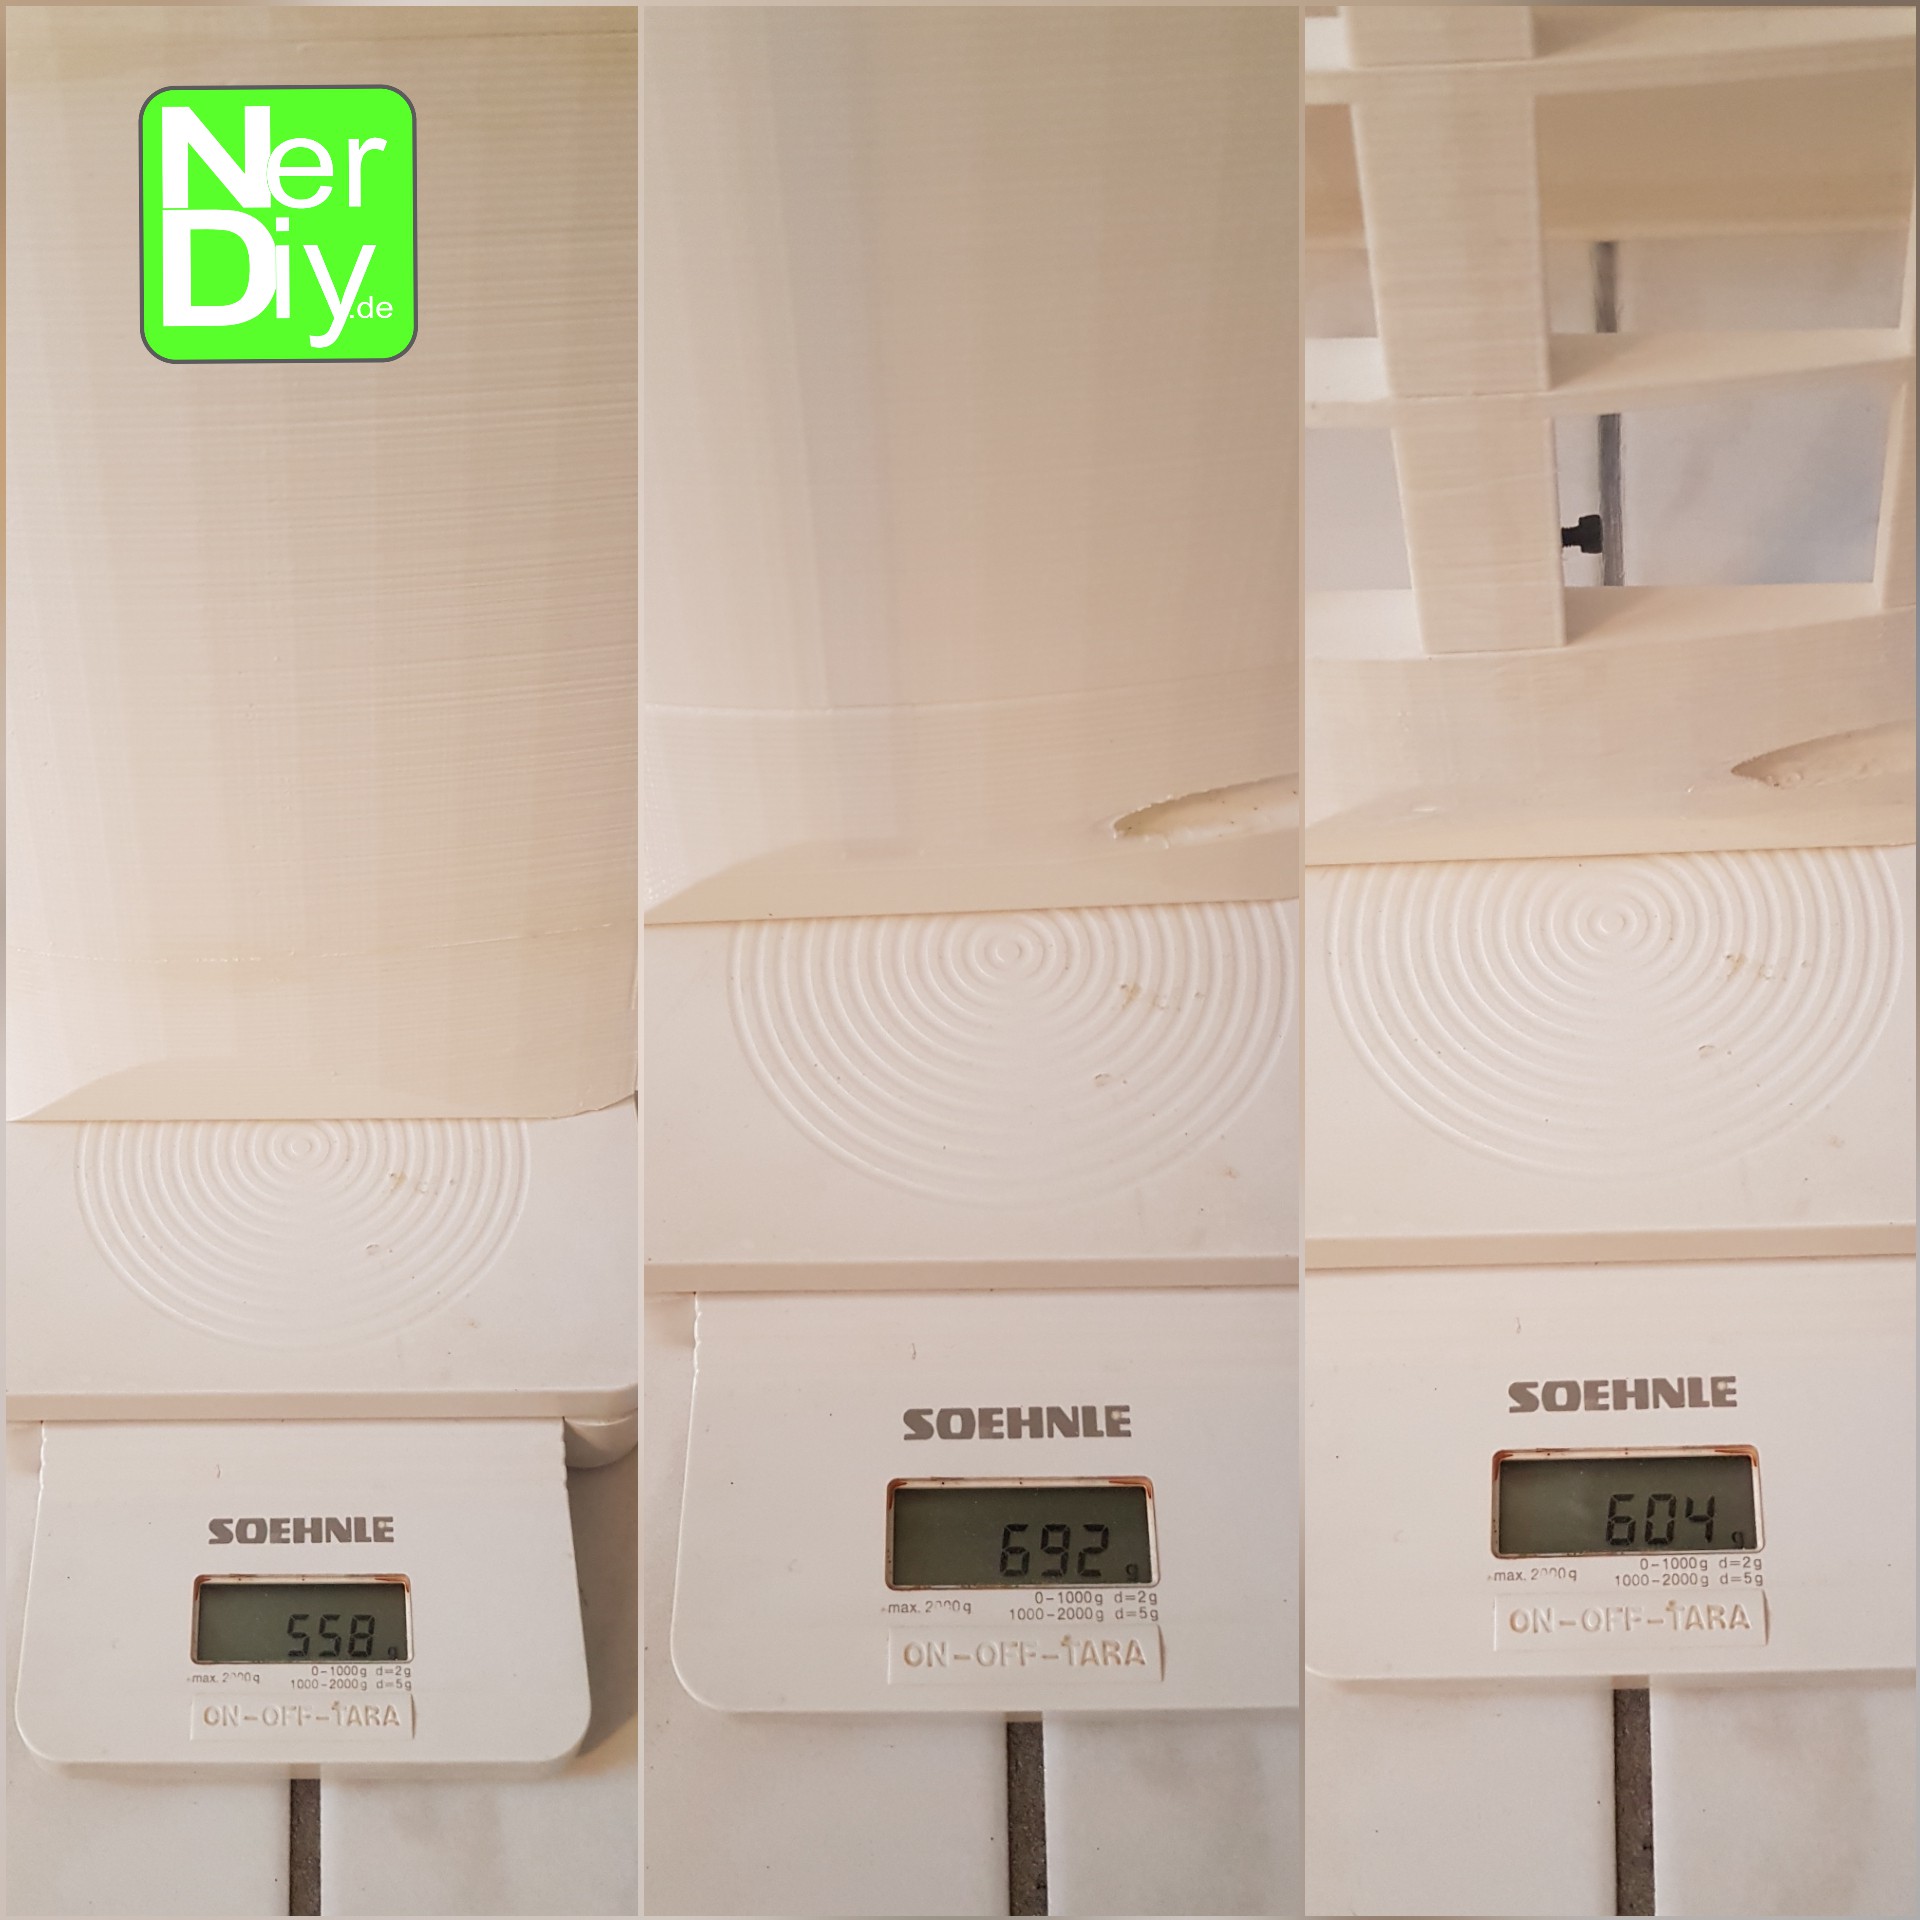
To tackle the problem of weight saving, I checked out a few "tricks" from aircraft wing construction. Just like airplane-wings, "Mark3" is now made up of 15 rafters, which are then covered with a film. So the weight could be reduced to approx. 600 grams which is only 40 grams heavier than "Mark1". Another advantage of this construction is that the number of rafters can also be reduced or increased. So you can make the wing longer or shorter (in a certain range, of course).
In the beginning I tried to stick the rafters individually with very thin adhesive tape. This worked in principle, but it didn't look really durable and, above all, it didn't look good.
At that time, I had given up the further construction a bit frustrated. But at some point I stumbled across shrink tubing on Ebay, which was actually intended to pack battery packs. The diameter of this giant shrink tube also fit over "Mark3". Ordered and tried: The shrink tube was a great solution because it lay flat and tight over the entire wing.
So that no rainwater can run into the wings, I glued the ends of the heat shrink tubing to the 3D printed wing parts. I hope that works. Otherwise I would either have to glue more here or develop another way to get the ends waterproof.
Now I only had the problem that the wing should be easily removable. For this I have divided the base of the wing into two parts, which can be screwed on the front and on the back with an 80mm long M5 screw. So the base part of the wing can remain connected to the hub, while the remaining 60 cm long wing part can be removed. This makes transporting and repairing a wing easier. A load test after the test setup (as shown in the previous log-post) with two 1 kg flour packages also showed that the connection should be able to withstand the load. :)
This is the (so far) last version of the wing for WinDIY. For this I will soon post the assembly instructions here. :)
And here are some pictures including a little comparison of the three different wing versions:

Discussions
Become a Hackaday.io Member
Create an account to leave a comment. Already have an account? Log In.