Close
0%
0%

Indicating when eye tracker software is in use

Give me a minute

Similar projects worth following
It can be difficult to tell when somebody who uses an eye tracker to operate their communications software is communicating. The temptation is to look over their shoulder. This would annoy me! This project creates an indicator for when the communications software is in use to enable a more natural two-way conversation. You talk to the person using the communication software. When you see the light flashing, you know that a reply is being prepared.

I use a BBC micro:bit to do the flashing as they are cheap, cheerful and reliable. I reckon to have two of these qualities.

The project was tested successfully at Beaumont College, Lancaster, UK.

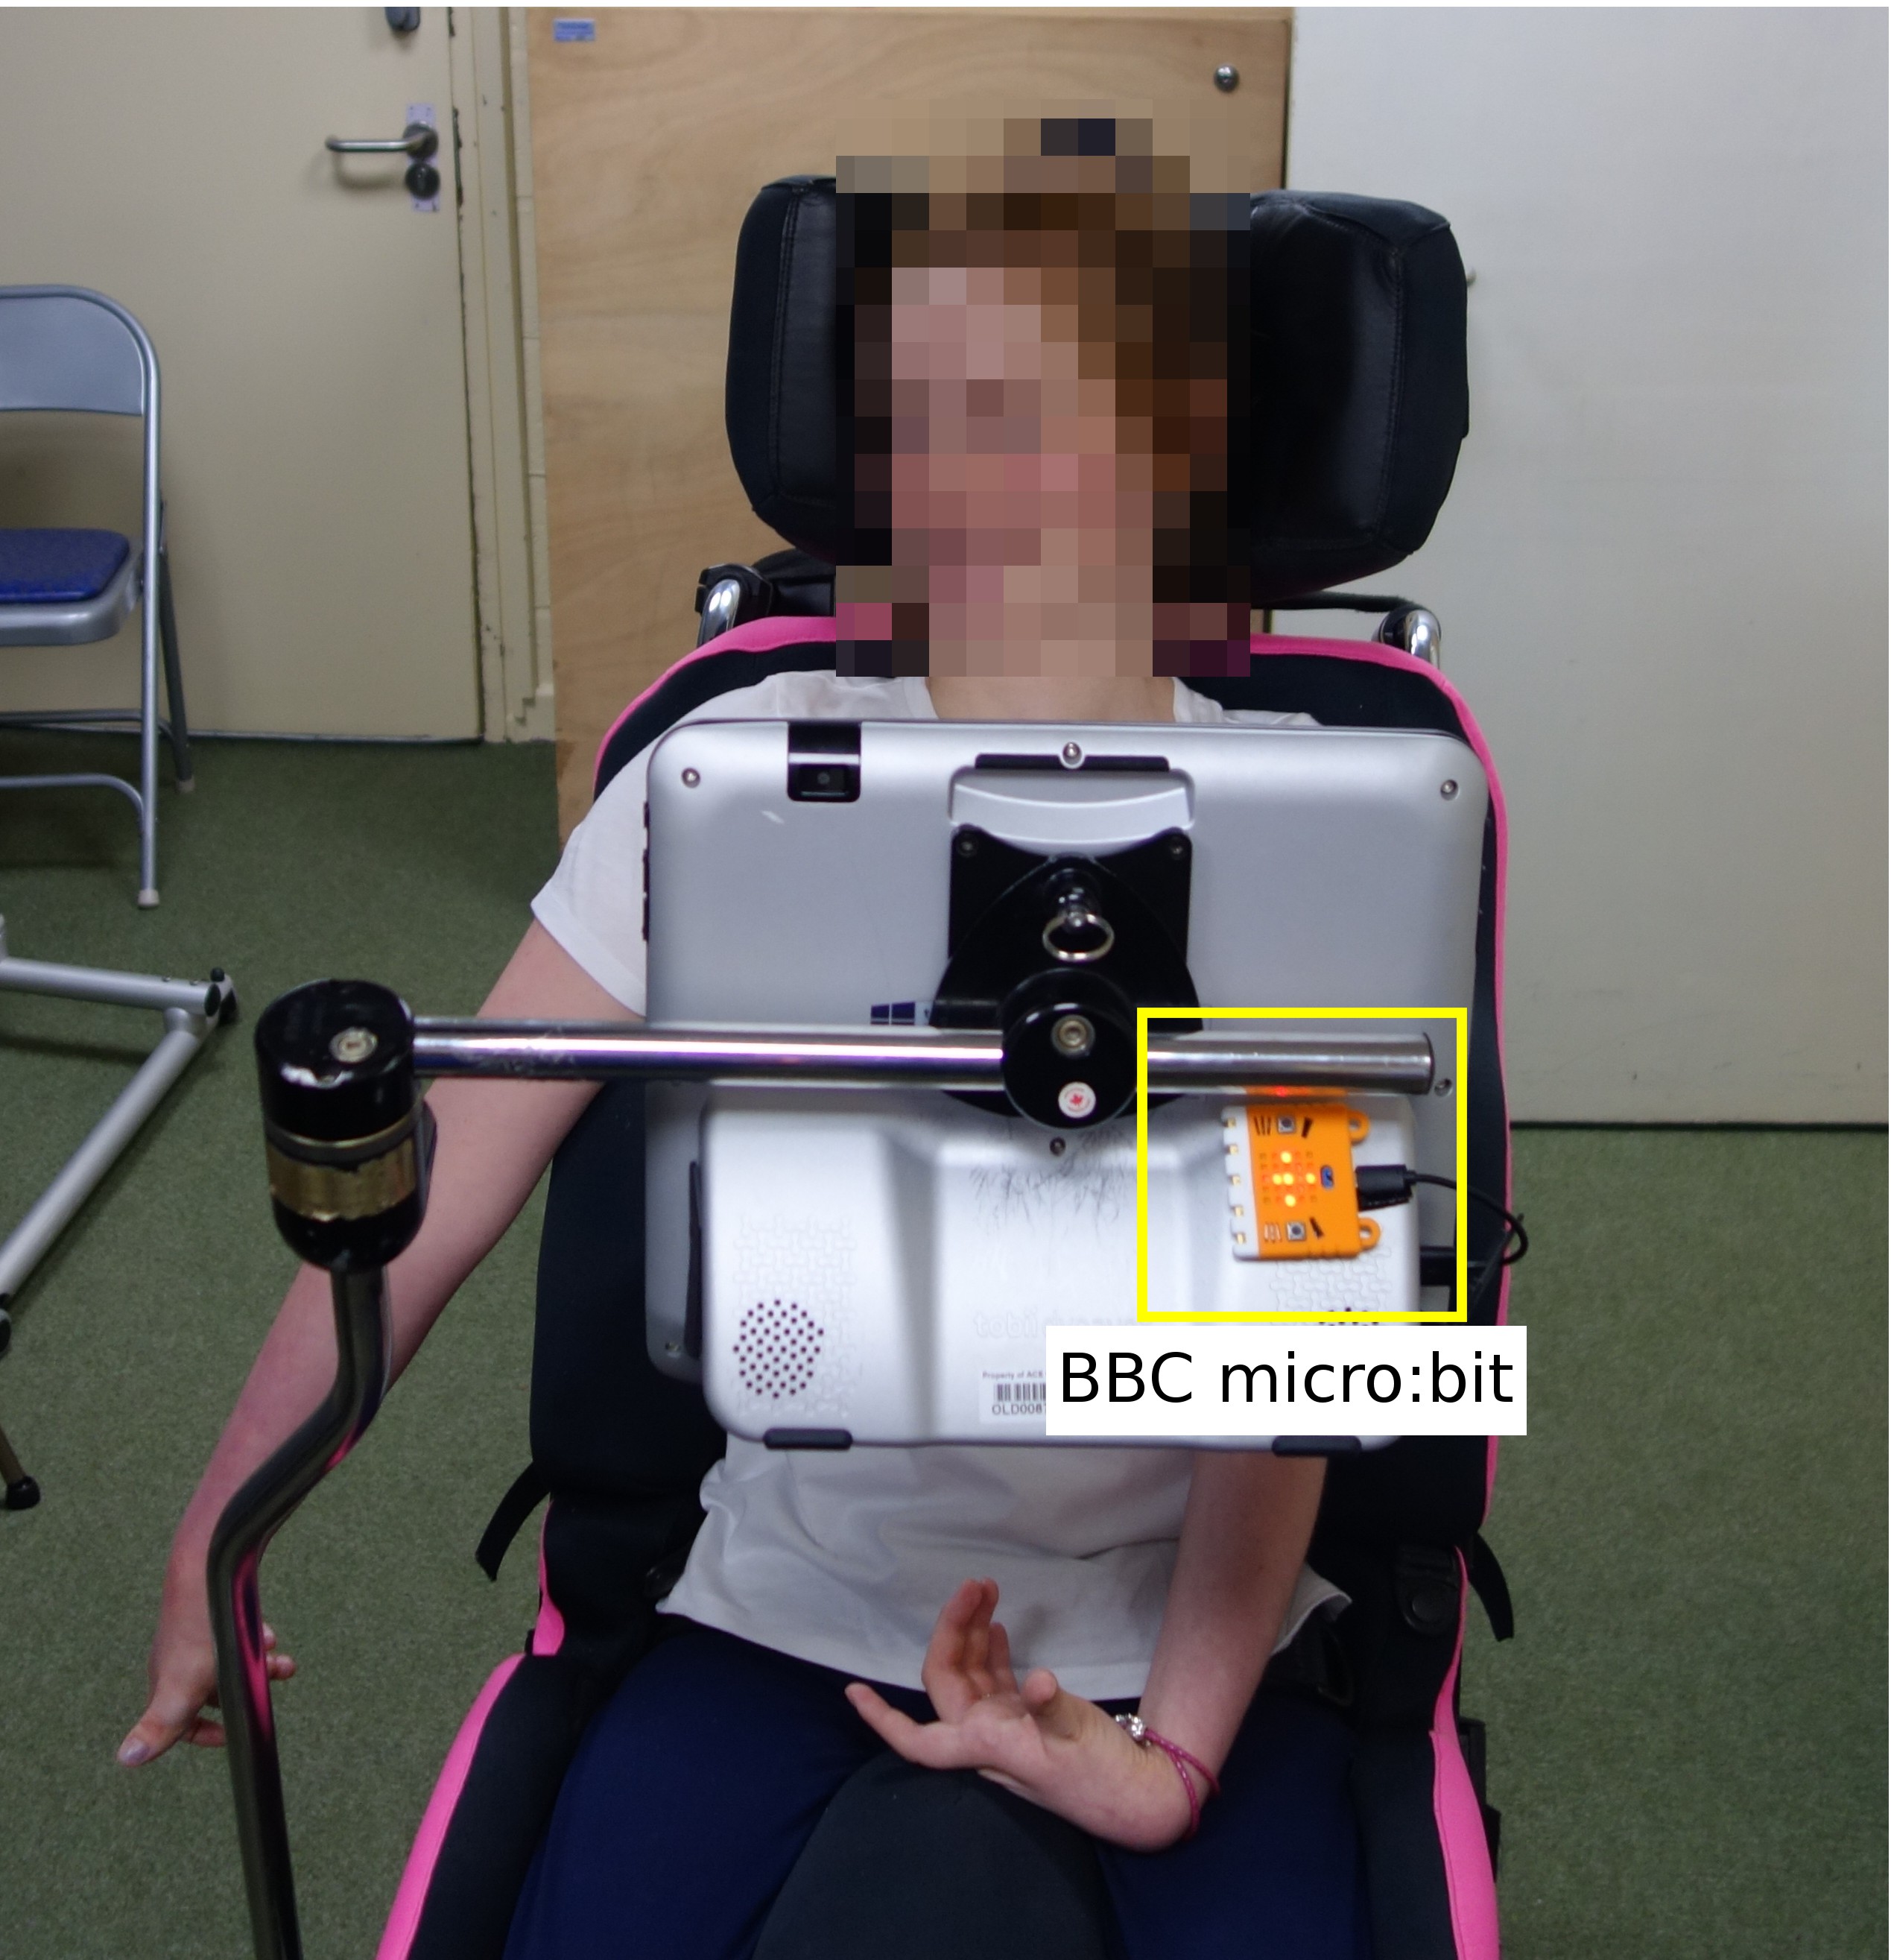
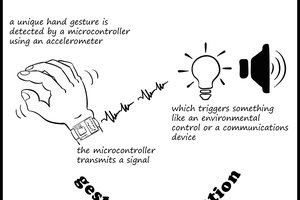
What happens during normal operation

This project operates with Sensory Software's Grid 3 or Communicator software. A microbit is plugged into the communications device. As you use the communication software, a moving pattern is shown on the microbit. This allows others to see that you are composing a message. Pressing button A on the microbit causes the patter to move as well. This feature is included so you can test the microbit is working. 

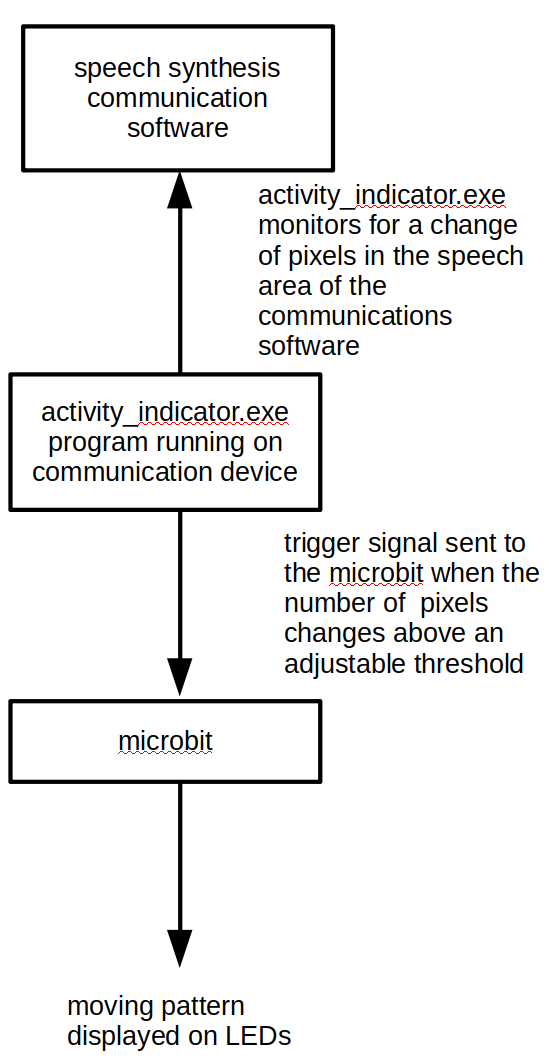
How the system works

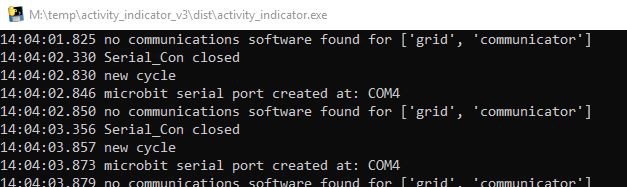
The amount of black text in the message window at the top of the communication software window is measured twice a second. When there is a change in the number of black pixels above a threshold, a trigger is sent to the microbit to flash.
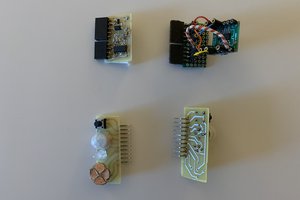
Hardware

I use a BBC micro:bit (www.microbit.org) to do the flashing as they are cheap, cheerful and reliable. I reckon to have two of these qualities.

Not having to make anything from scratch means that the idea can be replicated safely and quickly. The microbit is given to every 11-12 year old in the UK, so wiser folk than me have made it safe to use.

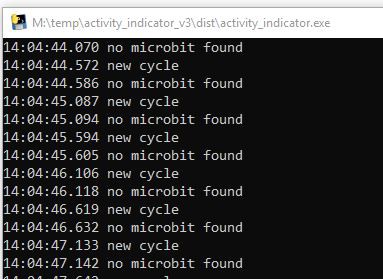
Where's the hack? I re-purpose an educational device to be assistive technology (AT). I wrote firmware for the microbit board and a Python script for the communication device that it attaches to.

I tried using a Blinkm programmable LED (https://thingm.com/products/blinkm/). The device works well. However, the form factor, availability and cost of the microbit won out. I use the microbit for some other assistive technology projects so am familiar and confident in the programming tool sets.

Licence


This project and all of the associated files are covered by the GNU General Public License version 3 (https://opensource.org/licenses/GPL-3.0)

  • 1 × BBC micro:bit board
  • 1 × micro USB cable long enough to reach from the communiction device to where you want to mount the board
  • 1 × Kittenbot cover for the micro:bit (optional)
  • 1 × sticky back velcro to stick the micro:bit to the communication device About 5cm length
  • 1 × software from my GitHub site Free and Open Source

  • Functional block diagram

    matt oppenheim08/21/2020 at 19:42 0 comments

    A block diagram of the system setup is shown below. The activity_indicator.exe program monitors the window running the speech synthesis software. When there is a change in the number of black pixels in the monitored area of this window, a trigger is sent to the attached microbit. When this trigger is received, the microbit displays a moving pattern. The number of black pixels that change can be changed for triggering a detection. Both addition and deletion of pixels creates a trigger, as editing text may result in the deletion of black pixels. So far, all the speech synthesis communication packages that I have seen use black text on a white background, so monitoring the number of black pixels is a valid approach. The code is open source on GitHub, so the colour (<- I am British) to be monitored can be changed in software.

  • Benchmark

    matt oppenheim08/13/2020 at 11:16 0 comments

    This log answers the Benchmark requirement for the Hackaday 2020 prize entry rules:

    Benchmark-How well is the project impact and viability demonstrated? Are estimated costs realistic? How well does the project improve upon other currently available solutions?

    Benchmark

    Preliminary testing can be seen with the target user group on a short video at:

    https://youtu.be/K9KNbRXPE_4

    The testing indicates the impact and viability of the project.

    The estimated costs are realistic as the component is a repurposed off the shelf component.

    This project fills a gap in what is available as assistive technology. This gap was identified by the Technologists who work at Beaumont College with the target user group.

    The project is now in use.

  • Production

    matt oppenheim08/13/2020 at 11:13 0 comments

    This log answers the Production requirement for the Hackaday 2020 prize entry rules:

    Production-Is the project realistically reproducible (taking into consideration necessarymaterials, skills, and production processes)? Are the manufacturing processes detailed? Are those processes realistic for scalability?

    Production

    Production is easy as the project repurposes a commerically available BBC microbit.. There are over 1.5 million microbits already produced. Microbits cost around $15 each. So obtaining these does not require any production.


    The code is on my GitHub site, so can easily be replicated.

  • Design

    matt oppenheim08/13/2020 at 11:12 0 comments

    This log answers the Design requirement for the Hackaday 2020 prize entry rules:

    Design-Is there a depth of design detail available (like a system design, CAD models, project test methods, etc.)? Is there base-level planning for the functionality (e.g.,functional block diagram, list of specifications and descriptions of how they will be met, etc.)? How user-friendly is the design?

    Design

    All  design details can be found on this website and on my own website at:

    https://www.seismicmatt.com/give-me-a-minute-set-up-and-use-instructions/

    The design is extremely user friendly as it repurposes off the shelf technology.

  • Concept

    matt oppenheim08/13/2020 at 11:09 0 comments

    This log answers the Concept requirement for the Hackaday 2020 prize entry rules:

    Concept-Is the project creative, original, functional, and pushing boundaries? Does the project effectively address the selected challenge?

    Creative

    This project is creative in that it creates a solution to a recognised problem.

    I repurpose off the shelf technology in a creative way.

    Original

    The need for this project was identified by the Lead Technologist at Beaumont College, Lancaster. This is a specialist educational centre for students, many of whom have cerebral palsy. The professional at Beaumont were unable to find off the shelf technology that fills the gap that this project intends to.

    The idea was original at the time of creation. Since I created the project, the idea of having a moving pattern indicate that communication software is in use is now implemented in a commercially available speech synthesis package. However, that is a close source commercial product and the technology only works with that one package. My project should work with any of the AAC packages that I have so far encountered and is safe, cheap and open source.

    Functional

    Preliminary testing was done with the target user group and shown to work. It is in use with the target user group.

    Pushing boundaries

    At the time it was built, there were no other solutions. The project pushed the boundaries of enabling natural two way communication for the target user group.

    Does the project effectively address the selected challenge?

    It is effective in that it works for the identified problem and is easy and safe to replicate.


  • virtual environments

    matt oppenheim07/07/2020 at 08:55 0 comments

    I use a virtual environment in Python to develop the script. Why? Apart from this being 'best practice', using a virtual environment with only the libraries that you need for the script installed reduces the size of the stand alone executable. I have tried all the common tools for creating a stand alone executable. The two I have most success with are:


    pyinstaller

    cx_freeze


    Currently I favour pyinstaller.

    I put a file called 'freeze.txt' onto the GitHub site. This contains all the extra installed libraries in the virtual environment. This enables another developer to copy my virtual environment development setup. I don't know if anybody else will ever want to develop this code, but having the freeze file is a good habit to get into. This is produced from within the virtual environment using the command:


    pip freeze > freeze.txt

  • Hackaday 2020 project entry

    matt oppenheim06/19/2020 at 18:35 1 comment

    I've entered this project for the 2020 Hackaday prize, for the United Cerebral Palsy of Los Angeles. I don't think I'll win anything as my project doesn't need much built, which is what Hackaday is all about. The hack is re-purposing a board designed for school education as assistive technology.

    What I want to get out of the competition is for the UCPLA to see this project and find somebody who could use it, then give me feedback on how well it worked and what could be improved.

  • online instructions

    matt oppenheim06/16/2020 at 18:52 0 comments

    I maintain a set of actively update instructions at:

    https://www.seismicmatt.com/give-me-a-minute-set-up-and-use-instructions/

    Much as I like Hackaday and this project site, I have no control over it. Tomorrow, all of this could be gone. I hope not. So I keep a set of project files on my own website, just in case. The page can be found on the 'my website' link on the intro page for the project.

  • Using a virtual machine for testing

    matt oppenheim06/13/2020 at 19:14 0 comments

    I like Linux. This is an OS designed by programmers, built by programmers, for programmers to program. Unfortunately the communication software used by my target user group does not run on Linux - Windows or MacOS only. One day it would be nice to look at an open source communication software package on Linux. In the meantime, I installed a Windows 10 virtual machine (VM). I got Windows 10 for free through my local University where I retain an unpaid honorary position during my time off from working at sea.

    I use VirtualBox to host the VM. Be sure to install the Virtual Box Guest Additions add on to enable the VM window to resize to the full extent of your monitor, amongst other extensions.

    Sensory Software were kind enough to give me a licence for their Grid 3 software. One advantage of the VM is that I can swap the hard drive with this on between different machines without being asked for a new licence.

    I also have a licence for Communicator, but so far I haven't managed to get this software to run.

  • Sticking the microbit onto the back of a communication device

    matt oppenheim06/12/2020 at 19:09 0 comments

    I found a nice silicone cover for the microbit (a Kittenbot). Then I tried to stick it onto the smooth back of a communication device...


    I found some sticky back Velcro with extra sticky glue that seems to do the trick. The silicone is a hard thing to get anything to stick well to.


    On my 'to do' list is to use my new and shiny 3D printer to make a case for the microbit that clips easily onto the back of a communication device. This would be a neater solution than sticking bits of Velcro on.


    On t'other hand (as we say Up North), the whole idea of using a microbit is to make it easy for anybody to implement this project. Sticky back Velcro works and is easy to get hold of. Not so many people have access to a 3D printer.

    I admit it, I'm looking for an excuse to use the 3D printer for something original, after cranking out face shield clips for local care homes. Which made me get to grips with the basics of how to set up and use the machine.

View all 12 project logs

  • 1
    Summary – regular use after setting up

    Connect the microbit using a micro USB cable from the microbit to the device running the communication software.

    Run Grid 2 or Grid 3 or Tobii Communicator.

    Run the Windows software – double click on activity_indicator.exe. This is not necessary if you set up Windows to automatically run the software at start-up.

    If the microbit is not plugged in you will see the message ‘no microbit found’. Plugin the microbit. The software allows for the microbit to be removed and plugged in during use. You can start the communication software with the program running and it will be picked up.

    The screenshot below shows what you will see when the software is started with no microbit plugged in and no communication software running.


    The display you will see with a microbit plugged in with no communication software running is:

    When the communication software is running, the number of black pixels detected in the message window and the limit to trigger a detection is displayed. These are debugging messages to allow me to see what is happening with the software as I develop it. The detection limit can be changed using the command line – see the section ‘Command line options to adjust sensitivity’. The screenshot below shows an example of a change in the communication software detected for either Grid or Communicator.


    When a change is detected, a moving pattern is displayed on the microbit to show that the communication device is in use.
  • 2
    Getting the microbit connected to your Windows device

    This connection should happen automatically with Windows 10. If you are using an earlier version of Windows, you will need to install the driver for the microbit. Detailed instructions on how to do this are on my blog post: https://www.seismicmatt.com/2020/04/27/connecting-the-bbc-microbit-to-windows-and-adding-code-to-it/

  • 3
    Downloading the code for the microbit and the laptop/tablet from GitHub

    Code for the microbit and the communications device needs to be downloaded and installed. This all lives on the GitHub site listed in the resources section.

    The simplest thing to do is to download the entire repository as a single .zip file from the GitHub site, then extract the folder we need from that.

    Go to the GitHub site:

    https://github.com/hardwaremonkey/microbit_activity_indicator

    Clone or download the repository. If you want a step by step guide with screenshots, please go to my website instructions at:

    https://www.seismicmatt.com/give-me-a-minute-set-up-and-use-instructions/

    The downloaded file is called microbit_activity_indicator.zip and is about 12 Mb large. Unzip the .zip file somewhere.

View all 7 instructions

Enjoy this project?

Share

Discussions

Similar Projects

Does this project spark your interest?

Become a member to follow this project and never miss any updates