Overview
This quadcopter is unique in that it is completely steerable using a smartphone web browser without the need to install any apps. The user simply types the copter's IP address into their browser, sets the thrust level, and then tilts their phone in the desired direction of travel:
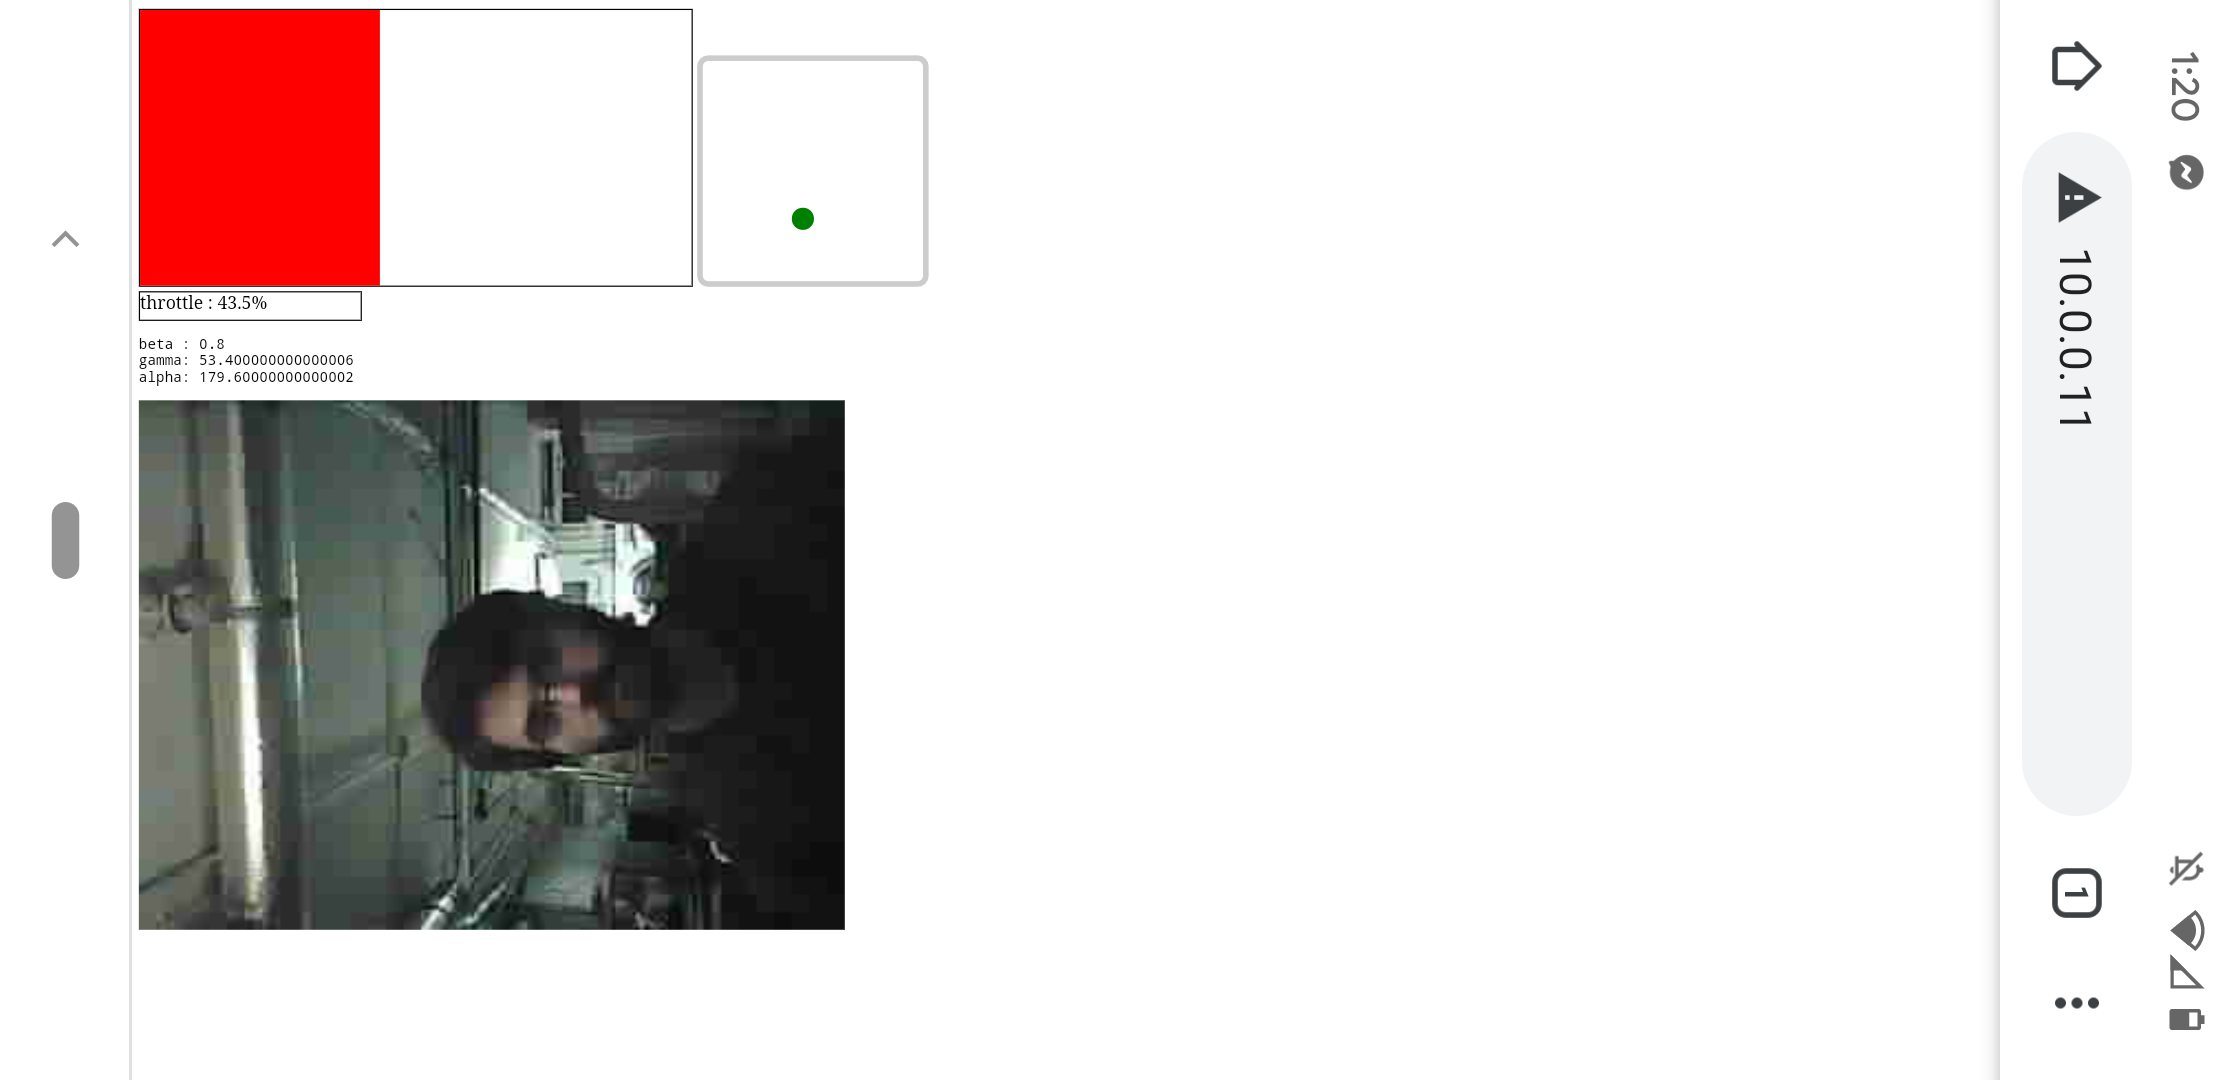
Web-browser RC controller. The state of the 3-axis tilt sensors in the phone's IMU are represented as the green dot in the small figure to the right. The throttle is controlled by swiping the red slider across the screen.
The three possible movement axes are described as yaw, pitch, and roll:
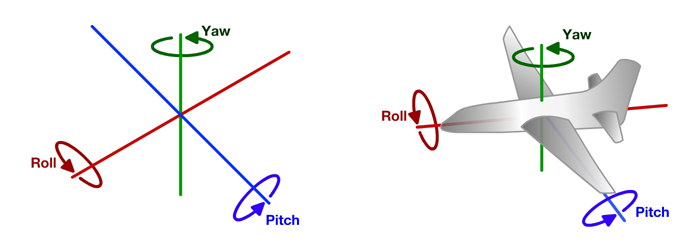
Tilting the smartphone in the roll or pitch direction (or rotating it, in yaw) sends the corresponding desired flight direction over Wi-Fi to the quadcopter. Of course, since the quadcopter lives in an asymmetrical environment with asymmetrical components, enforcing these values without any kind of feedback would cause dramatic error buildup (and a crahsed copter). Hence, the desired flight direction is "mixed" (added, in a PID loop) with gyro data on-board the quadcopter. This is facilitated with an off-the-shelf CC3D flight controller.
System Diagram
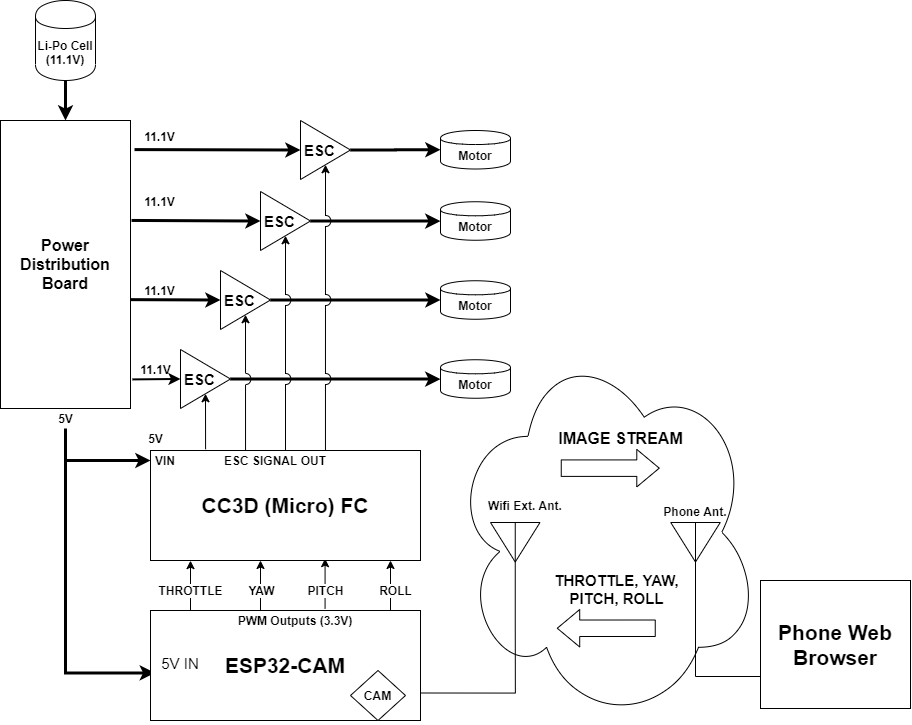
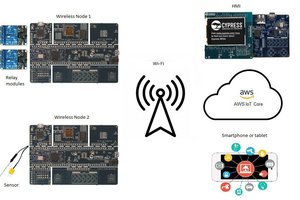
As pictured, the ESP32-CAM is needed to receive throttle/yaw/pitch/roll packets from the phone remote control, and to transmit images to the phone. Each desired direction is forwarded to the CC3D flight controller's RC inputs in the form of 50 Hz PWM signals. Fully "off" corresponds to a pulse width of ~1000us, while fully "on" corresponds to a pulse width of ~2000us. Neutral yaw/pitch/roll corresponds to 1500us. The CC3D can be programmed to expect these ranges of PWM pulse widths using a program such as LibreFlight, as used here.
Mechanicals
The quadcopter framewas assembled from a ZMR250 kit (great instructions here: https://www.youtube.com/watch?v=iCQkdGhkGOc). Propellers and motors are arranged as follows (courtesy http://www.rcdronegood.com/quadcopter-wiring-diagram-guide-diy-quadcopter/):
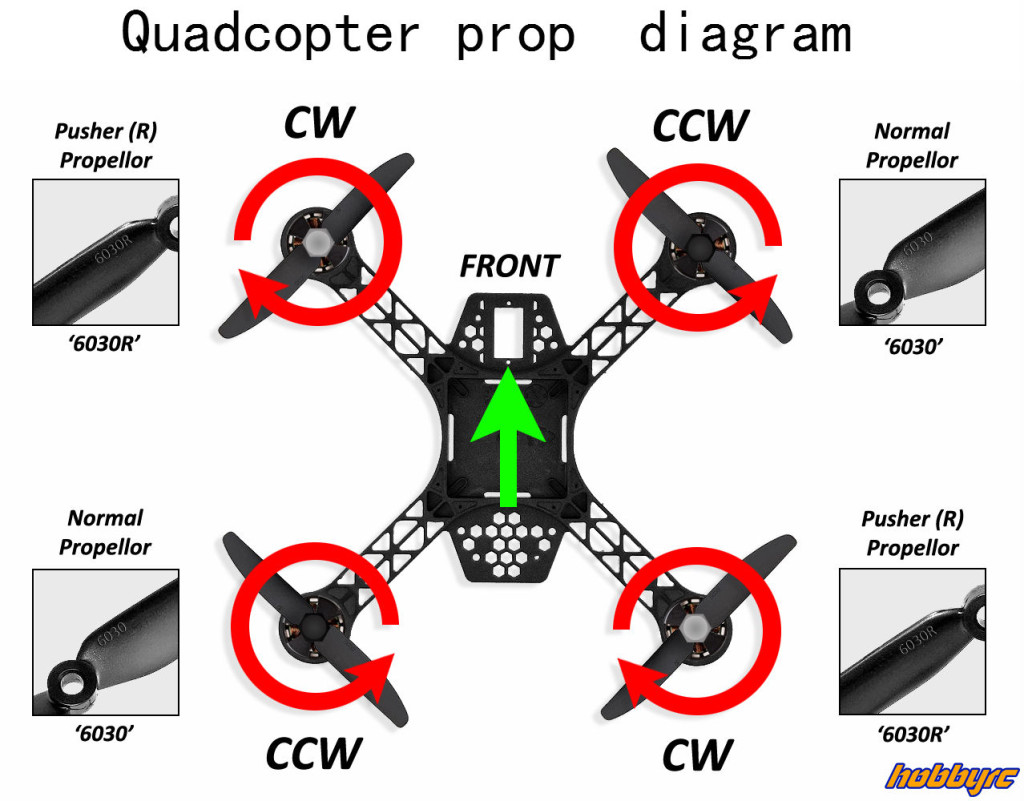
Power is provided via a 1.1V LiPo battery -- 1.3Ah is a good tradeoff between flight duration and weight for the ZMR250. Included in the kit is a power distribution board which provides 5V, which can directly power the ESP32 as well as the CC3D. The electronic speed controllers (ESCs) should have their input polarity reversed for the diagonal (counterclockwise) motors:
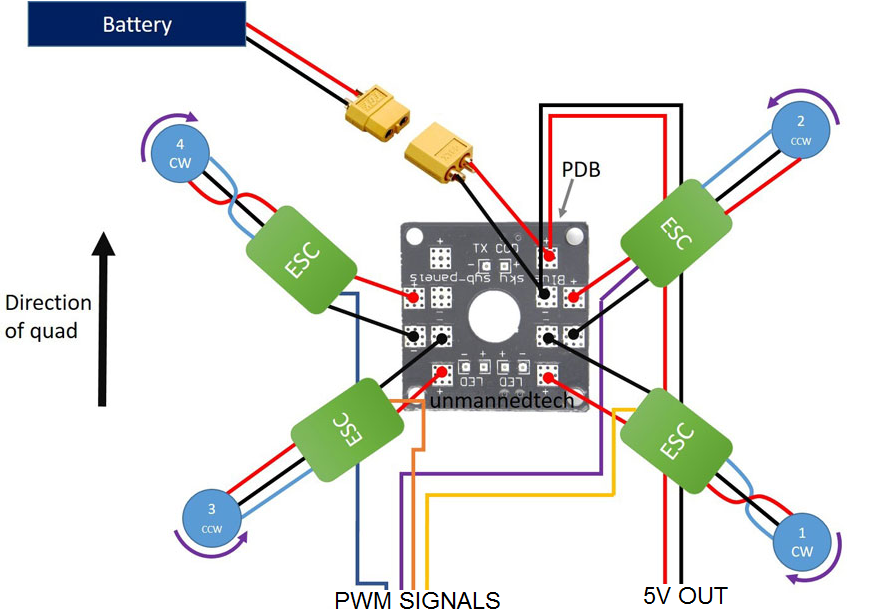
(image courtesy http://www.rcdronegood.com/quadcopter-wiring-diagram-guide-diy-quadcopter/)
Web RC page
The 3-axis gyro values can be requested from the smartphone's browser via the Sensor APIs: https://developer.mozilla.org/en-US/docs/Web/API/Sensor_APIs. Here, alpha, beta, and gamma are used, which correspond to yaw, pitch, and roll, respectively. It is most ergonomic to hold the phone in "landscape" orientation when steering; however, it is easy to accidentally flip back to portrait when tilting (if auto-rotate is enabled). Hence, it is recommended to disable auto-rotate, and instead use a CSS3 trick to rotate the HTML itself into landscape: https://stackoverflow.com/questions/38359782/how-to-lock-viewport-to-portrait-orientation-in-html5-css3
An additional point of complication: the Sensor APIs only operate within a secure context, so the webpage must be served over HTTPS. For the ESP32, I recommend this library: https://github.com/fhessel/esp32_https_server, which also includes a Websocket example.
 Josh Joy
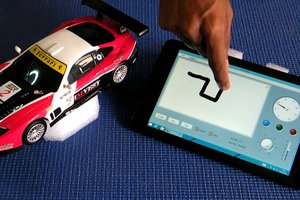
 kwikius