 Josh Cole
Axis 1 - Planetary Gearbox - 3:1 Ratio
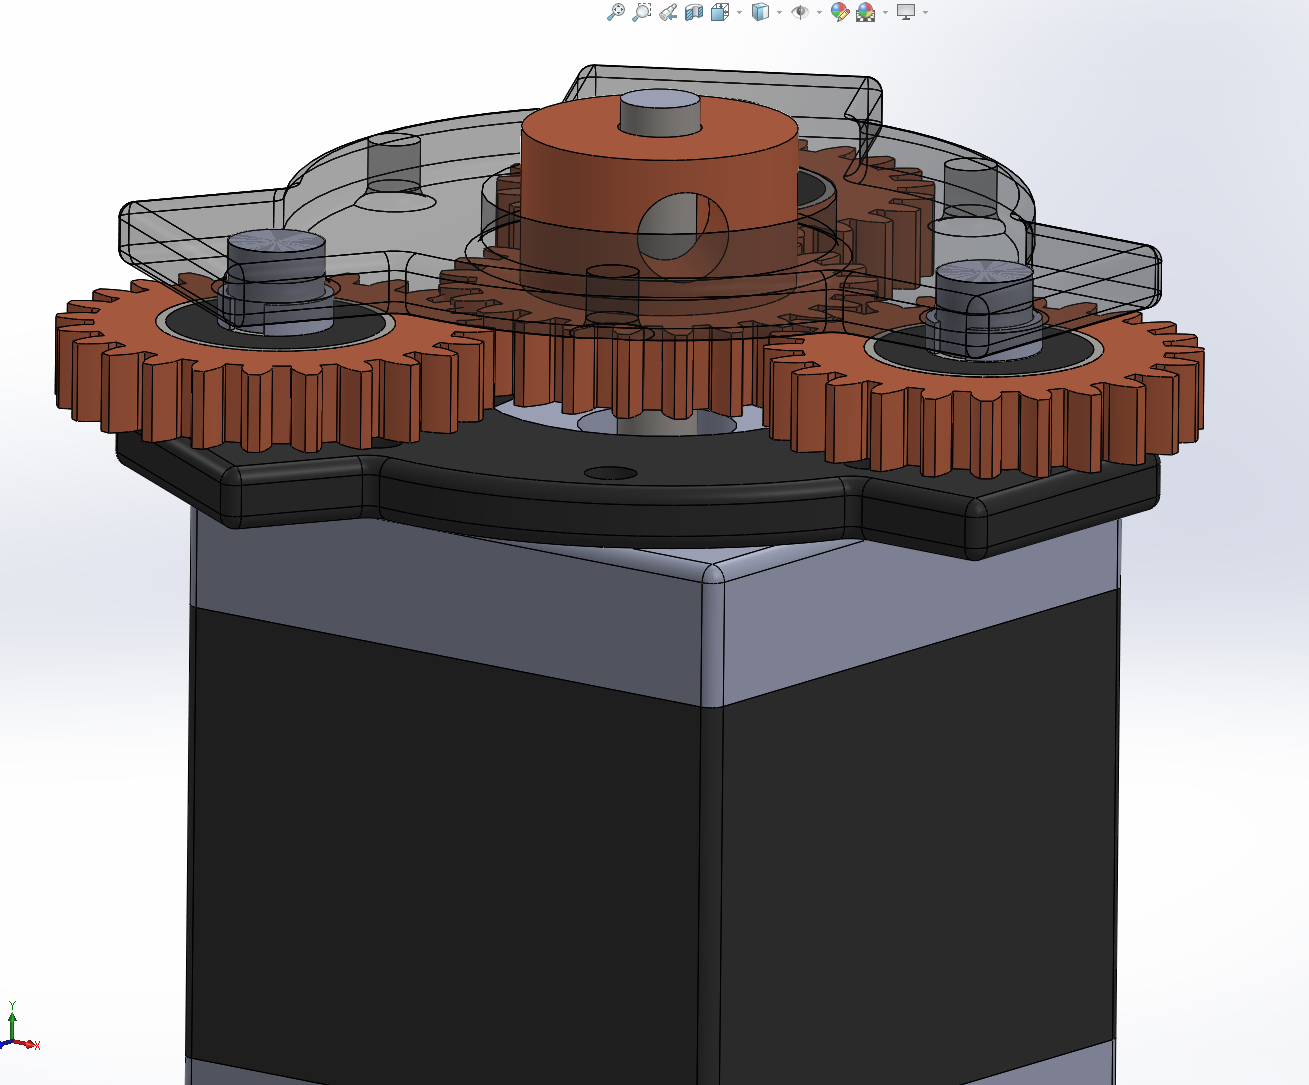
In order to control the center of gravity/mass, I wanted the first level to be a planetary gearbox. In this way, I'm starting out with the weight being exactly centered along the shaft of the motor.
Spoiler alert: I forsake this dream of perfectly balanced construction a bit later.
The sun and planet gears are 24T and the annular gear is 72T. Their powers combined create a ratio of 3:1. Paired with my NEMA17 400-step stepper, this will give me an accuracy of +/- 0.3 degrees of resolution. Is that good? Ahh I'm not sure. But we can always revisit this part later!
Mounting Strategies
The sun gear attaches to the motor through a standard set screw. So far I have managed to make Axis 1, Axis 2, and Axis 3 consistently use 6mm set screws. So that is the "standardized" size and it applies here.
The planetary gears have a press-fit bearing installed. Apparently the tolerances needed for a successful press fit are just to make the bore exactly the expected OD of the bearing. My printer is generally off by +/- 0.15mm so this produces a slightly smaller hole then expected. As a result, you can use a press to snugly push the bearing in place.
Lastly, I created some spacers for the top and bottom, to keep the bearing in place.
Reflection: If I were to design this again, I would try hard to avoid the spacer design. In fact, I would probably play around with custom shaft design which has built-in spacer. Will likely work much better.
All of this is sandwiched between two standard planetary gear mount structures. The bottom structure has a NEMA17 mounting holes, as well as some captive nuts on the underside which the top structure bolts down into. The result is this lovely and very strong planetary gearbox.
Discussions
Become a Hackaday.io Member
Create an account to leave a comment. Already have an account? Log In.