 Dan Jilek
Since I have the case mostly repaired, and the keyboard works I can start selecting the other parts to go into the system. If the keyboard had been a loss this would be complicated by having to find one that would fit ok into the case, but as it is I'm now mostly dealing with functional parts that won't be seen. The most notable exception here is the display.
The Powerbook 190 came with a 9.5 inch, passive matrix, greyscale display. I'm not even entertaining the possibility of using that. The 190cs came with a generous 10.4 inch color display. Maybe I should have started with one of those, but hey, the price on this one was right. Some cursory searches haven't come up with anything the right size to fit my 190 bezel, but there are options in the 10 inch range. That's only a half inch difference, and depending on the display I might not miss much. But if I need to widen the opening in the bezel, that's not the end of the world.
Currently I'm considering the Pimoroni HDMI 10" IPS LCD Screen Kit. I will admit the price is a bit high for a project like this, but the size is right(ish), the resolution is decent, and -this is key- it's the right aspect ratio. 10.1 inch displays are all over the Internet, but 10 inch displays with a 4:3 aspect ratio are not, and that's what's needed here. Plus, the Powerbook has those fancy display control buttons right on the bezel, which I can re-purpose for the Pimoroni display's menu buttons. The board it comes with won't have them in the right place, but that's easy enough to deal with. OSH Park will already be making some boards for me. What's one more?
Besides the display, I will have to work out input devices, external ports, and cooling. There is the matter of a battery for portability, but I'm saving that for later.
For input devices I have the original keyboard with Teensy controller, and a trackpad. The original trackpad is worn out, and the underside is a corroded mess.
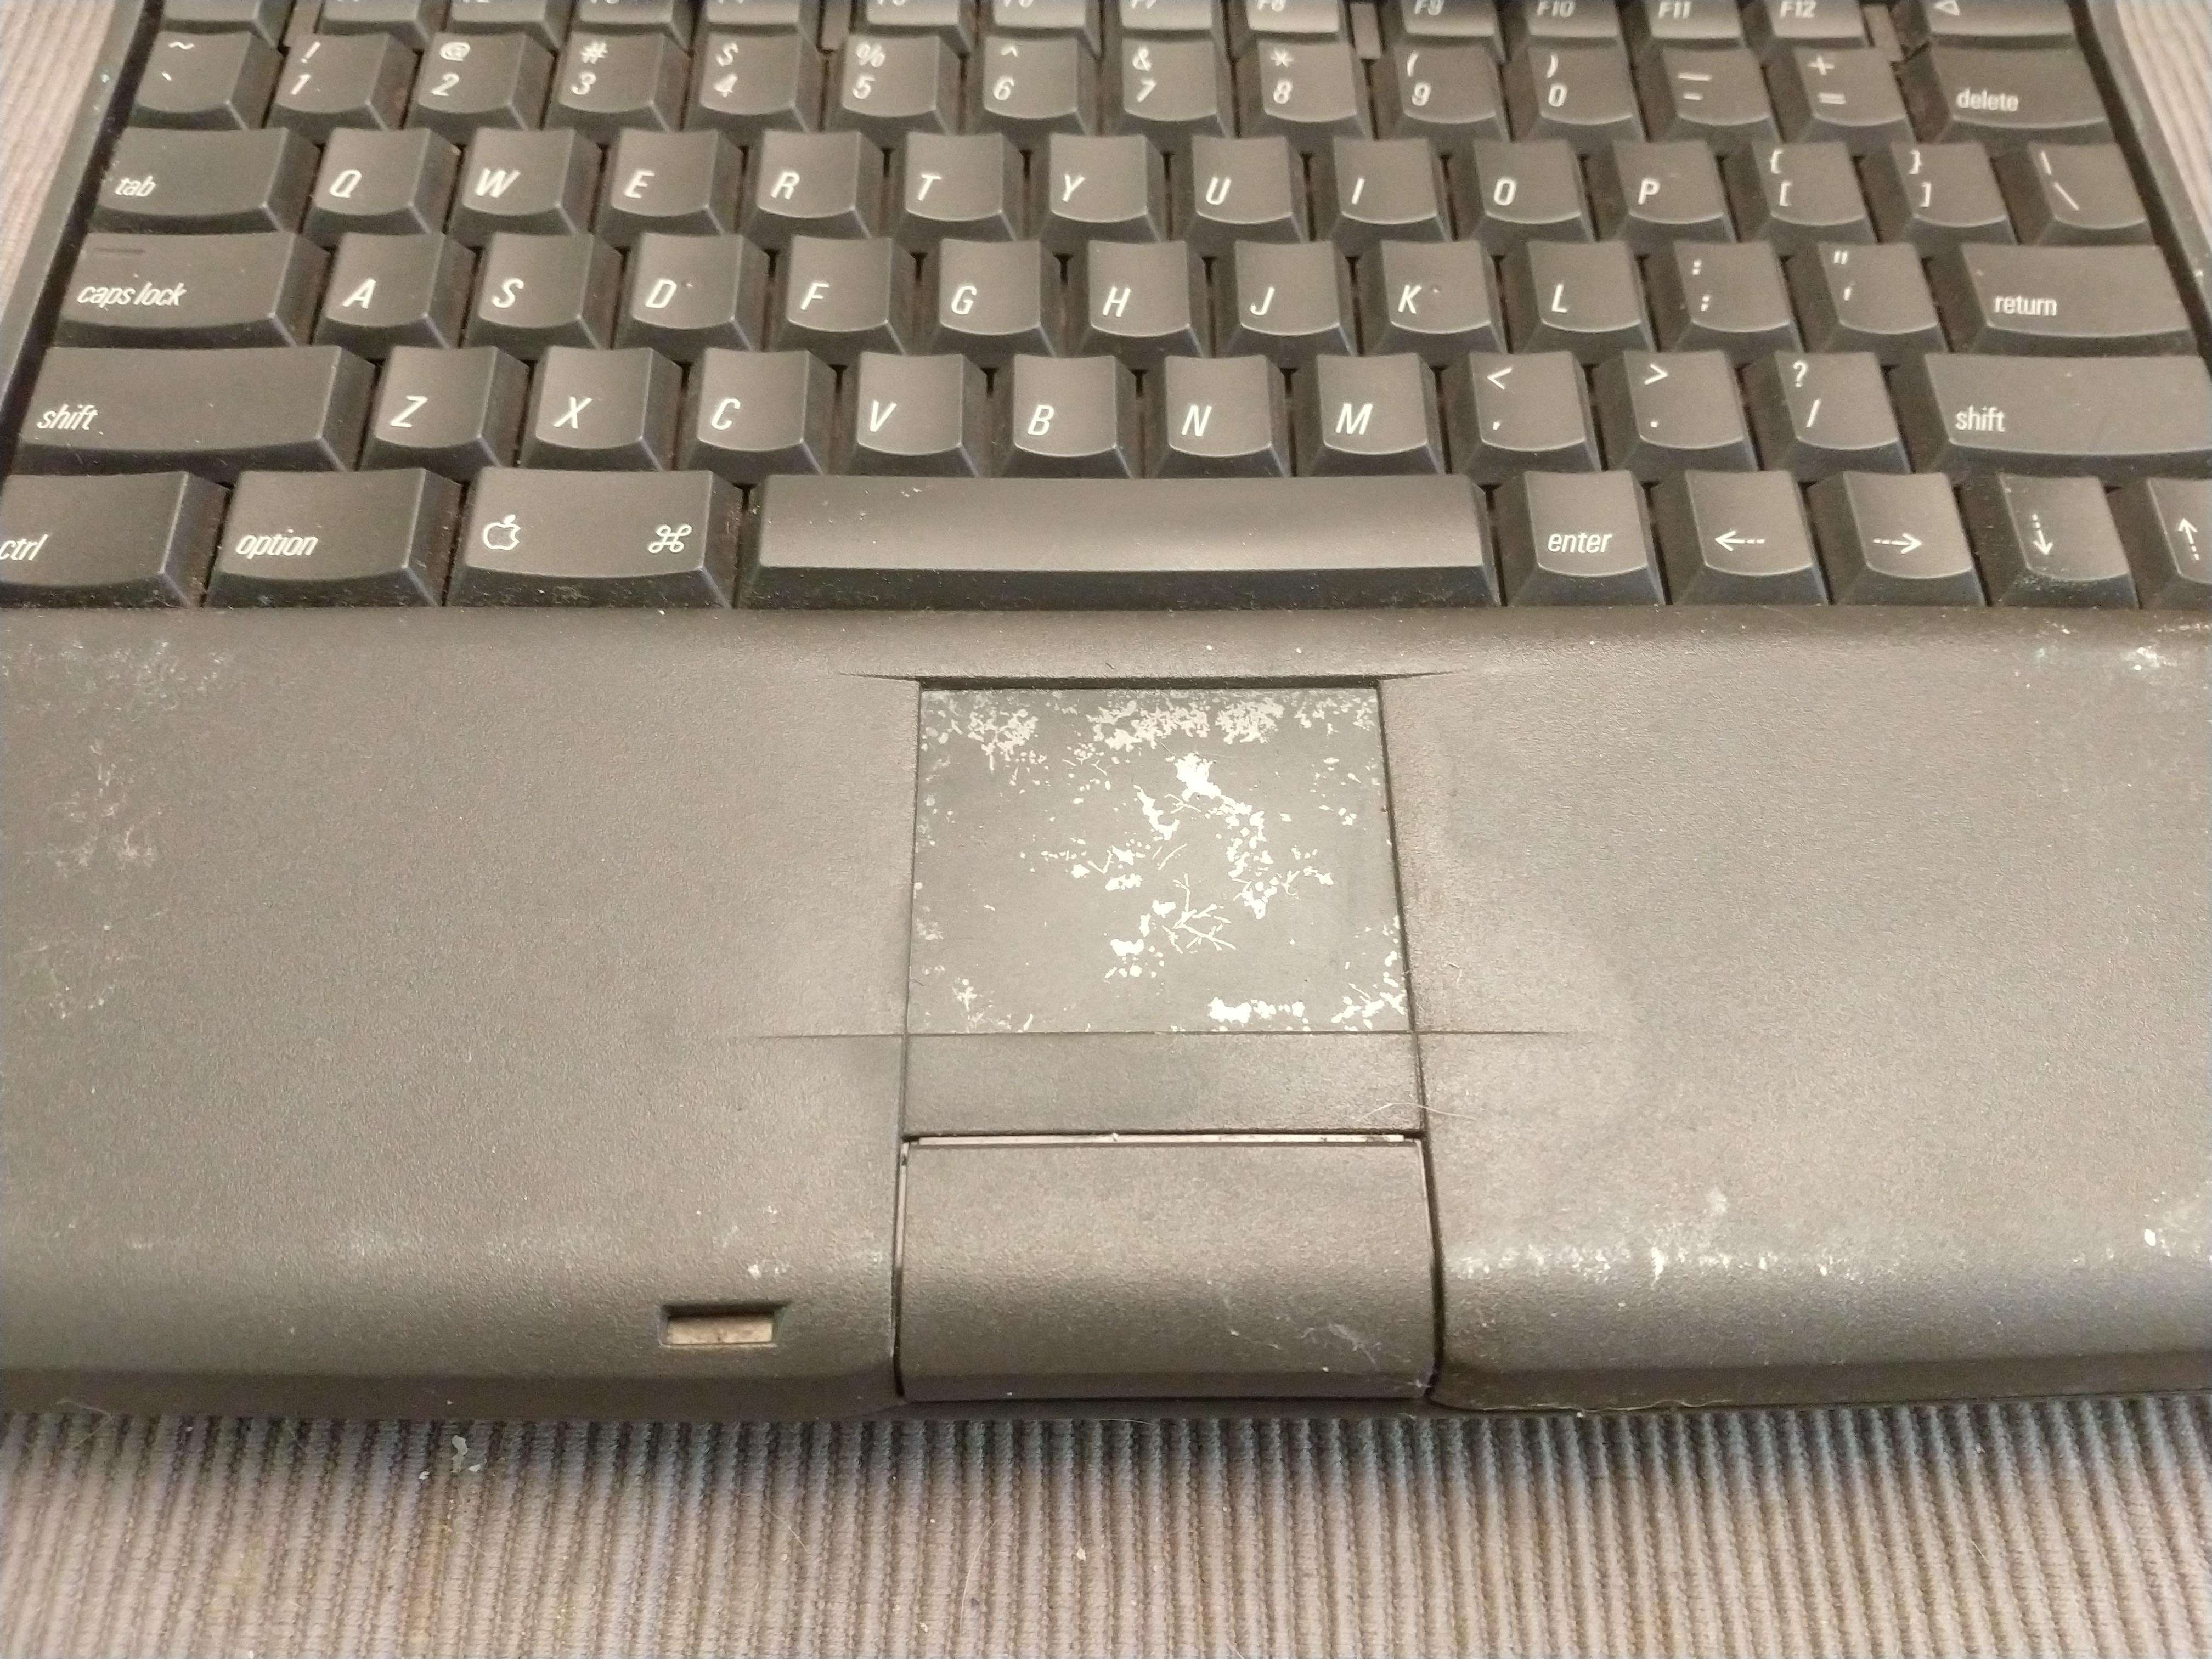
I need something that can interface over USB anyways, so the original needs to go. Fortunately finding one that would fit in with the aesthetic of my Powerbook was relatively easy. I picked up a Perixx Peripad 501, used, that appears will fit ok under the palm rest once it's out of its case. Not all of the touch surface will be exposed, but that shouldn't matter. Hooking left and right click to the original left click only button will take some work, but should be doable. I may just have to replace the original exposed assembly with something custom. 3D printing is going to be key for a lot of what I'm doing on this project.
For those playing the home game, you'll note that makes two USB 2.0 devices to connect to my Pi 4. That's fine, the Pi can support that, but what if I want to reserve one for an external port? Sounds like we're going to need a hub. I've taken small hubs out of their cases for projects in the past, but space is going to be more limited in this build. I'm going to want a dedicated solution. I already know I'm going to need a board to hold FFC connectors and debounce circuits for the keyboard controller. It's not that big a deal to include a USB hub IC with associated passives. Naturally there are a lot of options here, but right now I'm planning on using a USB2422 from Microchip. It appears to be relatively easy to design around.
One of the USB 3.0 ports will be connected to an SSD using a SATA adapter. With the USB 2.0 hub, this will leave one of each type to extend to the case as external ports. With all the connections coming off it, the Pi will likely end up looking like an octopus orchestrating the functions of the laptop from its lair beneath the keyboard. That being said, extending all the connections from the Pi makes the layout more flexible and the Pi easily replaceable (upgradeable).
The Pi will also need a reasonably robust cooling system, unlike what the original processor had.
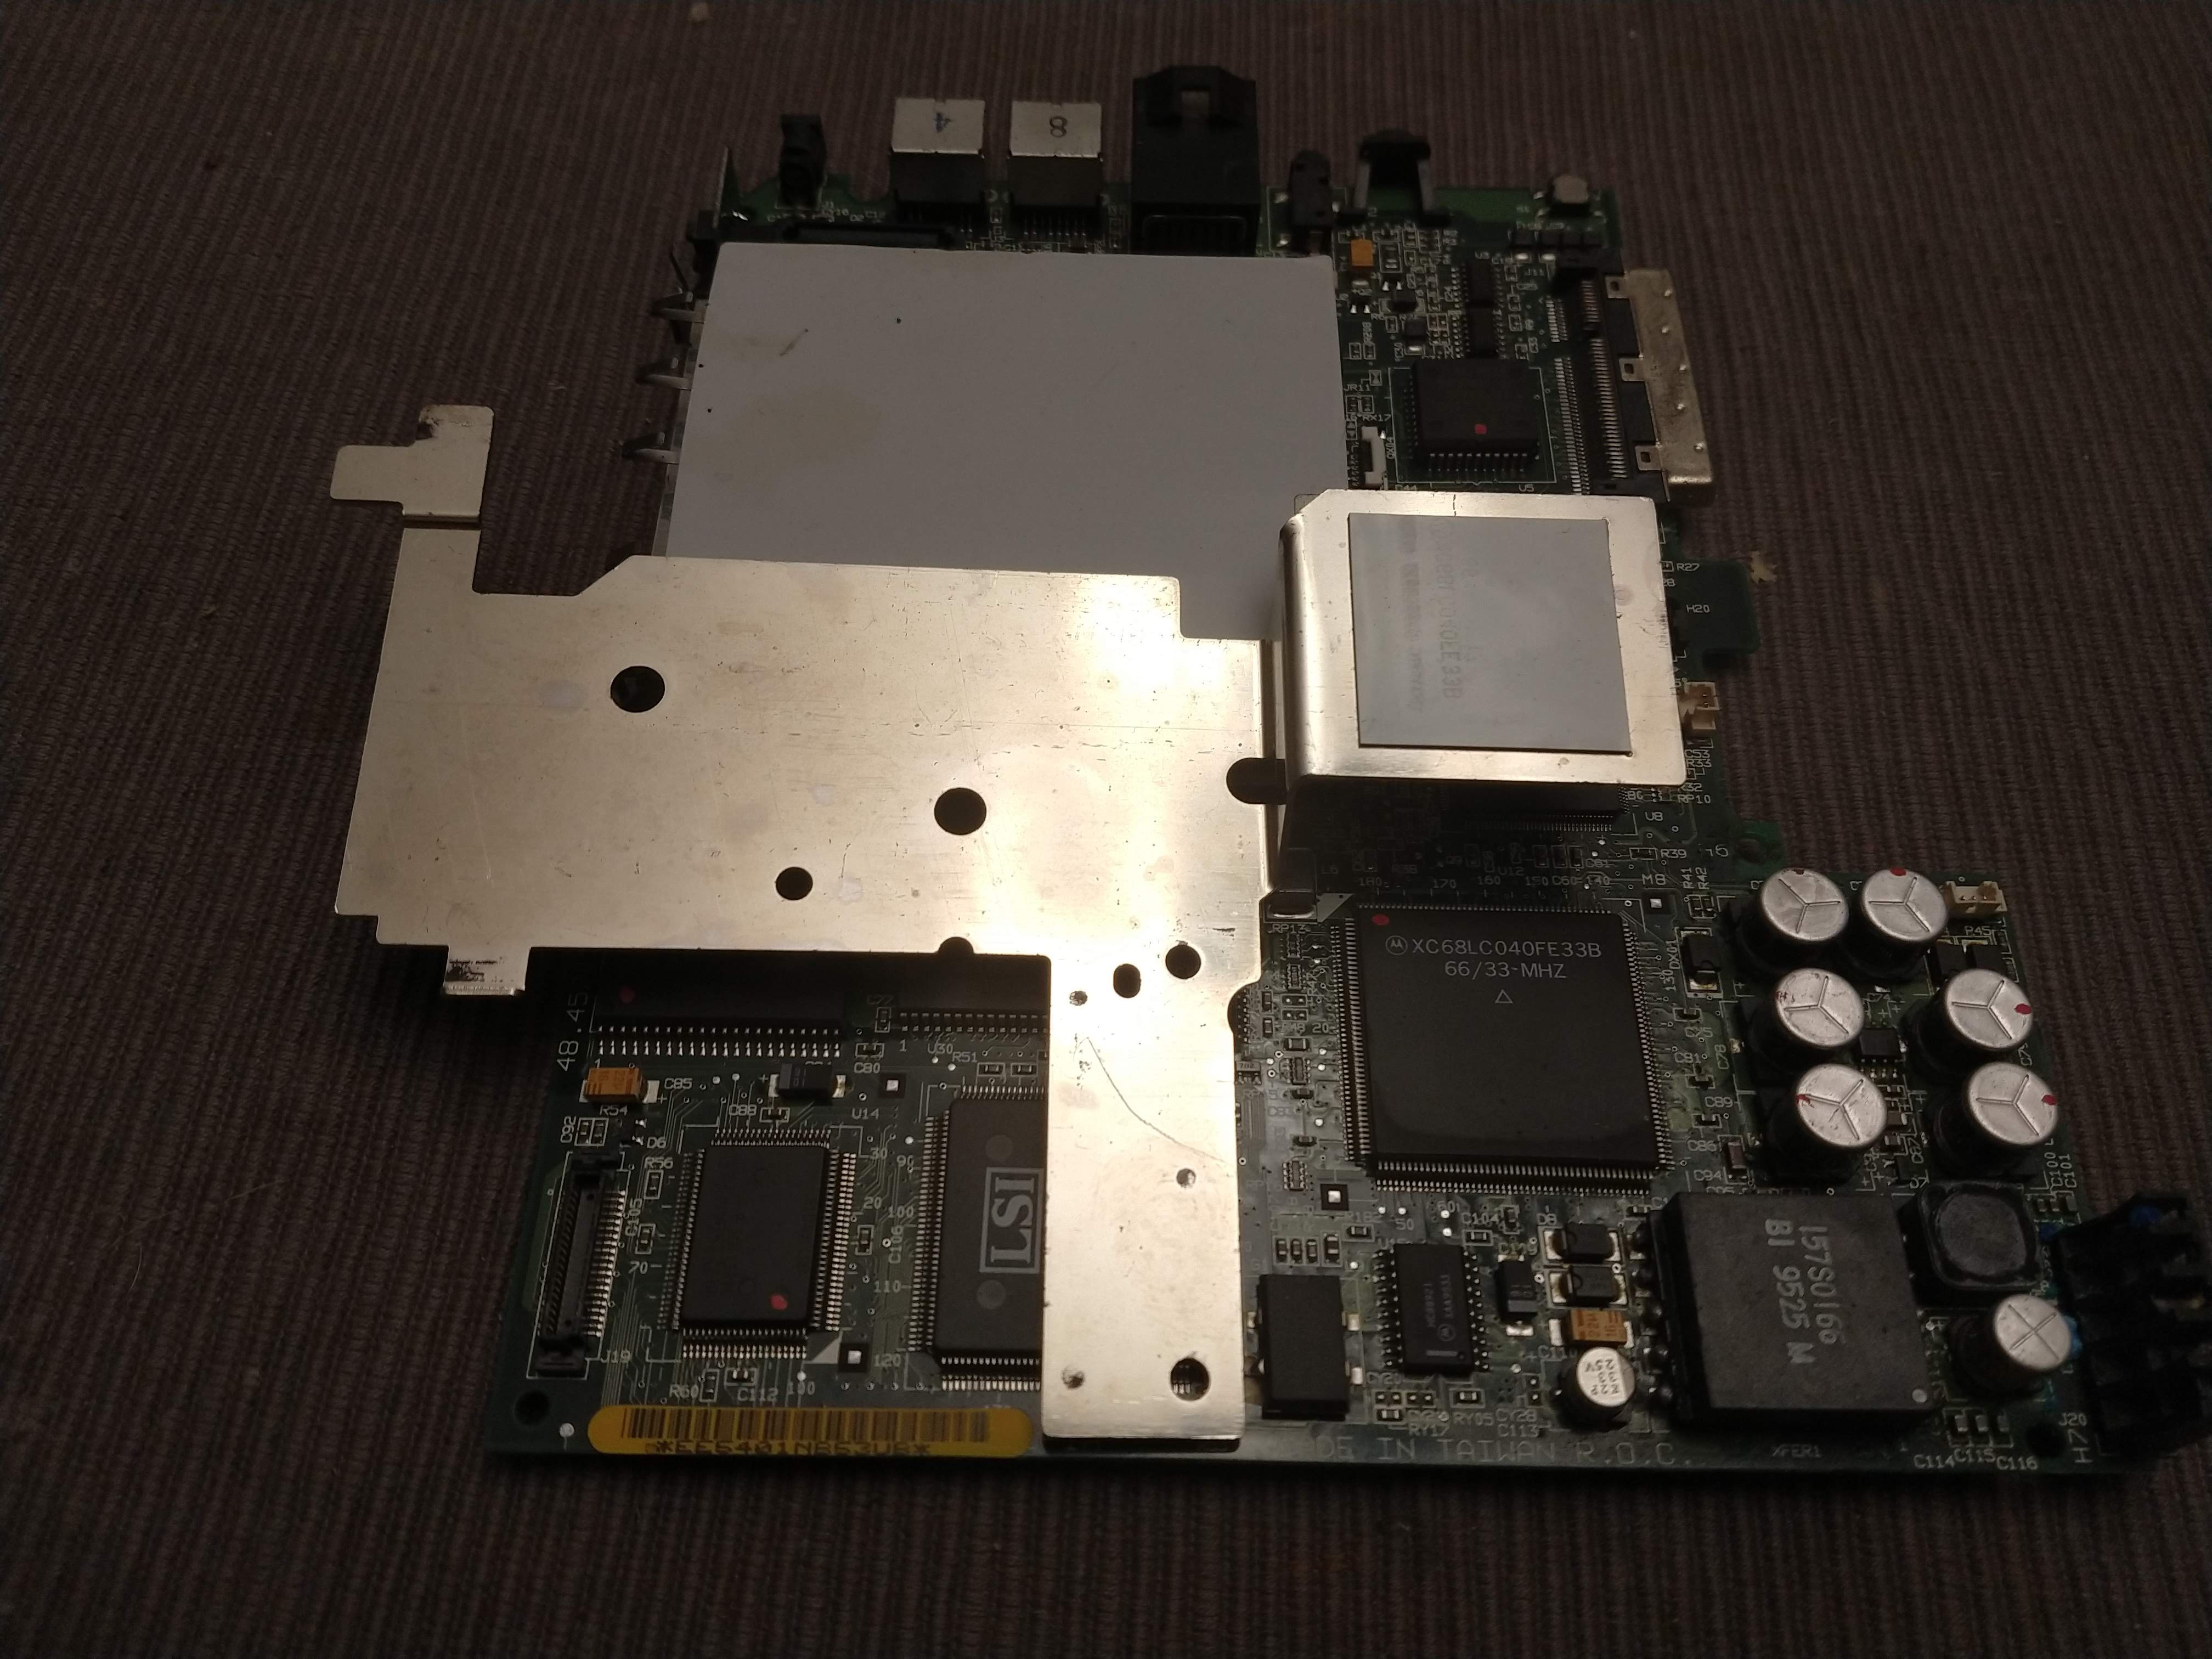
A steel plate won't quite do it for a Raspberry Pi 4. I can get a good heatsink for it, but being closed inside a larger case, it may require some active cooling. Looking around online, there are a number of low profile squirrel cage fans available that run on five volt DC. This should be a good option, but I will have to work out the airflow in and out of the case. Since the original electronics didn't need a fan, the case doesn't have the fan grills we're used to seeing on most modern laptops. This can, of course, be worked out. There are open spaces on both sides of the case where the floppy drive and PCMCIA slots were.
That'll do it for now. I need to do some work in KiCad.
Discussions
Become a Hackaday.io Member
Create an account to leave a comment. Already have an account? Log In.